Post a photo of the last thing you made

UKworkshop.co.uk

Help Support UKworkshop.co.uk:

This site may earn a commission from merchant affiliate links, including eBay, Amazon, and others.
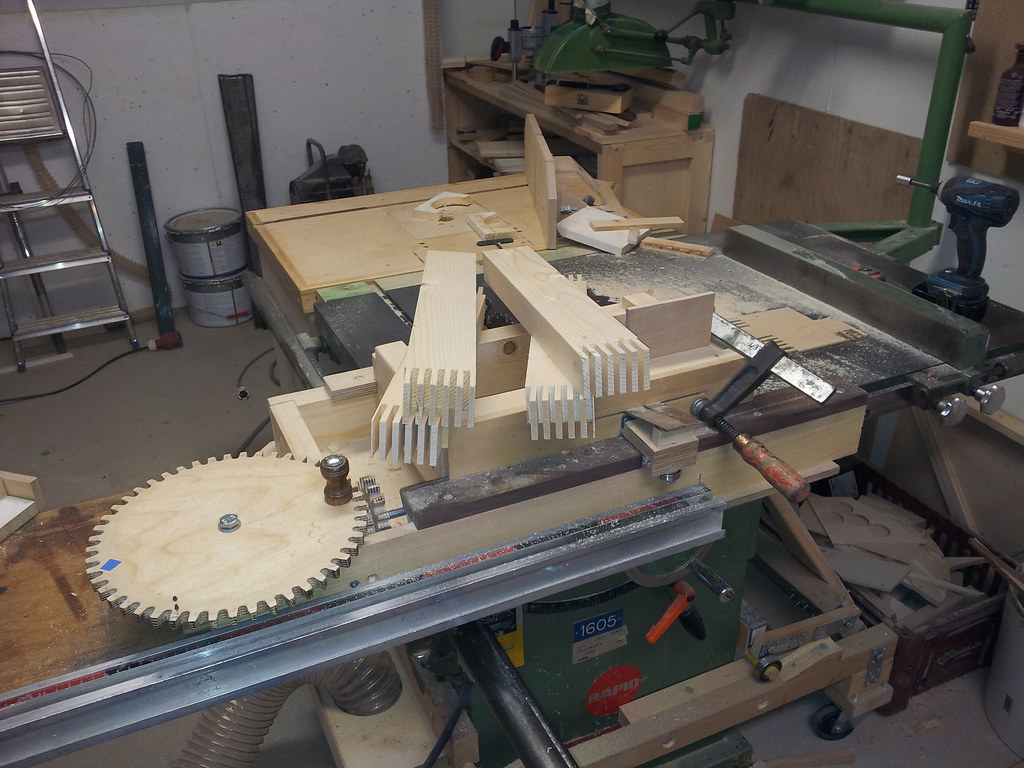
Screw advance box joint jig using Matthias Wandel plans:
24192223970_aced3964d2_b.jpg


24192222150_66ffecebcc_b.jpg


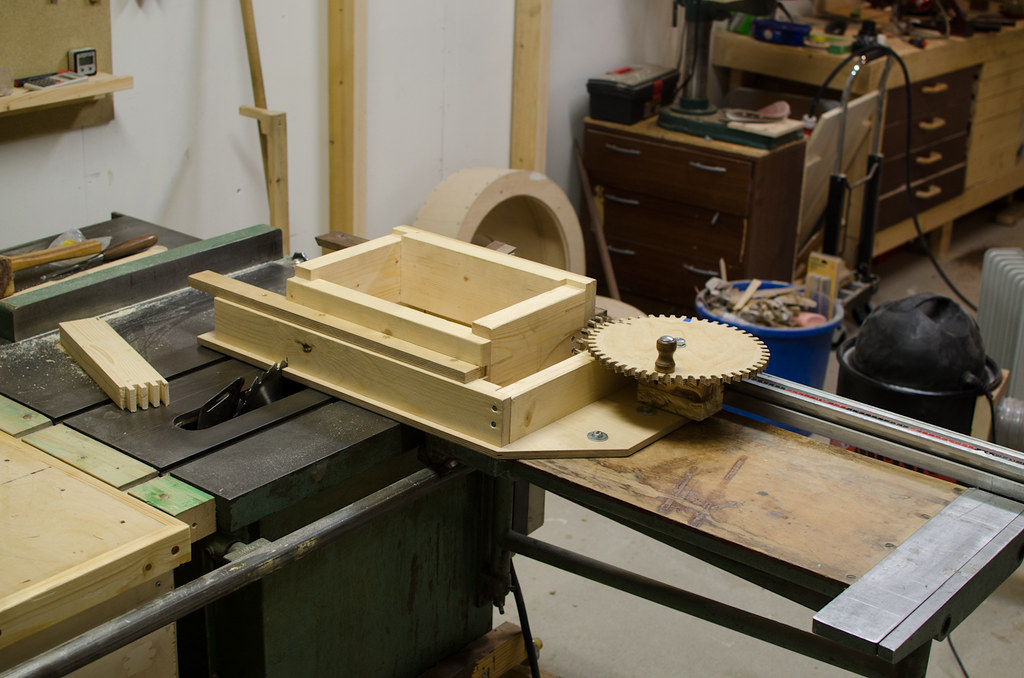
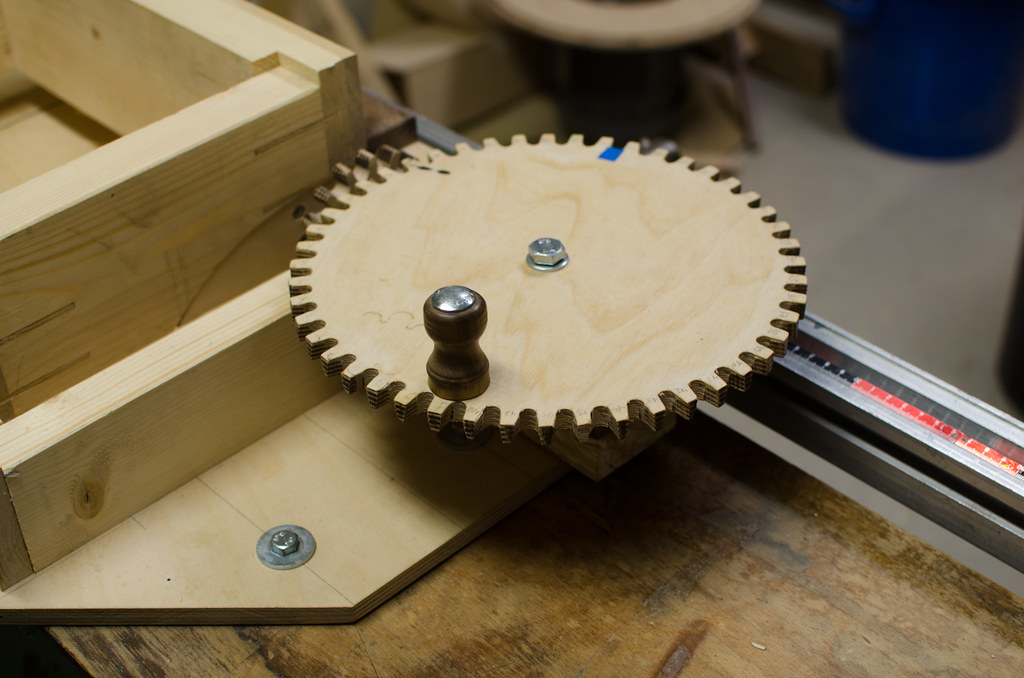
Instead of a guide bar I have it bolted to the sliding table. I put threaded inserts in the table that line up with the jig, so it'll always clamp down in the same place.
 
It was one of my more challenging projects, good thing I kept pushing it back. I was much better able to make this today than I would have been a year ago.

Last night I was baking bread and thought I really don't wanna knead on the countertop. So I went out in the shop and threw this together from pine and plywood:
24591805485_cfb663b5b7_b.jpg


Slides in nicely under the stovetop:
24296294030_31dd9b2d66_b.jpg
 
Playing with my screw advance box joint jig, so impressed with the precision of the thing.
24752167796_b69ce61072_b.jpg


24410728169_cdb390e673_b.jpg


What's more, I made all the pieces separately. I made one, then turned the jig back to start position and did another. For mating two pieces like this I advanced the start position by one turn. One of the things I've seen people have issues with other jigs is getting the pieces to line up exactly, and the solution is to make the pieces oversize and trim them afterwards. No such thing needed here.
 
They certainly are very nice clean joints, must be a nice sharp blade too!

I'm going to pinch your idea with the positive and repeatable location on the sliding table, but I think I'll just use a locating pin and the built in hold down clamp.
 
Actually the blade I used here was dull and chipped, but it was a flat tooth grind blade though.
 
Useful box and some lovely timbers. Personal opinion only but it looks a little odd to my eye to have the book match running East-West instead of North-South. Also you could have run a vertical chamfer on the front two edges of the base that co-incide with the joint, that would have echoed the chamfer detail on the lid and made the joinery invisible. Just my opinion, which as I don't have to live with it counts for precisely zero!
 
Doris":2gcl2dtl said:
This years Noahs Ark, about 3 times as big as the last one. With Camels....

Stunning...as always...your design skills really are right up there. Is that gold paint or gilding? It looks very glittery and golden.
 
Thanks for the comments chaps, I didn't see a bat until you mentioned it!

The silver birch is a nightmare to plane its very soft and the grain goes every way, a close set chip breaker (0.1mm) is the only way to plane it.

It should have been turned 90 degrees but somebody made a mistake in the glue up!

Pete
 
Racers":1vdl9g65 said:
The silver birch is a nightmare to plane its very soft and the grain goes every way, a close set chip breaker (0.1mm) is the only way to plane it.

It's interesting to hear an "independent" voice advocating that planing technique, I've been meaning to give it a go since the recent thread discussing it, hearing that you've tried it and that it works makes me all the keener!
 
I can't get it to work myself, but I must be doing something wrong, but not the place to ask this.
 
custard":1kiujhgw said:
Doris":1kiujhgw said:
This years Noahs Ark, about 3 times as big as the last one. With Camels....

Stunning...as always...your design skills really are right up there. Is that gold paint or gilding? It looks very glittery and golden.
n0legs":1kiujhgw said:
Doris":1kiujhgw said:
This years Noahs Ark, about 3 times as big as the last one. With Camels....
Great Ark Doris =D>

Thanks chaps. The hull is made from plywood so was a little reluctant to post it on here.

It is indeed gold paint. It doesn't look very glittery in person i don't think.

Its hopefully going to be donated to the local sunday school once all the animals are made. Am struggling to work out a pose for noah too who has yet to be carved...
 
Back
Top