You are using an out of date browser. It may not display this or other websites correctly.
You should upgrade or use an alternative browser.
You should upgrade or use an alternative browser.
Post a photo of the last thing you made
- Thread starter DTR
- Start date


Help Support UKworkshop.co.uk:
This site may earn a commission from merchant affiliate
links, including eBay, Amazon, and others.


DTR":rgb9rwmk said:Like it!
+1
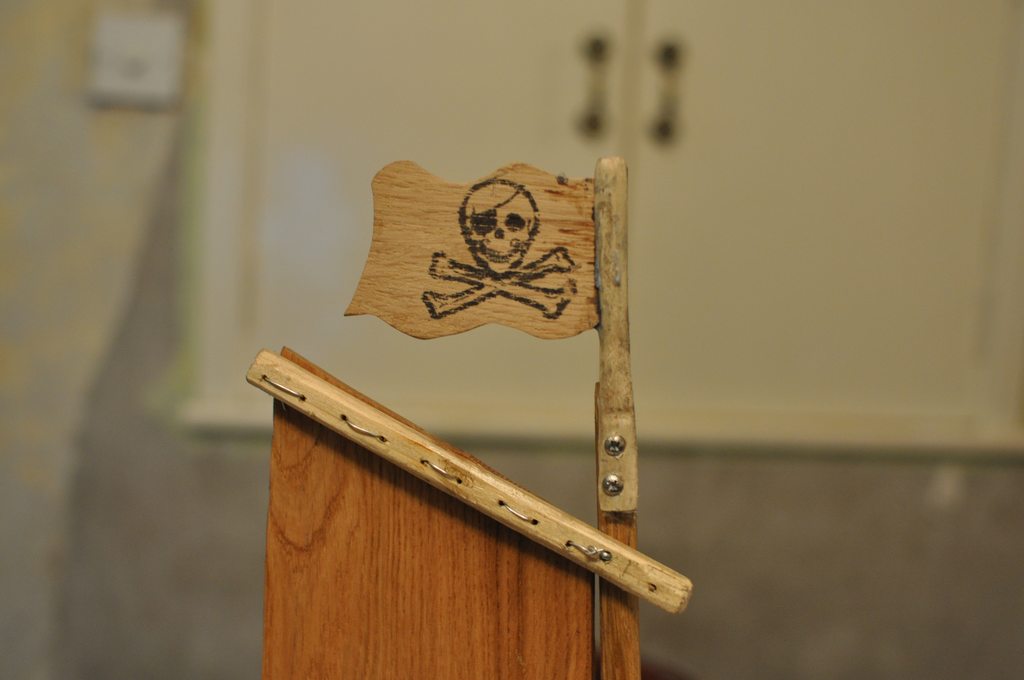
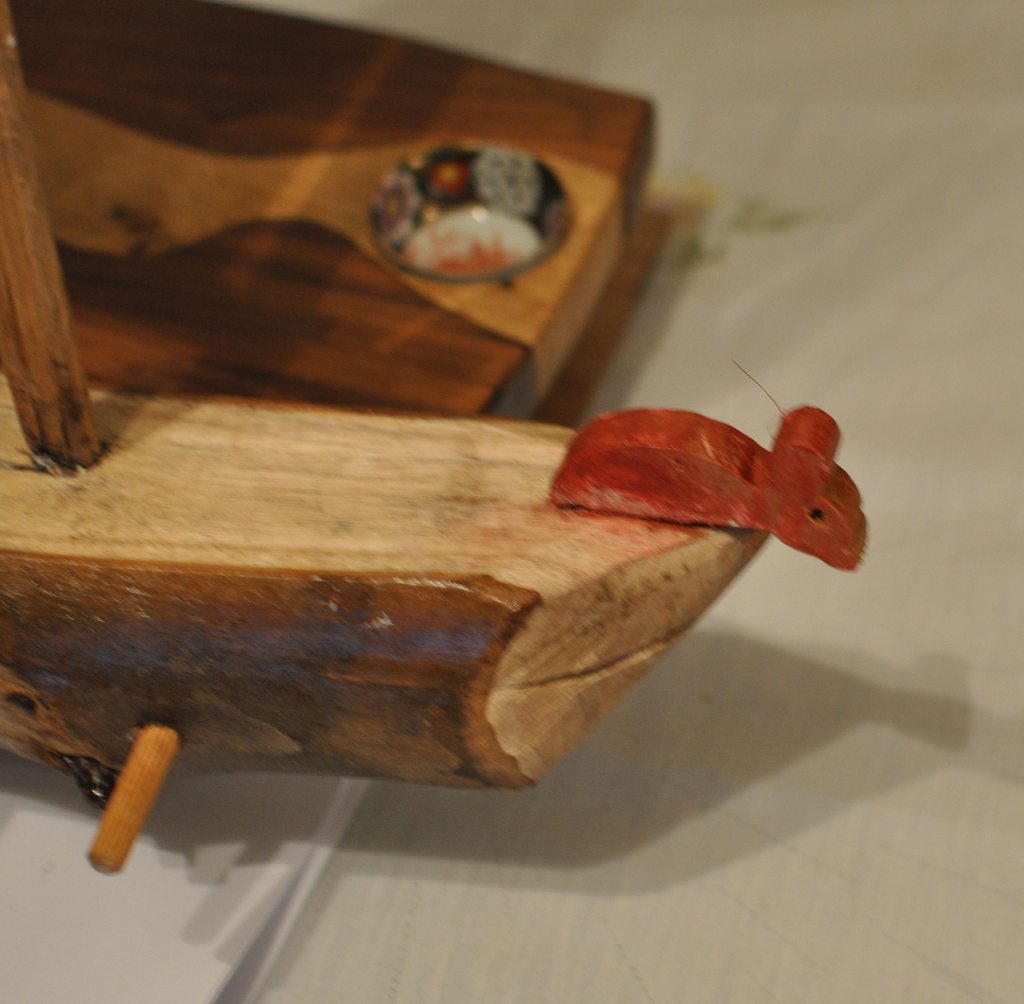
Where's he going on that boat I wonder? I don't think he needs any sun, he looks like a lobster already.
Do mice get sea sick??
Penny
Established Member

monkeybiter
Established Member
Well that's attractive! Spalted timber can be difficult to get a decent finish on, so you should be very pleased with that as a first attempt.
John15
Established Member
Very attrative bowl Penny
John
John
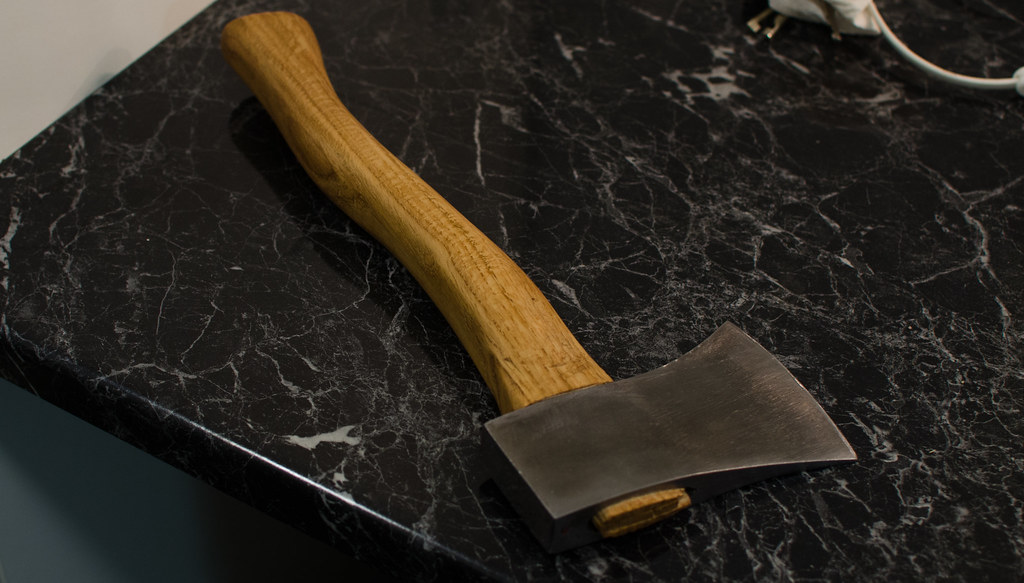
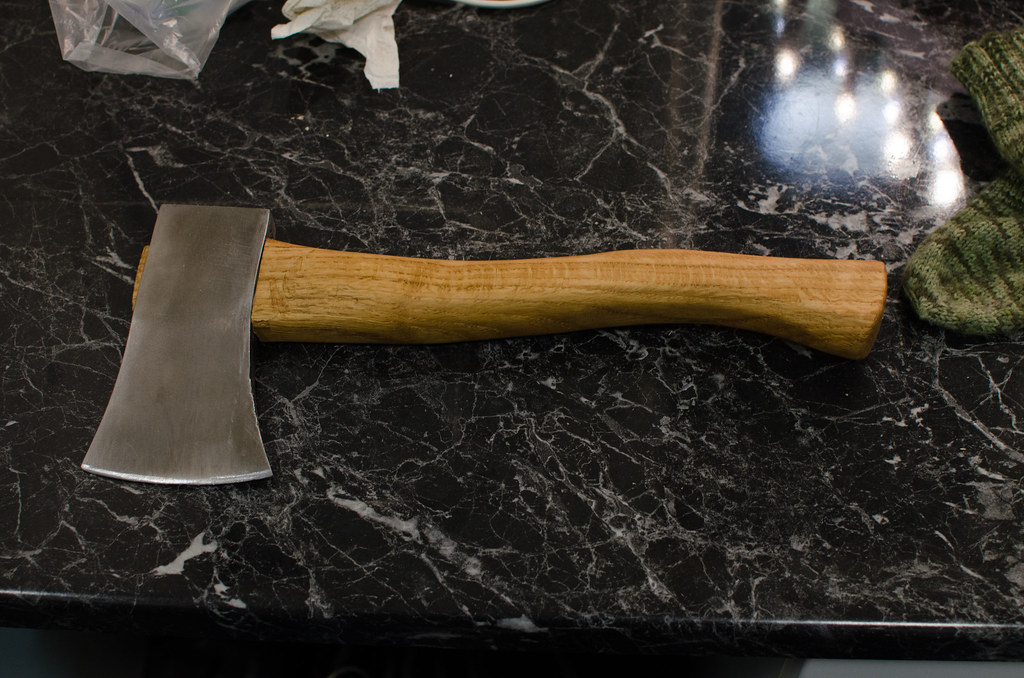
Refurbished an old axe, one handed for kindling making. I don't know what the brand was, probably swedish with an ugly red color on the head and epoxy holding it in. I wasn't able to get as good a fit as I wanted with the head because the inside is like an inverted dovetail, sorta like this ><. I think it wasn't made to take a traditional wedge type handle. But oh well it seems in there good enough.
Woops had mixed in some other language there.
Woops had mixed in some other language there.
mseries
Established Member
I got this rigged up today. The hose is an old one from the previous Draper vac, the drum is an old tile cement tub that's been in my garage for about 16 years, I knew it would come in handy some day. Stiffened the lid with a disc of ply, It's temporary until I can get something bigger. I made some MDF reducing collars and some pieces of steel/plastic tube from the vacuum tools to attached the hoses. Needs a bit of epoxy or silicon to secure the fitting and seal any gaps but it worked well on the first test..
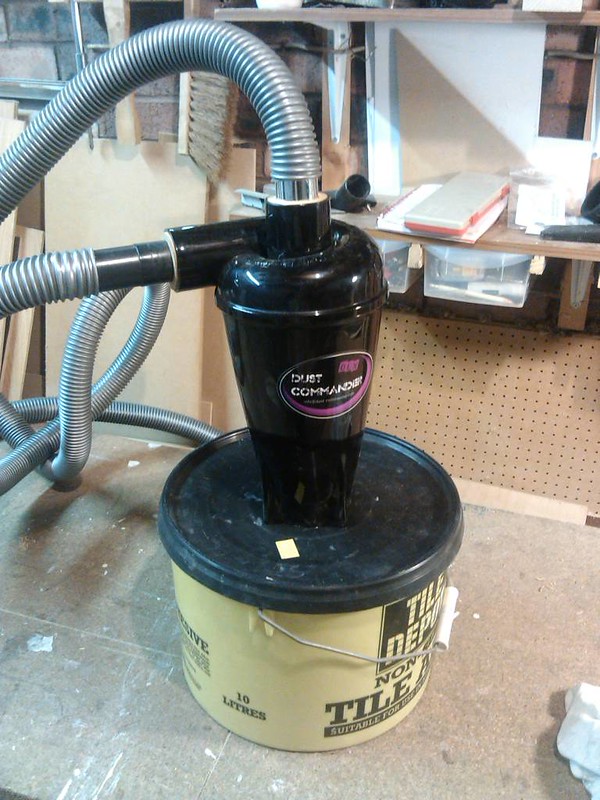 Cyclone separator by Mseries, on Flickr
Cyclone separator by Mseries, on FlickrPenny":of72rxtp said:
Cool, don't let it be the last one :wink: =D>
mseries":3sxbw7f7 said:I got this rigged up today. The hose is an old one from the previous Draper vac, the drum is an old tile cement tub that's been in my garage for about 16 years, I knew it would come in handy some day. Stiffened the lid with a disc of ply, It's temporary until I can get something bigger. I made some MDF reducing collars and some pieces of steel/plastic tube from the vacuum tools to attached the hoses. Needs a bit of epoxy or silicon to secure the fitting and seal any gaps but it worked well on the first test..
Looks good =D>
Almost completed, just the final clean-up of glue joints and chamfers and then the oiled finish to go. I've had the glass tops custom-made and these end tables are ready for delivery.
Definitely the most unforgiving pieces I've ever made- all the circles, mitres and corners had to be near-perfect as any errors would be very visible- but I'm pleased (and relieved) with how they turned out.
Definitely the most unforgiving pieces I've ever made- all the circles, mitres and corners had to be near-perfect as any errors would be very visible- but I'm pleased (and relieved) with how they turned out.
Attachments

mouppe":15j9p2j7 said:Definitely..........
some of the most interesting pieces I've seen posted here =D>
Very very nice.
Well I decided it was time to move some of the tools to the workshop, actually the good lady decided it for me :lol:
So I needed somewhere to put them. A friend had her old ranch style banisters replaced, so I used that for the framework and just general purpose hardwood ply from the local timber yard. I think the frames are alder, but don't quote me on that.
Lacquered with 2K clear, with the inside in a 2K cream colour I mixed from leftovers. The door furniture will be done soon.
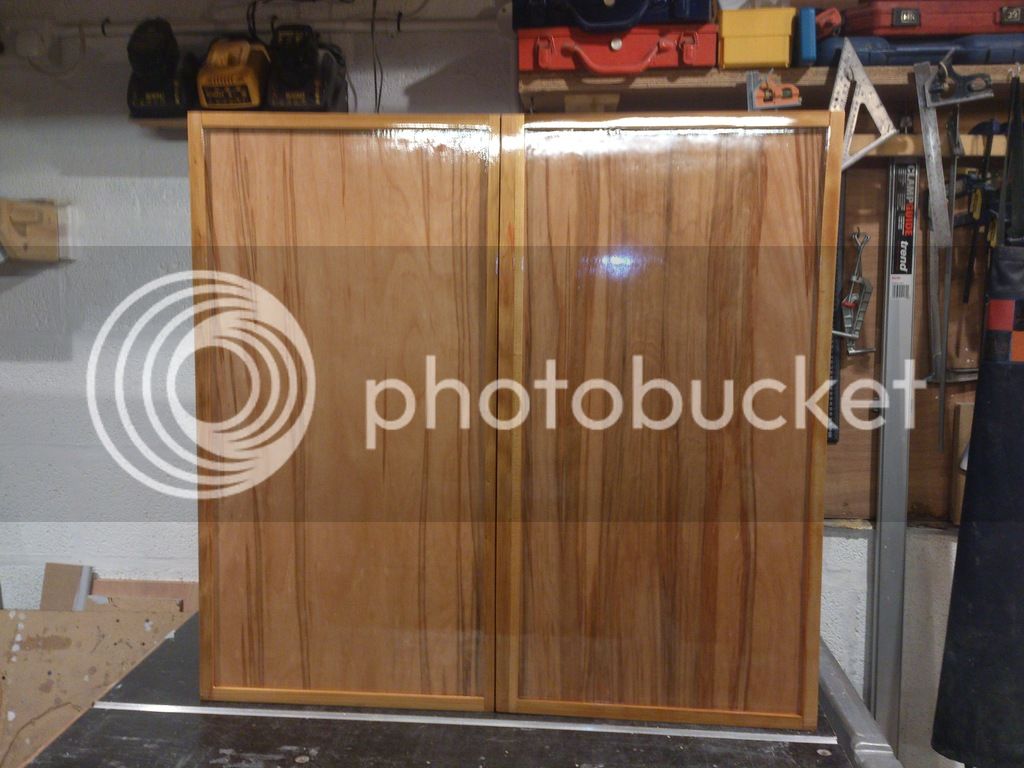
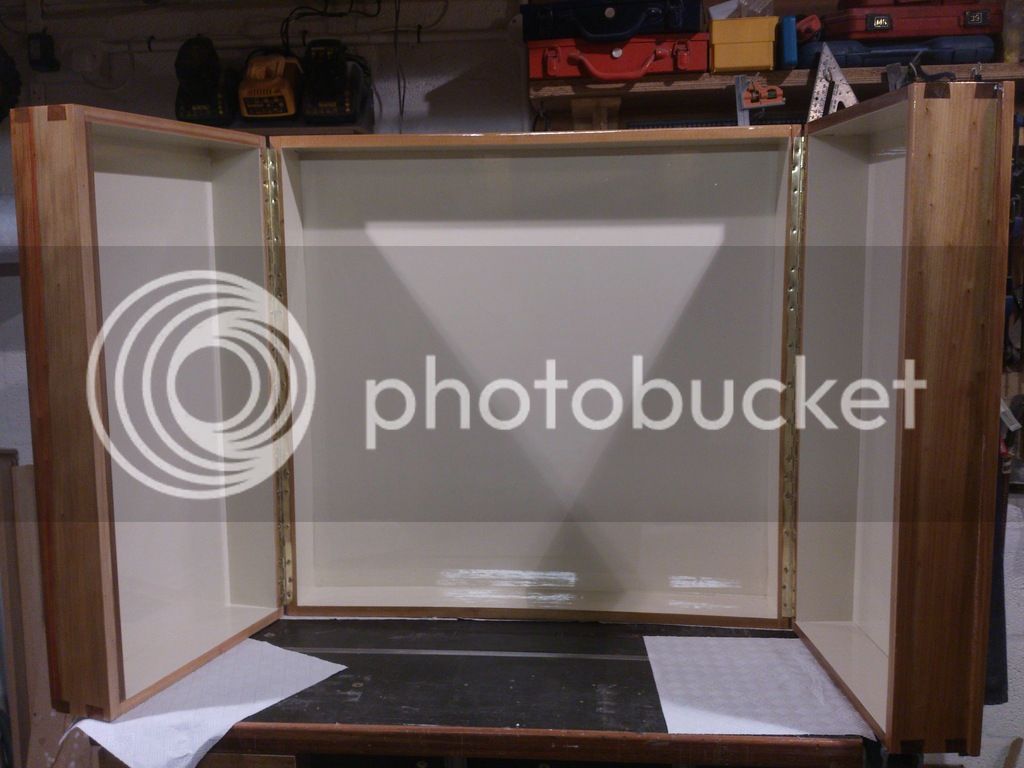
Now I need to plan the fit out #-o
OM99
Established Member
n0legs":1395ha8r said:Well I decided it was time to move some of the tools to the workshop, actually the good lady decided it for me :lol:
So I needed somewhere to put them. A friend had her old ranch style banisters replaced, so I used that for the framework and just general purpose hardwood ply from the local timber yard. I think the frames are alder, but don't quote me on that.
Lacquered with 2K clear, with the inside in a 2K cream colour I mixed from leftovers. The door furniture will be done soon.
Now I need to plan the fit out #-o
OOOH Shiny
.Very nice though.
Oli
stuffimade
Established Member
custard
Established Member
There's a current thread about Brown Oak in the projects forum. I posted some photos there of boards in a curious interim stage on the way to becoming Brown Oak, a rare timber called Tiger Oak. This is when the fungus has invaded the tree, but the tree was felled before the tree has turned completely brown, which permanently arrests the process at this stage.
I said on that thread that I'd post some snaps here of a finished article made from this timber. This is one of a pair of side tables I made from some large stocks of Tiger Oak that I was lucky enough to find.

It was an interesting and surprisingly challenging project to make. The curved stretchers need a halving joint on a curve and also need to be morticed and tenoned into a narrow chamfer on the inside of the splayed legs, so there's plenty of enjoyably complicated joinery involving angles and curves that all needs to be done with real precision to ensure tight glue lines. The top has a very narrow 1mm inlaid line of Sycamore stringing, and because the top is solid timber the only way to stop it popping out with seasonal movement is to use cross grain inlay on the cross grain sides. Cutting and fitting 1mm cross grained stringing accurately was another satisfying exercise.

Having sunk so much effort into these it only made sense to maintain the same build quality standards even on the less visible sections. So the top is secured with elegantly shaped buttons as a nice little touch, and there are corner blocks added which are tightly scribed into the angles of the splayed angle of the legs. Incidentally, these are all made from "normal Oak" so you can clearly see the colour difference between normal and Tiger/Brown Oak

It was a surprising amount of work but it was well worth it because off the back of these I'm close to securing a commission for a substantial desk and chair in Tiger Oak which will be a good three months work. As a small independent maker it's difficult to compete, but by using these kinds of unique and rare woods it's possible to carve out a point of difference that clients appreciate and, more importantly, are willing to pay for!
I said on that thread that I'd post some snaps here of a finished article made from this timber. This is one of a pair of side tables I made from some large stocks of Tiger Oak that I was lucky enough to find.
It was an interesting and surprisingly challenging project to make. The curved stretchers need a halving joint on a curve and also need to be morticed and tenoned into a narrow chamfer on the inside of the splayed legs, so there's plenty of enjoyably complicated joinery involving angles and curves that all needs to be done with real precision to ensure tight glue lines. The top has a very narrow 1mm inlaid line of Sycamore stringing, and because the top is solid timber the only way to stop it popping out with seasonal movement is to use cross grain inlay on the cross grain sides. Cutting and fitting 1mm cross grained stringing accurately was another satisfying exercise.
Having sunk so much effort into these it only made sense to maintain the same build quality standards even on the less visible sections. So the top is secured with elegantly shaped buttons as a nice little touch, and there are corner blocks added which are tightly scribed into the angles of the splayed angle of the legs. Incidentally, these are all made from "normal Oak" so you can clearly see the colour difference between normal and Tiger/Brown Oak
It was a surprising amount of work but it was well worth it because off the back of these I'm close to securing a commission for a substantial desk and chair in Tiger Oak which will be a good three months work. As a small independent maker it's difficult to compete, but by using these kinds of unique and rare woods it's possible to carve out a point of difference that clients appreciate and, more importantly, are willing to pay for!
Attachments
Hi Custard,
Nice one,I wish I had some of your skills,I hope that you get the commission.
Peter.
Nice one,I wish I had some of your skills,I hope that you get the commission.
Peter.
monkeybiter
Established Member
Gorgeous, clear demonstration of skill without being ostentatious ar flamboyant. I am curious about the underside though, I thought that buttons slotted into the apron to allow for movement in the top, however the corner blocks appear to be screwed into both the corners and the top. Is this not a problem because of the small size, or am I misunderstanding something?
custard
Established Member
Well spotted Mike, you are both sharp-eyed and absolutely correct! However in this case there's a 1.5mm gap between the top and the corner block, plus a hefty countersink on the hidden under side of the corner blocks, consequently there's some wiggle room for the brass screws to move with the top while at the same time providing hold down pressure out in the far corners where it needs it most.
Incidentally, the top is cut from two jointed boards sawn just fractionally off the quarter (I didn't want the Oak's medullary rays interfering with the harmonious top, and unless the two boards had been book matched medullary rays are a pig to joint up cleanly), the boards were also left to acclimatise for a decent time period and taken down to final thickness in four or five small steps spread over a month or so. Consequently I'm reasonably confident about the top remaining fairly flat. You'll hear some people advise alternating the heart and bark sides when jointing a top, I get the theoretical logic behind this, but if you look at scores or hundreds of antique tops you'll see they generally tend to cup upwards no matter what the board layout is. There's some interesting speculative explanations for this phenomenon, but they're a bit long winded and I'm being called for lunch!
Incidentally, the top is cut from two jointed boards sawn just fractionally off the quarter (I didn't want the Oak's medullary rays interfering with the harmonious top, and unless the two boards had been book matched medullary rays are a pig to joint up cleanly), the boards were also left to acclimatise for a decent time period and taken down to final thickness in four or five small steps spread over a month or so. Consequently I'm reasonably confident about the top remaining fairly flat. You'll hear some people advise alternating the heart and bark sides when jointing a top, I get the theoretical logic behind this, but if you look at scores or hundreds of antique tops you'll see they generally tend to cup upwards no matter what the board layout is. There's some interesting speculative explanations for this phenomenon, but they're a bit long winded and I'm being called for lunch!
Similar threads
- Replies
- 661
- Views
- 49K
- Replies
- 44
- Views
- 3K