Post a photo of the last thing you made

UKworkshop.co.uk

Help Support UKworkshop.co.uk:

This site may earn a commission from merchant affiliate links, including eBay, Amazon, and others.
1645993104539.png


1645993233746.png


A shoe seat for the nook in our porch. Been well over a year over due and is a real quality of life improvement in terms of space and clearing the floor as dull as that sounds.

Quite a lot of firsts in this project. First time using rough sawn wood and milling using my new planer/thicknesser. First time using Osmo Poly X for the finish. First purhcase and use of a spiral downcut router bit which was great. I also made the leap and got a dowel plate and flush cut saw. The panel was laminated using a new biscuit jointer as practice for larger glue ups in the future. I also took the plunge on Z clips to fasten the top to the frame. These cost a fortune and were imported from the US - I reckon I have enough for six more table tops before needing more but I enjoyed using them over wooden cabinet buttons I've made in the past.

Traditional bread board ends - the middle mortice is glued, the two outer are only draw bored. Had an absolute disaster with the outer face of the panel when the router bit which was bearing guided, slipped into the groove of the panel causing me to take a chunk out. I wanted to cry. Managed to get around this by trimming the panel - thankfully no one will see the otherside but I know it's there. This does mean less of an overhang but in terms of space it was a trade off for providing enough shoe storage vs space to sit.

Overall quite happy - but this will be one of the first things I rebuild once I run out of projects around the house. Good practice though I feel much more confident when it comes to my future coffee table/dining table builds.
 
Okay I’m getting somewhere. Already wife is saying you need to make two because I might not be able to give it away. After I add African blackwood, foot and finial on lid.
 

Attachments

  • image.jpg
    image.jpg
    75.5 KB · Views: 28
  • 1B213E6A-94E0-4E43-BA59-5A8C90F1430A.jpeg
    1B213E6A-94E0-4E43-BA59-5A8C90F1430A.jpeg
    151.6 KB · Views: 29
  • 8AFB4C02-7526-4E19-9011-4B241436CB9A.jpeg
    8AFB4C02-7526-4E19-9011-4B241436CB9A.jpeg
    190.7 KB · Views: 29
View attachment 130514

View attachment 130517

A shoe seat for the nook in our porch. Been well over a year over due and is a real quality of life improvement in terms of space and clearing the floor as dull as that sounds.

Quite a lot of firsts in this project. First time using rough sawn wood and milling using my new planer/thicknesser. First time using Osmo Poly X for the finish. First purhcase and use of a spiral downcut router bit which was great. I also made the leap and got a dowel plate and flush cut saw. The panel was laminated using a new biscuit jointer as practice for larger glue ups in the future. I also took the plunge on Z clips to fasten the top to the frame. These cost a fortune and were imported from the US - I reckon I have enough for six more table tops before needing more but I enjoyed using them over wooden cabinet buttons I've made in the past.

Traditional bread board ends - the middle mortice is glued, the two outer are only draw bored. Had an absolute disaster with the outer face of the panel when the router bit which was bearing guided, slipped into the groove of the panel causing me to take a chunk out. I wanted to cry. Managed to get around this by trimming the panel - thankfully no one will see the otherside but I know it's there. This does mean less of an overhang but in terms of space it was a trade off for providing enough shoe storage vs space to sit.

Overall quite happy - but this will be one of the first things I rebuild once I run out of projects around the house. Good practice though I feel much more confident when it comes to my future coffee table/dining table builds.

Very neat - the shoe rack I made is altogether more rustic being made from pallet wood using a nail gun! (It is by the back door so not quite so visible)
 
Set myself a little challenge today, one of the girls at school is leaving tomorrow and I thought it would be nice if she had a gift made from one of the schools trees so using my last bit of clean silver birch I set out to make a twig pot/bud vase in around 2 hours, it took a little longer but over all I'm pretty happy with it, sanded to 600 and given a good coat of linseed oil
20220228_185856.jpg
20220228_185851.jpg
20220228_185820.jpg
20220228_185809.jpg

Ideally I would have liked a bigger opening but the blank I had was only just over 3 inches thick.
 
A building went up at work in ~2016 for which some trees needed to be cut down, the arborist were disposing of the logs as firewood so I bought some from them and rough-turned them in to bowls. We have a few people now retiring, so these are gifts to them, made from the wood of the trees grown where they worked.

The finish is ~6 coats of danish oil, followed by Chestnut buffing and waxing.

The back-left is cherry, which has darkened through spalting, the other two are sycamore.

B2EB3547-AC97-4EC3-8C9F-483A5FFBD5A6.jpeg


9BE5A903-E561-4947-ACF2-B25288CA7914.jpeg


The shape is only defined by getting the biggest piece possible from the logs I had. This one could be a yarn bowl:
B1D2C3E7-6FEB-46B6-8101-E3CC3DECA31F.jpeg


This one is pleasing to hold because of the subtle’ogee’ shape to the underside:
E9BE8141-8F70-4F1E-A207-9D2756116E1E.jpeg


This one is my favourite because of the spalting, it can sometimes be pretty, other times not; I think that this one worked out well.

85BDEC58-B76C-4953-948D-5077C62EF4F8.jpeg

46913192-CBC1-43BE-B301-2DA8DFA334AE.jpeg
 
View attachment 130514

View attachment 130517

A shoe seat for the nook in our porch. Been well over a year over due and is a real quality of life improvement in terms of space and clearing the floor as dull as that sounds.

Quite a lot of firsts in this project. First time using rough sawn wood and milling using my new planer/thicknesser. First time using Osmo Poly X for the finish. First purhcase and use of a spiral downcut router bit which was great. I also made the leap and got a dowel plate and flush cut saw. The panel was laminated using a new biscuit jointer as practice for larger glue ups in the future. I also took the plunge on Z clips to fasten the top to the frame. These cost a fortune and were imported from the US - I reckon I have enough for six more table tops before needing more but I enjoyed using them over wooden cabinet buttons I've made in the past.

Traditional bread board ends - the middle mortice is glued, the two outer are only draw bored. Had an absolute disaster with the outer face of the panel when the router bit which was bearing guided, slipped into the groove of the panel causing me to take a chunk out. I wanted to cry. Managed to get around this by trimming the panel - thankfully no one will see the otherside but I know it's there. This does mean less of an overhang but in terms of space it was a trade off for providing enough shoe storage vs space to sit.

Overall quite happy - but this will be one of the first things I rebuild once I run out of projects around the house. Good practice though I feel much more confident when it comes to my future coffee table/dining table builds.

That's a fine piece of furniture you have there; I know what you mean about router slips, have had a few myself and they are so disheartening, but on the plus side the next time it happens, and it will, you'll feel more confident about fixing it, and the "I know it's there" yeah I (we all) know that feeling too, but try not to let it mar the enjoyment and satisfaction of the build as you've made an item I'm sure any one of us would be very happy with.
 
That's a fine piece of furniture you have there; I know what you mean about router slips, have had a few myself and they are so disheartening, but on the plus side the next time it happens, and it will, you'll feel more confident about fixing it, and the "I know it's there" yeah I (we all) know that feeling too, but try not to let it mar the enjoyment and satisfaction of the build as you've made an item I'm sure any one of us would be very happy with.
I hate router slips, but as a carpenter , you have to consider them design opportunities!
 
Since I had a move around in the workshop a few months ago my clamps haven't had a proper home, they have just got leant against a wall. It was driving me mad as they kept falling over and I couldn't quickly grab the one I needed so I finally made time to build a clamp rack.

clamps 1.jpg


No joinery involved, just dominos and pocket screws

clamps 2.jpg


All loaded up and ready to go

clamps 3.jpg


Should have done it weeks ago :rolleyes:
 
Last edited:
typical in Canada. 200 amp service in new houses. This is my old 100 amp service. Had to add a second 100 amp service in my garage/shop as I was using all house power..
 

Attachments

  • 5F9055C0-6800-4F4E-BA72-D99D44647799.jpeg
    5F9055C0-6800-4F4E-BA72-D99D44647799.jpeg
    83.5 KB · Views: 21
You have a seriously big fuse-box :)

Not mine a customers, I couldn’t remember it that well so just had a look back in my photos, this was what it covered

D688632E-BA19-47BC-A623-D75C70425CEC.jpeg


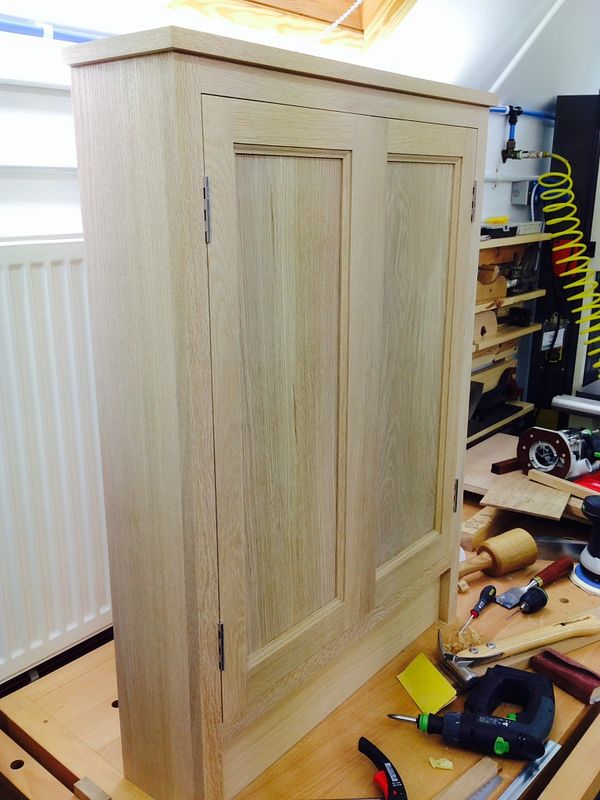
I also made an adjoining unit for the tv to stand on this also hid the gas meter hence the two pairs of doors, think this photo was prior to final finishing.

FF50EA4C-AD95-4B77-8688-9CB45CDD8C96.jpeg
 
Not woodwork but directly involved. A home made riving knife for my table saw out of 2mm stainless steel. Most cutting with a angle grinder with a metal slitting disc and a fare amount of filing. Works well and much safer than before. Strange shape allows 'cowl' to be mounted and adjusted to horizontal: took a little working out.
Martin.

20220227_113558.jpg
20220227_112726.jpg
 

Latest posts

Back
Top