Post a photo of the last thing you made

UKworkshop.co.uk

Help Support UKworkshop.co.uk:

This site may earn a commission from merchant affiliate links, including eBay, Amazon, and others.
Hi,

Thanks for the kind comments praise indeed!

Benchwayze, I too have "old eyes" and remember the old wooden Meccano boxes, never had one myself, but a few more drawers and I do see your point.

Devonwoody, you are spot on, this type of intricate work (inlaying, half blind dovetails on drawers less than 2 inches high, etc) was unknown to me and my usual level of accuracy quite simply was not good enough! A huge learning curve!!

As you can imagine, SWMBO filled the box up pretty quickly, so Mk II may well be on the drawing board!

Cheers

Steve
 
flounder":ibdof2th said:


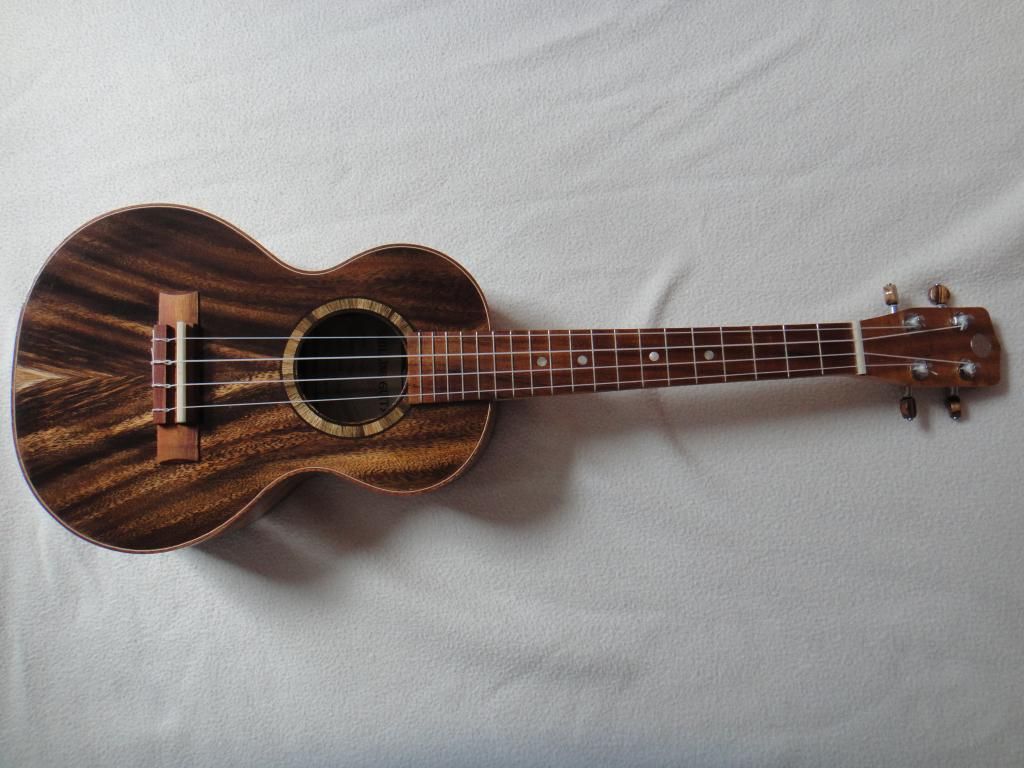
Just finished this Ukulele for my wife. It is all made of Koa, apart from the neck and internal bracing.

love this, absolutely stunning.
I might get around to playing mine now.

I suppose this counts as the last thing I actually finished, which was a while ago :oops:


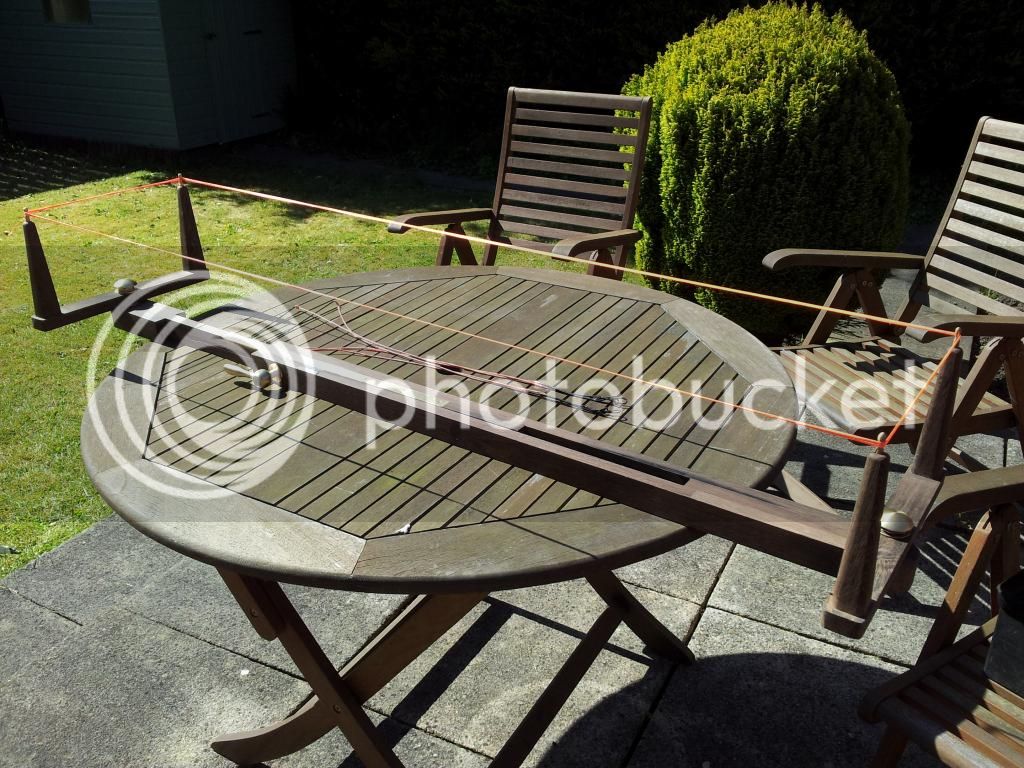
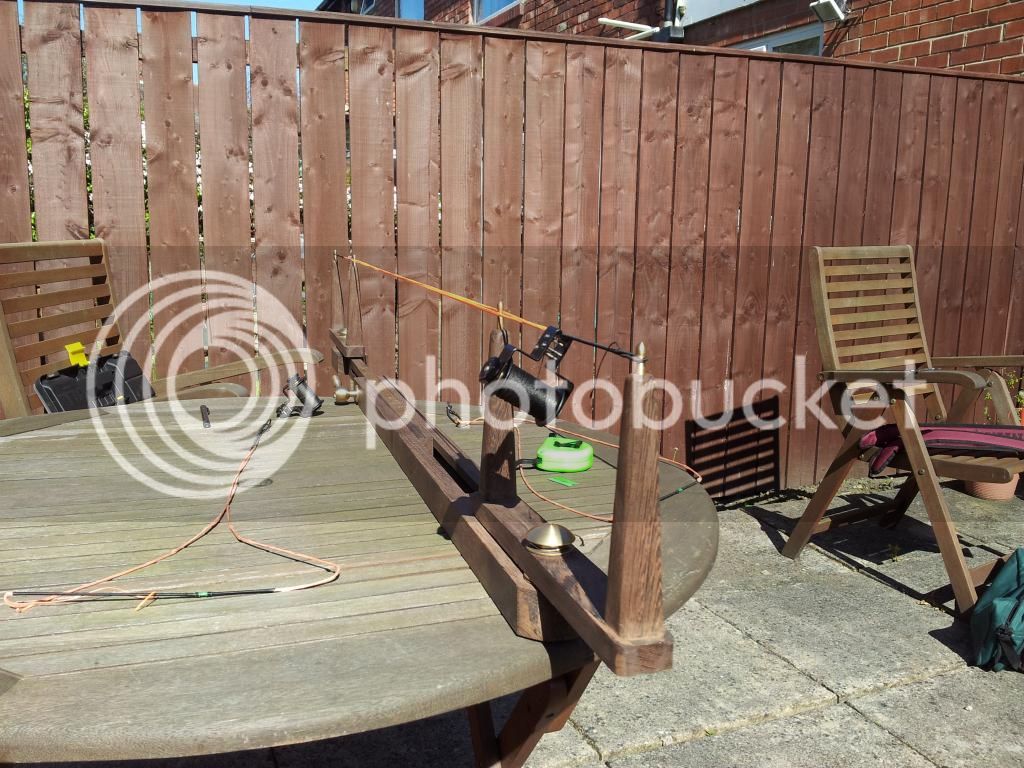
It's a string jig for making bowstrings for archery


Made entirely from repurposed materials,
Wood is wenge and came from the kitchen fitters first attempt at our upstands and the brass is all plumbing scrap with a strip from an old fireplace.

I was chuffed as it's also the first thing I've made out of wood in some twenty years, but like all of my projects it still needs finished as the wood is still untreated.
 
A new workbench for the smaller of my two sheds.
Built from 2x4 joists and a single sheet of 18mm sheathing ply.
Img_0108.jpg

Col.
 

Attachments

  • Img_0108.jpg
    Img_0108.jpg
    126.4 KB · Views: 329
A Fruit Bowl carved from a piece of Sycamore felled in my garden earlier this year.
Fruit Bowl - Sycamore..jpg
 

Attachments

  • Fruit Bowl - Sycamore..jpg
    Fruit Bowl - Sycamore..jpg
    113.4 KB · Views: 281
Burr elm shelf I just made
 

Attachments

  • IMAG1241 (362x640).jpg
    IMAG1241 (362x640).jpg
    223.6 KB · Views: 139
  • IMAG1243 (362x640).jpg
    IMAG1243 (362x640).jpg
    117.3 KB · Views: 139
xy mosian":1q3i9cca said:
A Fruit Bowl carved from a piece of Sycamore felled in my garden earlier this year.

I like it and very interesting, how did you go about carving the bowl, any details would be interesting?
 
Hi devonwoody, I put it through the planer thicknesser, sanded to 240g, epoxy'd the cracks then finished with 2 coats of satin varnish.
 
vinnie_chip":9hduosew said:
Hi devonwoody, I put it through the planer thicknesser, sanded to 240g, epoxy'd the cracks then finished with 2 coats of satin varnish.

Very nice piece of 'rustic' work. It's given me ideas for a bit of waney-edged walnut I have. It should look good in my new bathroom!

Cheers

John
 
vinnie_chip":cverat6u said:
Nice one ;) Dont suppose you have got any walnut spare?


Vinnie,

I have one piece about four feet long, which varies in width from 2 feet to 1 foot. It's a board from the middle of a squat bole, and both edges are waney; although the bark has all fallen off over the years. Spare bits I have are mostly weird shaped offcuts I can't bring myself to ditch.

I could split the plank up the middle, but it would mean having sapwood on both halves! :lol:

John
 
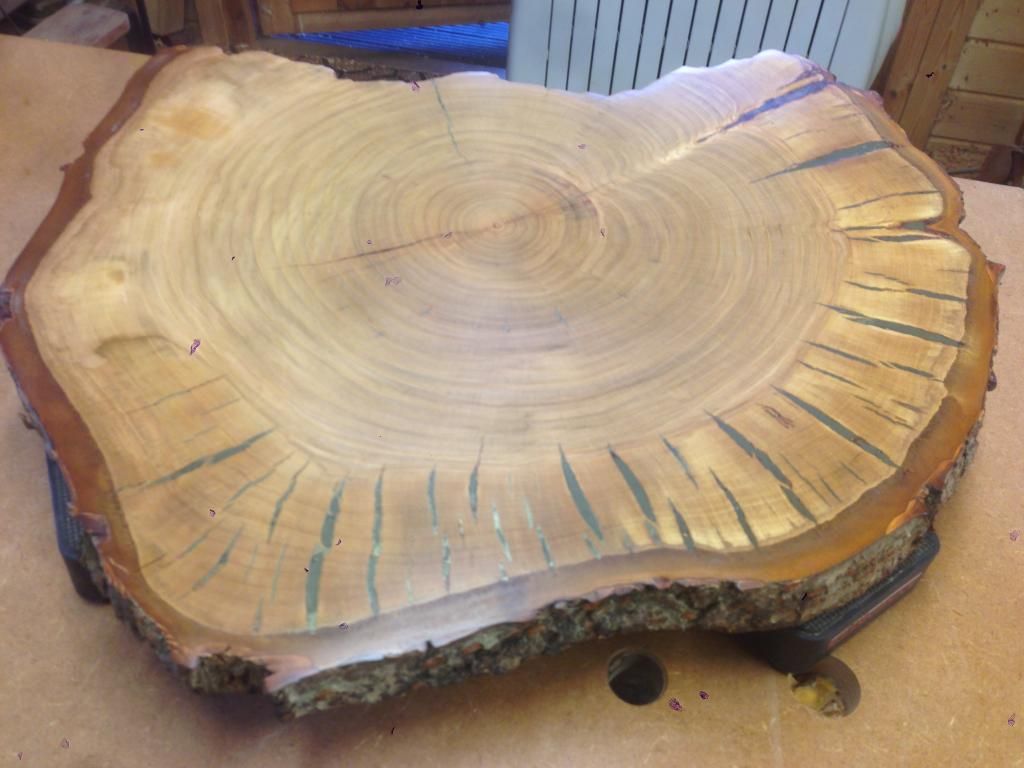
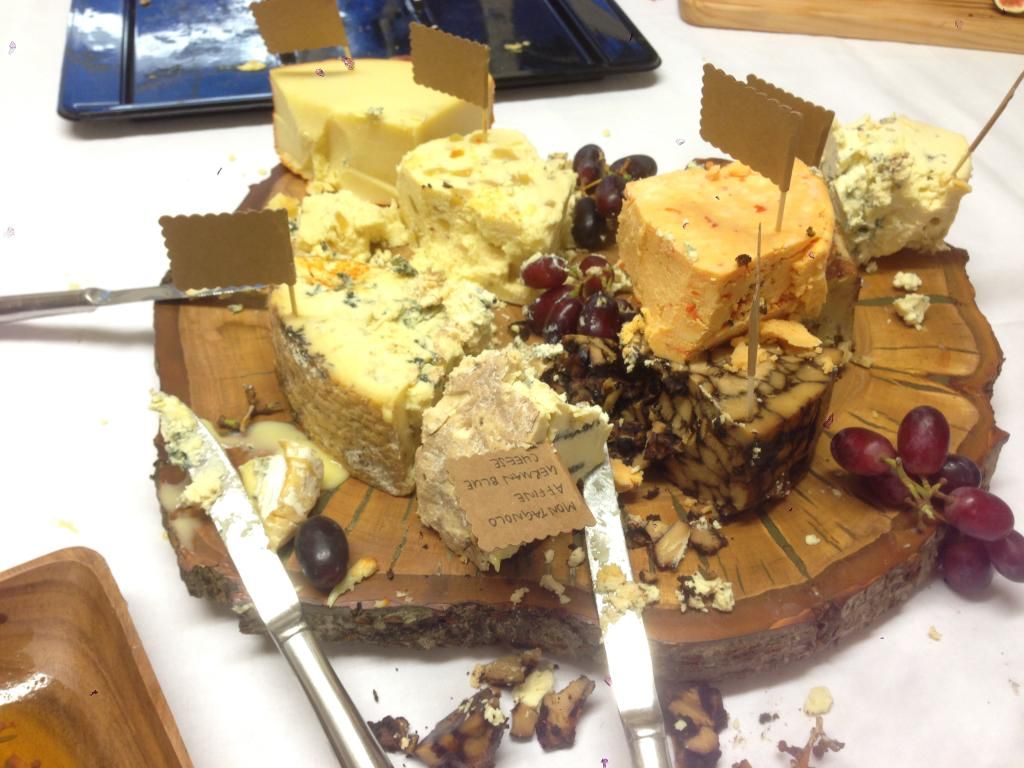
This was requested by good friends for their wedding. The spec was 14", natural-edged platter for cheese. The only thing I could find was some cherry trunk which was only felled this year, so there was loads of movement and it was obviously end-grain. I sliced it with a chainsaw a few months ago, then sealed it with pva. I then mounted on a screw-chuck a couple of weeks ago and turned it slightly hollow. The cracks were then filled with epoxy mixed with brass powder, left to harden and then skimmed. Finally sanded up to 2000 and finished with osmo. They were the simple steps, but I've missed all the swearing out, especially when my lathe broke a few days before. I learned loads, especially about epoxy and brass.

On the lathe;


Finished;


Full of cheese (me trying not to cry);

 
Finished this, I love auctions and thought I'd give a gavel and anvil a go.
 

Attachments

  • DSC03605.JPG
    DSC03605.JPG
    197.3 KB · Views: 240
xy mosian":1j8rxk3n said:
A Fruit Bowl carved from a piece of Sycamore felled in my garden earlier this year.
devonwoody":1j8rxk3n said:
I like it and very interesting, how did you go about carving the bowl, any details would be interesting?

Hi DW,
This was made from a half of the largest lump of a Sycamore I had felled earlier this year. Cut, not quite down the middle, by hand. Then of course what to make with it. I have never carved a large bowl, never had a lump this size to work with before. Some years ago, at a woodworking show, I picked up an Ashley Iles gouge number 31, about 19mm I think. That was from the 'reduced price' box with no handle. A confession, I bought it because it looked as if it wood be useful, and it is a glorious shape :oops: . Apparently their quality control were not satisfied with it and so would not sell it complete as first quality. I can find nothing amiss and saved about a fiver when I had bought a handle as well. Here was my chance, basically I chisel carved a parallel flat on the outer curved surface to act as base and set to work on the sawn surface with the No. 31. The wood was spitting at me as I chopped away but the gouge certainly took some welly, enough that the box head on my mallet split anyway. The rectangular shape was the biggest I could get out of the half log, I went as deep as I dared, to a bottom thickness of 10mm, or there abouts. As with planing I smoothed out the crests between the grooves with flatter sweep gouges. I cut the outside with a hand saw, sorry Mike, and roughly finished the corners with gouges and spokeshaves.

By then I was getting to a stage that would be easier with drier wood. I left it alone for about 6 weeks, weighing it weekly. Once the weight seemed to have stabilised I set about finishing it. Again gouges, with smaller, finer cuts, a block plane and scrapers. Using thumb planes did cross my mind but I felt there were too many changes of curvature at the inside corners. It was difficult at the rim going across the grain, this broke up rather than cutting well. Eventually I made up some shellac sanding sealer and that sorted the problem. Using the sealer all over gave me much better finishing all round, I re-learn something too often these days. :(

The final finish is sanding sealer followed by a chilled beeswax. Swmbo is happy with her new fruit bowl, I am happy with a carved piece which is part of the, short, history of our occupation here.

Thanks for asking.
xy

Ashley Iles No.32.PNG

The image is taken from a pdf of the Ashly Iles catalogue, I hope they don't mind. The catalogue has some interesting pages about their manufacturing process and can be found here:-
http://www.ashleyiles.co.uk/ashley_iles_catalogue.html
 

Attachments

  • Ashley Iles No.32.PNG
    Ashley Iles No.32.PNG
    34.6 KB · Views: 348
Well you have definitely produced a piece of art and the hard work which it must have been in my opinion was worth the effort.
 
After recently making a new stand for the lathe I needed a few little lathe projects to make the stand build seem worth while.
qyzanesa.jpg

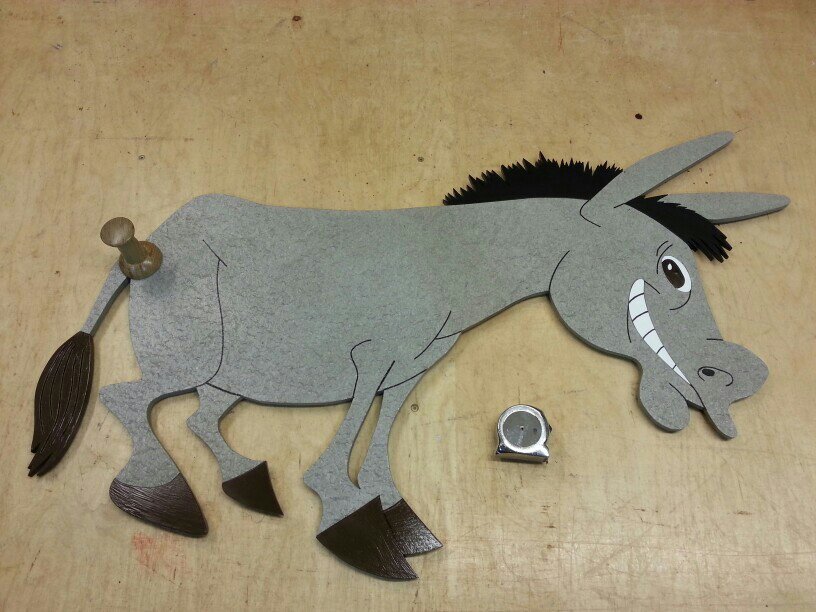
I also had a largish piece of sundela board left over and it seemed like quite a fun thing to do. Sundela has a couple coats of clear varnish and the front picture is stuck onto 6mm birch ply to hold it altogether. Its nearly my first attempt at intarsia but some of the joints are a bit questionable :oops: :lol:
 
Back
Top