What did you do in your workshop today ?

UKworkshop.co.uk

Help Support UKworkshop.co.uk:

This site may earn a commission from merchant affiliate links, including eBay, Amazon, and others.
Status
Not open for further replies.
It really does, it highlights the tabletop wonderfully. The ebonising got done today; it looks good to me, but I've discovered my tastes in this are weird. Custard had an excellent suggestion about adding washing-up liquid as a surfactant to the tannic acid and vinegar/iron solutions; it works well, but I preferred the imperfect look, with some of the grain showing through to give a kind of pin-stripe trousers appearance.

I'm not sure why I prefer it, I'm probably just an awkward pineapple or something :D
 
Great job Mark, an excellent design that's been really well executed. You should be pleased as punch.

=D>

By the way, did you use that fiendishly clever little jig that Nab showed in order to cut the bridle joints?
 
I'm rather happy with it allright custard :)
And yes, they're a lovely simple little jig so they're going in the toolbox - my mother caught sight of the table and another will need to be built now :D
His new series on a hall table (it looks a bit like a shaker table) has a similar simple jig or two for mortices and tenons.
 
MarkDennehy":19aevzl5 said:
I'm rather happy with it

It's brilliant to see stuff like this, real woodworkers getting stuck in and making real pieces of furniture instead of endlessly droning on about sharpening. Bravo! And that certainly is a real piece of furniture, clean and contemporary design, professional construction, appropriate finish... if you put it alongside the other side tables here with a £300 or £400 price tag, no one would bat an eyelid,

https://www.heals.com/furniture/living- ... ables.html
 
I made a plane.

It's a flush trim plane I knocked together using a piece of holly very kindly given to me by custard.

It's not in the league of some of the amazing planes some of the guys on here have made, but it's perfect for things like removing glue squeeze out.

be4de56437a1955bfba00ad525346a5a.jpg
165743bb3af585dd9ac047ef91d9e029.jpg
c948e308026b22c47d20593d3090533c.jpg
 
I’ve been turning offcuts into Christmas presents -

559E3729-2F5A-4853-AD90-194EA4247EF9.jpeg
 

Attachments

  • 559E3729-2F5A-4853-AD90-194EA4247EF9.jpeg
    559E3729-2F5A-4853-AD90-194EA4247EF9.jpeg
    146.1 KB · Views: 257
DSCN2462.JPG
DSCN2461.JPG
DSCN2460.JPG


Standard lamp made from firewood my neighbour chucked over my wall. Stained with Morrell's orange, as the three pines were different colours and one had water stains.
 

Attachments

  • DSCN2460.JPG
    DSCN2460.JPG
    122.4 KB · Views: 211
  • DSCN2461.JPG
    DSCN2461.JPG
    123.4 KB · Views: 211
  • DSCN2462.JPG
    DSCN2462.JPG
    124.9 KB · Views: 211
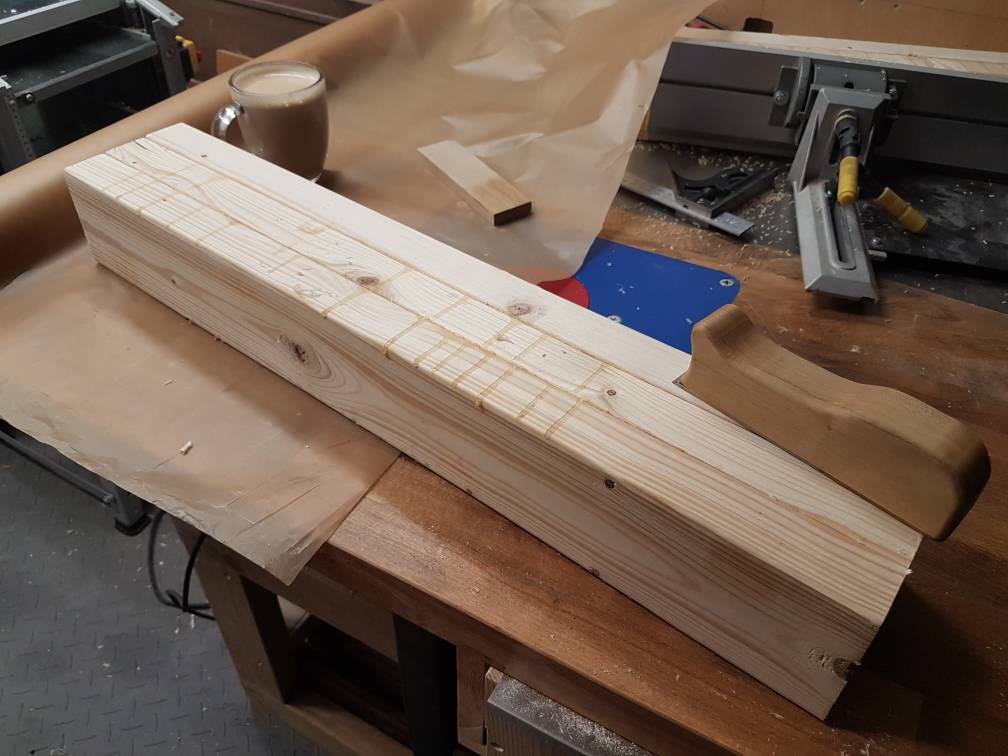
Not quite today, but I did finally finish the crib/cot bed I'd been working on for a *very* long time. I did it all with hand tools except for resawing the wood for the curved rails.

It was definitely an experience. The lumber was horribly expensive, and I'd paid to have it jointed/thicknessed for me since I didn't want to do it with the few planes I had at the time. Unfortunately I'd just assumed that it had arrived properly dimensioned, and properly dried... which was foolish of me. everything was cut wrong, thicknessed wrong (no two pieces the same thickness, no board the same thickness at both ends), and it wasn't until half way through the project that I realised the wood was still very wet when it had arrived. I'd made the side pieces and then moved on to the end sections, and when I'd come back to fit all the parts together the sides had warped significantly. Then I watched the end sections warp as they dried too. Doing the math I figured the wood must have been around 16-18% moisture when it arrived, rather then the 8-10% I'd have expected.

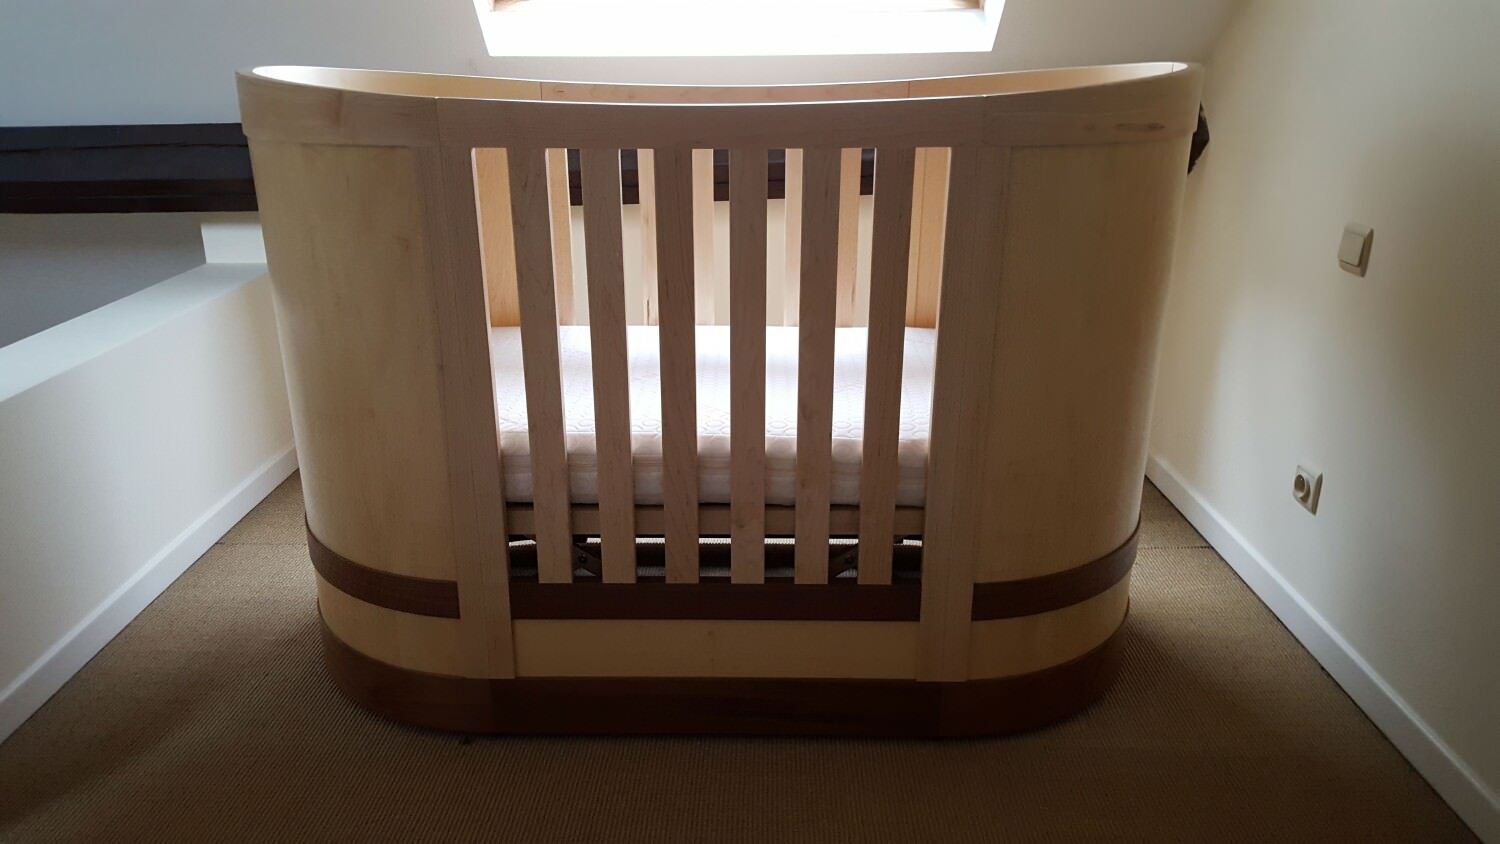
Still, aside from a glue discoloration from having to scrap through an entire layer of veneer on two of the end pieces (which I can still fix, once I get to where the crib is again), the thing turned out reasonably well. In January I'll go to where the crib is and to the last bit of tweaking and apply another layer of beeswax, but all in all it was a messy, frustrating, expensive, and downright horrible experience that I'd do again in a heartbeat. A bad day in the workshop is still a pretty darned good day.

the lighting isn't good in these pictures - it's not ultra shiny, but it does have a lovely lustre to it when you see it in person. The finish is simply oil (Osmo top oil I think?) and beeswax.

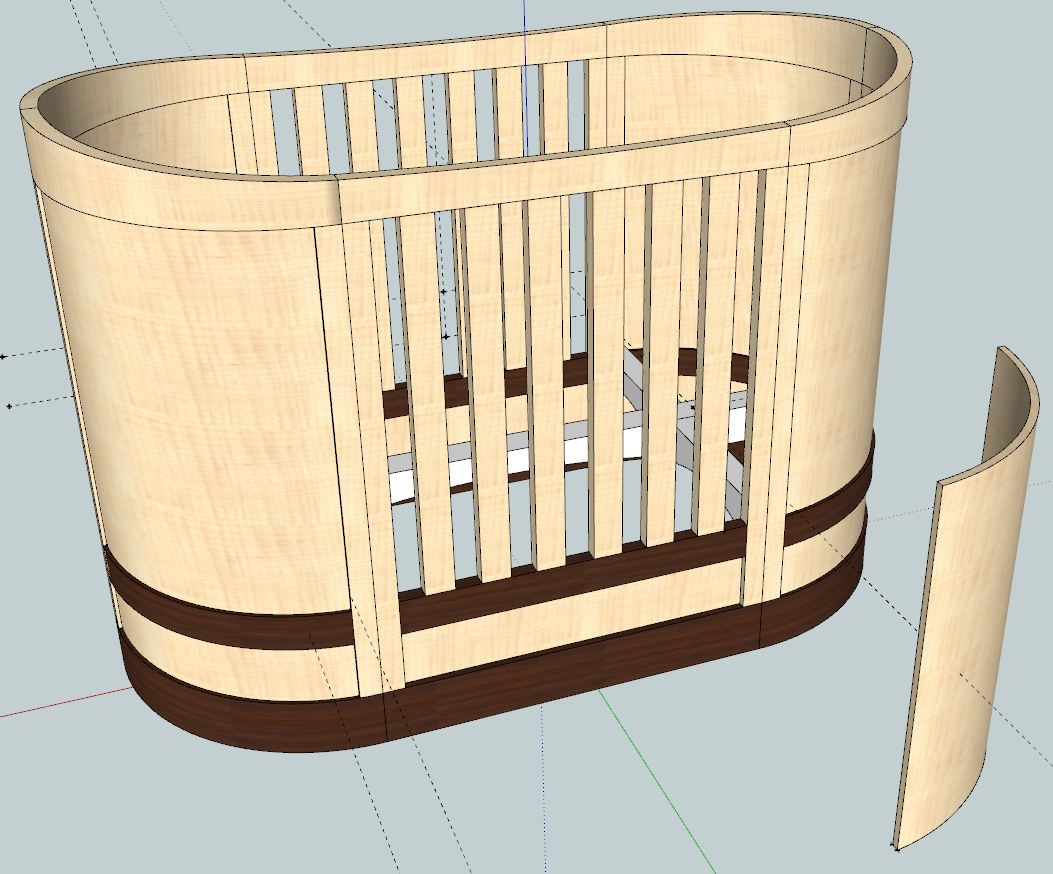
the internal frame didn't end up being needed, but the sketchup model was pretty close to the finished project.

Sketchup

du3OVYK.jpg


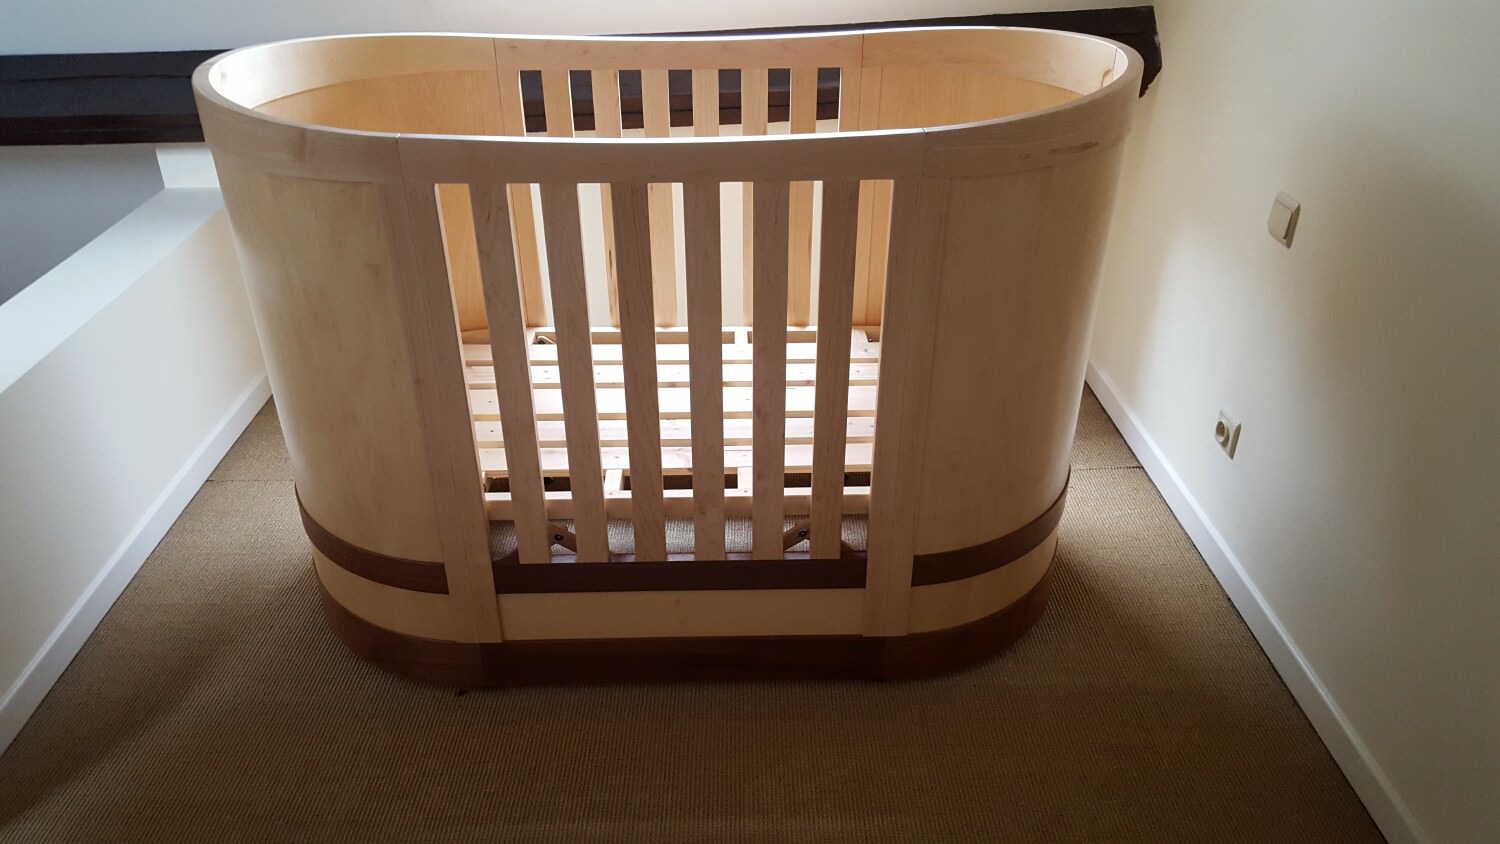
finished crib with height adjusting platform.

KLMeE9U.jpg


SaT5S1k.jpg
 
Donovan

Love it, but is that a French/European socket I spy on the wall? seems strange for Berkshire.

Mike
 
dkaardal":mrtgiti9 said:
I did finally finish the crib/cot bed I'd been working on for a *very* long time.

I salute you Donovan, I really do. To be honest if I hadn't seen the photos I wouldn't have believed that a project as ambitious as this was within the orbit of a relative newcomer to woodworking. It's a difficult and complex undertaking, but you seem to have pulled it off superbly, very well done!

=D>
 
Thought so, I spend half the year in France so recognised it immediately, hate the b****y things most of them eventually pull out of plasterboard, France no longer electrically approve the tooth cage backbox's for that reason, changed all of mine for English backbox's which still take the French socket face.

Mike
 
phil.p":2uks0zw2 said:
The baby's five stone now, but by the bye ........... :D
There's ABSOLUTELY NOTHING WRONG WITH THAT FOR COT BUILDS :D :D :D :D :D
And it's a lovely light-handed touch in that build dkaardal, beautiful work.
 
custard":1z9bsdyl said:
dkaardal":1z9bsdyl said:
I did finally finish the crib/cot bed I'd been working on for a *very* long time.

I salute you Donovan, I really do. To be honest if I hadn't seen the photos I wouldn't have believed that a project as ambitious as this was within the orbit of a relative newcomer to woodworking. It's a difficult and complex undertaking, but you seem to have pulled it off superbly, very well done!

=D>

Oh, I've been woodworking for a while - this was just my first bit project since moving to England and leaving my entire workshop behind. There wasn't a day that went by when I didn't miss my old workshop, but having to rely primarily on hand tools for about 85% of the build was kinda nice. Of course the darned thing took so long to build that NOW I've got pretty much a fully kitted out shop again.

That having been said, I'd never done bent lamination before (Cascamite = magic), never really done any resawing, and never had to work on a project without a basement full of fancy tools and machines. Fortunately there were people on the forums that had done all these things before and didn't mind sharing their experience.

:)
 
Not posted a project here before, so don't bite.

I finished this cabinet off for my workshop at the weekend. Nothing too special, the case is just Far East hardwood plywood, which I milk painted red. The face frame I made out of cheap pine, but I ripped each piece down the middle and glued the edges to dial out the knots and end up with a sort of quarter sawn look.

The drawer at the bottom is my very first attempt at a hand cut joint. Yes I wasn't brave enough for a hand cut dovetail, so it's a box joint.

Challenged myself to do inset doors, the they are okish.

Anyway, good enough to hold paint finishes, Lidl storage boxes and sand paper.

39105182652_4763fffe7f_h_d.jpg
 
I made this today, just to shape a banjo neck ...

drawknife.jpg


1'' x ¼'' steel bar, oak handles, brass plumbing fitting for the ferrules.
 
Status
Not open for further replies.
Back
Top