What did you do in your workshop today ?

UKworkshop.co.uk

Help Support UKworkshop.co.uk:

This site may earn a commission from merchant affiliate links, including eBay, Amazon, and others.
Status
Not open for further replies.
Bye bye Parkside pillar drill, hello ugly unknown pillar drill that weighs silly amounts! Even the belt guard is cast, seems better than my Meddings that I need to get round to restoring


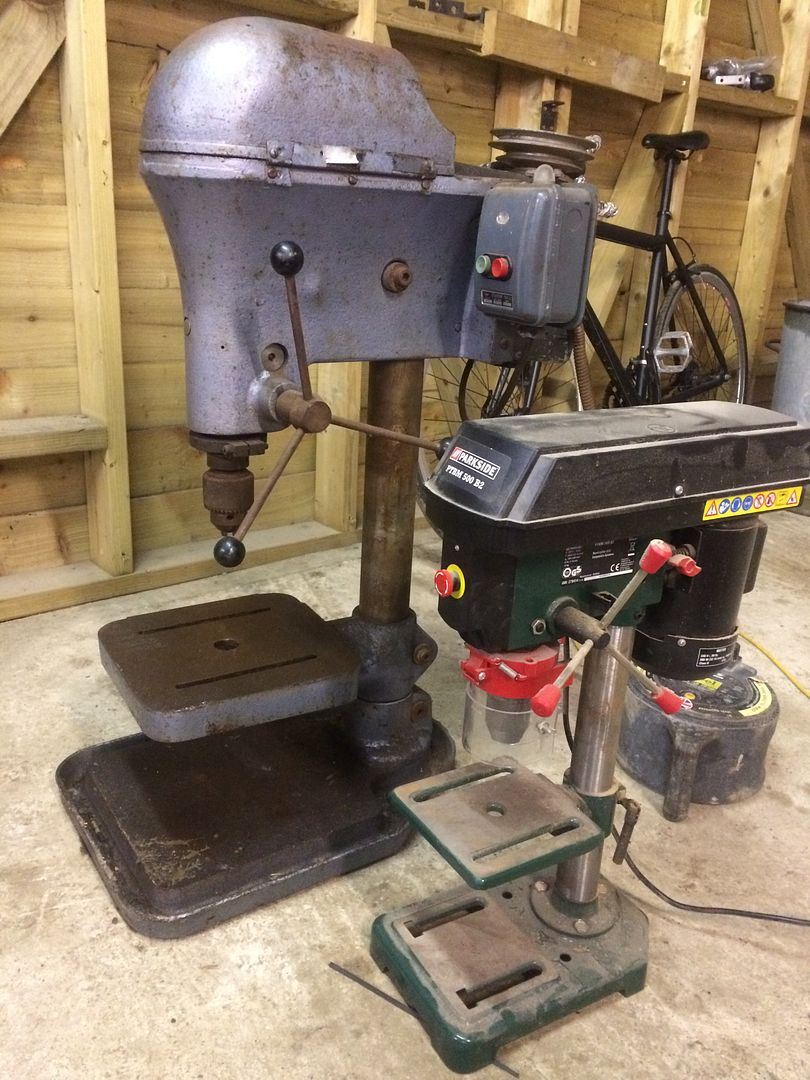
Looking forward to getting it cleaned and in use, the Parkside will donate its guts to another machine as it's terrible! I'm thinking about making a Bobbin sander from it.

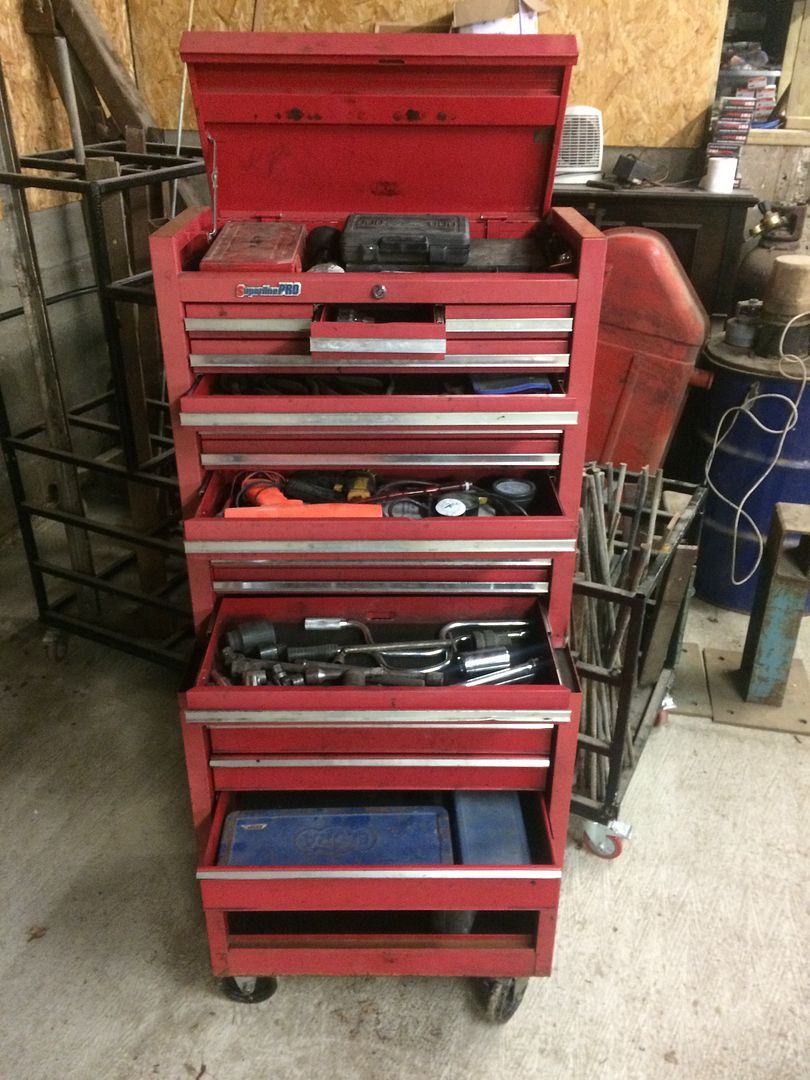
I also got a rolling cabinet thingy for not a lot whilst I collected the drill, so that now has some of my car stuff stashed in it and hopefully it'll make my life easier when I'm trying to find things.

 
Today I finished a much overdue project. I wanted a small display shelf for my kitchen in a similar style to another I have had for ages. Similar proportions and overall style, but slightly different configuration.

This is my version - I hadn't thought through the cornice (?) at the top before I had glued up a piece and then it was too late to fancy it up any more. These things happen when you use offcuts...
download.jpg


The wood is sweet chestnut with a vandyke stain then Osmo Polyx Oil (Gloss) over that.
It turned out pretty much as I had it in my head, with the typical bumps in the road along the way.

Here is the original:
download (1).jpg
 

Attachments

  • download (1).jpg
    download (1).jpg
    100.8 KB · Views: 89
  • download.jpg
    download.jpg
    212.8 KB · Views: 89
I spent all morning discovering that I have the Sadim touch. :-(
 
I like that very much Rob, I think the bigger cornice makes it look more unique and a bit more dark and gothic, the new one also looks more modern to me somehow.

did you carve the 2 round details on it? also did you use dado joints for the shelves?
 
thetyreman":uey5wv1o said:
did you carve the 2 round details on it? also did you use dado joints for the shelves?

Thanks for the feedback!

I have a small cnc router that I used to carve the roundels.
I didn't use dado joints as it is only for holding tea and coffee pots, just glued and pinned.
 
TFrench":sy35067s said:
Finally just about finished my router table this weekend. Just needs the MDF faces painting when I can be bothered and fancy doing a hateful boring task! Also need to add a T-track to the front when I can find some at a sensible price. The extraction works very well, theres nothing at all on the table in use, some bigger bits stay in the cabinet but I think its catching all the finer airborne stuff. By far the most complex thing I've attempted so far!


That looks a nice setup a good size plate, Can I ask what size the table insert is and where to get them? Thanks
 
I'm prefacing this with the comments that (a) it's not finished yet; (b) aside from four cuts with a router, this has all been hand tool work; and (c) this is the first piece of furniture I've ever made.

IMG_0813a.jpg


Still needs a drawer.

IMG_0808a.jpg


But the drawboring and the wedged tenons came out well, I thought.

IMG_0815a.jpg
 
I finished my workstation for morticer and thicknesser last week.
It is on casters so can be pushed out of the way.
Surprisingly stable with the weight distributed that high.
So much easier than having to lift them off a filing cabinet and onto a workmate every time I need to use them.
 

Attachments

  • 1.jpg
    1.jpg
    244.5 KB · Views: 163
  • 2.jpg
    2.jpg
    251.5 KB · Views: 163
TV Stand made from 1" Oak jointed and glued up into boards. Walnut accents added to the shelf ends and drawer handles. Top held in place by 4 x 8mm Dowels each side. Shelves mounted into housing dado joints. Drawer fronts are router dovetails with rabbet joints on the draw back and bottom. Finished with Osmo satin.
Happy with the results and there's something very satisfying being able to use something you've made yourself.
rsz_img_4190.jpg

rsz_img_4191.jpg

rsz_img_4195.jpg

rsz_img_4196.jpg

rsz_img_4197.jpg
 

Attachments

  • rsz_img_4190.jpg
    rsz_img_4190.jpg
    227.8 KB · Views: 109
  • rsz_img_4191.jpg
    rsz_img_4191.jpg
    229.5 KB · Views: 109
  • rsz_img_4195.jpg
    rsz_img_4195.jpg
    230.2 KB · Views: 109
  • rsz_img_4196.jpg
    rsz_img_4196.jpg
    229.9 KB · Views: 109
  • rsz_img_4197.jpg
    rsz_img_4197.jpg
    228.6 KB · Views: 109
As a English car enthusiast you should know the difference between a Rabbit and a Rebate, Rabbit's are little fluffy things that run around fields being chased by Land Rovers. :wink:

Nice job by the way.

Mike
 
MikeJhn":353sur8z said:
As a English car enthusiast you should know the difference between a Rabbit and a Rebate, Rabbit's are little fluffy things that run around fields being chased by Land Rovers. :wink:

Nice job by the way.

Mike

Thanks Mike! Ok now i'm confused, is a rabbet not the same as a rebate?...... #-o
 
Its what the Americans do to our English language, miss pronounce and miss spell everything, think yourself lucky you did not have any Aluminum in the construction. :lol:

Mike
 
MikeJhn":1sw7cr3u said:
Its what the Americans do to our English language, miss pronounce and miss spell everything, think yourself lucky you did not have any Aluminum in the construction. :lol:

Mike

:) ok now i get it. Rebate it is from now on, cheers for the heads up.
 
The wife had made a Polaroid montage and then decided it needed a frame, cue a session digging through the wood pile. Repurposed some mahogany rear panel rails from an old wardrobe, learnt how to make half lap mitre joints, a coat of danish oil, and it turned out nice like. Couple of the joints are a little rough but first time doing these joints, and cut/trenched on the mitre saw that is far from accurate, so I'm happy.

IMG_3708.JPG

Wood has a lovely shimmer with a coat of danish oil. Will go over with briwax and polish when dry.
IMG_3707.JPG

Probs the best of the half lap mitres.
IMG_3706.JPG

Kitchen table assembly, needs must.
IMG_3705.JPG

Practice half lap was much better than any of the actuals, typical!
IMG_3704.JPG

IMG_3703.JPG

IMG_3702.JPG


Cheers

Fitz.
 

Attachments

  • IMG_3702.JPG
    IMG_3702.JPG
    139.5 KB · Views: 63
  • IMG_3703.JPG
    IMG_3703.JPG
    144.8 KB · Views: 63
  • IMG_3704.JPG
    IMG_3704.JPG
    151 KB · Views: 63
  • IMG_3705.JPG
    IMG_3705.JPG
    119.7 KB · Views: 63
  • IMG_3706.JPG
    IMG_3706.JPG
    67.8 KB · Views: 63
  • IMG_3707.JPG
    IMG_3707.JPG
    124.3 KB · Views: 63
  • IMG_3708.JPG
    IMG_3708.JPG
    83.4 KB · Views: 63
You could use the mitres as a "design opportunity" and round the edges to make them more noticeable whilst evening them up, put a strip of contrast in them (after evening the up the gap) or overlay something to cover the gaps.
 
Status
Not open for further replies.

Latest posts

Back
Top