Beautiful qualityMade myself a Paul Sellers router plane. Had a piece of beech I'd earmarked for this kicking around for over a year. Finally pulled my finger out over the weekend and got it done.
View attachment 176618
You are using an out of date browser. It may not display this or other websites correctly.
You should upgrade or use an alternative browser.
You should upgrade or use an alternative browser.
Post a photo of the last thing you made
- Thread starter DTR
- Start date


Help Support UKworkshop.co.uk:
This site may earn a commission from merchant affiliate
links, including eBay, Amazon, and others.
Andy's Shed
Established Member
That looks greatMade myself a Paul Sellers router plane. Had a piece of beech I'd earmarked for this kicking around for over a year. Finally pulled my finger out over the weekend and got it done.
View attachment 176618
 I was watching one of Paul's videos a little earlier today, one where he's using wooden spokeshaves. I'm collecting a couple of them tomorrow.
Doug71
Established Member
I have been meaning to make a cabinet to go under the extension table of may panel saw for ages, the saw is next to my spindle moulder and I often end up dumping spindle moulder related things on the table which isn't ideal hence the need for a cabinet.
I was getting rid of an old desk which had a drawer unit at the side when I realised the unit would actually fit perfectly under my saw!
I know I didn't make it, I just painted it grey and added castors but the thing is it probably fits better than if I had actually made it

I was getting rid of an old desk which had a drawer unit at the side when I realised the unit would actually fit perfectly under my saw!
I know I didn't make it, I just painted it grey and added castors but the thing is it probably fits better than if I had actually made it
Wildman
Established Member
We are gonna need a bigger lorry
left over iroko handrail made into plant pots
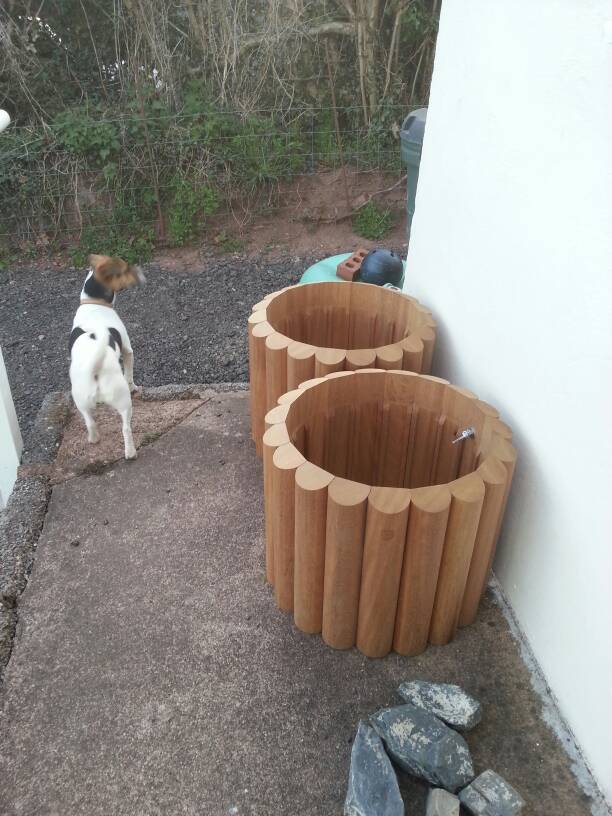
the extreme heat this week sure has caused a few splits an shakes, I'll leave them to weather naturally.

a laundry basket skip

had to buy the lorry for £1.50 when I saw it in the charity shop")
Adam W.
A Major Clanger
Underway, a 17th century chair panel.
Finishing off stuff which has been neglected for a year or so.

Finishing off stuff which has been neglected for a year or so.
A replacement panel or the whole chair?Underway, a 17th century chair panel.
Finishing off stuff which has been neglected for a year or so.
View attachment 176875
Amazing workUnderway, a 17th century chair panel.
Finishing off stuff which has been neglected for a year or so.
View attachment 176875
Adam W.
A Major Clanger
New chair, I think you've seen the rest of it before.A replacement panel or the whole chair?

I have to finish that picture frame behind it afterwards.
That's ADHD for you, loads of good ideas which never get finished. Gives me something to do for when I retire though.
Silver lining and all that.
Last edited:
Wildman
Established Member
perfect for the ladies. Not designed for men obviously, ha haI went back and rounded off all the corners with a spokeshave, here's the completed stool finished with de-waxed shellac.
Writing desk for a customer. European ash, grain matched drawer cut out from front apron via a few steps. Turned out quite nice. I tried my best to keep the apron height down but still having a usable drawer height, as a tall apron on a writing desk is not desirable. Recessed 15×15mm solid metal bars (final picture) on the inside above and below the drawer to keep these thin (18mm) and long sections straight over time, drawer bottom mounted from below to maximize usable drawer height.

.jpg")
.jpg")
.jpg")

Wildman
Established Member
Saw this -- not sure where ?
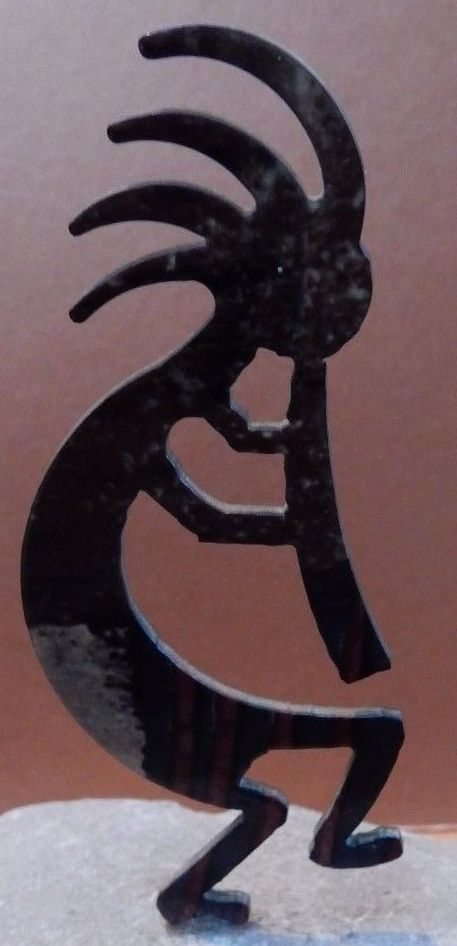
Made this from off-cuts


Louisvn
Member
Dear Carmonius, the writing desk is an excellent piece of work. Thank you for sharing it with us.
Yojevol
Clocking on
Lovely job. What method did you use to get the grain match on the drawer front?Writing desk for a customer. European ash, grain matched drawer cut out from front apron via a few steps. Turned out quite nice. I tried my best to keep the apron height down but still having a usable drawer height, as a tall apron on a writing desk is not desirable. Recessed 15×15mm solid metal bars (final picture) on the inside above and below the drawer to keep these thin (18mm) and long sections straight over time, drawer bottom mounted from below to maximize usable drawer height.
View attachment 176940
View attachment 176941
View attachment 176942
View attachment 176943
View attachment 176944
Brian
- Joined
- 25 Jun 2021
- Messages
- 12
- Reaction score
- 5

Thanks! I started with an over wide apron (approx 10mm material outside the bars), routed grooves for the metal bars and screwed these in place. With the bars in place I could after that go really thin on the dimension, sent the apron through the planer a few times until I had about 1.5mm thickness outside the bars.Lovely job. What method did you use to get the grain match on the drawer front?
Brian
Followed with ripping the front into 3 pieces, then replaned the ripped faces, cut away the drawer front part and then glued back together. I chose a board with very straight grain in the areas where the drawer was cut away, if wavy grain here even only a saw blade thickness would give a mismatch.
I have build videos for this but didn't want to spam this thread with those.
Last edited:
Can you post a link to the videos please, I am about to make a Hall / Sofa table and on a few practice attempts the join is visible even though the grain is a good match, in your picture as Eric Morecambe used to say "you can't see the join"Thanks! I started with an over wide apron (approx 10mm material outside the bars), routed grooves for the metal bars and screwed these in place. With the bars in place I could after that go really thin on the dimension, sent the apron through the planer a few times until I had about 1.5mm thickness outside the bars.
Followed with ripping the front into 3 pieces, then replaned the ripped faces, cut away the drawer front part and then glued back together. I chose a board with very straight grain in the areas where the drawer was cut away, if wavy grain here even only a saw blade thickness would give a mismatch.
I have build videos for this but didn't want to spam this thread with those.
OK, the front apron cut out is done starting around the 16min mark in this video. But, for the joint to be invisible some luck and the right board for the job is needed. Grainmatch on the sides of the drawer is the "simple thing" since this is predictable, to have it invisible in the rip lines a bit luck is needed. One trick to play with here is that you can shift the short pieces outside the drawer sideways to match the grain as good as possible (not too far out though as then the drawer front will be too short, inwards you're free to move them without any constraints more than that the drawer will be smaller the more you move them). You can also shift the narrow pieces above and below the drawer individually, with the same constraint.Can you post a link to the videos please, I am about to make a Hall / Sofa table and on a few practice attempts the join is visible even though the grain is a good match, in your picture as Eric Morecambe used to say "you can't see the join"
Another way to make it is veneer, that makes life a bit easier.
Last edited:
Adam W.
A Major Clanger
Nearly done with this now, just the ears and a bit of shaping on the crest to do tomorrow.
It'll be nice to have some space in the shed.

It'll be nice to have some space in the shed.
This is a collaborative effort with @Gandalfs Staff. Inspired by the Octavian Dan YouTube channel, it’s a low workbench designed for use in my kitchen. While the Council reviews my planning submission for constructing a workshop at the end of my garden, I can work on this bench. Once I’m done, I can store it in the cupboard under the stairs. Although there are a few finishing touches left, such as the vice faces and chamfering the sharp edges, it’s already fully functional. Many thanks to @Gandalfs Staff for letting me use his workshop and building this with me.


Similar threads
- Replies
- 640
- Views
- 47K
- Replies
- 44
- Views
- 3K