Jameshow
Established Member
Sorry should have been a stand up!Too much detail!
Predictive text!!


Sorry should have been a stand up!Too much detail!
Cheers. Just now need to design a logo or stamp. Been playing around with a few idea's but nothing quite suitable yet. But good to know where I can get something made. Regards ShanThanks Shan!
I had a couple of different size branding irons made via etsy a few years ago. Something like…
https://www.etsy.com/uk/listing/260733879/2cm-10cm-custom-leather-stampleather?ref=yr_purchases
Fairly cheap for what it is. I only got the brass stamp made, then made myself a handle with a stainless steel bolt of the right size to attach the stamps, then heat them up with a blow torch


That is absolutely stunningThis was some cherry from the same stash as before; cut in 2016 when a plot was cleared for a building, I wet, rough turned and left to dry. Given the complex branches coming out of this section of the tree, one side cracked and twisted and I thought this was going to be a write-off; I have not seen drying cracks that go all the way through the walls that don’t meet the rim. However, filling with black-tinted epoxy seems to have worked well (normal 5 min epoxy + black spirt stain).
Finished with 3x coats of Danish oil + buffed wax.
Next week, this one is going to a lady retiring from where the wood was cut.
View attachment 132552View attachment 132553View attachment 132554View attachment 132555View attachment 132556


Hello John. It's a rock maple body and the wedge is a piece of figured ash that I couldn't throw away. Glad I didn't!Nice looking plane Shibby. Whats the timber?
Regards
John
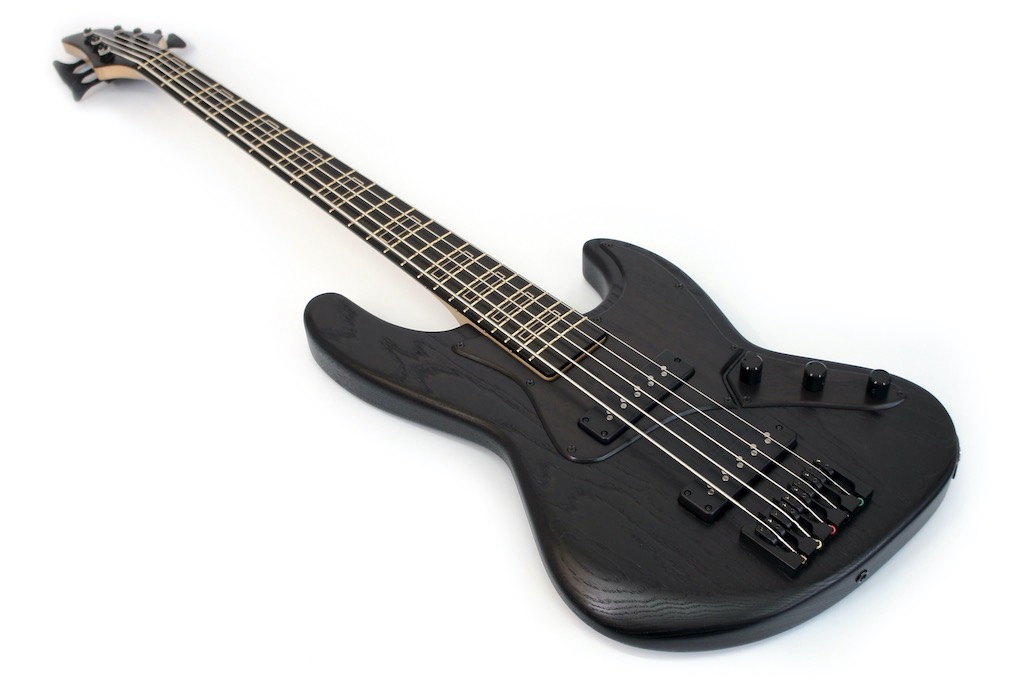
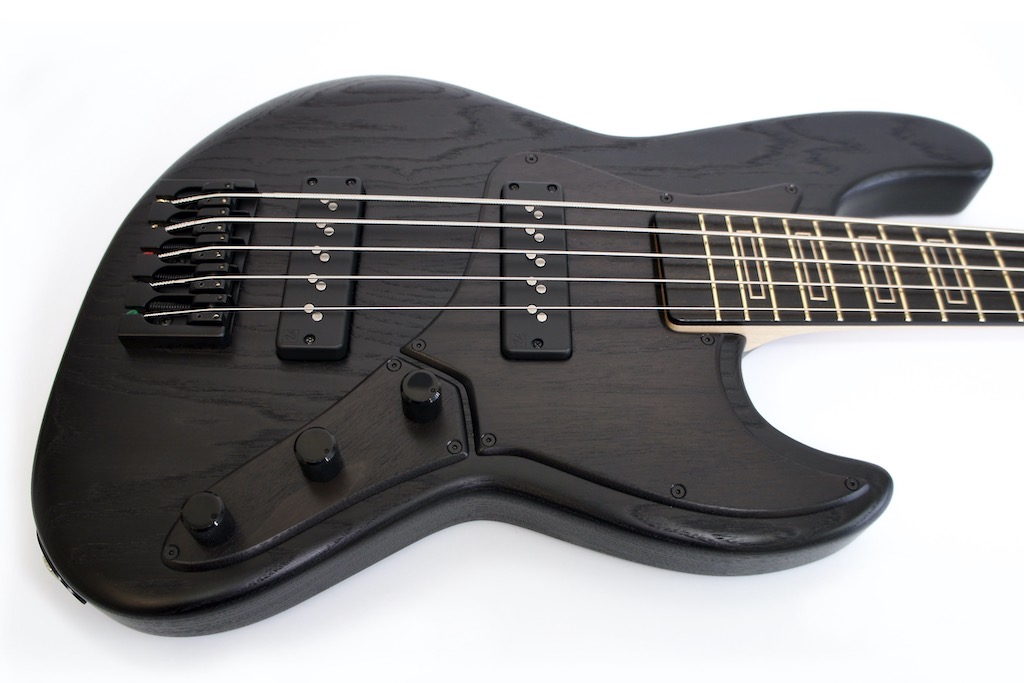
That's gorgeous!My latest bass build for a friend of mine.. Swamp Ash body with Walnut scratchplate & control plate, stained black and finished with Osmo. Maple neck, Ebony fretboard with Maple inlays, Swamp Ash headstock veneers.
Very impressive, well done.
Very nice. Did you burn it or is it stain?My latest bass build for a friend of mine.. Swamp Ash body with Walnut scratchplate & control plate, stained black and finished with Osmo. Maple neck, Ebony fretboard with Maple inlays, Swamp Ash headstock veneers.


Enter your email address to join:


")

