The 19mm Valchromat works well for my workbench. It took me about three hours to drill the 200 dog holes and chamfer both sides of the top. Maybe it was my technique with the first time using the Parf MK2 Guide, but the unsupported bottom of the dog holes weren't as crisp as the top and there was some slight tear out on some of the holes. The chamfer tool cleaned up most of it.
I was very pleased with the accuracy Parf guide, despite this being the first time I've done this. I checked the squareness of the hole grid using the large TSO MTR triangle and bench dogs in ten or twelve places, and the hole alignment is perfect. As soon as I fit the sacrificial HDPE strip, I'll do the 5-cut test for squareness; although, I'm confident it will be fine.
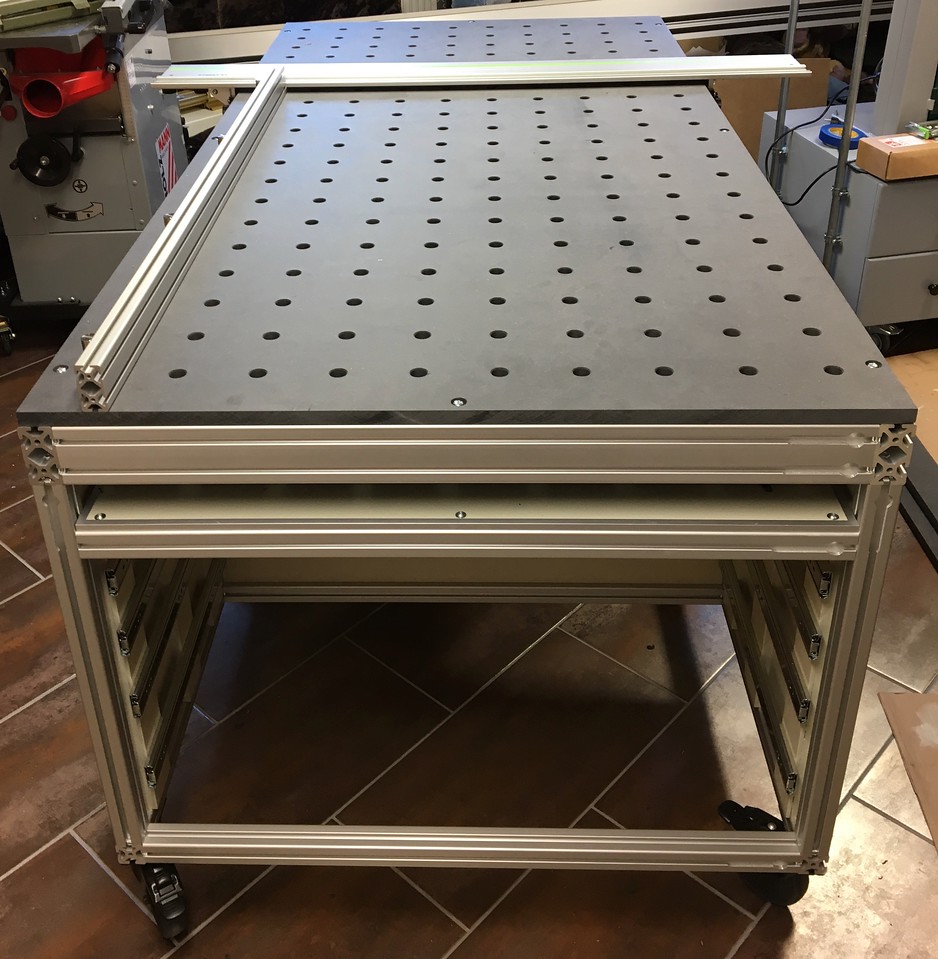
This is the workbench with the fence and FS 1400/2 Guide Rail attached.
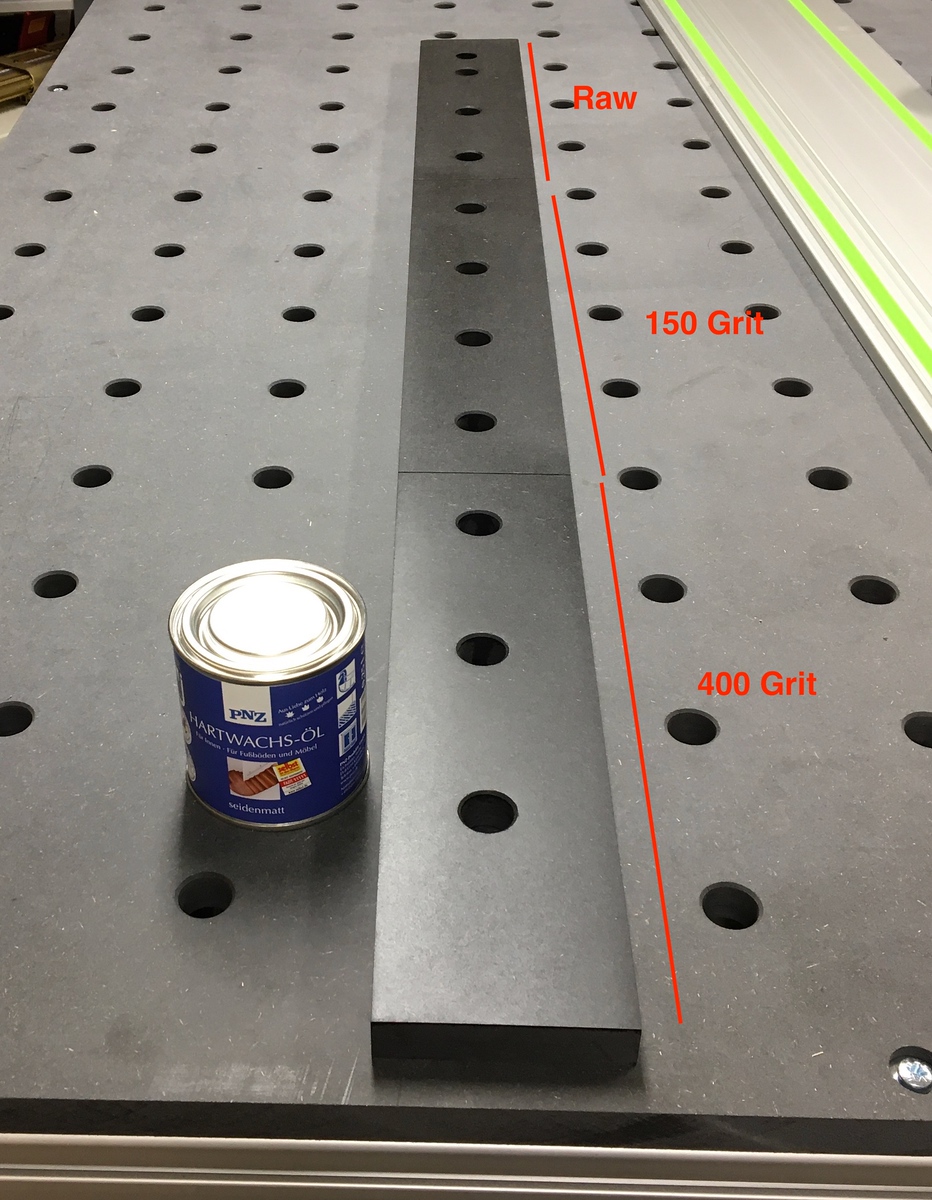
I wanted a durable finish for the Valchromat, so I used a test piece. This board has ten 20mm dog holes and one 18mm hole with the Forstner cutter to determine the cutting depth for the mounting screw and washer. I divided this board into three sections by making a shallow saw kerf to make it easier for me to remember where one finish ends and the next begins. The top kerf is not visible in this image, but it is there.
The top section, with three dog holes and the Forstner hole, is unsanded. The middle section, with four dog holes, is sanded with P150-grit paper. The bottom section, with three dog holes, is sanded with P150, P220, and P400. I then applied a thin coat of the hardwax oil to the entire board, ensuring the chamfer edges were coated. I intentionally let some of the oil dribble into one dog hole in each section. After ten minutes, I wiped off the excess and let it dry for 12 hours. When I inspected the board, there was no residue of oil when checked with a clean rag, and the dogs fit perfectly in the holes, even the ones that I didn't clean after letting oil dribble into them.
I applied another thin coat and wiped off the excess after ten minutes. This photo was taken about four hours after I applied the second coat, and it is already dry to the touch. The finish is surprisingly hard and I can feel the difference between the sections. The section with the P400 finish and two coats of oil is the winner for me.
The small 250ml can in the photo is more than enough oil to apply two coats to the workbench top. I wanted a matte finish, but after driving to four stores, the best I could find was semi-matte.


")