Tissue boxes 2011

UKworkshop.co.uk

Help Support UKworkshop.co.uk:

This site may earn a commission from merchant affiliate links, including eBay, Amazon, and others.
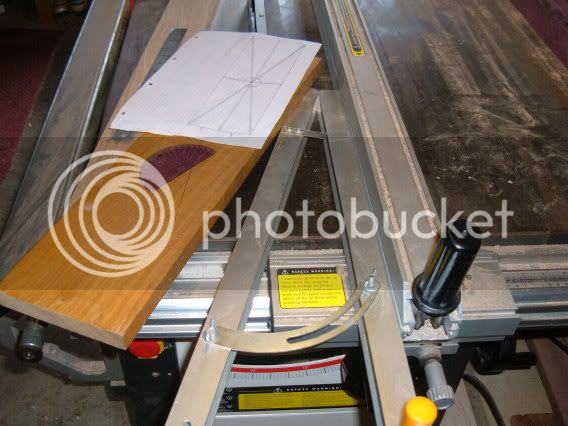
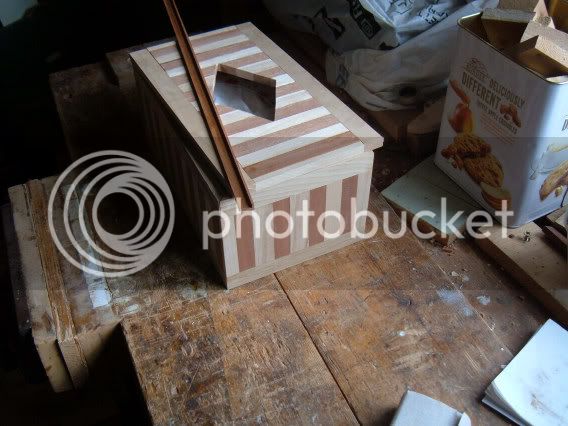
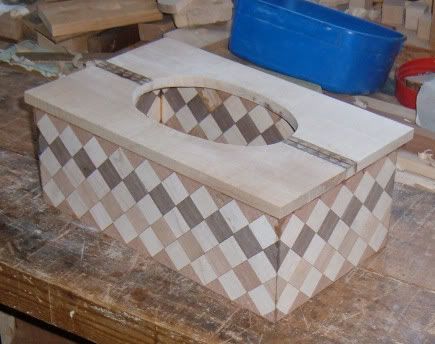
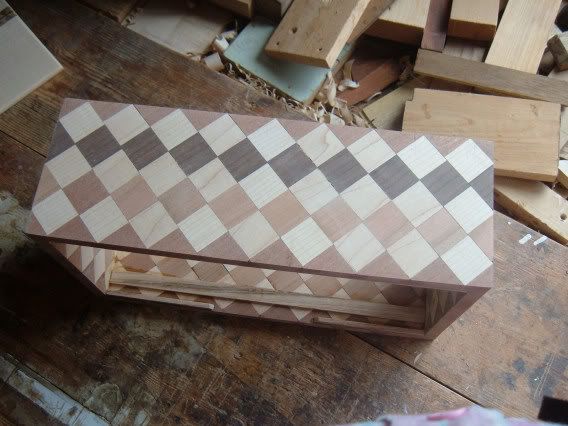
Tinytim, I suspect the boxes come out at around £3 in materials, so I suppose last year if I made forty boxes that's around £120. That makes it a very cheap hobby compared to other pursuits. I am retired so do not take part in any business activities.
 
The lid in its basic unprepared state together with the carcass.

23w-5.jpg


24w-5.jpg


I am inclined to have the top lid overhanging this time so that top does not conflict with frame, also the carcass is twisting or warping. This happened a couple of years ago on another design, I think it has something to do with the grain directions and glue pulling it out of shape. I did avoid similar action when I glued pieces to a plywood former.
 
The harlequins have sanded up quite nicely and you might note I have added runners instead of dadoes for the bottom sliders.

26w-4.jpg


The carcass sides as mentioned previously did bow slightly but not enough to worry about imo.

27w-4.jpg


The lid on this occasion has been glued with overhang and also shows a box referred to as the parthenon awaiting completion of a lid.

28w-4.jpg


Back to the harlequin awaiting a sanding sealer and then a wax and my wife has bagged this one.

25w-4.jpg
 
That one's even better than that 'wicked' one you made with the random wood pieces and that one was a total stunner

amazing
 
Forgot to ask, did you have to fill the sides in the end or has the glue done enough not to worry?

Seen a maths thread elsewhere (not read it properly), I'm assuming that is the prelude to the sunburst box :)

Do you think there is a way around the slight distortion in the sides when gluing up? or is it just a by product of trying to clamp it all tight as possible. Sorry for the questions!
 
Pleased that you like them.

The parthenon box is also nearing completion, I will cut a diamond shaped aperture with lapping for this one.

parthenonlidandbase.jpg


The wife also keeps herself busy on her embroidery and we compete for wall space.

2011_0109leopard0004w.jpg
 
No skills":2eac20xe said:
Forgot to ask, did you have to fill the sides in the end or has the glue done enough not to worry?

Seen a maths thread elsewhere (not read it properly), I'm assuming that is the prelude to the sunburst box :)

Do you think there is a way around the slight distortion in the sides when gluing up? or is it just a by product of trying to clamp it all tight as possible. Sorry for the questions!


Dabbed a bit of brummer filling at some edges, Sunburst should start this week but I am expecting a large timber consignment, maple and black walnut and I think I might have to start cutting it down for storage. Regarding distortion, my view is that as the glue sets and hardens it displaces the timber at joints and hence changes take place.

BTW there are 145 pieces of timber in the harlequin box plus waste bits.
 
Everything does not always go smoothly for me, cleaning up the lid on the P/T smashed up one of those short lengths going across the grain so I did the following repair.

Inserted a new piece.


29wpant.jpg


30w-4.jpg


Then had a timber delivery, would you like to price it. nearly 12 feet of 9x2" maple.

and 9ft. of 10 x2 black walnut.

31wmapleblwalnut.jpg


The sunburst box is giving me a problem, I cannot cope with cutting the angles required on my original sketch and don't want to cut the pieces small on the tablesaw.
Any ideas?

30wsunburst.jpg
 
I do like black walnut, I dont do any real wood work so cant hazard a guess on the price other than :shock:

Not 100% sure what you mean with your angle cutting problems?
My no skill solution to all that complicated cutting would be to print off a picture of the patten at the correct size and glue it to a piece of the stock being used - glue/screw/double sided tape the other pieces of stock to the first making a big wooden sandwich, then find somebody that has a bandsaw and cut along the patten lines.

By the time you have finished laughing at my suggestion somebody that has a clue might suggest something helpful :D
 
No Skills, your suggestion is taken on board, I do have the bandsaw but the cut surface would not be good enough to glue to adjacent piece, however the paper pattern would make the set up easier to follow, might cut pieces by hand with my Japanese saw and use a softer hardwood. I originally intended to use some very grainy oak (floorboarding).

Timber cost was £150 plus vat plus £25 delivery charge £209 in all.
 
I do like the halequin box and is a credit to your accuracy in cutting. With diagonals, diamonds, lozenges etc show up the most minor deviations.

I have a couple of questions

Have you replaced your table saw bed with a timber one?
What is the detail of fixing for the top?

Could you show a box of tissues being loaded.

Keep up the good work. What design will you think of next.

Regards
 
adzeman":1ngqu8ee said:
I do like the halequin box and is a credit to your accuracy in cutting. With diagonals, diamonds, lozenges etc show up the most minor deviations.

I have a couple of questions

Have you replaced your table saw bed with a timber one?
What is the detail of fixing for the top?

Could you show a box of tissues being loaded.

Keep up the good work. What design will you think of next.

Regards


Here is a picture of loading the tissues a frequently asked question.

19w-7.jpg


The dadoes are usually cut with a router however the harlequin might be delicate so I stuck timber guide strips instead on that one.


The wooden table top you refer to is a sled which I find a more accurate way of cross cutting than using a mitre gauge on the table.
 
Back to the pathenon box, I instigated some changes, first I reduced the height of the carcass because I have decided on a flush fitting lid and I wanted to maintain proportions of horizontal lines and also thought a triangular aperture would be more appropriate to this design.

partenonnearlytherew.jpg


The carcass height was reduced the same way box makers create their lids, it went well.

partenoncacassoffw.jpg


The diamond aperture was lipped after making the beading on the router.

pantenondiamondlidw.jpg


The lid glued flush with box and then it will be sanded but no round overs this time to maintain the cubic feel.

partenongluedlidonw.jpg


Now to the sunburst which I will start a new thread because those that are on dial up might find things slowing down.
 
Tanks for your responce. Have you shown your sled on a previous post? I saw the one made by Woodwork for Mere Mortals but I use one as shown by Norm. I picked up some Tulip wood this week whats. Have you any experince of using this wood?

regards
 
Your work is amazing I am just in the process of planning my first piece ever lol now I've seen yours I hope I'm half as good. In 5 years

lnspirational well done great read too

Regards
Dave
 
The concept for my designs are the same as when a youngster with a Mecanno set, having built all the published plans that came with the set I just thought of other objects to construct, hence 60 years later I can sometimes still do it.

We didnt have mobile phones and tv to watch all day as kids.
 
Back
Top