Tissue boxes 2011

UKworkshop.co.uk

Help Support UKworkshop.co.uk:

This site may earn a commission from merchant affiliate links, including eBay, Amazon, and others.
I know what you mean C. but I have been getting away with this sort of thing the past five years, watch my avatar (left hand side) and there some real shockers.


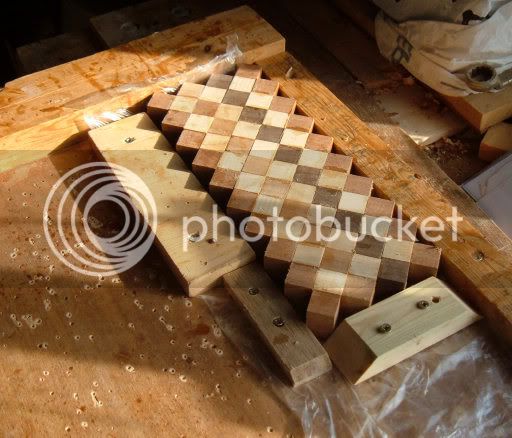
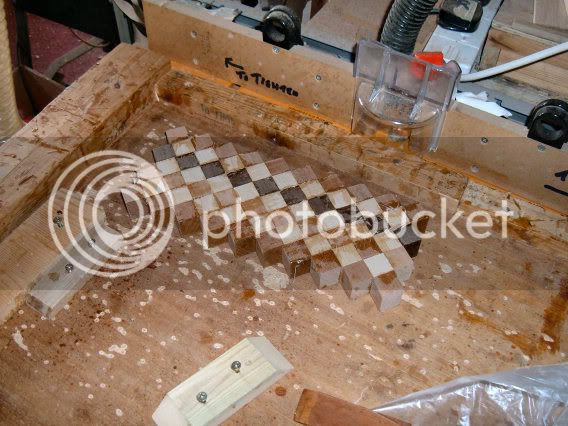
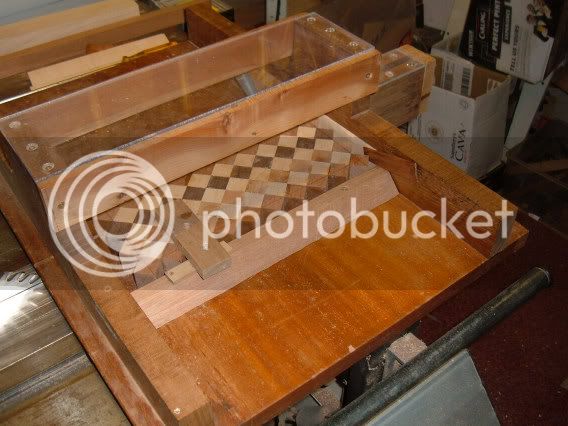
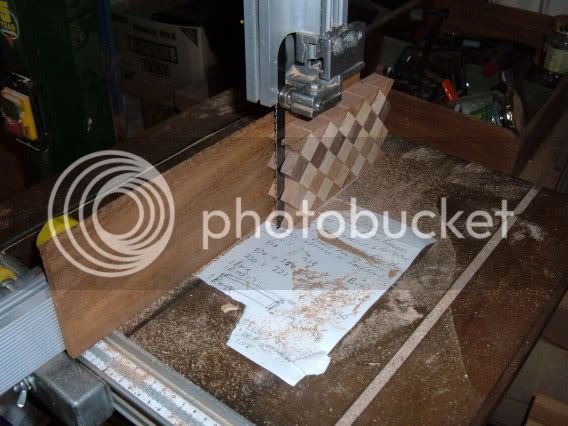
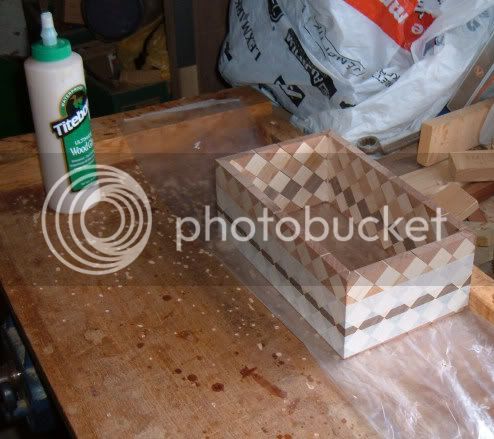
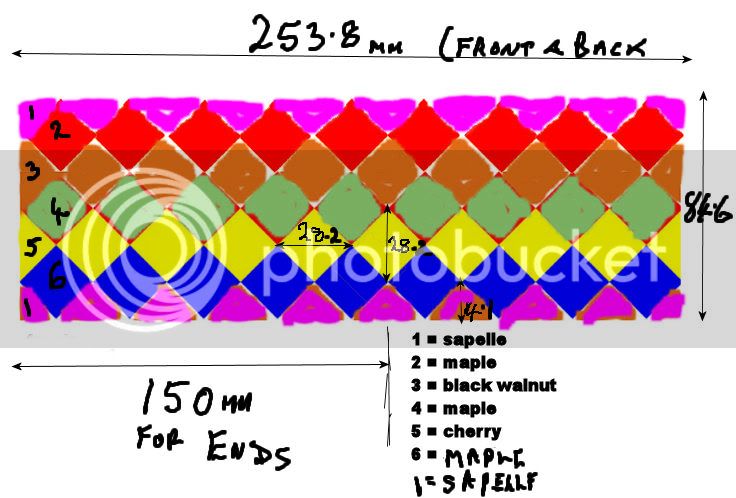
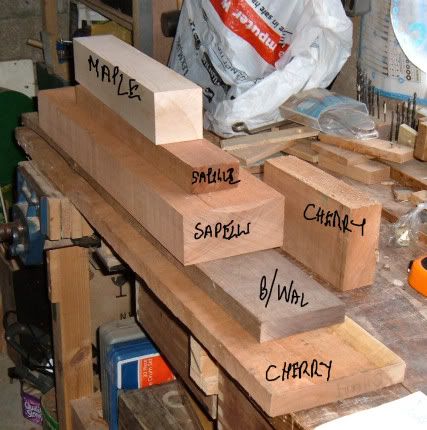
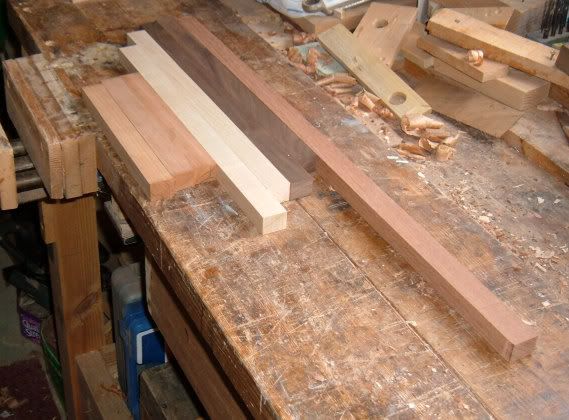
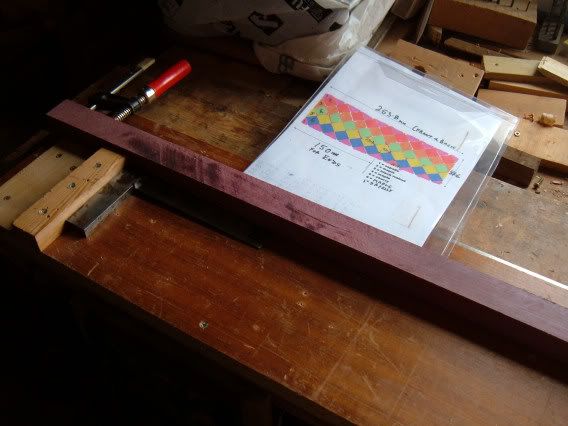
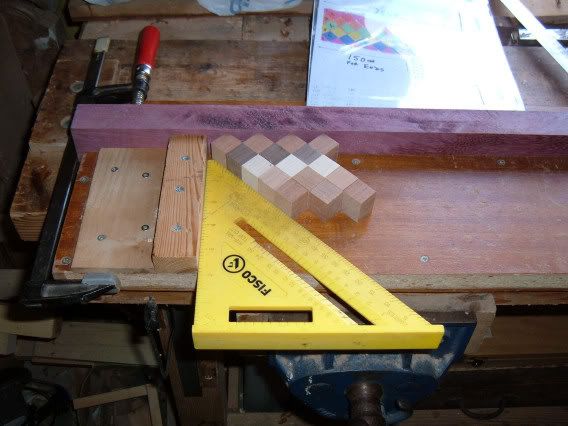
I went out to the W/S around 5pm and thought I would make a start, pulled out some different timbers and my head started swimming trying to work out the colour co ordination of the harlequin patterns. Had to come in and do a drawing and print out as per this.

Image2wplan.jpg


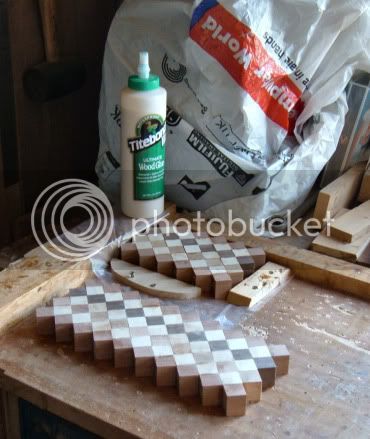
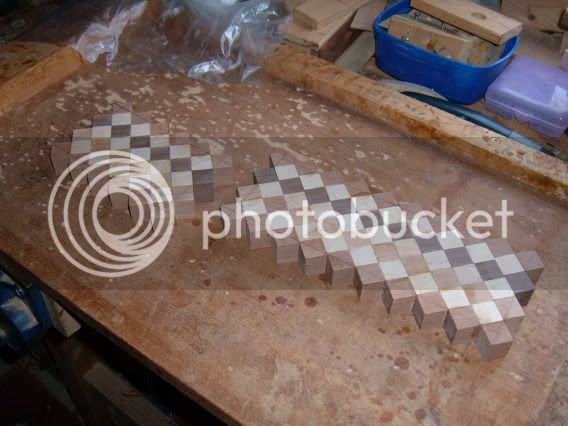
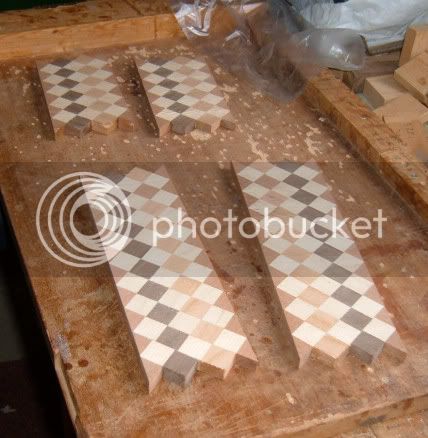
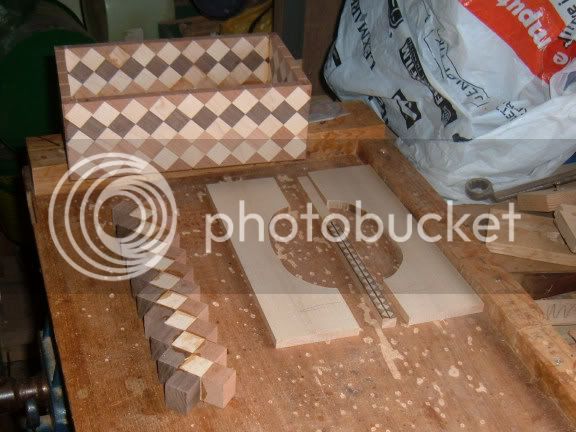
This time I am going to make the blocks around 25 mm thick and then resaw to half thickness to double up the front and ends.
 
Timbers for harlequin located, there are two pieces of cherry and sapele, I would like to have enough on the smaller pieces without starting on the larger lumps.

3wtimber.jpg
 
Good day (Saturday) in the W/S.

Used this lump of cherry which actually was a timber spacer and I accidentally purloined it when loading timber at a timber yard 5 years ago. So a 220mm length even comes in useful eventually.

4cherryoffcutw.jpg


Cut the length of sapele on the bandsaw using a 6mm blade. It was so easy ripping with the blade this size, I will not go up to a 12mm blade in future because its a bind changing blades. Must ask Ian what is the benefit of using wider blades after that experience.

5quarterbladew.jpg


The timbers have all been machined to 25 x 20mm dimensions. I would like to have had the lengths all the same but using offcuts like I do it was not practical. It also means I cannot make the pattern up like making a cheeseboard pattern.

6timbersallthesamedimensionsw.jpg


Set up my shooting board to lay out pattern pieces after cutting up those squares on my table saw sled.

7shootingboardadaptionw.jpg


Did a couple of trial runs.

8trialrunw.jpg


9thepatternw.jpg
.

It is now Sunday morning and we have a gale together with heavy rains the first for months here in the S.W. so it will not be pleasant if I go out and start the gluing up of front and back.

10wetandwindymorningw.jpg
 
No skills":cxydrh0f said:
Thats going to look good, are you worried about trimming the edges of the panels straight afterwards?


I might put some extra timber in the spaces and then run through the tablesaw for a straight line cut or if I get scared I will use the bandsaw.
 
Wow! That's some serious box production. I like the look of the Ash and Sapelle. I'm almost done with a display table using those same two woods.
 
mn pete":1t3vcgd0 said:
Wow! That's some serious box production. I like the look of the Ash and Sapelle. I'm almost done with a display table using those same two woods.


Welcome to the UK forum, American friends are always welcomed here.

Why not post your pictures here of table mentioned above after you have passed the initial picture posting rule (4 posts)
 
Thanks for the warm welcome! I really enjoy seeing what folks are doing in the craft all over the globe. I've been pretty heavy into boxes myself lately. They've been a great way for me to practice some new skills, and everyone likes receiving them! :)

Absolutely on the table. The body (legs and aprons) are assembled, sanded and ready for a finish. Just a little more work to do on the top and it'll be ready for final assembly.
 
The first full lump glue up (front and rear to be resawn later to form two pieces) clean side.

12glueupw.jpg


The messy side.

11glueupw.jpg


They have glued up quite well but it was a bit like doing a jigsaw puzzle with the pieces already having impact glue to make things awkward. Although I used titebond 3.

Off to hand that display cabinet.
 
Popped into the shed yesterday afternoon and glued up the squares for the end panels and at the same time I ran the larger piece on the belt sander and it got very hot but cleaned up quite nicely. I shall have to use a filler to tidy up the faces. What do you recommend?

13endsgluedupw.jpg
 
It was an exciting and a little stressful day in the W/S. I was going to saw the bits up to form boards.

So marked them out.

14w-8.jpg


Set them up in the sled with loads of stops sub fences and back plates (to stop any tear out).

15w-10.jpg


Even used thick paper to pack out for square cuts.

16w-9.jpg


Then resawed them to half thickness and double up number of pieces. (nearly came a cropper the fence was not square to the blade, but I had extra thickness )

17w-9.jpg


Then came the most stressful part of all, I put them all through the thickness to reduce to 10mm thick and obtained a clean face and no hiccups at all.

18w-7.jpg


Then mitred the corners with more backing plates than normal to stop tear out .

19w-8.jpg


Then glued the pieces up to form a box. (note not rebated this time for bottom runners, I will glue in slider bars.

20w-8.jpg


Going to continue with the lid in harlequin if I can.
 
NS, (I could not type noskills :) ) I think I will give your pva/maple sawdust a run.

Thinking ahead I would like a sunburst design pattern for the next setup :x
 
Box on show and I am pleasantly surprised that filling of pattern will be minimal, that titebond glues well at all grain opposing surfaces as well.

Glued some more blocks up for lid but laying the part top on carcass I was not impressed so going this route with some harlequin banding that I was given some years ago by a forum member. Thanks again.

22w-4.jpg
 
devonwoody":3hfk2muj said:
NS, (I could not type noskills :) ) I think I will give your pva/maple sawdust a run.

Thinking ahead I would like a sunburst design pattern for the next setup :x

I like the design looks real good, the sunburst design will look good also.
What do you generally spend on making each box? also what do you charge for each box? Just that you can only spend so much on making a box then you cannot afford to keep giving boxes away you have to make sure you are making just enough money to enable you to carry on making you boxes.
Thanks Tim
 
Back
Top