The UKW Infill Project

UKworkshop.co.uk

Help Support UKworkshop.co.uk:

This site may earn a commission from merchant affiliate links, including eBay, Amazon, and others.
Racers":3rq7352u said:
Shavings!

Wicked work Jimi, that's some high stress work out of the way.

Pete

Hi Pete.

Yup..you have no idea how stressing that last bit was...well you probably do because you built the most excellent scraper plane I saw at Richard Arnold's charity event....but I spent yesterday knowing that (for reasons unknown to me!)...I chose to make this fairly public...so a cock up now would be like me being a Brazilian international footballer!! :mrgreen: :mrgreen:

Yesterday...the impatience got to me and even though it was a long day...late and not the best light...I just had to post first shavings.

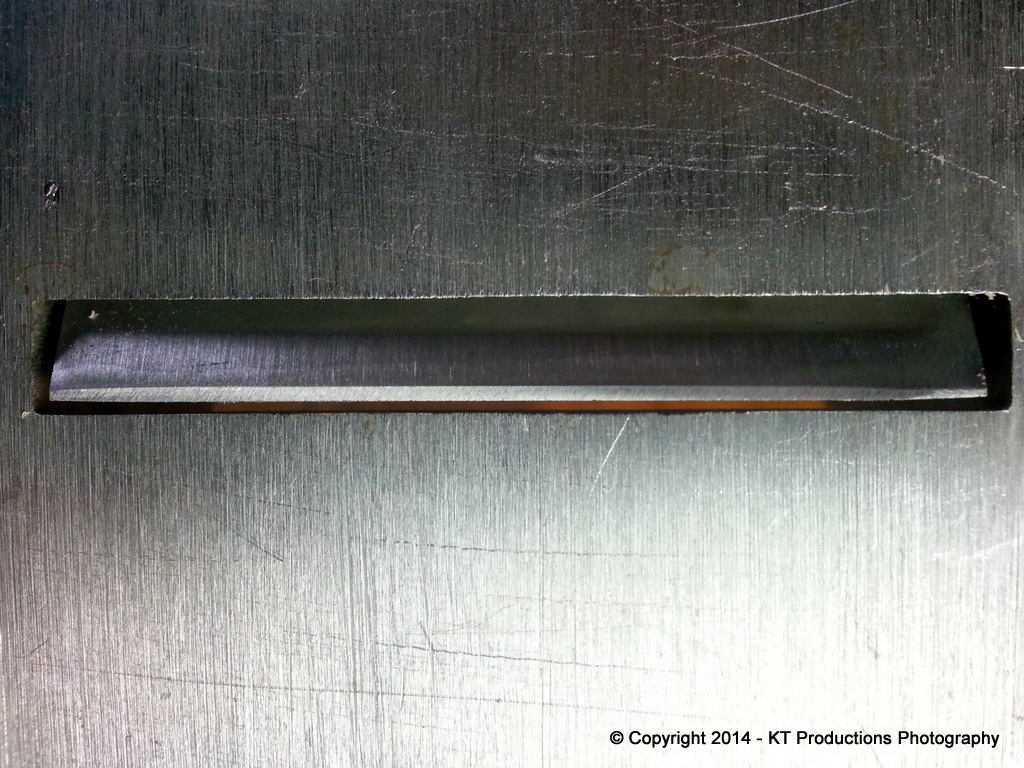
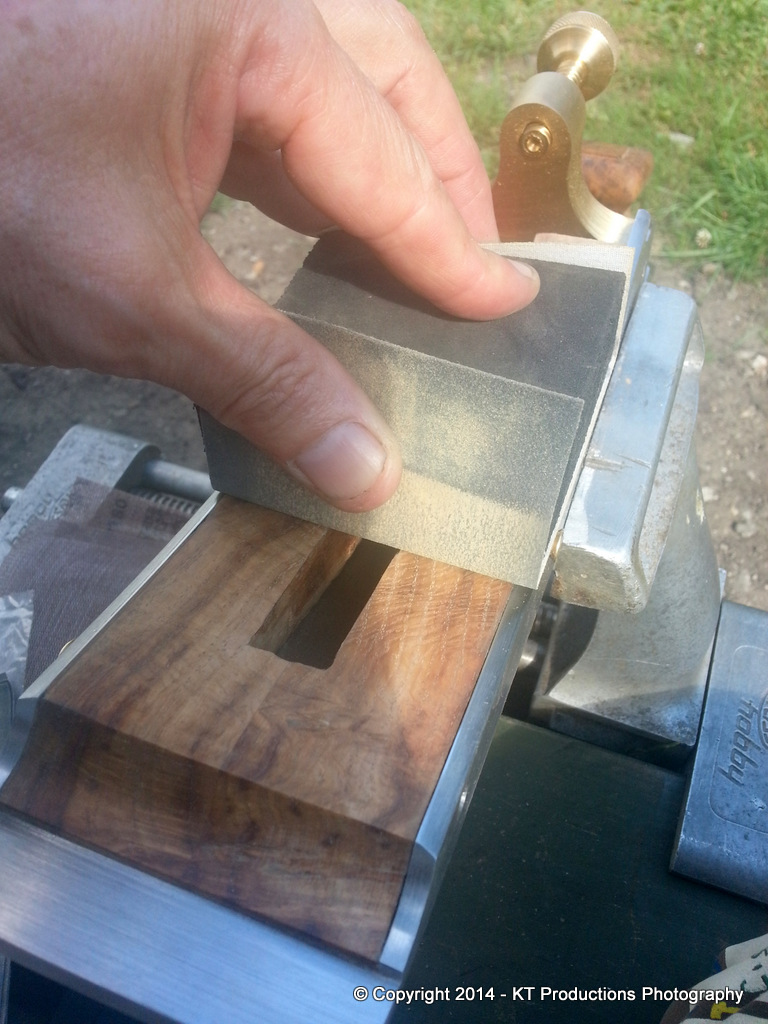
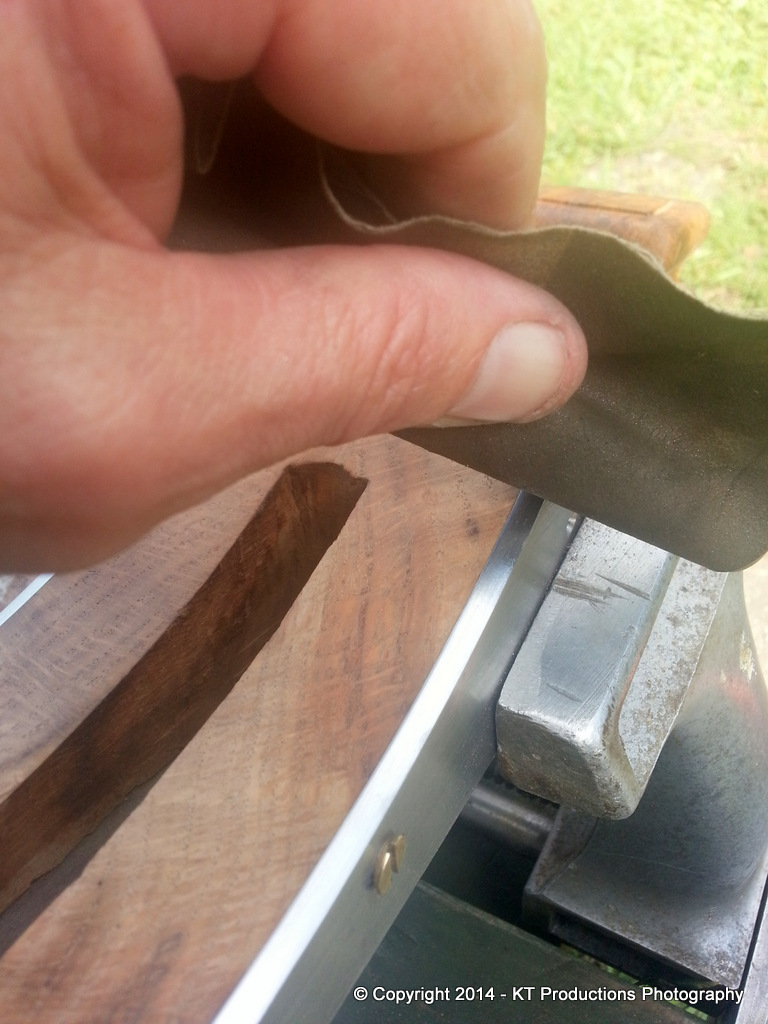
I didn't want to sharpen the iron last night but sitting there with a blunt iron and the Fallkniven ceramic stone which happened to sit in guilty seclusion on my coffee table....I decided to do it anyway. Luck was once again, shining on me. The face near the edge was concave! YES!!!

It took only 30 minutes and only slightly abraded thumbs and I had it flat! 8)

I did resist the temptation to go out and try it until first light though! Mostly because I didn't really want to wake my wife up on the eve of her birthday to ask her to take the pics...I waited until her birthday! :mrgreen: :mrgreen: :mrgreen: :oops:

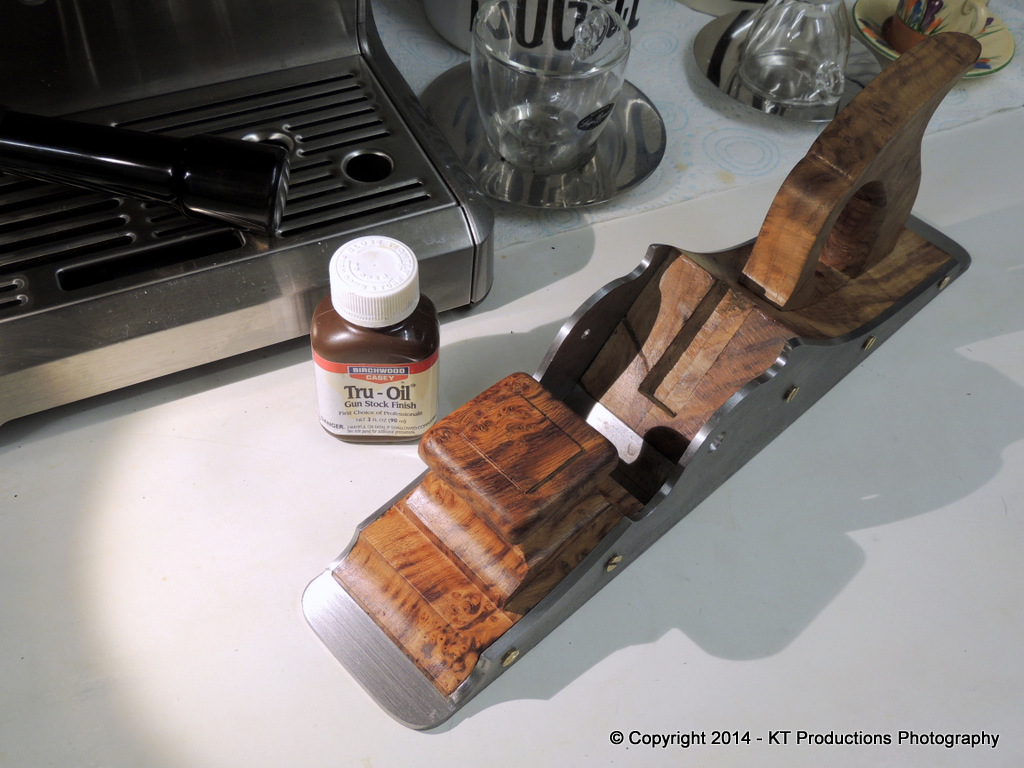
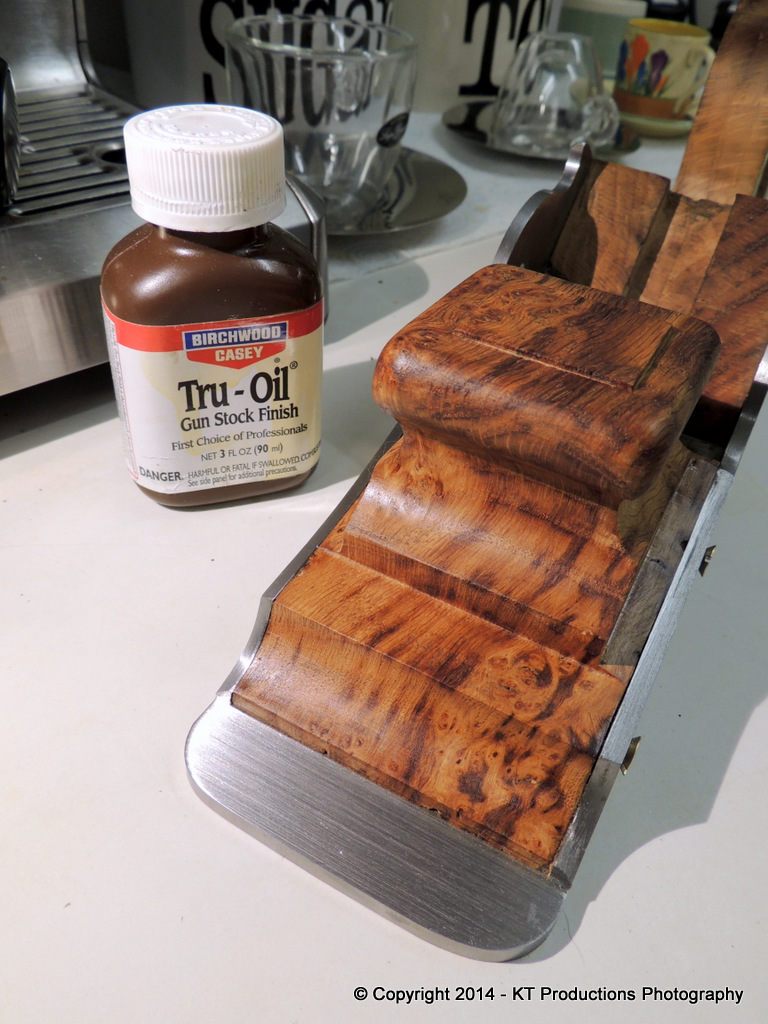
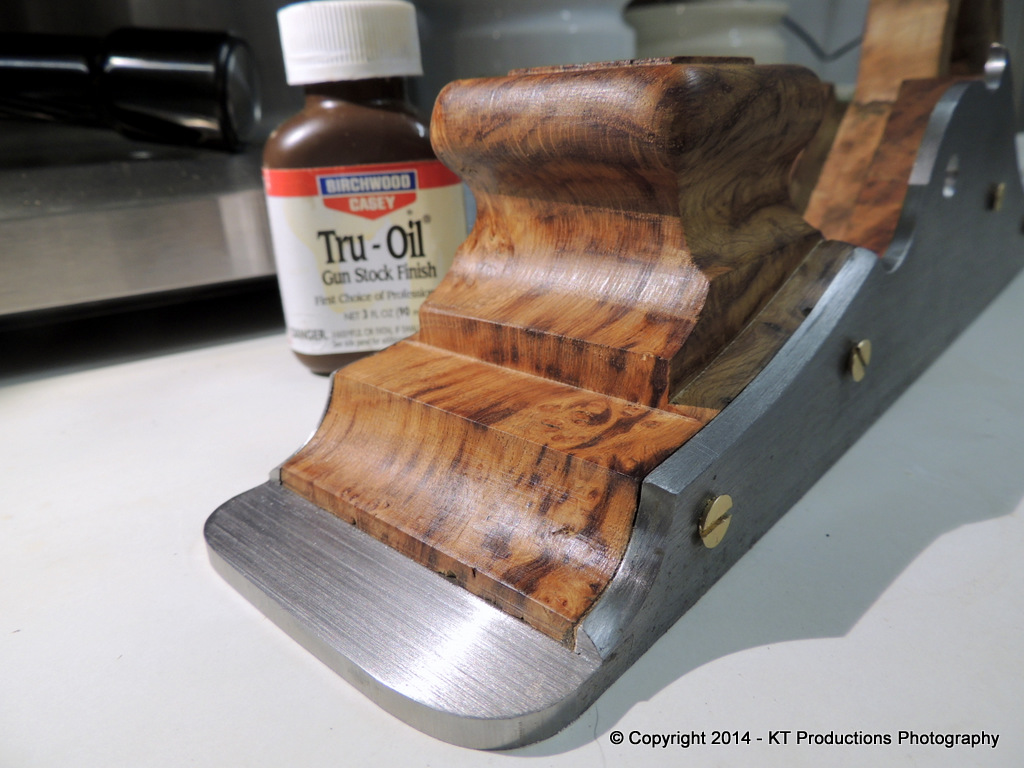
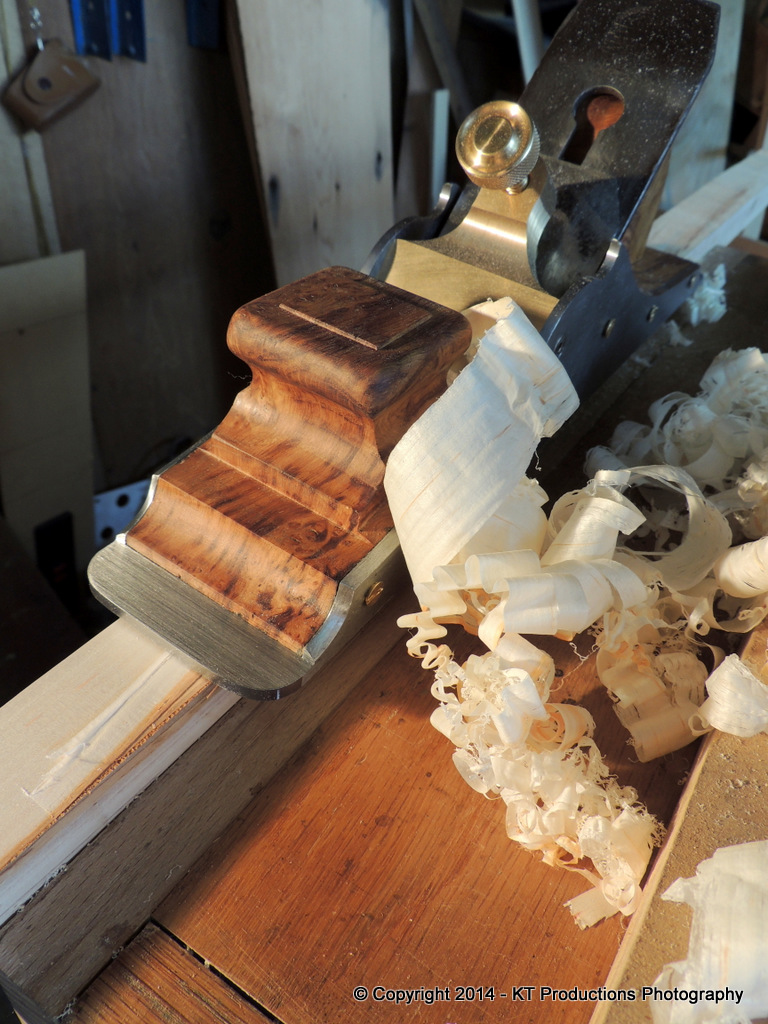
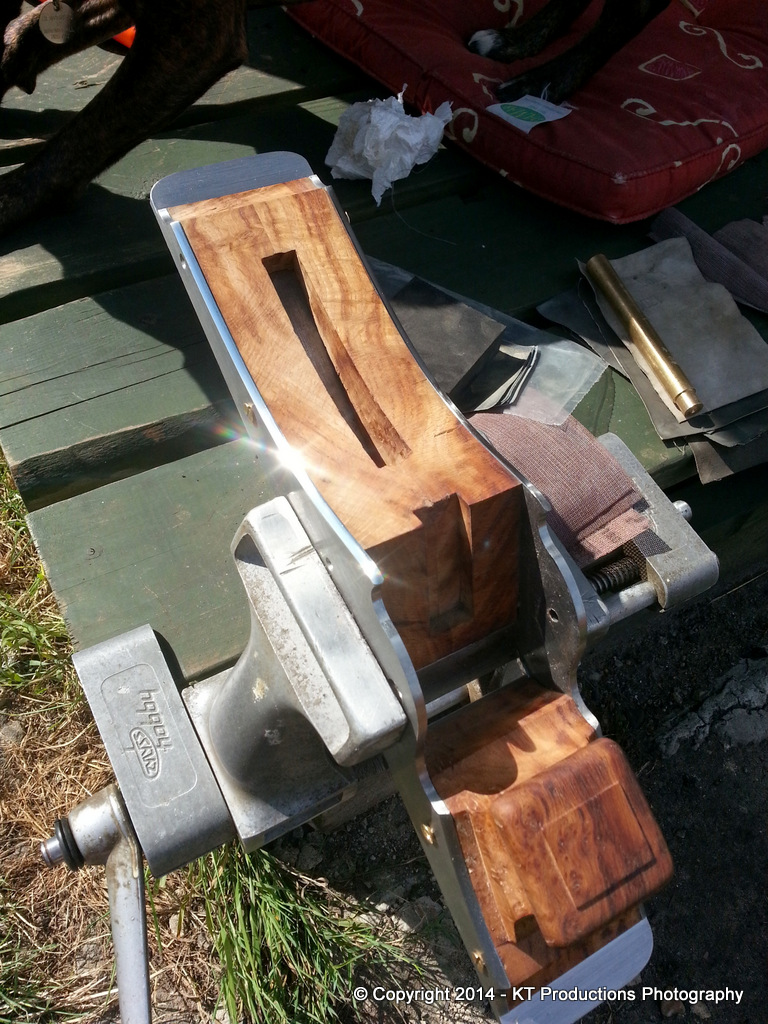
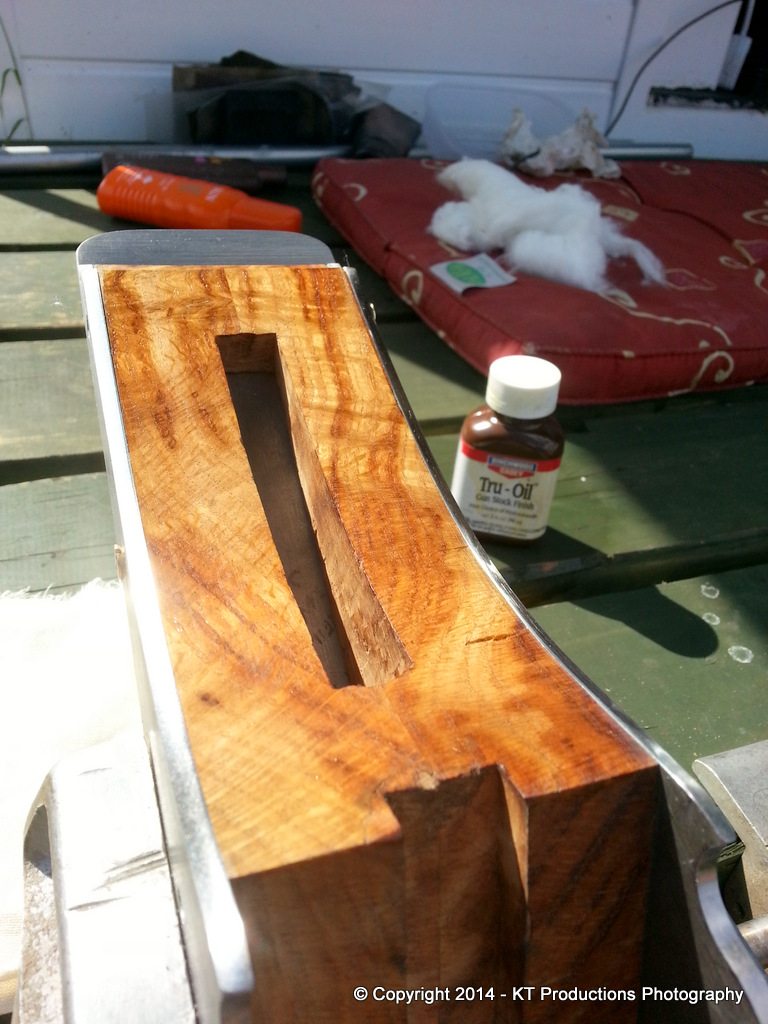
Most of you will know by now that I have this evil piece of yew which has some rather annoying patches of opposing grain...it's really a nightmare to plane and only Phillys smoothers usually come close to taming it...or my infill smoothers.

So...that's the wood I chose!

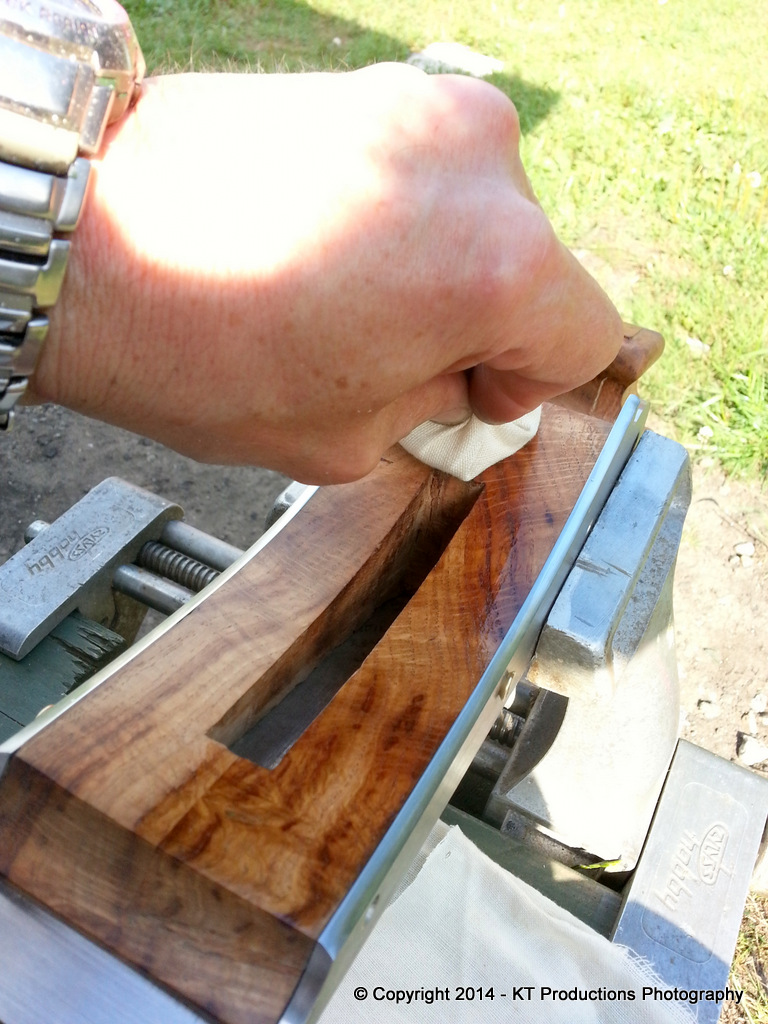
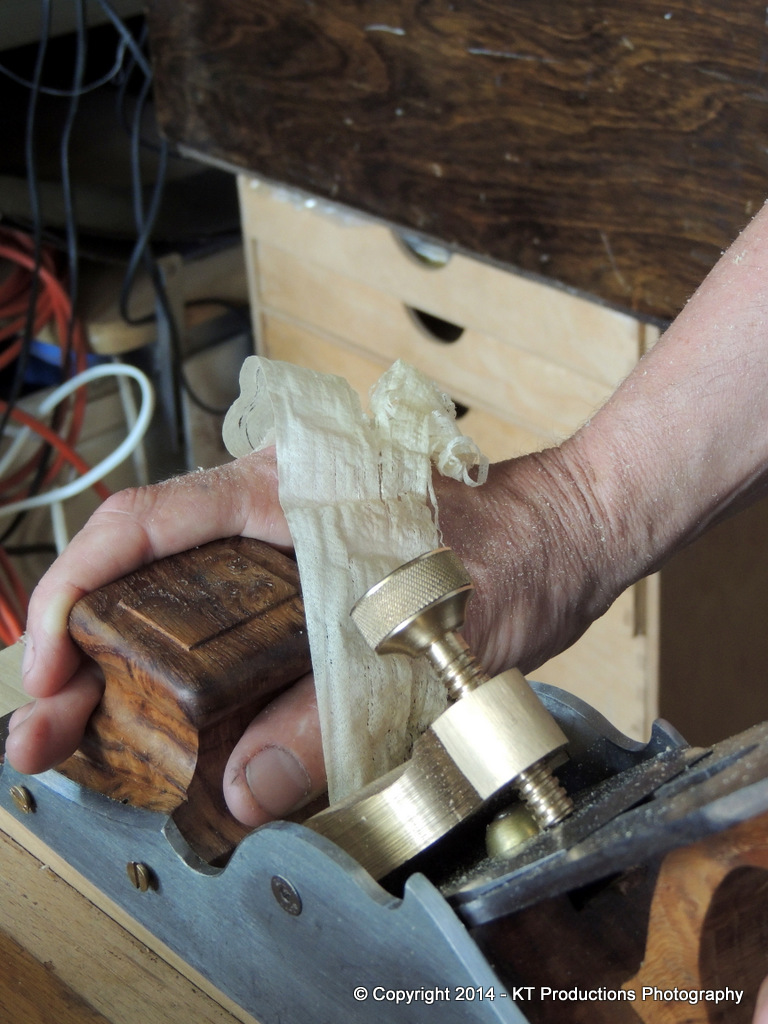
This is a fairly coarse cut....

2014-07-13%2013.21.38.jpg


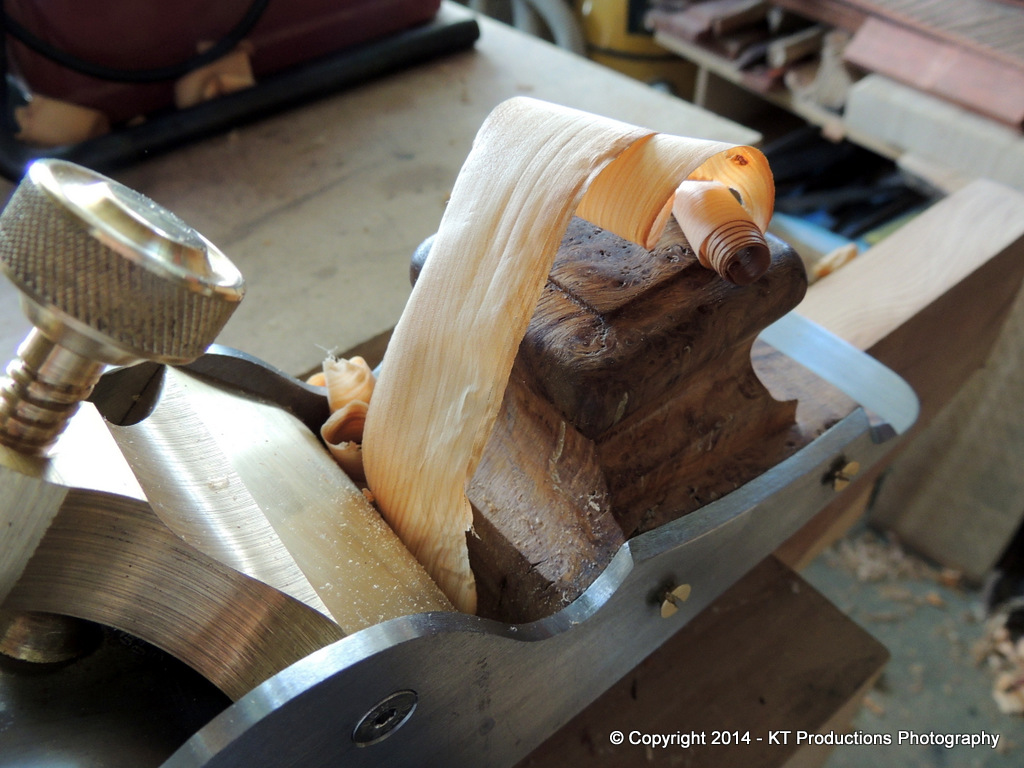
....but a slight adjustment and I kind of went a bit mad!!!

2014-07-13%2013.25.10.jpg


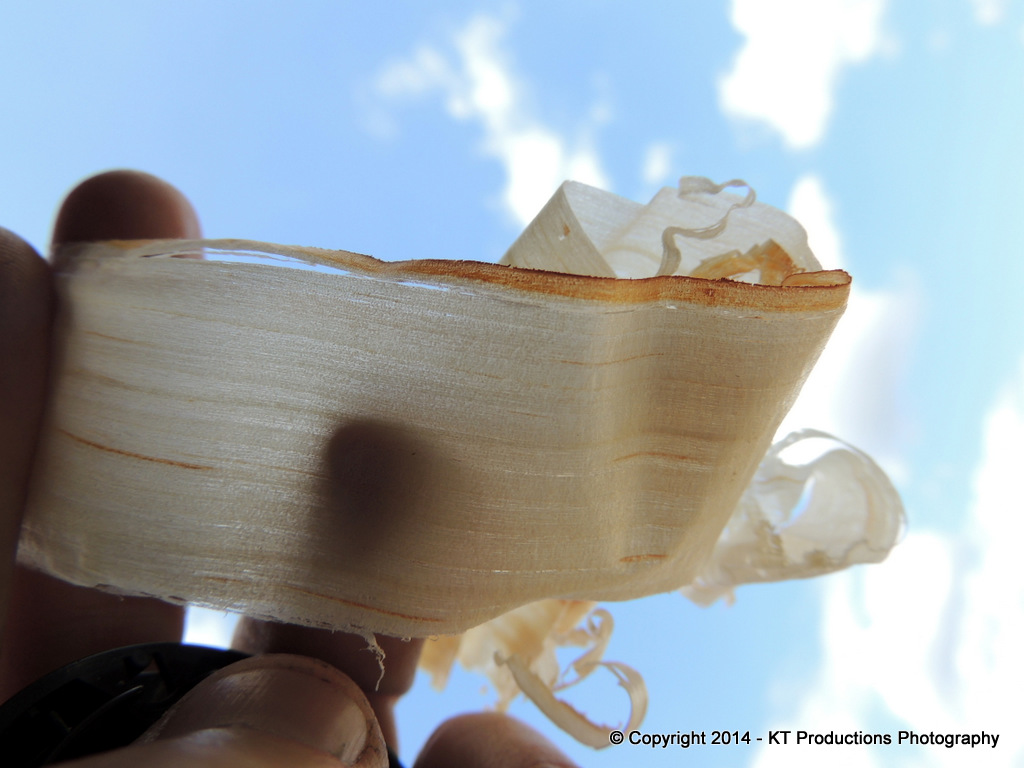
Normally I have to fake shaving positioning in the photo but today....the birthday missus being the snapper.....(and what a superb one she is too!).....this was straight off the stock...two shavings one after the other with a kind of SSSSSSSSSS sound...a sort of "better" WHOOOSH if that makes sense?! #-o

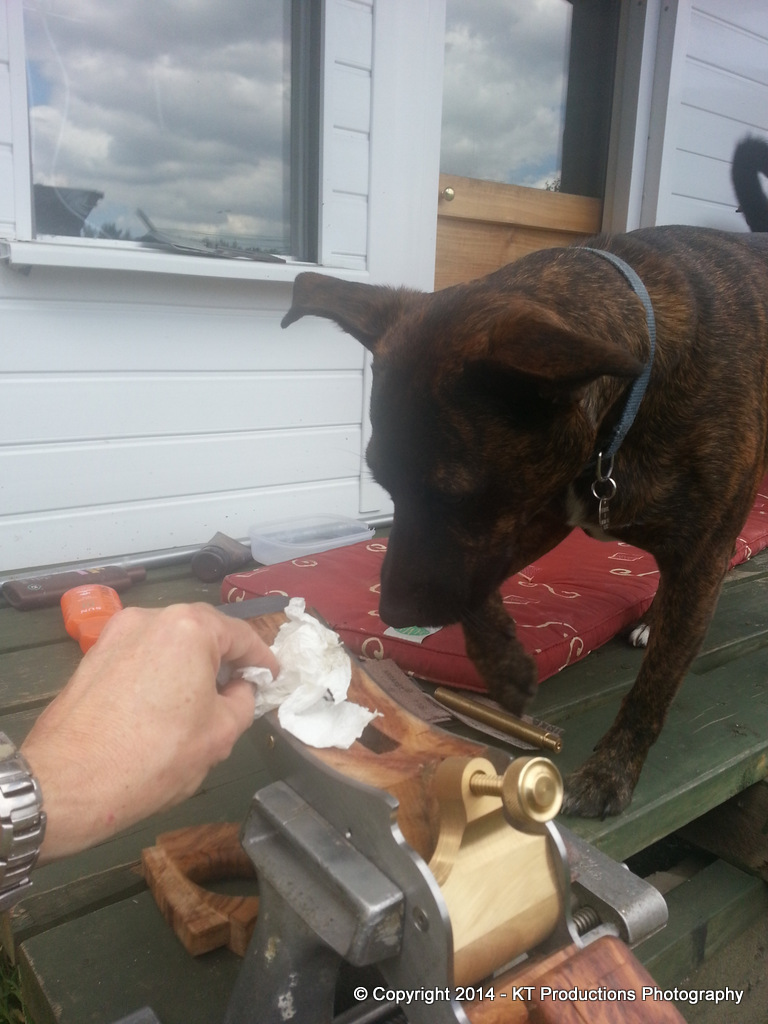
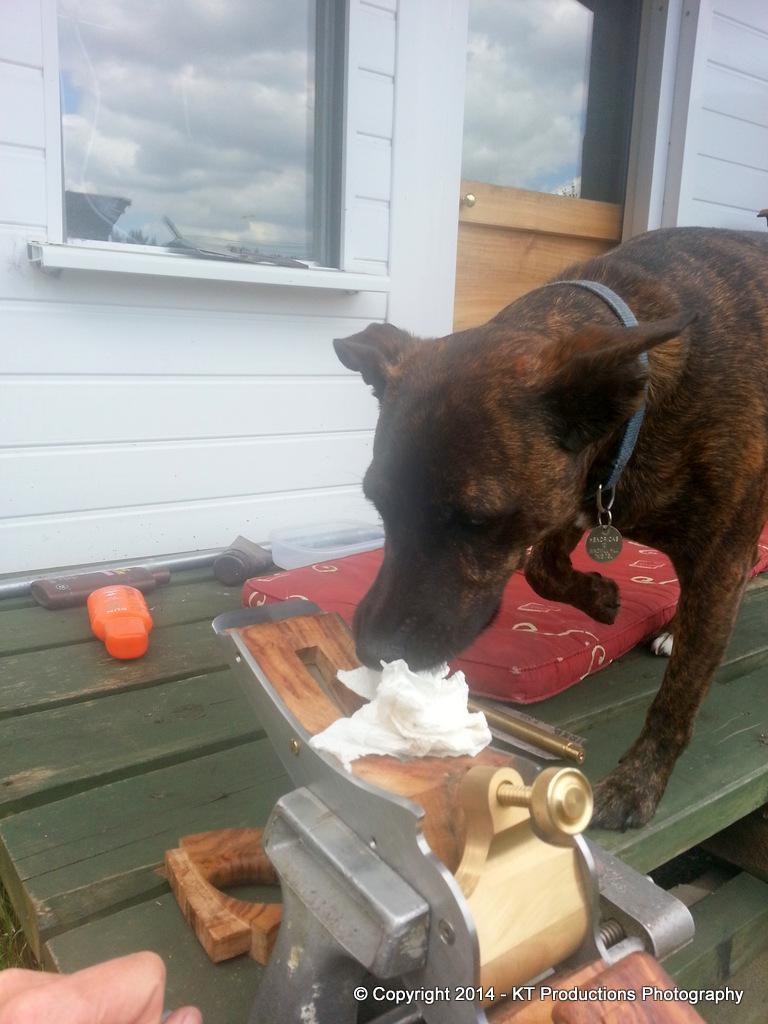
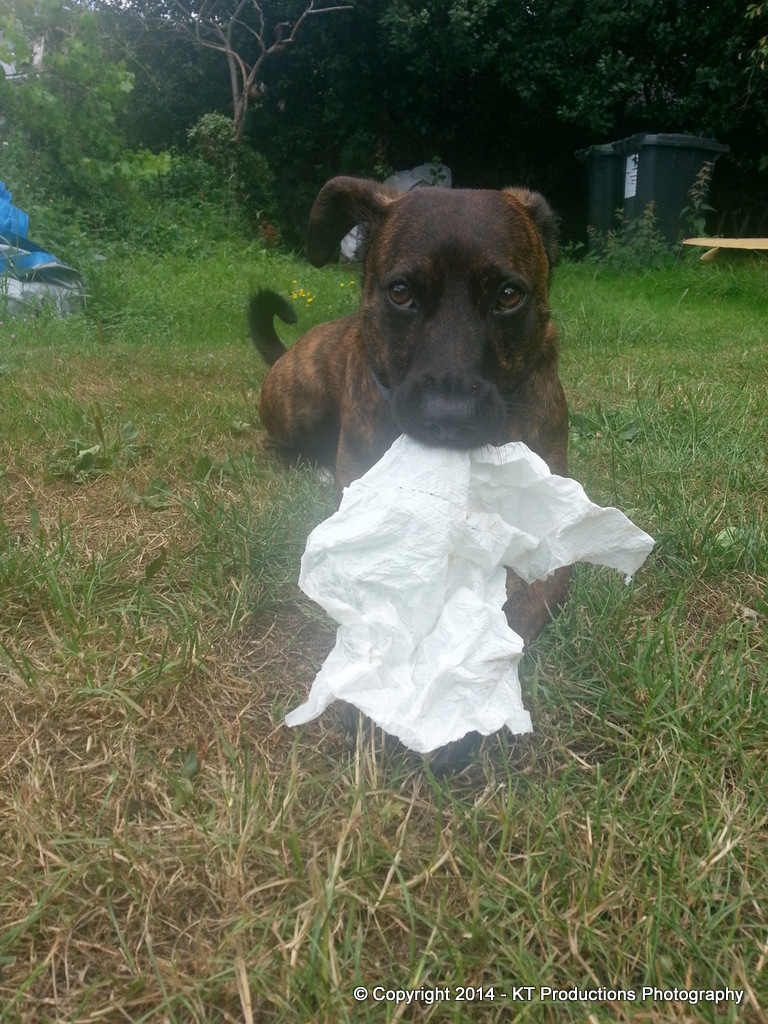
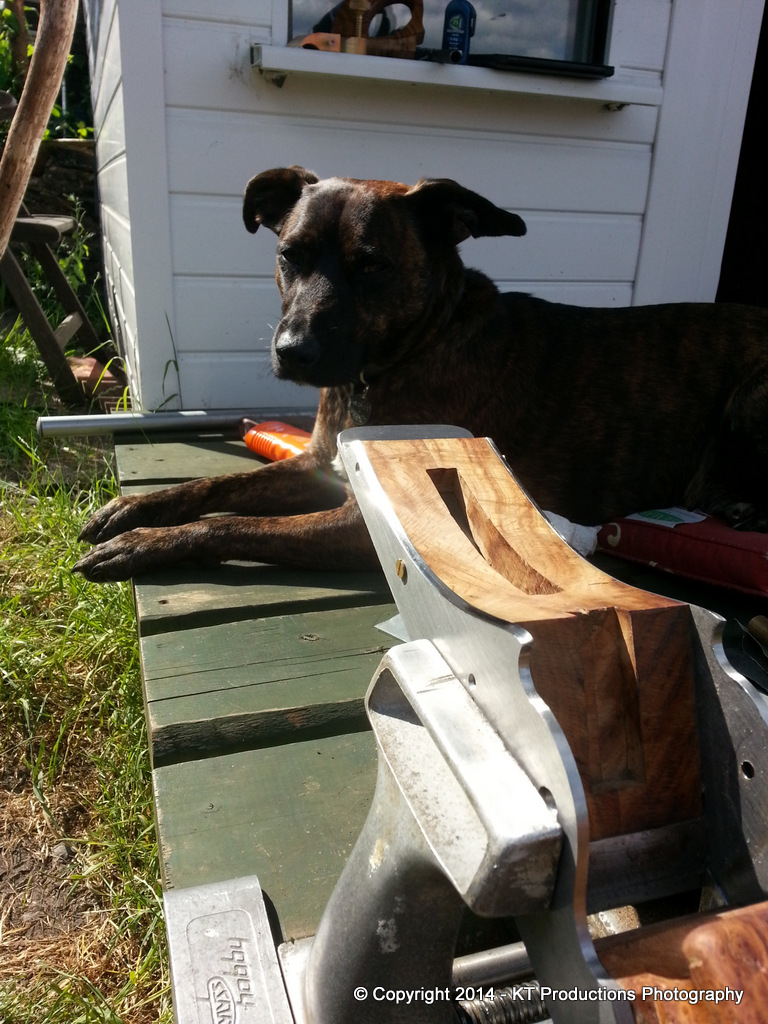
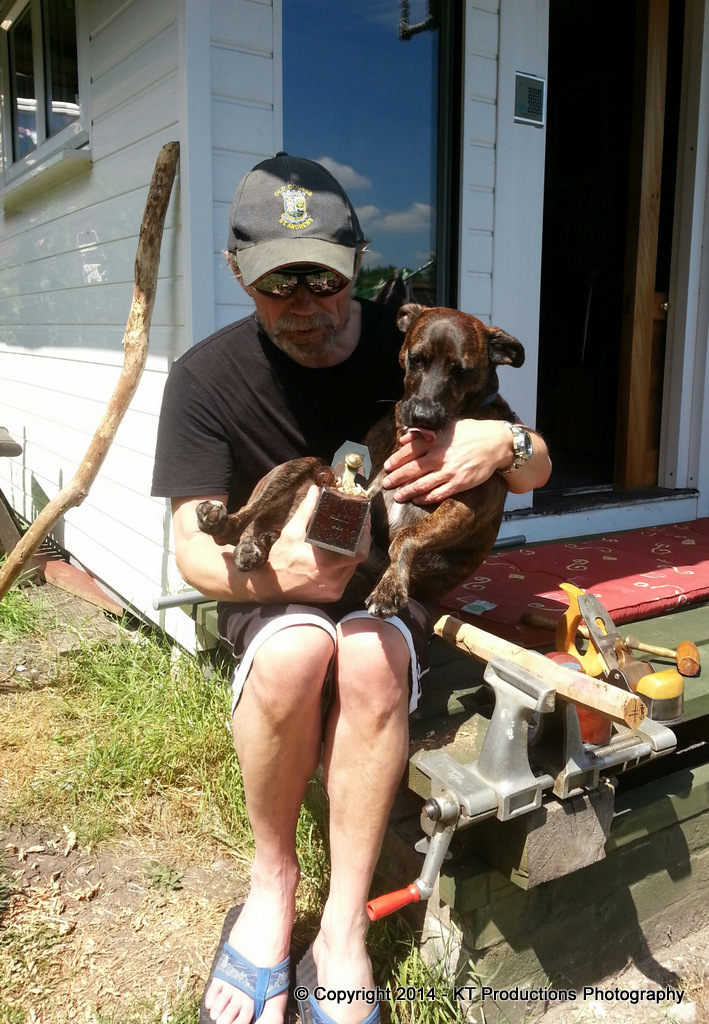
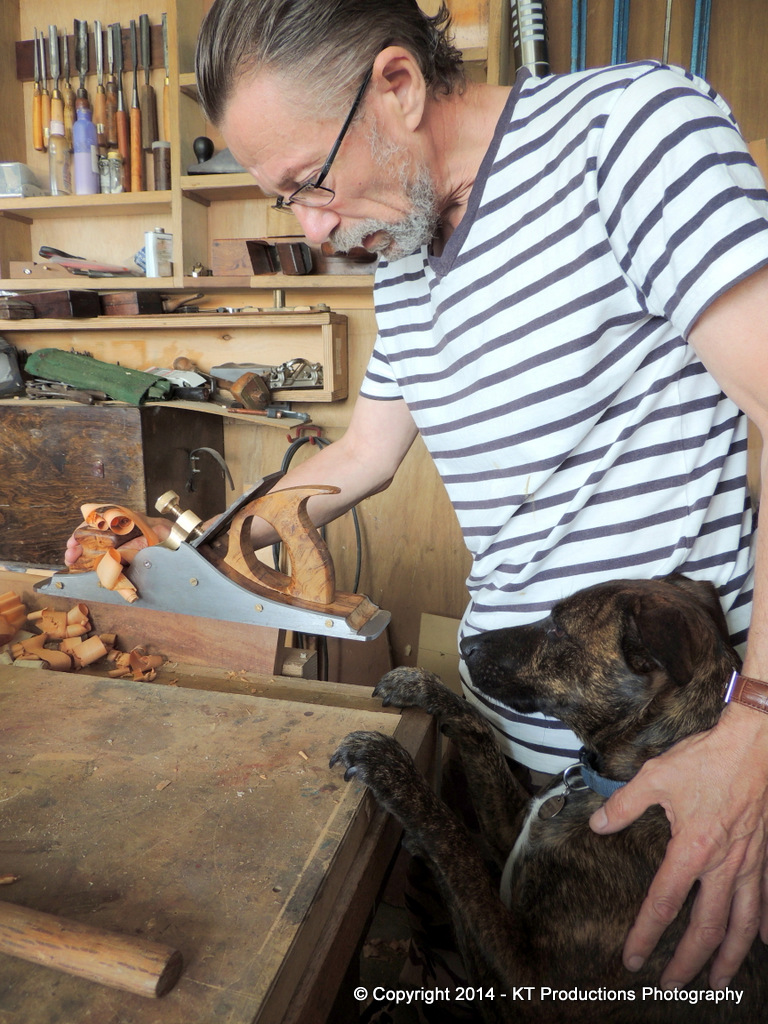
Of course...ALFIE had to see....

2014-07-13%2013.27.29.jpg


There then followed a panic moment....ALFIE ran off with a shaving and I am never sure how poisonous this stuff is....so we had to chase him around the bleedin' garden for ages to get it back! :mrgreen:

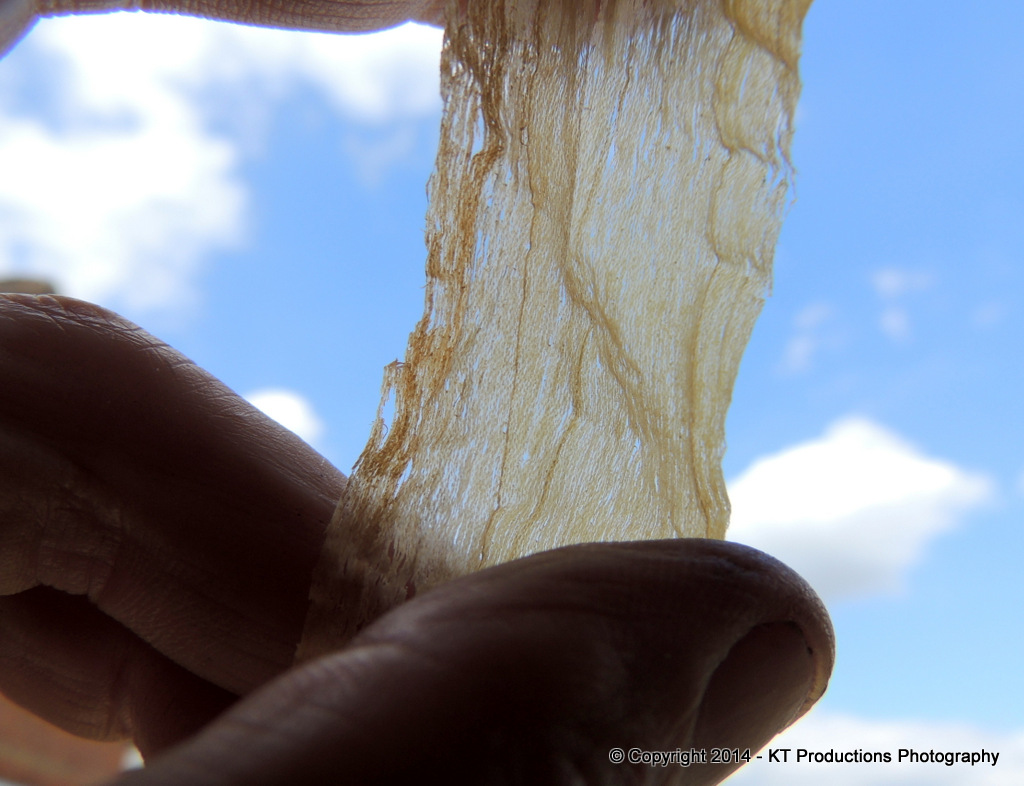
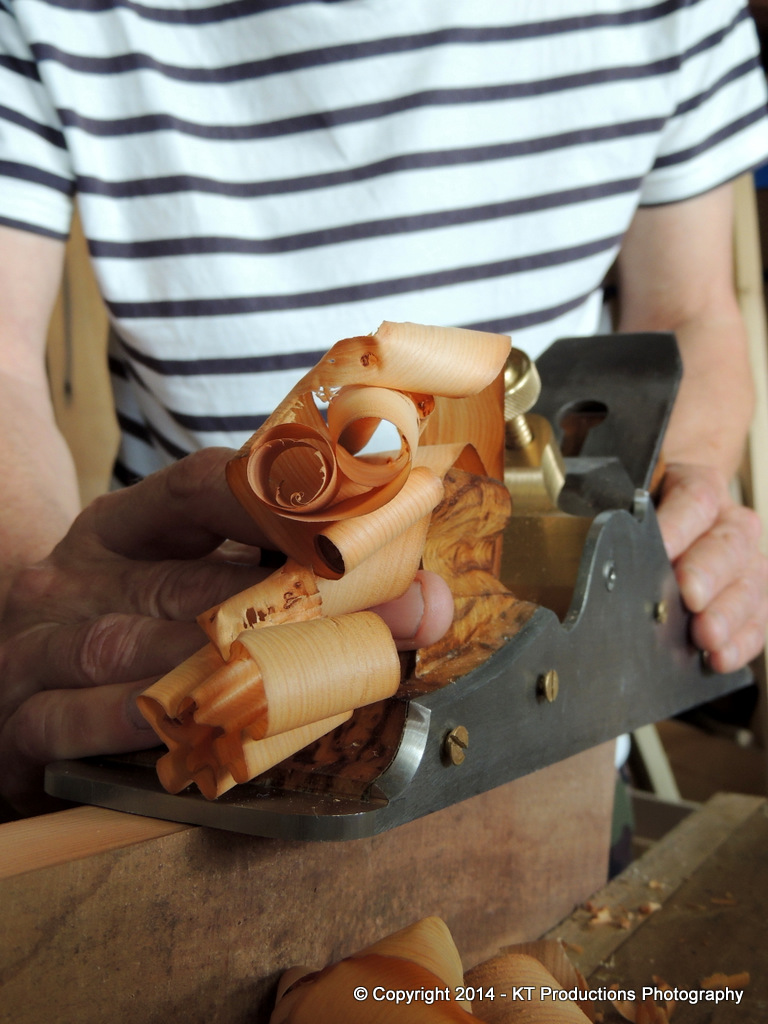
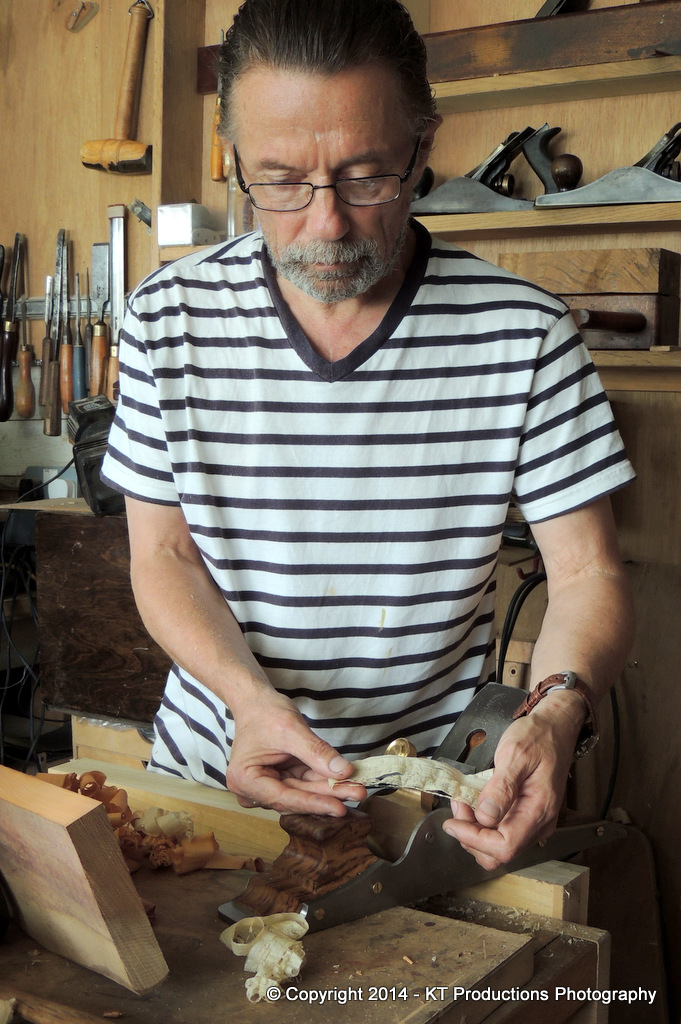
So...I transferred to a bit of tulipwood left over from the doors Douglas made for me...

2014-07-13%2013.33.36.jpg


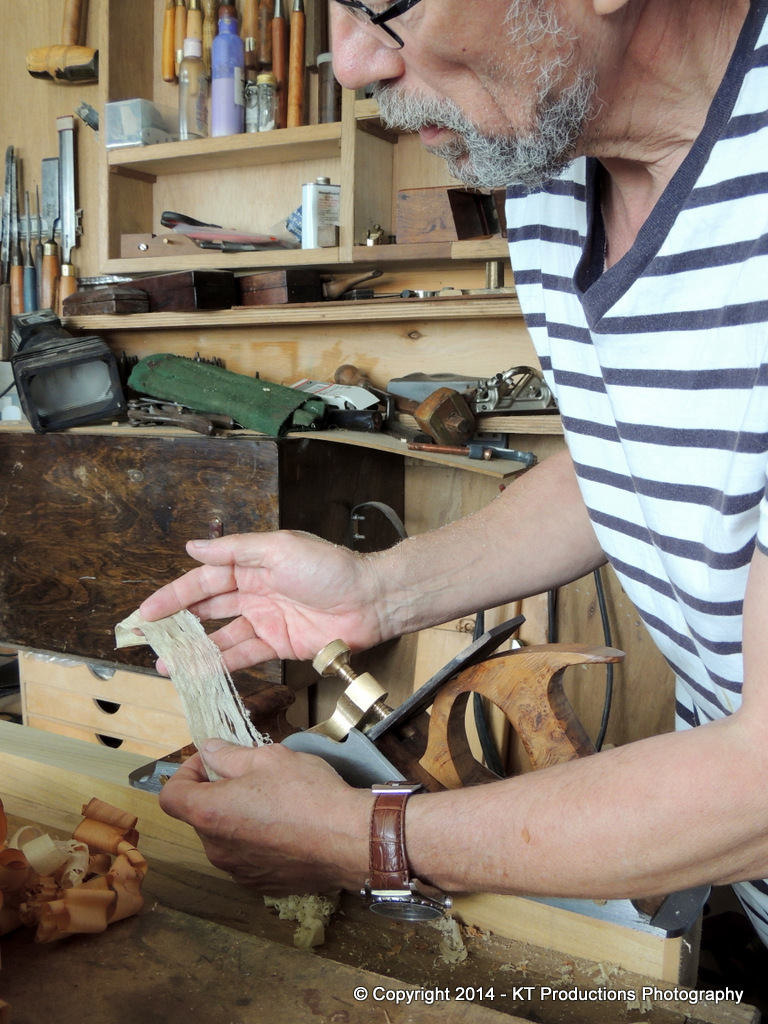
The shaving was even and thin right across the width of the iron....

2014-07-13%2013.37.10.jpg


....and as you can see from this next shot....I'm kinda pleased....

2014-07-13%2013.38.21.jpg


No...let's rephrase that....I am feeling that it's MY birthday today...not just her indoors!!! :mrgreen: :mrgreen:

WOW! Pressure all gone...smiley face big style!!

Jimi (and ALFIE and his BIRTHDAY MUM!)
 
Wow fantastic!!!

And happy birthday Mrs Jimi.

I will pm you my address so I can harden a blade.

Pete
 
Thanks Pete...I passed on your regards to Annie and she said thanks!

She did spend most of the day taking pictures (with ALFIE's help!) so later on I cleaned up and called it a day so I could do her a steak dinner...(reality...I ordered it from the local restaurant and picked it up ready done!! :oops: ) She loved it though!

Today must have been nearing 30 degrees on the porch...so I waited until it cooled down a bit and then sat out in the sun and tidied up all the angles and crispness of the line with a combination of files and scrapers. Again the Clifton burnisher came up trumps when it was needed but for the next part I really need to renew the edge on the side before I pull a burr...it's getting a bit tatty!

I carried on sharpening the Maples iron late last night but resisted the temptation to try it again until the end as I simply have to step up the speed of this project!

So...after doing as much as I could to get the bun correct...I applied a couple of coats of Tru-Oil in order to check for errors and deeper scratches...

DSCN5088.jpg


The great thing about using the sanding sealer earlier is that it seals the wood pretty well so the Tru-Oil does get absorbed but only just enough. I can see that I might need to take it up one more grit before I start to lay down coats...but when I did guitar bodies...my experience was that these scratches disappear after a few coats with sanding to 400G between coats.

DSCN5080.jpg


I have never used Tru-Oil on crazy oak before...boy this stuff has some sneaky pockets!

DSCN5094.jpg


I am more used to closed grain woods...which is why I like working with box!

I have to decide if I just accept this as part of the character of the wood or see what happens when I start building up the finish.

Anyone who regularly uses pippy or burr oak want to chime in here? One thing I would say...I want to stick with Tru-Oil because it doesn't....stick that is! I just love the tactile feel of it and I may take it to silk after full polishing.

Couple more things were done today. Tonight I did all of the countersinks for the infill screws and tidied up the lever cap ones as I had completely forgotten I had some quality metal countersinks! (knew they would come in handy one day!)

I also took a decent photo of the mouth with the Marples set up correctly for the first time...

20140713_192712.jpg


Considering I haven't even touched the mouth since Richard gave it to me...this just shows how much of a superb engineer that guy was! Thank you Richard! =D>

I don't see the mouth moving much...I have checked the sole and it's spot on already so I might just leave it like that...just line it up on the inside with the infill slope.

I like to leave Tru-Oil to harden for 24 hours per coating session of three layers.....so I will sort out the remaining bun scratches tomorrow and then start on the rear again. I also have to make iron #2 for you Pete.

On the iron front...#1 is a 5mm and is ready (almost) for shipping to Philly who is going to take a few thou off it to match the Marples and then hardening that one. Pete...I will make the one to send to you in 4mm steel and this will give me two thicknesses of iron to play around with. I think both will work for different jobs. 8)

I might even look into the cap iron tomorrow...should only take an hour to make one...and I will probably make two....oh...and some cap iron bolts...oh...and the inset thread nuts...and....oh let's just say I'll get them done over the next few days! :lol:

More tomorrow.

Jimi
 
Lovely stuff, Jim. I do agree with you about Tru-oil. I made a recorder (the musical type) for my professional recorder player daughter out of holly from my garden and it gave a wonderful silky finish with very few coats. Lovely wood, holly. The recorder? It looks nice but the sound is loud and unsophisticated, but it is to a medieval design so at it suits that sort of music which she does occasionally play. At least I had fun making it on a course at West Dean.

Jim
 
Indeed Jim...basically anything that is handled continuously would benefit from Tru-Oil. Some of the more expensive guitars, high quality shotguns...other musical instruments and indeed...tools are all candidates for the finish because of the tactile nature of the surface.

Also...it's easy to "repair" as, like French Polish....each additional layer will "burn" into the next and create a new but amalgamated surface.

I did some more work on the finish today and will come on to application later in this post.

But first...the obligatory shaving update.

Each night I tinker with the Marples edge...last night was to get the remaining TINY back bevel from the face to the "popping hair" level.

I shall avoid discussing the sharpening techniques too much for fear of attracting the usual suspects! :wink:

Anyway....I think I have this iron running about as good as it gets...

2014-07-15%2014.09.55.jpg


That's willow...or is it holly...I forget. Homegrown and seasoned anyway.

Pretty shaving of the day....

2014-07-15%2014.12.22.jpg


Hell...after that one...let's have two today!..........

2014-07-15%2014.14.48.jpg


The surface of each specimen of stock is silky smooth from rough sawn...but I can't post "feel"....you'll just have to trust me on that one.

Ok..enough playing around.

It was sunny again today and as we head into a heatwave I shall be taking full advantage of the light level and the heat to do the rest of the finishing of the wood in Tru-Oil.

Last night's coat was first keyed to accept the next coat...using 1500M Micro-Mesh.

20140715_153703.jpg


That being done...I decided to keep the Micro-Mesh out and finish off the rear metalwork....

Remembering to use a brass rod as a "straight edge" this time! :oops:

20140715_155737.jpg


I started at 1500M again.....and then moving through the grits up to 12000M.....

20140715_160820.jpg


That's better!

20140715_161426.jpg


So now to the next coat of Tru-Oil.

At this stage I thought it might be helpful to show how I apply it. I am not saying this is the right way...nor is it the only way...it's just my way....a sort of "Frank Sinatra" method! :mrgreen:

I use a lint free "muslin"...actually...it's my son's wardrobe...one of those temporary ones you get at IKEA....rubbish as a wardrobe...brilliant as a rubber!

20140715_162449.jpg


The "rubber" is composed of cotton wool (overseas viewers see recent thread on the subject!)....with the muslin cloth wrapped around it thus...

20140715_162811.jpg


Basically....any cloth which is "lint free" will do to prevent fibres being shed into the finish and ruining it.

It is important to clean off all the dust from the previous stage first....

20140715_145302.jpg


A crazy mutt is not an essential part of the kit...and indeed, can sometimes be a hinderance.....

20140715_145308.jpg


....as they tend to want to "clear up" before that stage is reached.....

20140715_145341.jpg


...with resultant delays at this stage of the project!!! :mrgreen: :mrgreen:

DARN DOG!!!

Ok...with the game over...and the surface dust free and smooth.....

20140715_161457.jpg


....we are ready to apply the next coat.

This is done with the grain. Ok ok ok...I know..in this instance that is like saying follow the straight path through Hampton Court maze but you get my drift...

20140715_162912.jpg


Fairly light but even pressure is needed and you must keep going. Then when you reach the end you do the next pass, slightly overlapping the first one...until you reach the far edge.

Never go back to "fix" a bit you've missed. This will spoil that area. It doesn't matter if you do have patchy areas. These soon disappear as the coats are built up and sanded between each coat.

The fantastic burr figuring is now really starting to jump out...

20140715_163405.jpg


...the decision to bookmatch two halves of the infill is now really paying off...with a pattern akin to the vessel which forms the handle ploughing its way through the waters of the infill.....

(Lord KNOWS where that last bit came from! I blame sunstroke!!) :mrgreen:

That's all for today folks.....more on Thursday...work tomorrow (damn and blast!) #-o

Jimi (AND ALFIE AGAIN!)
 
I work Wednesdays but I managed to fit in some bits and bobs before going....

First...some black Allen bolts arrived....

20140716_132815.jpg


This will be option 2.

Corneel....I have bought some CSK M5 brass bolts with slot heads too....just for you and this will be option 3

I have a feeling this will be the one that most suits so you are probably right! 8)

We can have a democratic vote on that issue once I have the brass screws ground down (last thing!) and then all three can be compared.

Last night I did coat number 3 of Tru-Oil and today..coat number 4 was applied...and we are now starting to see the value of Tru-Oil coming out....

20140716_132923.jpg


....and sunshine also shows the correct natural colour of this beautiful wood....

20140716_132941.jpg


Tru-Oil is quite hard work...it's not an instant finish...but it will be worth it in the end.

ALFIE and me also had a break and played with a selection of planes...on a piece of wood Richard Arnold gave to me...

20140716_123327-1.jpg


We're going to make something special for the infill.....but that's a secret at the moment (if ALFIE can keep secrets that is!) :mrgreen:

Stewart was really getting a work out though...lovely plane that....

Jimi (and ALFIE!)
 
jimi43":382hsi8k said:
Corneel....I have bought some CSK M5 brass bolts with slot heads too....just for you and this will be option 3

I have a feeling this will be the one that most suits so you are probably right! 8)

We can have a democratic vote on that issue once I have the brass screws ground down (last thing!) and then all three can be compared.

:lol:

On a Honda streetracer, allan bolts look fine, but on an old Norton Manx? Or a Triumph Speedtwin?

Your Infill deserves better then allan bolts.
 
Corneel":1fthewpu said:
jimi43":1fthewpu said:
Corneel....I have bought some CSK M5 brass bolts with slot heads too....just for you and this will be option 3

I have a feeling this will be the one that most suits so you are probably right! 8)

We can have a democratic vote on that issue once I have the brass screws ground down (last thing!) and then all three can be compared.

:lol:

On a Honda streetracer, allan bolts look fine, but on an old Norton Manx? Or a Triumph Speedtwin?

Your Infill deserves better then allan bolts.

And do you know what the silly thing is Corneel....I totally agree with you from a "traditional" standpoint...I just want to cover all options.

The brass bolts should be with me tomorrow.

Cheers mate

Jim
 
We don't have to be slaves to tradition. Personally, I think some nice stainless Allen bolts with the socket ends cleaned up to remove the writing they often have would look good. If you were making this to appeal to the deeply conservative antique plane market, you would have to use slotted screws (probably not in brass), but you are not, so you can make a very personal choice.

Jim
 
Wow is, what I think everytime I return to this thread.
You must be very proud Jim and so Richard is sure, wherever he is!

Cheers
Pedder
 
I think I'd rather brass allen bolts tbh. But I'm easy. It looks wonderful either way. It's looking lovely with the oil and the like on it.
 
yetloh":3df5ojln said:
We don't have to be slaves to tradition. Personally, I think some nice stainless Allen bolts with the socket ends cleaned up to remove the writing they often have would look good. If you were making this to appeal to the deeply conservative antique plane market, you would have to use slotted screws (probably not in brass), but you are not, so you can make a very personal choice.

Jim

The plane is deeply traditional as it is. The shape of the infills, the dovetails and the curves of the steel are very much according to 19th century fashion.
 
Corneel":2hzc1itl said:
The plane is deeply traditional as it is. The shape of the infills, the dovetails and the curves of the steel are very much according to 19th century fashion.

I agree, but so what? It is a completely personal choice in a piece made by a craftsman for his own use.

Jim
 
morfa":15fzgwnr said:
I think I'd rather brass allen bolts tbh. But I'm easy. It looks wonderful either way. It's looking lovely with the oil and the like on it.

HA! Another variable...option 4!

Will try and see if I can find brass ALLEN bolts...couldn't see any on fleaBay....will keep searching.

yetloh":15fzgwnr said:
Corneel":15fzgwnr said:
The plane is deeply traditional as it is. The shape of the infills, the dovetails and the curves of the steel are very much according to 19th century fashion.

I agree, but so what? It is a completely personal choice in a piece made by a craftsman for his own use.

Jim

I see both sides...and as I say...let's get all the options and then we can vote! More fun that way.

Off out to do more coats of Tru-Oil and bask in the sun with ALFIE!

England like this is like no other place on earth! 8) 8)

Jimi
 
jimi43":53psm8wd said:
morfa":53psm8wd said:
I think I'd rather brass allen bolts tbh. But I'm easy. It looks wonderful either way. It's looking lovely with the oil and the like on it.

HA! Another variable...option 4!

Will try and see if I can find brass ALLEN bolts...couldn't see any on fleaBay....will keep searching.

Heh, feel free to totally ignore me. No need to bother. In fact if you tell me what size etc you need, if I can find some I'll buy them and post them to you. Save you the effort.
 
morfa":39luqp8s said:
jimi43":39luqp8s said:
morfa":39luqp8s said:
I think I'd rather brass allen bolts tbh. But I'm easy. It looks wonderful either way. It's looking lovely with the oil and the like on it.

HA! Another variable...option 4!

Will try and see if I can find brass ALLEN bolts...couldn't see any on fleaBay....will keep searching.

Heh, feel free to totally ignore me. No need to bother. In fact if you tell me what size etc you need, if I can find some I'll buy them and post them to you. Save you the effort.

On the contrary...I find it is often the "left field" suggestions which turn out to be the most suitable!

I will get hold of some from somewhere and we shall do a visual comparison...plenty of time but this is JUST the sort of ideas feedback I seek! Keep it coming! =D>

Jimi
 
Mr_P":2f9d21yc said:
jimi43":2f9d21yc said:
On the contrary...I find it is often the "left field" suggestions which turn out to be the most suitable!

Jimi

Challenge accepted

http://www.amazon.com/2-Piece-Smiley-Fa ... B00KSAGYAW

COAT.

Keep up the great work Jimi.

HA HA HA!!!

Brilliant! Pity they're Imperial!! :mrgreen: :roll:

Just put coat #5 on....LORDY LORDY LORDY!!!

And I got the CSK brass slot M5 bolts Corneel....

More later!

:mrgreen: :mrgreen: :mrgreen:

Jimi
 
Of course, no need to heed my advice either! It's your plane, and misses T might enjoy a word in it too.

Anyway, you did a marvelous job so far.
 
Back
Top