The UKW Infill Project

UKworkshop.co.uk

Help Support UKworkshop.co.uk:

This site may earn a commission from merchant affiliate links, including eBay, Amazon, and others.
Hi Jimi,
I'm pleased that occurred to you. I don't like sticking my nose in, especially on such a masterpiece.
Keep up the good work.
xy
 
Jimi how about making a wooden blade to test it out?

Pete
 
xy mosian":1o8p5osj said:
Hi Jimi,
I'm pleased that occurred to you. I don't like sticking my nose in, especially on such a masterpiece.
Keep up the good work.
xy

Hey mate...please please please stick your nose in any time you want mate! That is just the sort of feedback I want and trust me...I will be making many a balls up during this build...trust me on that one! What I will show is all these errors in the hope that the next person to undertake such a challenge will do so forewarned! (homer)

Gee Louise Mike...I nearly said "Yes Captain Mainwaring" there mate! :mrgreen: Actually that's a blinking good idea! Let's see how long Barmond take to send me the stock and I'll see if I have got to that bit by then...I suspect this whole lever cap thing may take me to then to research until I'm happy!

Jimi
 
I don't think the exact ratio is too important. There is so much leverage pressure available anyway. Important is that the screw doesn't end up in the same spot as the capiron screw, that the nose of the lever cap sits somewhere on the bulge of the capiron and that the leverpin goes through the sides of the plane in a nicely pleasing way.

In my only lone infillplane, the levercap is too short and it ends definitely behind the bulge of the capiron. But it still works allright and is easilly adjusted both up and down with light hammer taps. That's why I think the exact dimensions aren't too important.
 
Corneel":1q0u1tt2 said:
I don't think the exact ratio is too important. There is so much leverage pressure available anyway. Important is that the screw doesn't end up in the same spot as the capiron screw, that the nose of the lever cap sits somewhere on the bulge of the capiron and that the leverpin goes through the sides of the plane in a nicely pleasing way.

In my only lone infillplane, the levercap is too short and it ends definitely behind the bulge of the capiron. But it still works allright and is easilly adjusted both up and down with light hammer taps. That's why I think the exact dimensions aren't too important.

That was my initial feeling Corneel and I am moving towards concluding that.

I have done a bit of research on "improved" cap iron design...over the standard bent spring of steel and based on my limited use of the ones Clifton makes for Bailey type planes with a split "Stay Set" construction. Although I won't be making an infill "Stay Set" version....I do like the way the thicker steel is relieved on the underside near the mouth and all the way back beyond the screw thus forming a kind of low bridge with a point at the front to act as chip breaker. This is an altogether more robust solution and that will have less of a pronounced "hump" at the leading edge so I will aim to set the lever cap limit near to this point and about half way up the frog slope.

That, along with the screw pressure...should give a very positive location of the assembly against the bed and further solidify the edge against chatter and chip ingress.

Jimi
 
Okie dokie...next step.

The whole day was spent dodging rain and trying to sit in the sun again to get the most of the summer...and very little was apparent since last time but the placement of the holes took a long while to research and even longer to set out and drill.

I went through loads of examples to see just where the screws should go to hold the infills and yet again, I found quite a bit of variation.

Konrad Sauer (as usual!) came to my aid with his placement and so I went with that...each hole being half way between the sole and the side curve at that point and thus creating a nice pattern which just looks right AND giving the maximum amount of wood, particularly important at the thin ends!

I then hit the rear bevels...

20140630_181952.jpg


Draw filing as recommended by Richard using a turnip file first and then moving to a finer file until the profile was right both sides.

20140630_183419.jpg


It really is amazing how the "black stuff" techniques come flooding back from over 30 years ago which was the last time I did this much metalwork in anger!

20140630_183547.jpg


It does look like the bevel isn't even from this shot but that's just a camera illusion being closer to the lens and the fact that I'm using my phone camera as I couldn't be bothered to get the Nikon out! :oops:

So...little steps now...but all moving to the light at the end of the tunnel!

20140630_211234.jpg


The iron in there is a 5mm one I made WRONGLY!

20140630_211251.jpg


....yup...I put the hole at the bevel end by mistake and realised too late so had a slight lack of steel to make the bevel end! (homer)

I have ordered the screws...I'm going to use brass ones and do a shallow countersink and screw them up to finish the body and when it's all done I shall file the tops off and leave little brass dots along the sides. I think that will work rather well.

More later when other stock arrives...taking a few days off now...back later.

Jimi
 
Looking great, Jimi. I like the idea of the brass screws - I'm a big fan of mixed metals in a plane (and in jewellery).

I see you've put the hefty spacer to good use :D

It's going to be so very pretty. Well done.
 
Mrs T":2cr0maas said:
Looking great, Jimi. I like the idea of the brass screws - I'm a big fan of mixed metals in a plane (and in jewellery).

I see you've put the hefty spacer to good use :D

It's going to be so very pretty. Well done.

Hi Emma

I have indeed used the spacer...every time in fact as I can't get the infills out otherwise! :mrgreen:

Richard made this so very easy to infill that it virtually makes itself! I want to ensure that I keep the sides parallel of course!

The bit of wood is there out of paranoia as I doubt if the aluminium jaws of they Zylyss vise will affect the sides but I ain't taking any chances! :wink:

The brass screw concept came from the reverse of the method used for gunmetal sides using steel screws and from the fact that Richard once said that how ever much care he took trying to get opposite holes in line...there was always an error so I didn't want to risk putting a through rivet in which was the other idea.

I don't have a drill long enough either so trying to drill from both sides and hoping for the best just wasn't on the cards!

The next few stages (the polishing of the bevels and infills...the finishing of the curve flats...the making of the irons and cap iron will all bring it out and I can't wait but I have to remind myself to get the engineering right first..then the prettiness! It's so tempting to do it the other way around...believe me! :oops:

Hope you are ok.

Jimi
 
I know it's a design feature, and I should have made this comment earlier in the build, but are you sure that hook on the side just level with the blade isn't going to take a ragged piece out of your left hand if one day you release your grip on the bun and pull your hand back just too close to the side?
Just a suggestion - I'm paranoid about cuts and grazes these days because of a recently developed blood problem, but maybe a bit of easing off of the point would be a good idea??
 
dickm":e99fimhu said:
I know it's a design feature, and I should have made this comment earlier in the build, but are you sure that hook on the side just level with the blade isn't going to take a ragged piece out of your left hand if one day you release your grip on the bun and pull your hand back just too close to the side?
Just a suggestion - I'm paranoid about cuts and grazes these days because of a recently developed blood problem, but maybe a bit of easing off of the point would be a good idea??

Yes indeed...relieved they will be once I have fitted the infills and can "use" the plane to check the ergonomics. I suspect that they will be softened which I will do when I finish the steel on the non-beveled curved section. I don't want to take away too much of Richard's original concept of the "Japanese Wave" but I think I can still retain this in essence and make it safe.

Keep 'em coming Dick...these are the sort of feedback comments I love to get to ensure everything is covered. It shares the load a bit! :wink:

Jimi
 
Ok....now for the boring but vital bits so bear with me if you're not into the geometry stuff!

Earlier this week I got a quote from the most excellent Richard Airey at BARMOND STEEL for the iron/cap iron stock and I am getting metre lengths of 70mm width at 3mm, 4mm and 5mm thicknesses which gives me quite a lot of scope for the design.

On FleaBay the other day I espied an old iron which would make an IDEAL test iron whilst I wait for the steel so I snapped it up and it arrived within 24 hours!

20140704_232527.jpg


It was EXACTLY the right width...thickness and was a Three Shamrocks Marples so well up to being a test iron for this plane!

I then fitted the rear infill temporarily....(note the screws are still sticking out so it's removeable!)

20140704_230118.jpg


Using a small straight edge, I then found that the righthand side was a tiny bit out and this is where the Liogier float comes into its own...

20140704_230028.jpg


The iron now sits beautifully flat on the entire wood/frog area with no wobble or tilt.

I wanted to get the iron thickness worked out so that I get a good fit for the mouth and this one is perfect!

20140704_232257.jpg


With the iron held in place there is the right amount of clearance to start with...really happy. Note that this iron has been sharpened with a slight curve hence more of a gap towards the edges.

The next job will be to cut all the countersinks and sink the screws to just above the slot depth....trim the ends of the plane to a slight curve increasing to the corners and finish off the rear infill.

I will now be able to position the lever cap and fit.

One thing I noticed was that the precision of the mill meant that the holes I drilled on each side were in perfect alignment (I know...I was shocked too! :shock: ) and so I am thinking about a through shaft for the lever cap...

I just have to build up to risking this first...over the weekend!

More later!

Jimi
 
Hi Jimi

Nice work as usual.

How about spring loaded pins for the lever cap?

Looking forward to heat treating the blade.

Pete
 
Hi Pete

I had thought about a spring pin as per Jim's Kingshott design but I don't see the point of being able to remove the lever cap...do you?

The steel should be with me tomorrow (I hope!) as it has left Sheffield...but since it's coming via Herpes...I may be a little rash thinking that! :mrgreen:

Ok...today I couldn't put off the metal bits any longer...so I decided to finish the rear of the plane and also finish the lever cap.

The decision to set a ratio for the lever cap of 1.5:1 (arm length to pivot/pivot to leading edge) was made based on consensus and proved to be perfect (more later!)

The first thing to do was to flip the cap in the mill and tighten the machine vise VERY tightly so as not to get a flying lever cap in the workshop...there wasn't much holding it down!

20140707_115836.jpg


I want to put an arc scallop on the underside leading to a bevel to the front edge to give point contact just where it's needed...so the first thing to do was excavate the stock as far as I could using a medium mill....

20140707_115804.jpg


.....slowly working towards the edge of the arc.

After the basic trench was milled out...the bevel was set on the leading edge by flying over the area and using high speed to get the required finish so I don't have to do this again...I don't want the geometry changing here as it is critical that this is flat and parallel to the pivot point exactly.

The stock was then run against the homemade brass abrasive shaft in the lathe until the arc was created....

20140707_144103.jpg


This was remarkably quick but I'm glad I used brass as the substrate for the abrasive rod...it stayed really firm and neat...

20140707_144120.jpg


Ok....so that was the difficult bit done! Phew! :shock:

20140707_144203.jpg


I keep thinking of that saying "many a slip between cup and lip!"....

It's all very nerve-racking! :oops:

20140707_125359.jpg


Ok...that bit was wrapped in cotton wool while I fitted and redid the back bevel!

Yup...re-did the back bevel....because I needed to line up the wood and the steel and this affected the original bevel so note to self....don't do the bevel before you fit the rear infill properly!!! (homer)

And guess what!? The handle now sits perfectly...(as I knew it would!!! :oops: ...yeh right Jimi!!!)

20140707_173337.jpg


I stuck some sanding sealer (cellulose of course!) on it to see how the grain shows...(oh..and to seal the grain!)....and it is starting to jump out now...

20140707_173644.jpg


I can hardly wait to get to the Tru-Oil and finishing bits and bobs...!

Ok...so back at the beginning I said that the cap iron was resized (oops forgot to photo that bit) so it's shorter at the front now and has a ratio of 1.5:1...and this is how it fits...

20140707_175308.jpg


It just LOOKS right! The curve..the point at which the leading edge presses on the cap iron...the fact that this is right on the steel frog...all that good stuff!

The iron in place is the test Marples set and I really like this old workhorse...I will copy all the elements of the original once the steel arrives....except the top...I like more pointed bevels. :wink:

Throat clearance is also more than sufficient...

20140707_175357.jpg


Ok...so that's all today folks....

20140707_175429.jpg


The steel should arrive tomorrow or this Wednesday...but before then the front needs to be installed..I need to square off the front bevels because I stupidly rounded them over because I didn't use a flat backed abrasive pad.... (homer) ...the front and rear curves need to be done on the overhangs and then marking out of the lever cap will be done once I am absolutely certain the new iron/cap iron combination is the same as the Marples test iron/cap iron.

Phew! Nearly there! :mrgreen:

More this week....

Jimi
 
Fellow woodworkers, forget about Karl Holtey, Konrad Sauer, Ron Brese and other famous infill makers. We have
our own Jimi!!

Fantastic stuff man, keep up the great work!!!!
 
ali27":2wh43gkr said:
Fellow woodworkers, forget about Karl Holtey, Konrad Sauer, Ron Brese and other famous infill makers. We have
our own Jimi!!

Fantastic stuff man, keep up the great work!!!!

WOW! Steady on there mate! Those are the K2 and Everests and I'm still struggling up Ben Nevis! :mrgreen:

No pressure then! :mrgreen:

Seriously though...thanks for the kind words...I need all the encouragement I can get because I having even got a shaving to show yet! :oops:

Now THAT would be embarrassing if it didn't cut wouldn't it! :mrgreen:

Nah...that ain't gonna happen....... :shock:

Thanks ali!

Jimi
 
Beautiful work as allways mate. Don't worrie about if it can get shaving or not worrie about if we can find a instrument capable of reading such a fine shaving as I know in my heart that this will out preform any spires (jim loves a spires)

I want to see shavings every colour of the rainbow ;)

Jimi you are nearly in my favourite plane makers of all time

Cheers
TT
 
tobytools":11i77ull said:
............

Jimi you are nearly in my favourite plane makers of all time

Cheers
TT

I better get some more polish in then Toby! :mrgreen:

After seeing what sort of finish you can get with Tru-Oil on a guitar...I am fairly confident you will like the result when I get around to that stage...not far off now hopefully.

Jimi
 
Cracking work Jimi.

That cap looks fantastic, and the infill is starting to pop!

Pete
 
jimi43 said:
I had thought about a spring pin as per Jim's Kingshott design but I don't see the point of being able to remove the lever cap...do you?

]

Lovely work as ever, Jim. As to the removable lever cap, I have infills with and without this facility and have to say I much prefer to have it removable because it is so much easier to replace the blade after sharpening without bashing the edge on something hard.

Jim
 
Cheers Pete...not long now..but the steel is still with HERPES...yup..as predicted! Bloody shower that lot..lord knows why they're still in business...a whole day to pick up from Sheffield let alone send south! It will be here tomorrow (MAYBE!).

I can then fashion the irons and cap irons and send one to you and one to Philly...I can't wait!

In the meantime I can do all the testing with the Marples...as that is the one I shall copy exactly so it will be dimensionally the same.

I am chatting with Emma (MrsT) about getting the lever cap engraved...at the moment I am not sure what to put and what script to use but we will come to a decision on that soon. I want Ian at Chalco to do it as he made a wonderful job of my stamp...and Richard's, neither of which I can use on the brass. I can send this off at the same time as the irons and that way they should all be back together for fitting and final testing.

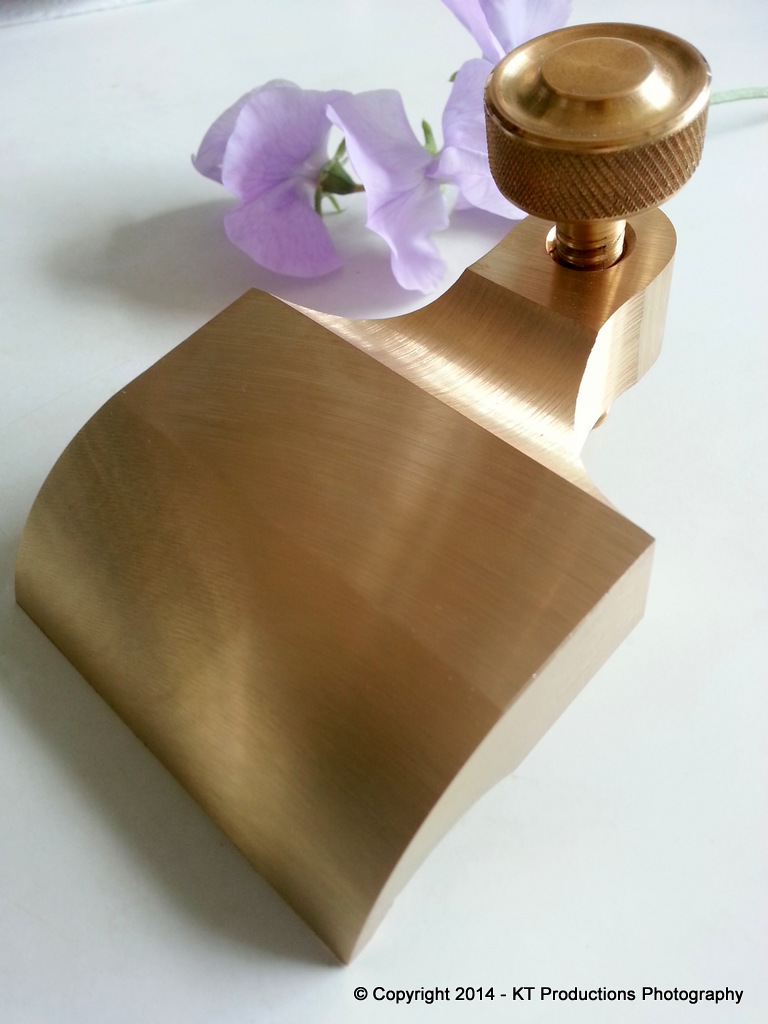
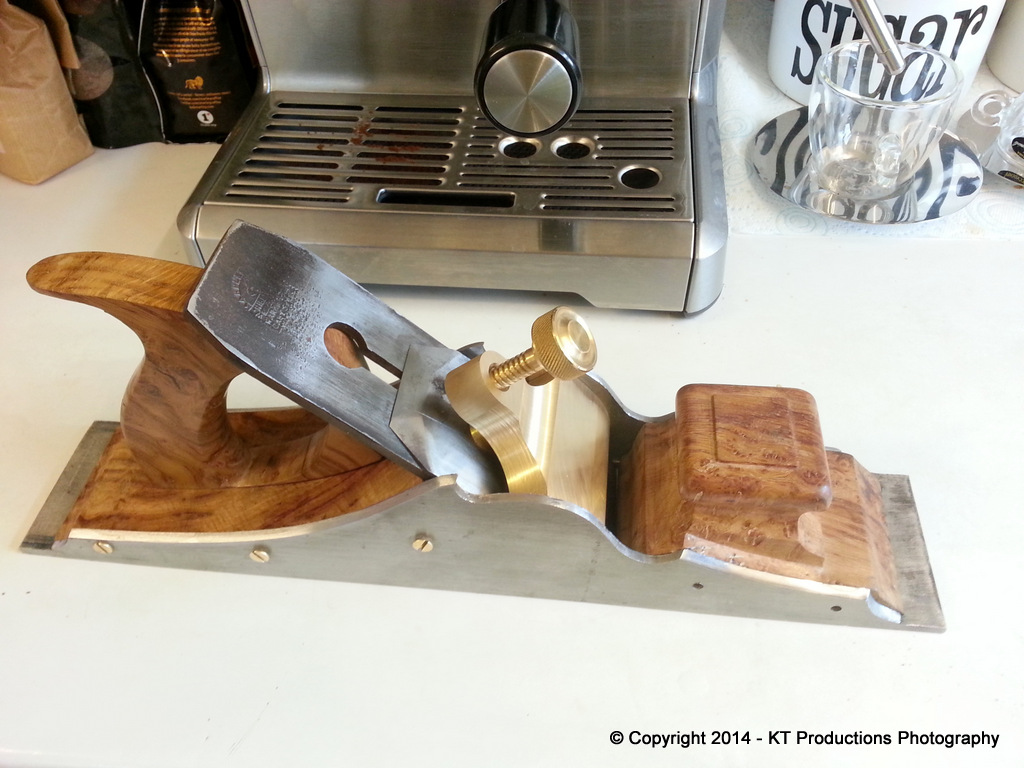
Hi Jim....yes..ideally it would be great to have the lever cap removable but I am still wary of trying to get a perfectly straight and perpendicular hole through that much brass ending on the other side accurately enough not to cause problems. The other way..drilling one side...bolting it in and then lining the other side up and marking and drilling will be safer. I am just a chicken at heart!

I think I could do a through hole but why risk it at this stage...(many a slip an' all!) :oops:

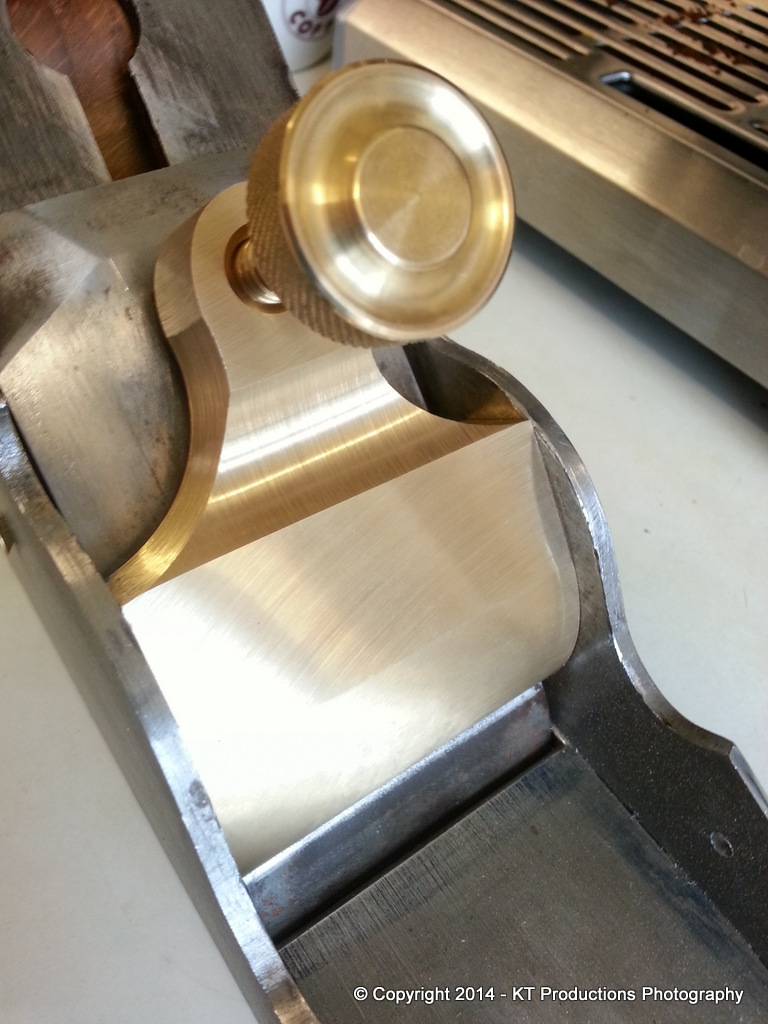
I have therefore decided to use countersunk stainless steel Allen key bolts. I have also ordered some black ones as well...so I can play....sadly they don't do them in brass as far as I can tell but if anyone knows where I can get M6 18mm long Allen countersunk bolts from.....let me know!

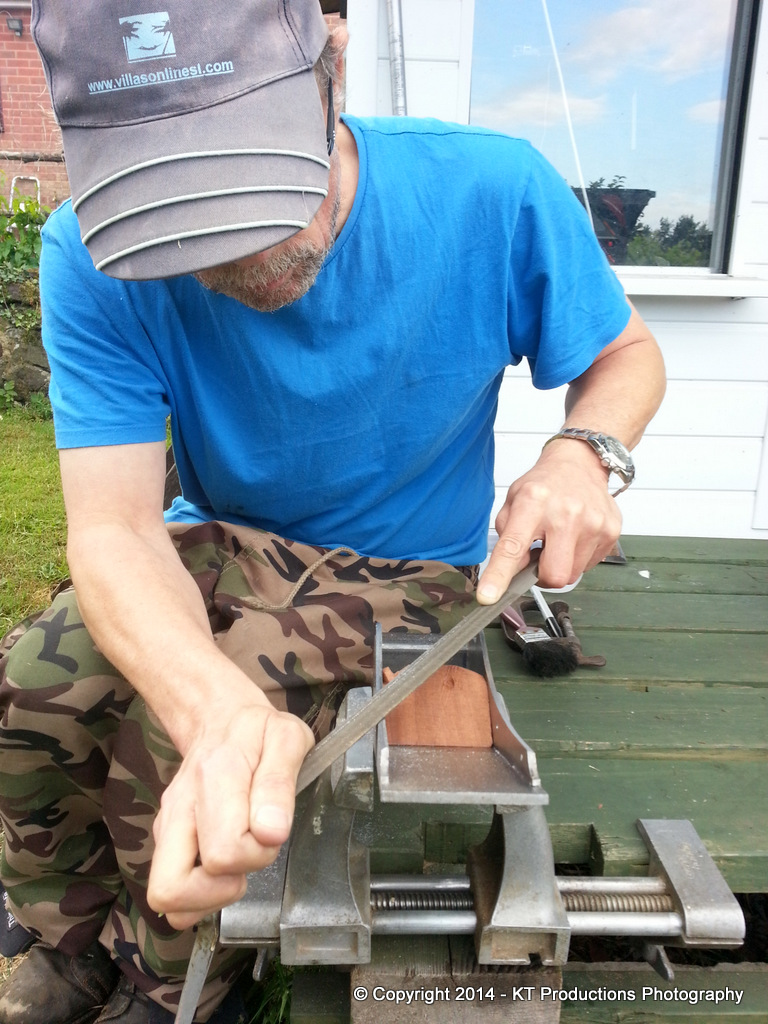
Ok..today I spend the whole day working on the plane...and I have cuts and sores on both my thumbs to prove it! :roll:

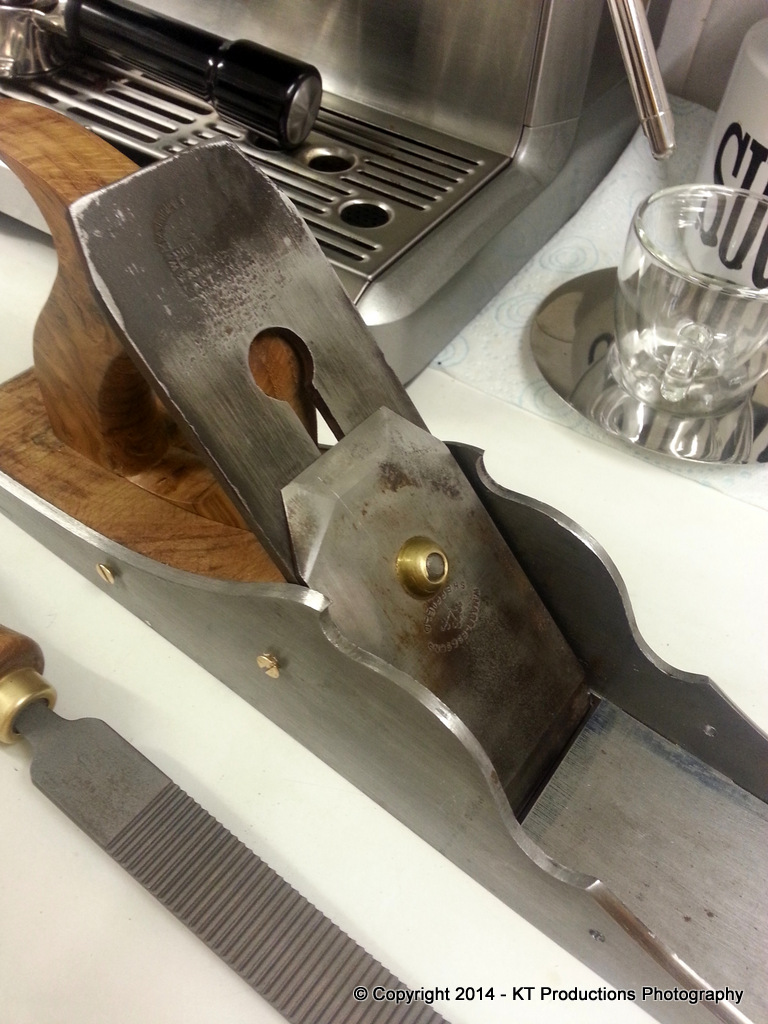
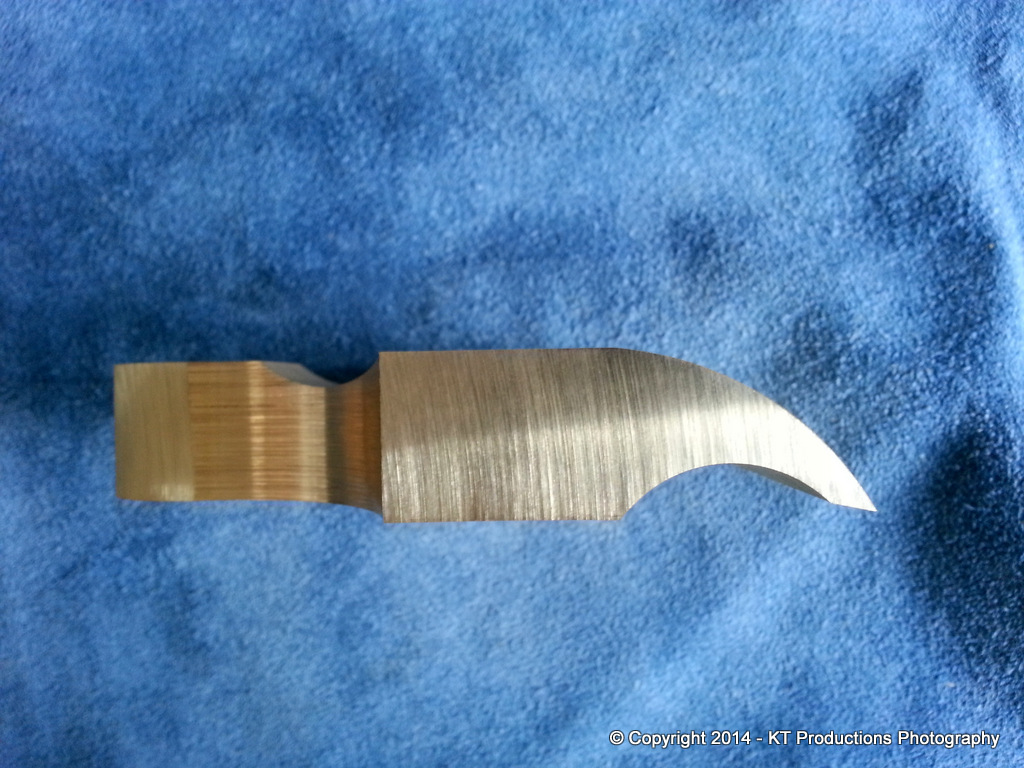
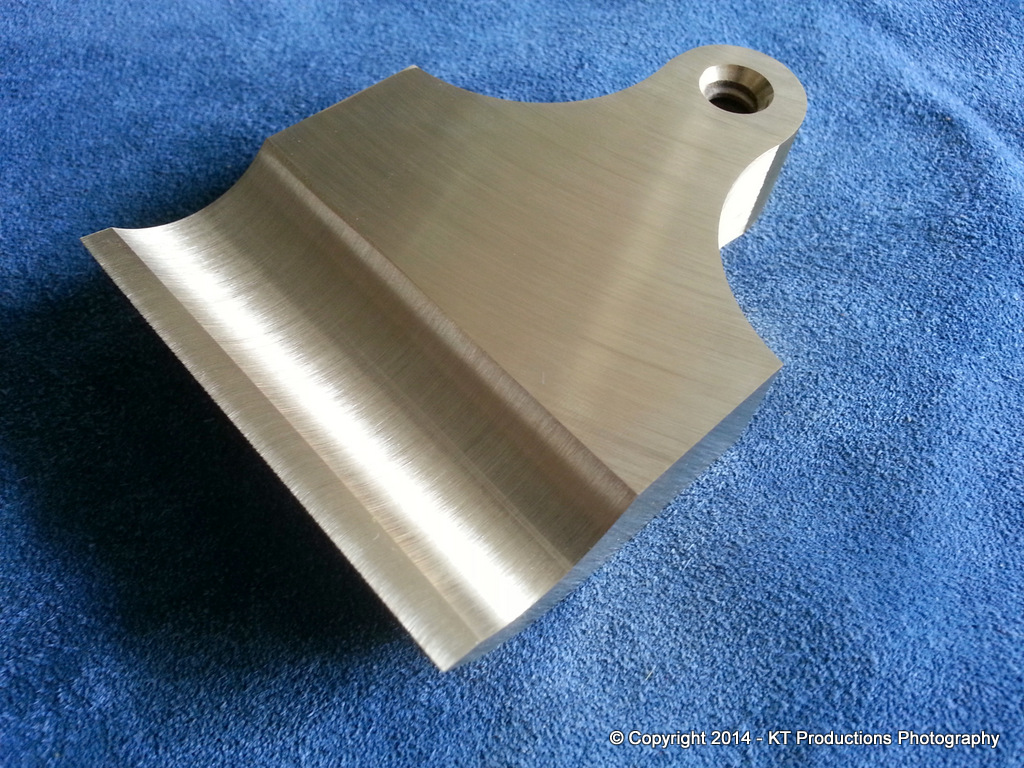
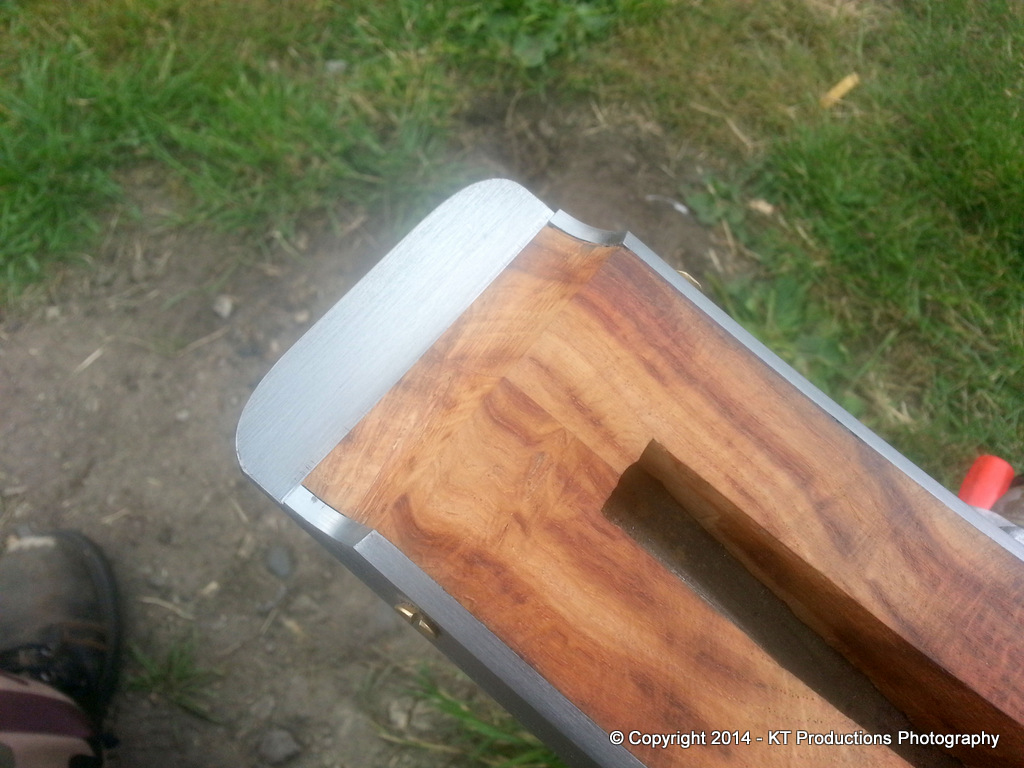
After redoing the bevels at both the front and the back and curving the rear steel on my Creusen white wide wheel... I set about first finishing of the rear infill...

20140708_145355.jpg


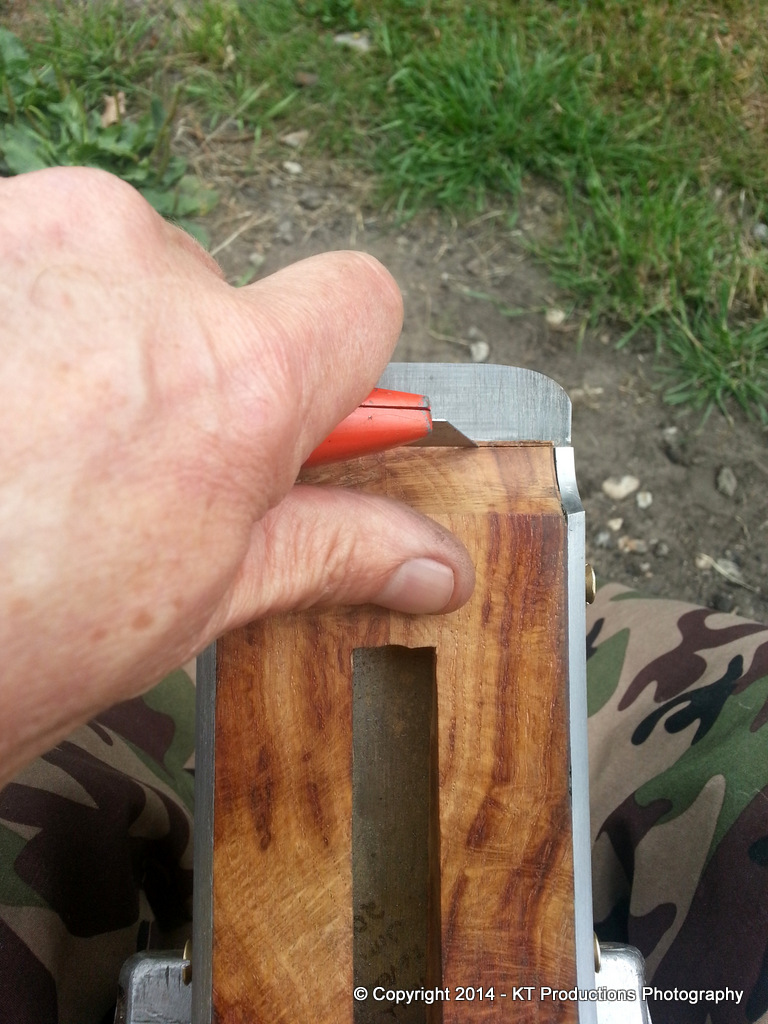
First I used the abrasive 1" shaft on the lathe to the rear curved bevels. Then using a hacksaw I cut down into the remaining wood overhang just shy of full depth...and used a Stanley knife to cut the waste out.

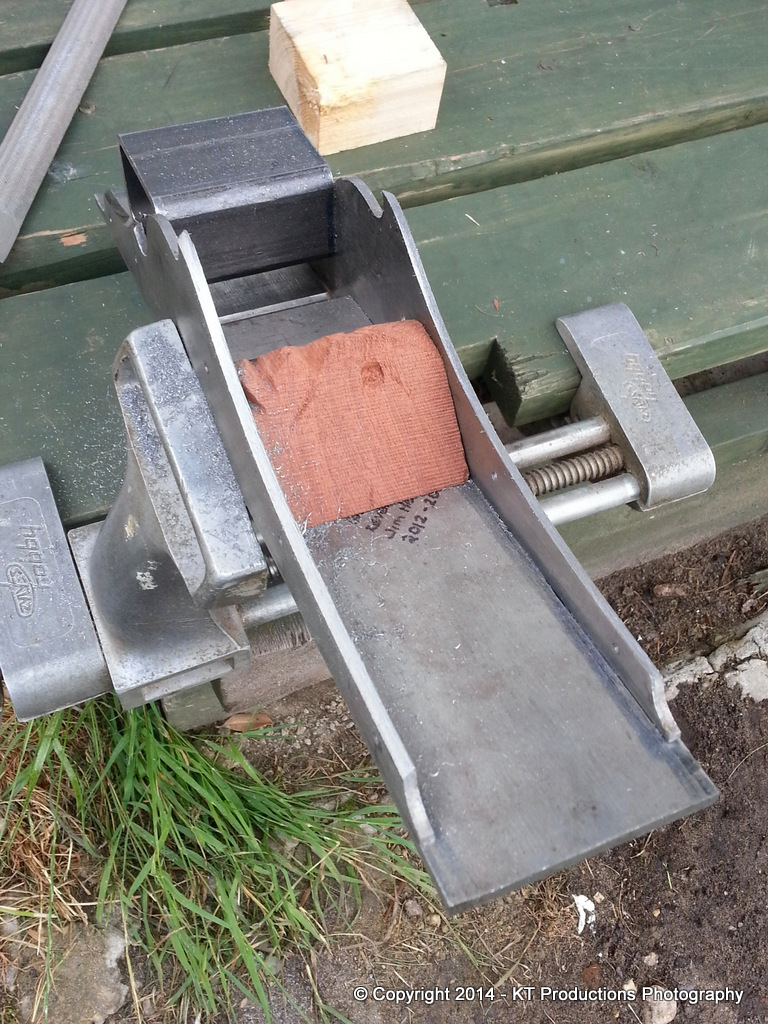
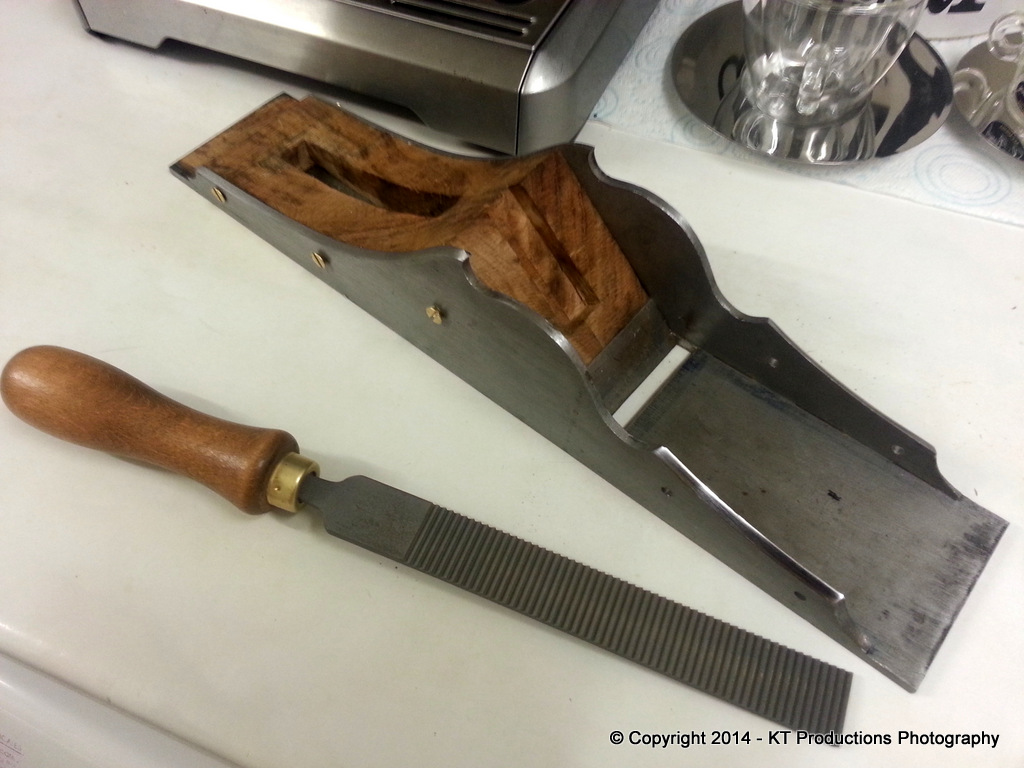
This left a fairly coarse edge and I was unsure what to use to trim this very thin surface...but ALFIE came up trumps (again!)....

20140708_150954.jpg


...and he was spot on! :mrgreen:

20140708_145553.jpg


That baby Veritas shoulder really is a handy little plane for these jobs. A present from my dear buddy Pedder and it has come through so many times now...when anything else just won't cut it! It's a masterpiece of engineering if ever there was one!

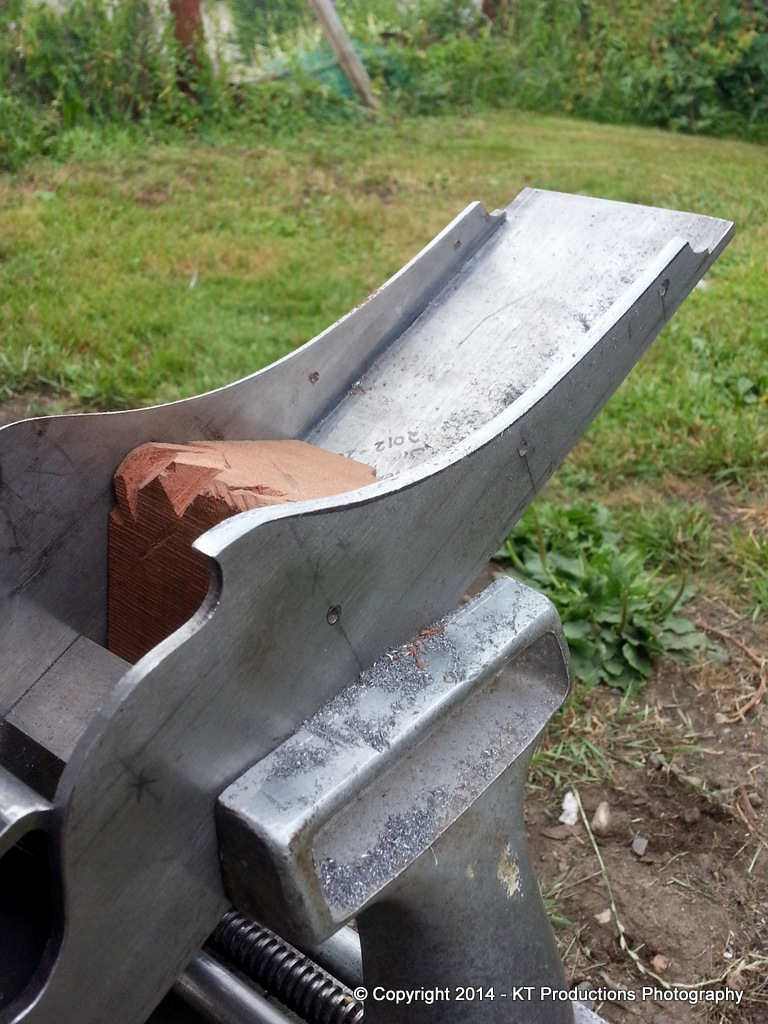
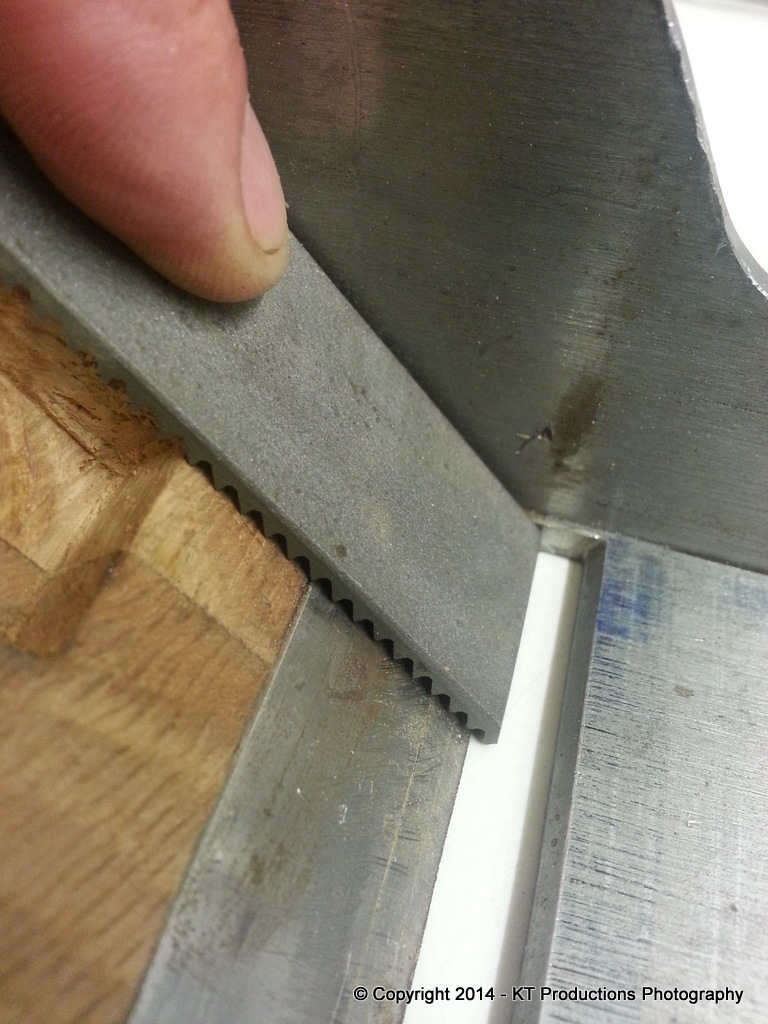
And if you don't believe it's shaving...check this out...

20140708_145614.jpg


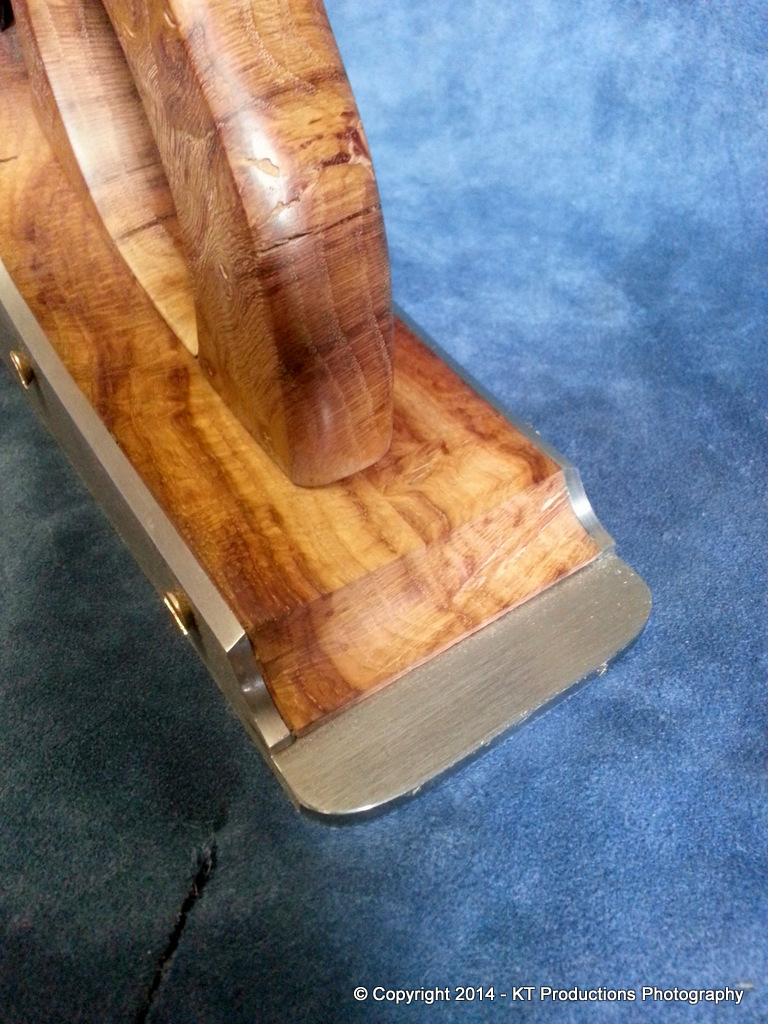
In this picture you see there is a tiny aberration in the infill ( (homer) ) at this very point which is annoying but I will fill it with some glue mix and it will disappear in the final finishing.

A quick file over the rear overhang and final silk finish with Abranet to 180G and we're done at the back...

20140708_152659.jpg


Apologies for the clarity of the picture at this point but I think my lens on the phone steamed up! I shouldn't be so lazy...and take the little Nikon Bridge out with me but you get the idea!

20140708_193405.jpg


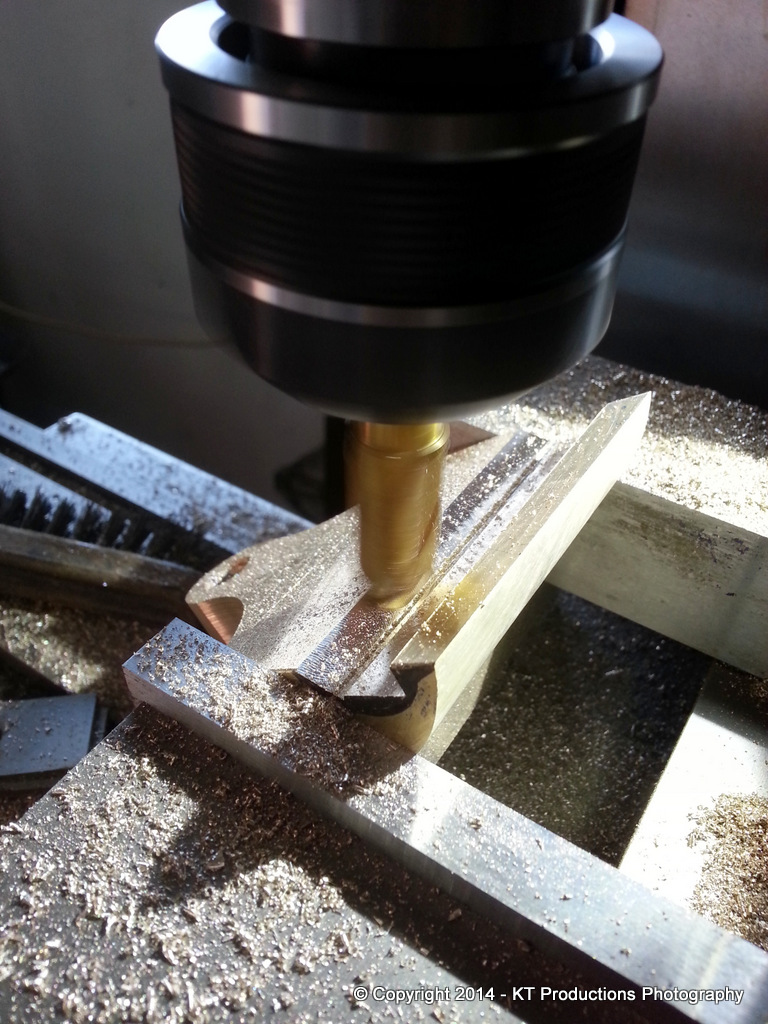
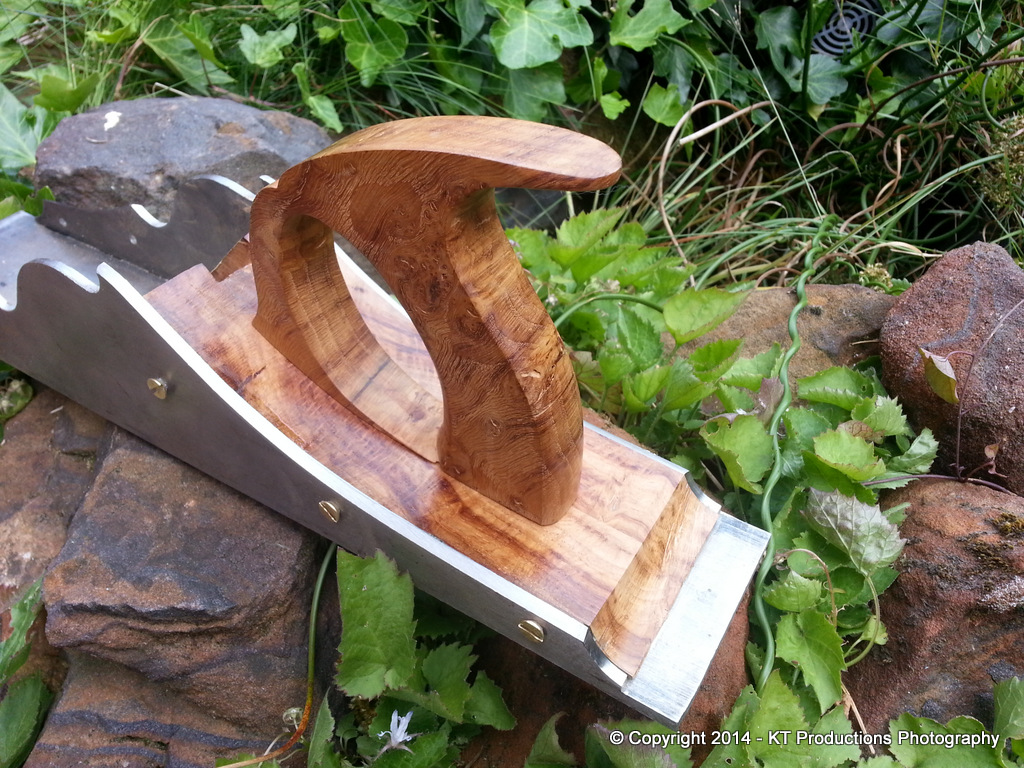
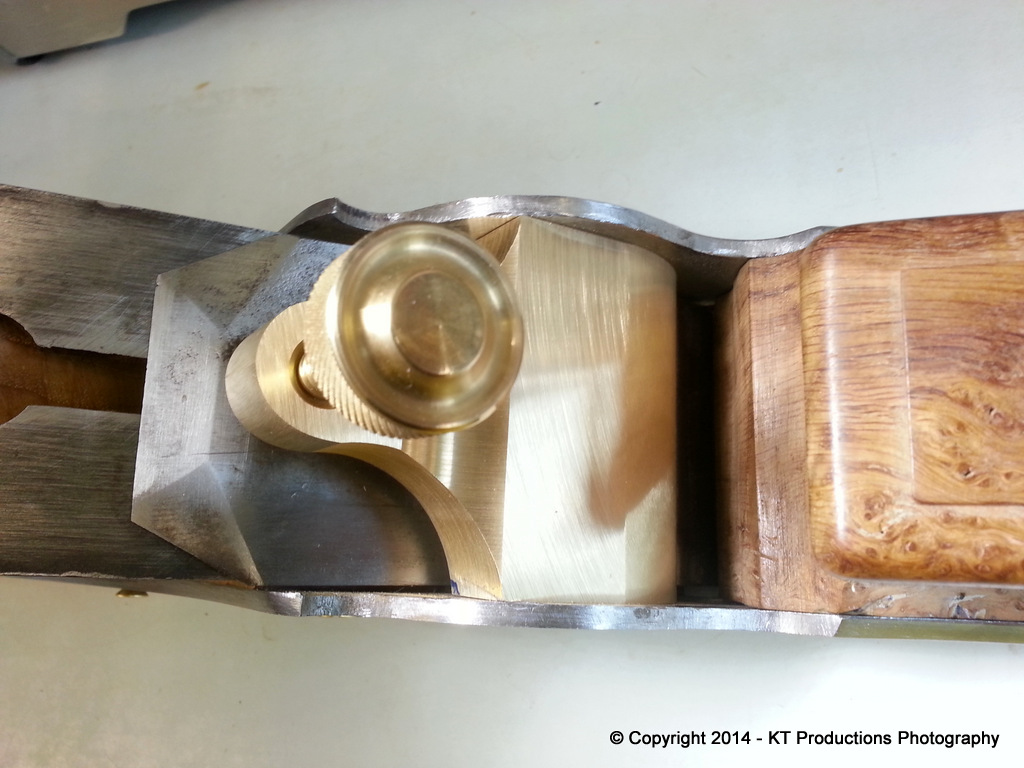
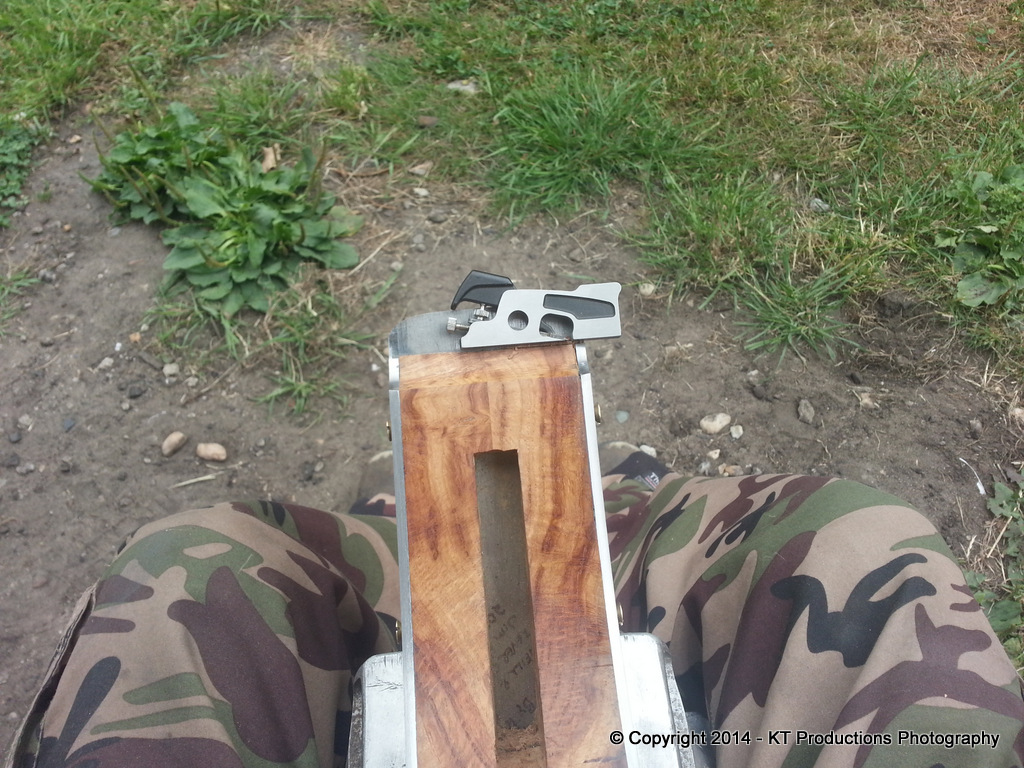
Ok...so I then fitted the front bun and tidied up the front and inside throat curves..again with the 1" homemade rotating abrasive..this time with 120G cloth backed abrasive sheet used to ensure crisp lines...

20140708_192950.jpg


This needs finishing like the rear but I simply ran out of time before the rain came along and I wasn't up to pulling it all up and starting again in the workshop...so I will do that bit tomorrow morning.

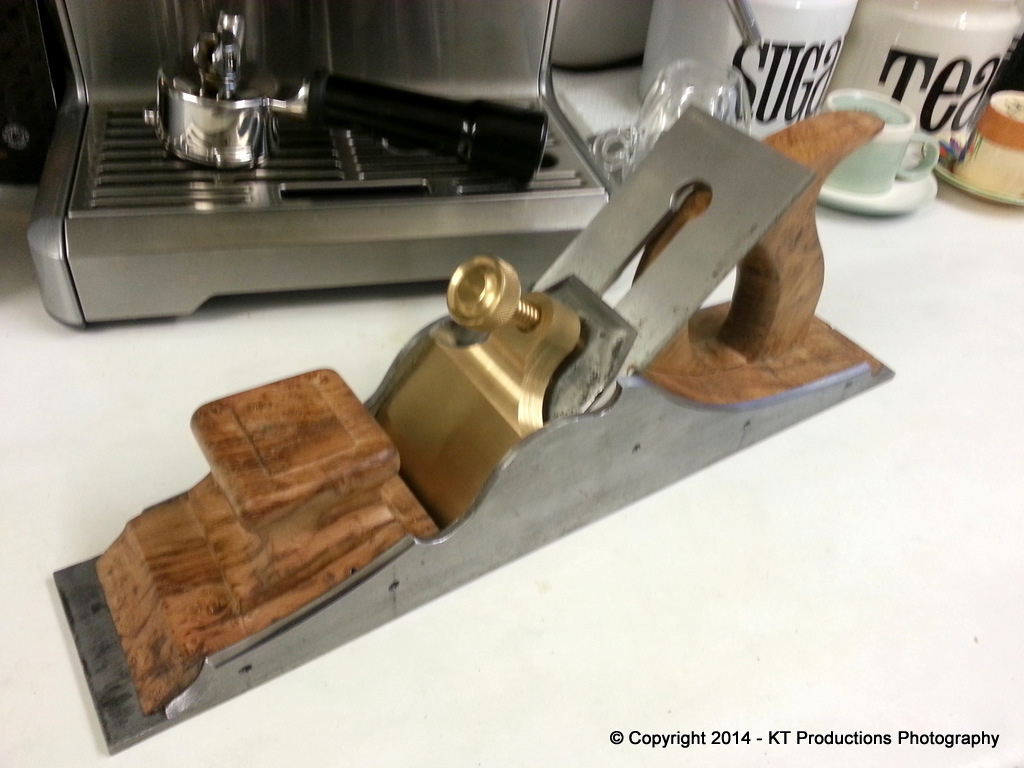
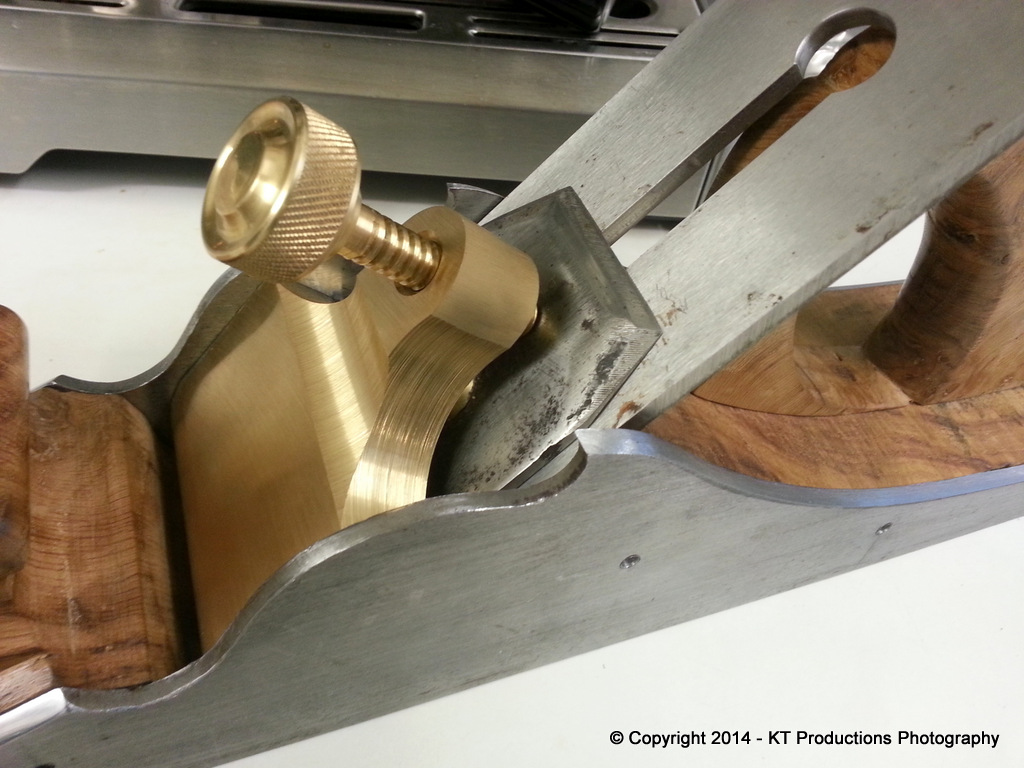
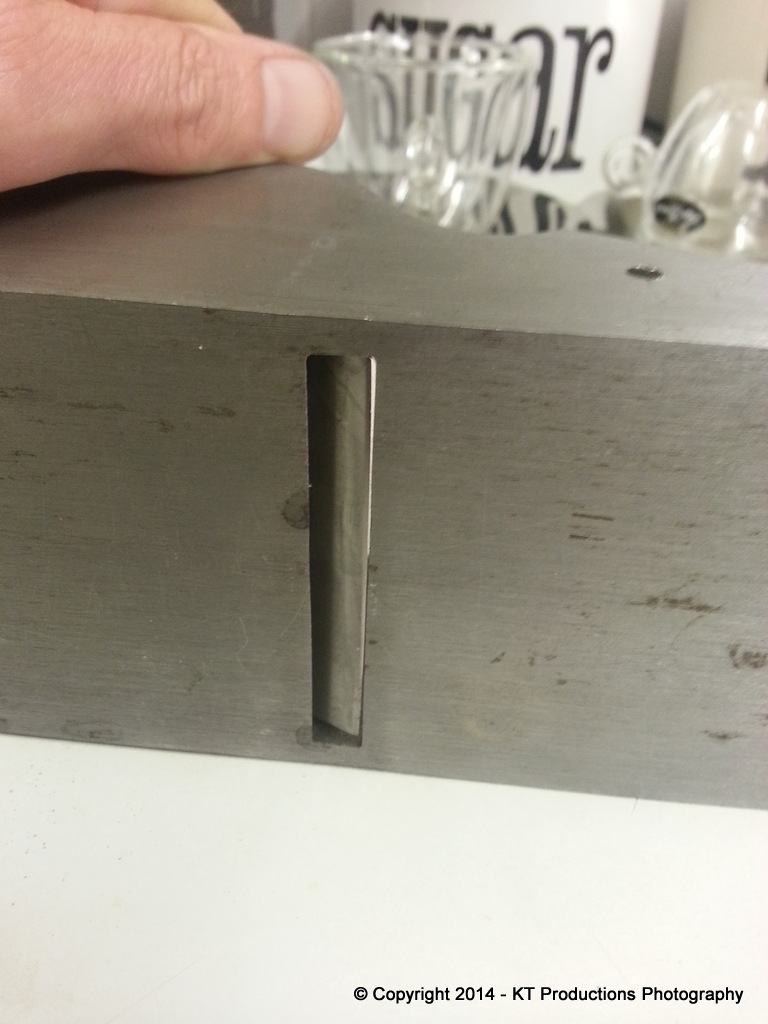
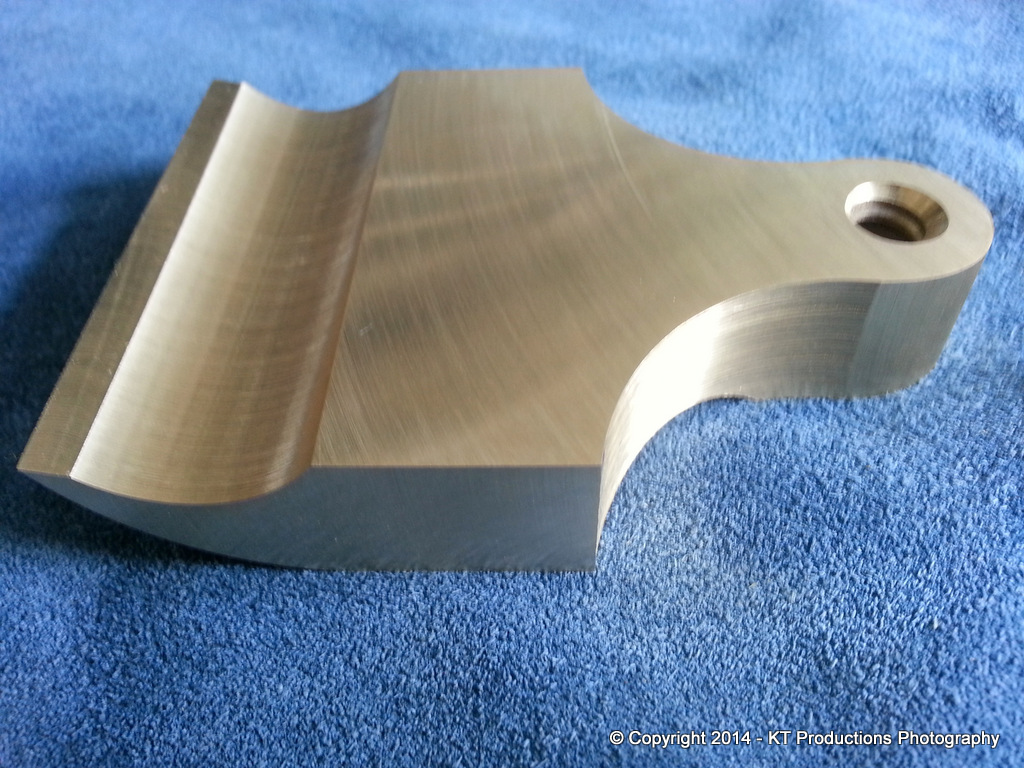
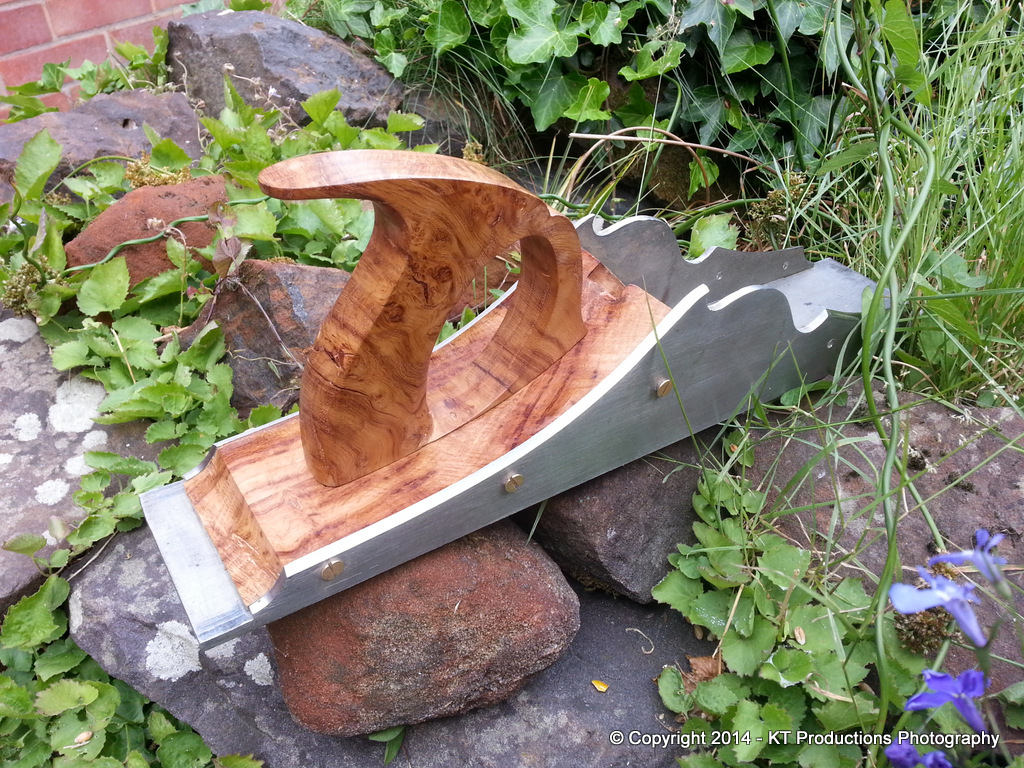
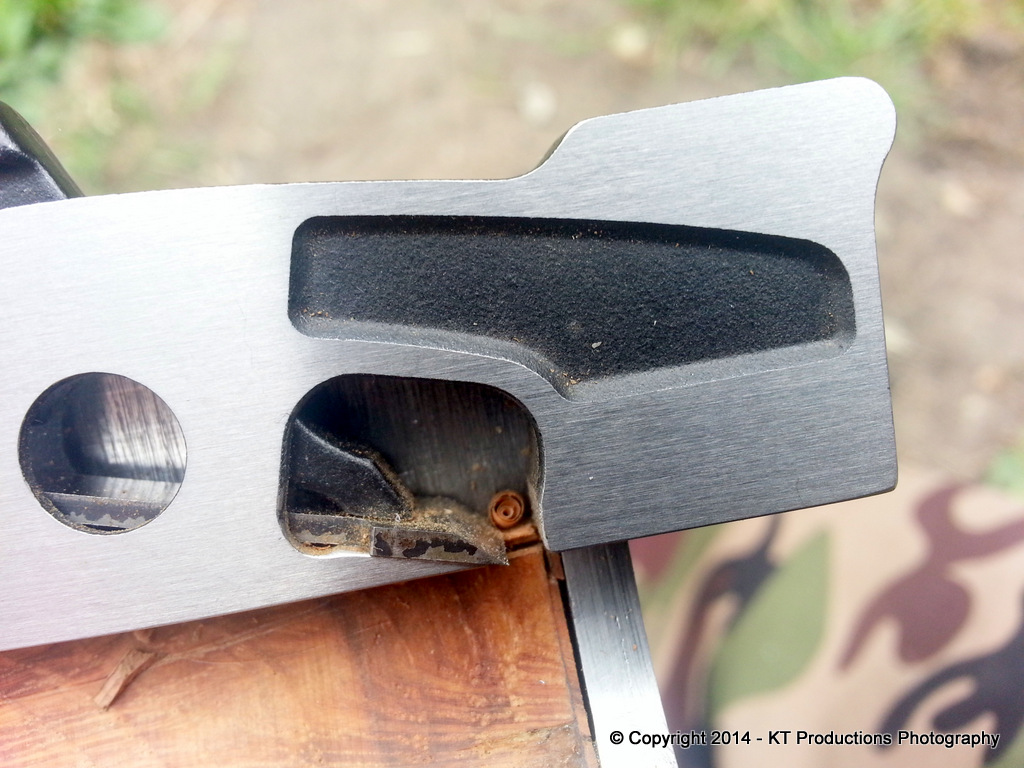
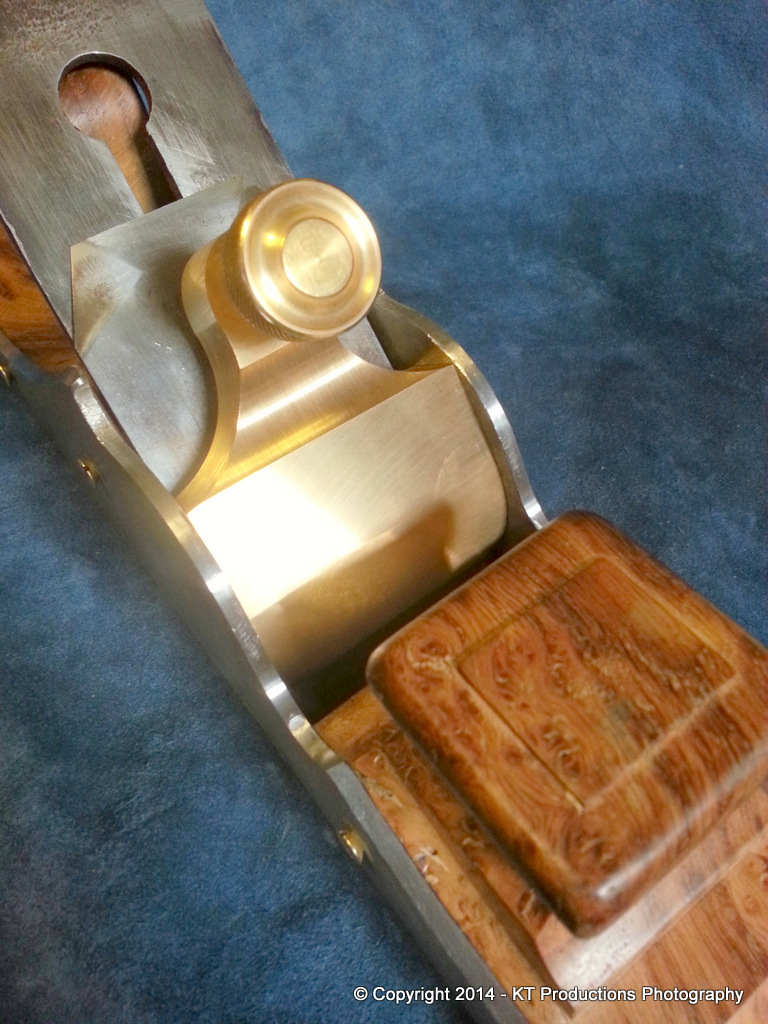
As can be seen below...I also partially sorted out the finish on the waves....

20140708_193456.jpg


....and you can see the ideal place to get the engraving done.....on the flat surface of the lever cap.

I also softened the points of Hokusai's Great Wave of Kanagawa....as suggested by Dick as these were indeed a tad dangerous. But..I think I have managed to retain the spirit of Richard's idea at the same time...

20140708_194813.jpg


I really want to get the irons finished now...that lever cap has to go in and I just have to get some test shavings...but patience..as they say is a virtue and this has been a bit of a long marathon rather than a sprint so I can wait!

More later...if this darn courier turns up! :wink:

Jimi
 

Latest posts

Back
Top