Dave you do have to start somewhere and it doesn't have to complicated work to get a pleasing result. The chopping boards look good and if you get satisfaction from it that motivates you to go on to something else. Keep it up.
You are using an out of date browser. It may not display this or other websites correctly.
You should upgrade or use an alternative browser.
You should upgrade or use an alternative browser.
Post a photo of the last thing you made
- Thread starter DTR
- Start date


Help Support UKworkshop.co.uk:
This site may earn a commission from merchant affiliate
links, including eBay, Amazon, and others.
Dave-Jeffo":vm7gvm93 said:So I'm just stating out with the whole joinery/working with wood scene (I'm an engineer so I'm used to metal and machines)
Recently I managed to get hold of some solid wood worktop (a few different ones) and decided to try my hand at making some chopping boards.. Here is a few of the outcomes.
There nothing special like end grain butchers blocks I've seen but you got to start somewhere")
Cheers Dave
I've been commsioned to make a chopping board for someone. Interesting idea of using worktop offcuts to use them. A very nice finish too. What did you treat them with?
Dave-Jeffo
Established Member
Doris":2zhut1xw said:Dave-Jeffo":2zhut1xw said:So I'm just stating out with the whole joinery/working with wood scene (I'm an engineer so I'm used to metal and machines)
Recently I managed to get hold of some solid wood worktop (a few different ones) and decided to try my hand at making some chopping boards.. Here is a few of the outcomes.
There nothing special like end grain butchers blocks I've seen but you got to start somewhere
Cheers Dave
I've been commsioned to make a chopping board for someone. Interesting idea of using worktop offcuts to use them. A very nice finish too. What did you treat them with?
Thanks everyone! I'm very happy with the outcome and more importantly I think the finished products are getting better and better every time.
I have finished them with a few coats of food grade tung oil, sanding between coats. To be honest I probably go over the top on how smooth they are but I just can't help my self to get the smoother and smoother.
The good thing about using worktop is there is actually very little work to do. quite often the worktop off cuts/sink cut outs just go in the bin, so I like to think of them as reclaimed/recycled wood.
Doing these has spurred me on to build a workshop (as saw dust and motorbikes doesn't go well together)
It's not yet finished got quite a bit to go yet but here is what I have so far.
Sorry about the garden to many projects on so its a state lol
Cheers Dave
Attachments


I was asked by a lady for a special gift for her friend who kept on and on about a driftwood tealight holder a friend of hers had as a table center piece.
Well after lots of thought and driving round the farm found what I thought would make a nice piece and made this, comments welcome good or bad lol

![P210615_09.11_[01].jpg](https://cdn.imagearchive.com/ukworkshop/data/attach/28/28452-P210615-09.11-01-.jpg "P210615_09.11_[01].jpg")
Well after lots of thought and driving round the farm found what I thought would make a nice piece and made this, comments welcome good or bad lol
Attachments
Knot Competent
Established Member

Dave-Jeffo":3ijx4xu8 said:The good thing about using worktop is there is actually very little work to do. quite often the worktop off cuts/sink cut outs just go in the bin, so I like to think of them as reclaimed/recycled wood.
I made a Noah's Ark from a piece I was given recently.
https://gracesilverwood.wordpress.com/2 ... noahs-ark/
I don't think most people realise just how versatile solid worktop is.
just completed this box for my Sister's Boyfriend. I was told he liked trees and so relief carved a tree on the lid with the roots going down to the lid. Don't think I will be using Sapele again for relief carving.


monkeybiter
Established Member
Doris":310eyszd said:Don't think I will be using Sapele again for relief carving
I am finding Sapele very splintery [in bands] on a piece I am carving, frequent honing and constant attention to grain direction are imperative, but the latter is not always easy when you're creating a form is it?
Grain direction doesn't mater as much as it does in joinery but I always try to work with the grain when you can, but you can't always. A sharp chisel or a smaller sweep always help when working across the grain. I have found sapele splintery but not too bad once you adjust to it you should be ok.
The reason I won't be working with it again for relief carving is because of the grain is too in your face for the carving and detracts from it. A you doing relief work or sculpturing with it at the moment?
The reason I won't be working with it again for relief carving is because of the grain is too in your face for the carving and detracts from it. A you doing relief work or sculpturing with it at the moment?
monkeybiter
Established Member
I've got a Sapele wallet [for the colour] on the go, along with an Oak green man [relief] and a small Beech human head. All ongoing as time and enthusiasm permits. I envy your output.
James C
Established Member
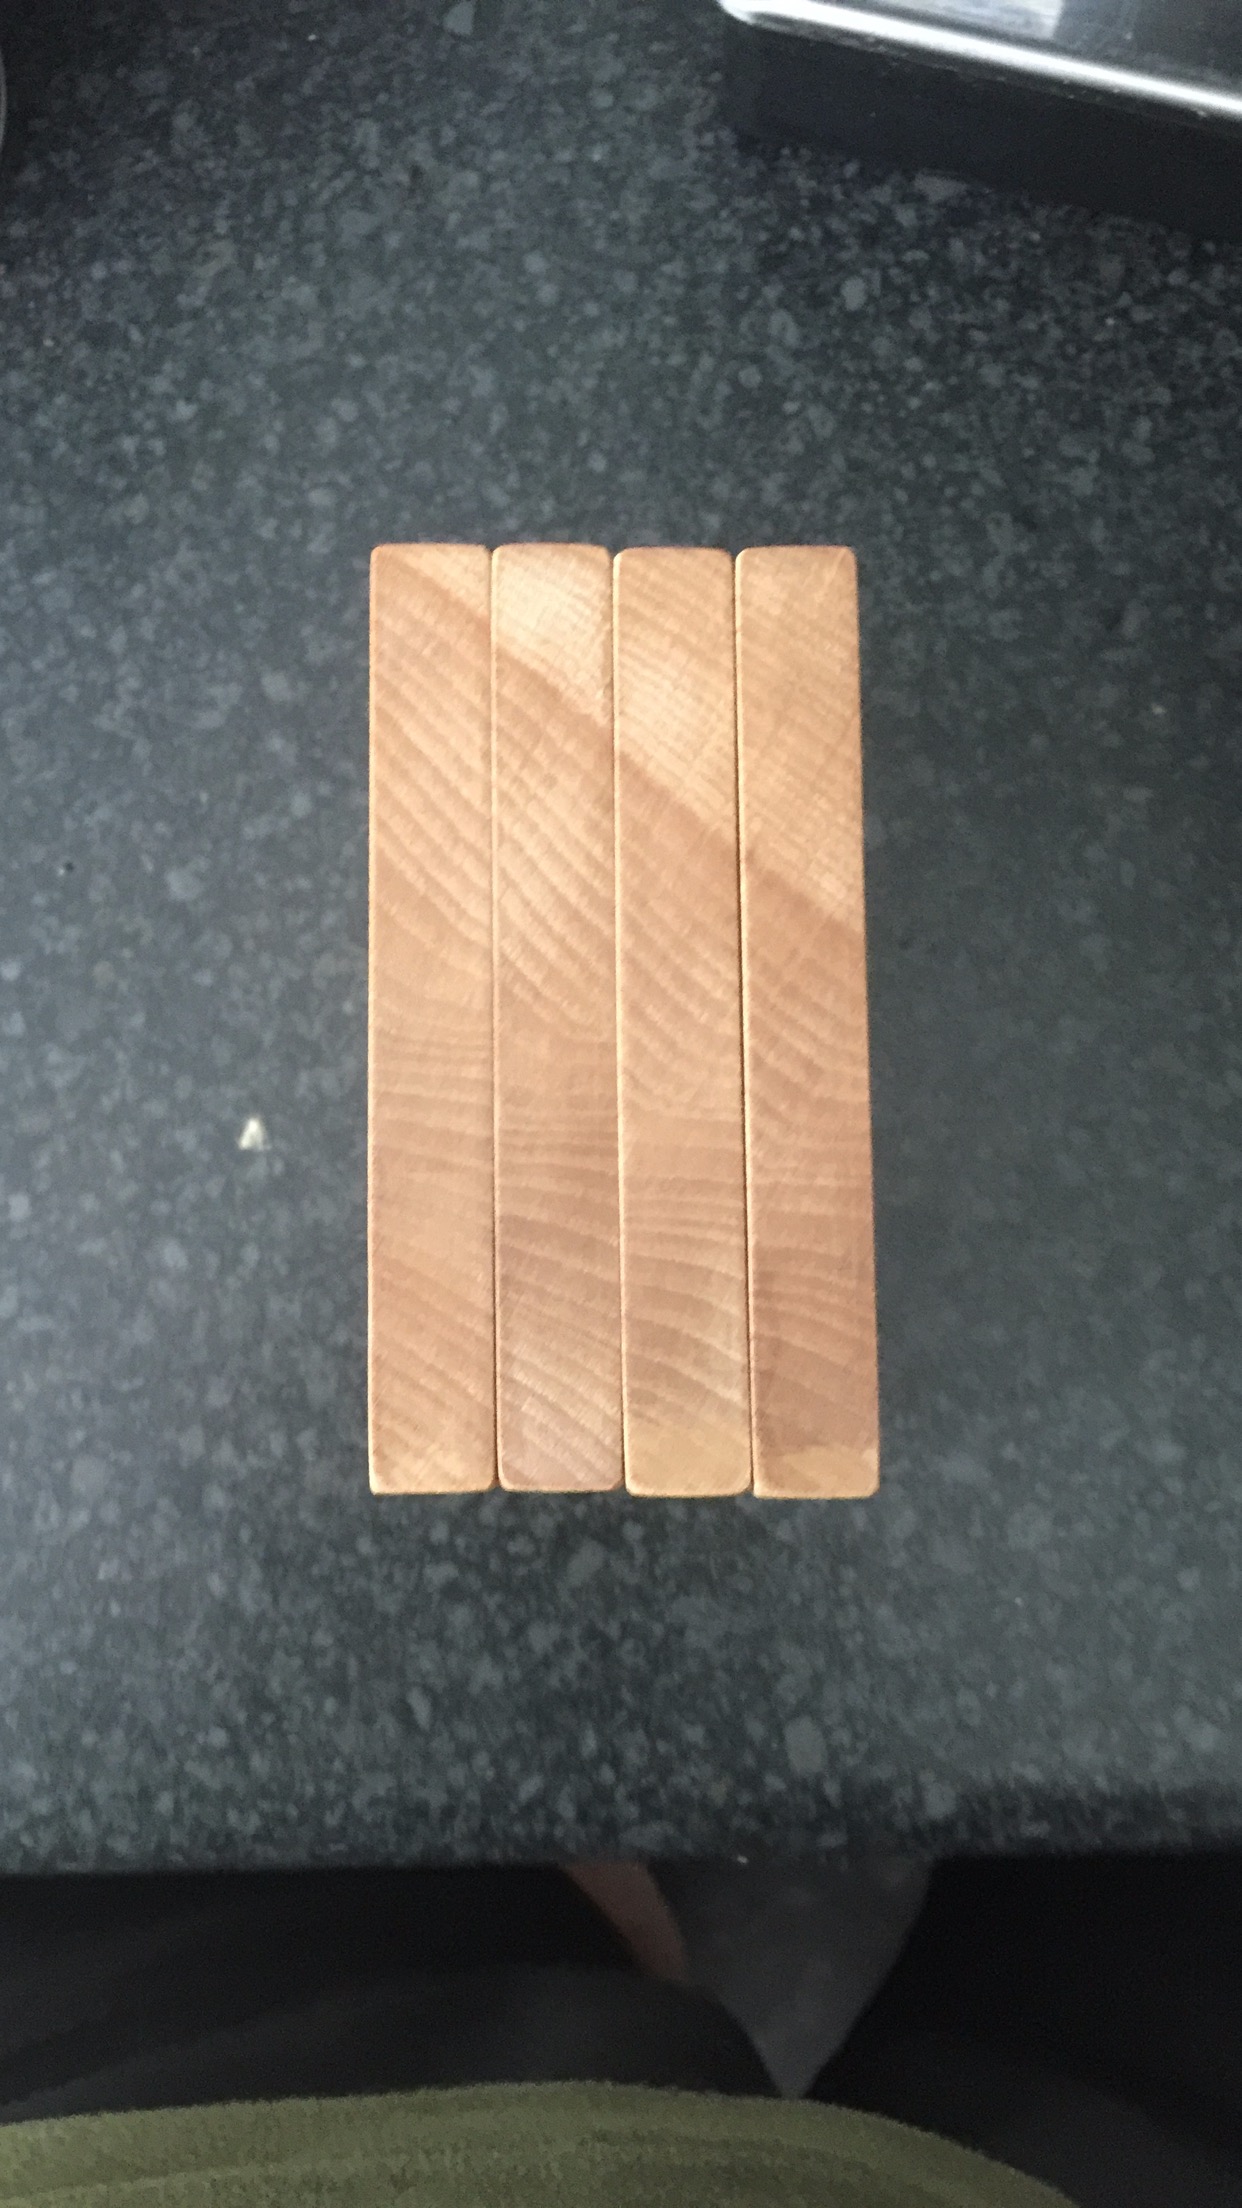
Posting something that I made for my Dad recently.
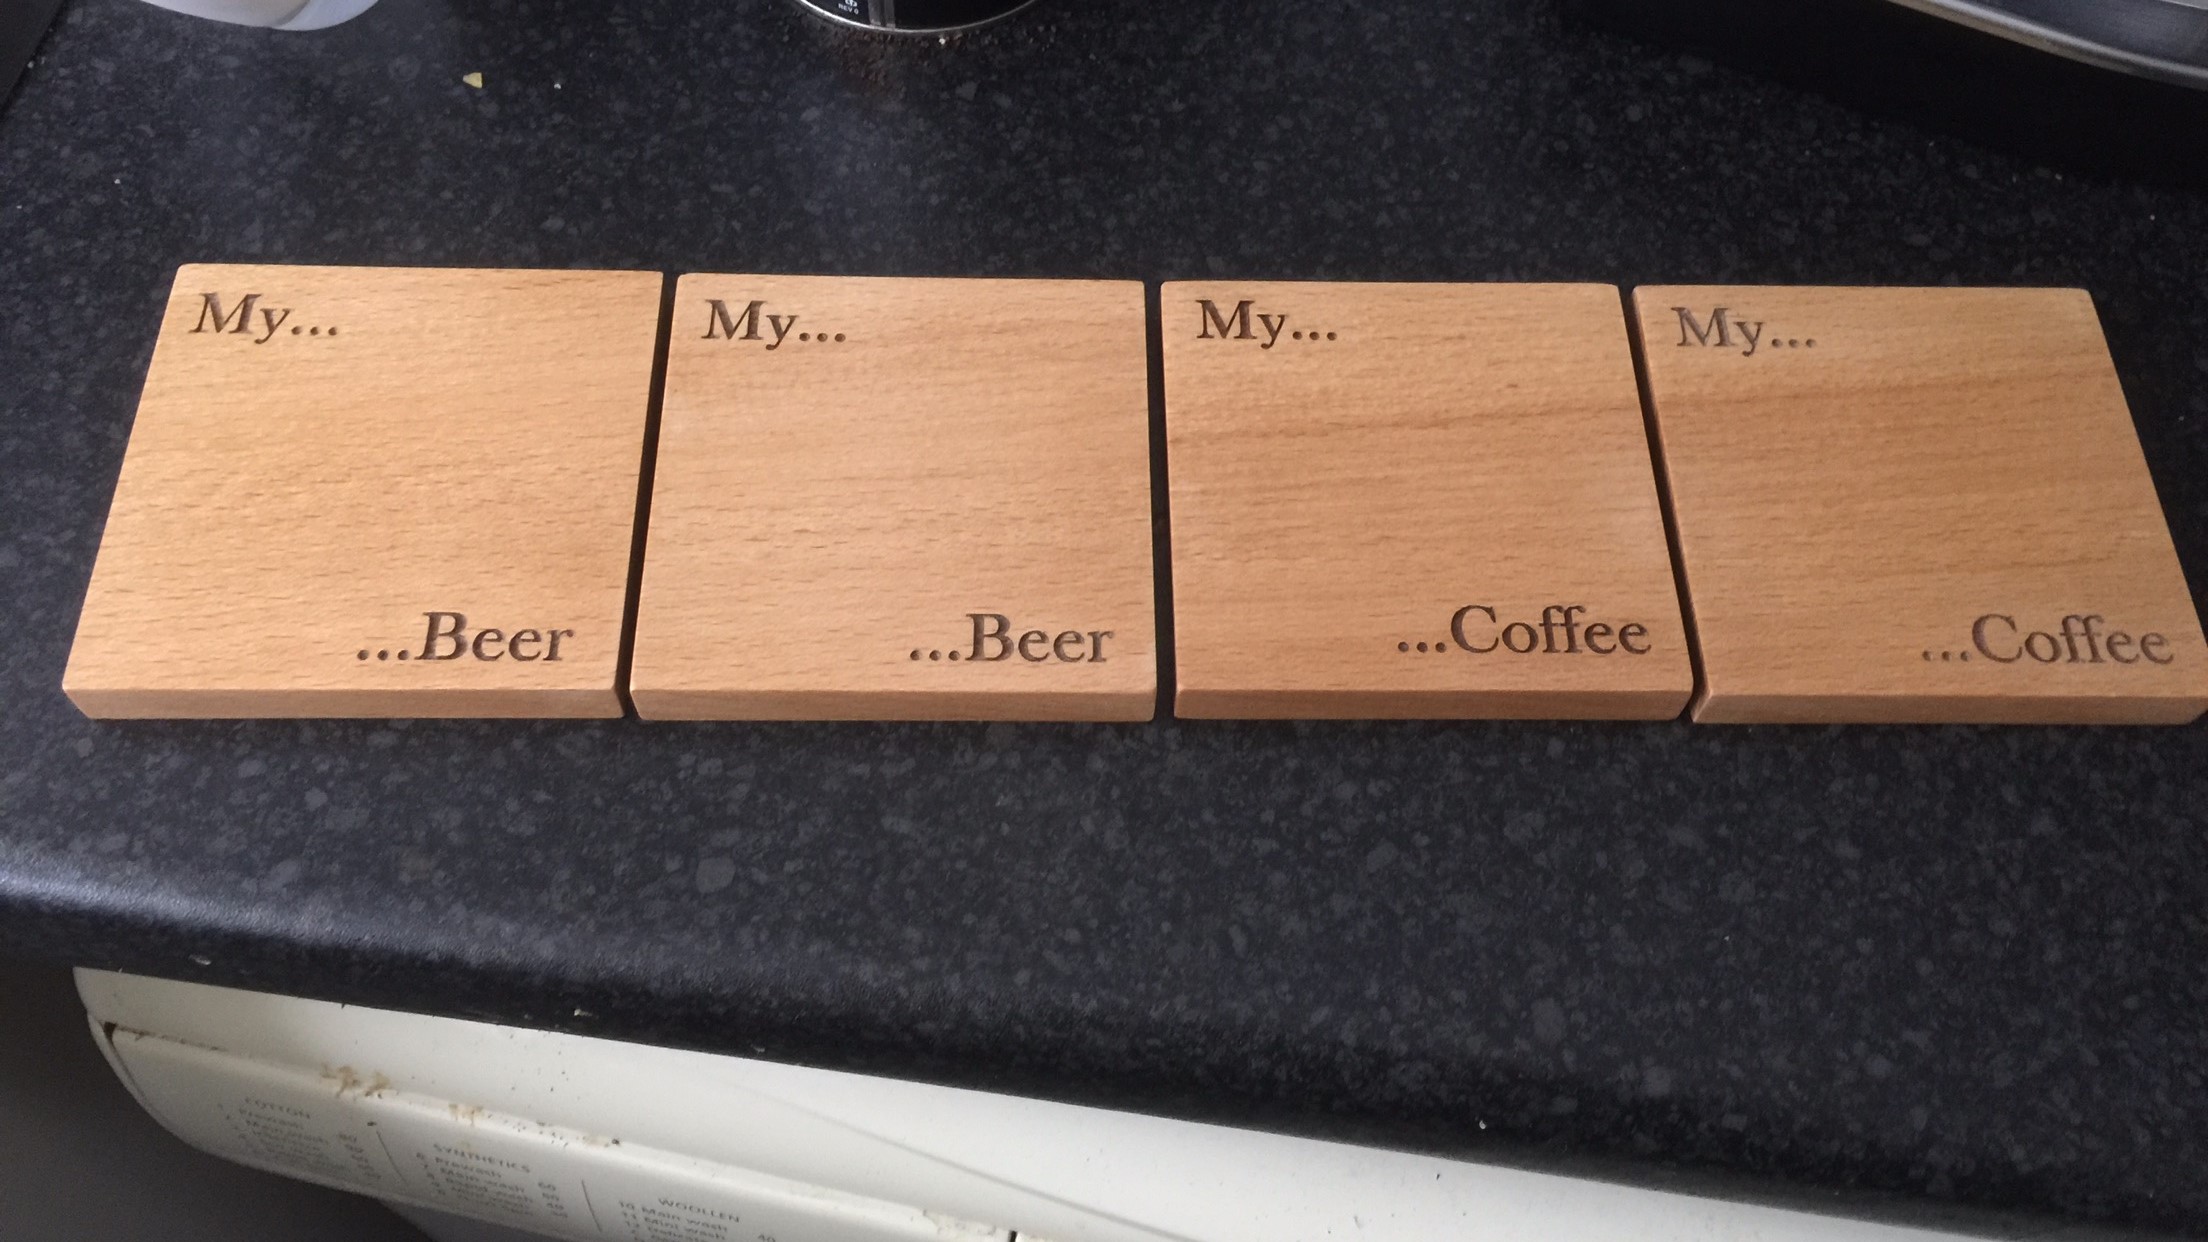
Laser cutter gave quite good results. I did all my crosscuts on the table saw and then found it was set to 88 degrees (homer) .
Anyway after some time on the shooting board with my LAJ it turned out ok.
Happy coincidence with the grain means that when the coasters are lined up correctly it makes the pattern below.
rafezetter
Troll Hunter


Woodchips2
Established Member
That's one nice cot Steve, well done =D> =D> =D>
Regards Keith
Regards Keith
thankyouWoodchips2":2615vkpp said:That's one nice cot Steve, well done =D> =D> =D>
Regards Keith
I have a small WIP but is a pain to resize pics
Steve
CHJ
Established Member
Now that's destined to be passed down for a few generations I'm sure.
For a quick and easy way to resize images you can use free. Picture resize 6 http://www.rw-designer.com/picture-resize
Basic exe file. change the number in the file name to change pixel count. E.G. PhotoResize400.exe / PhotoResize800.exe / PhotoResize1024.exe Just drag and drop your image to the exe file, it will generate a new image with the size selected incorporated in the name.
That's a beautiful job Steve.
rafezetter
Troll Hunter
That's an hierloom for sure How could it not be?
How could it not be?
SteveF":s1v5g83f said:Cot for Grandaughter
Steve
Thats top class =D>
Similar threads
- Replies
- 673
- Views
- 51K
- Replies
- 44
- Views
- 3K