Help please - truing the edges of a box

UKworkshop.co.uk

Help Support UKworkshop.co.uk:

This site may earn a commission from merchant affiliate links, including eBay, Amazon, and others.

Not-Entirely-Useless

Established Member
UKW Supporter
Joined
17 Aug 2021
Messages
51
Reaction score
12
Location
Milton Keynes, where roundabouts go to die
Hi all - I need some help from people with more experience and wisdom than me (that'll be most of yo, I expect).

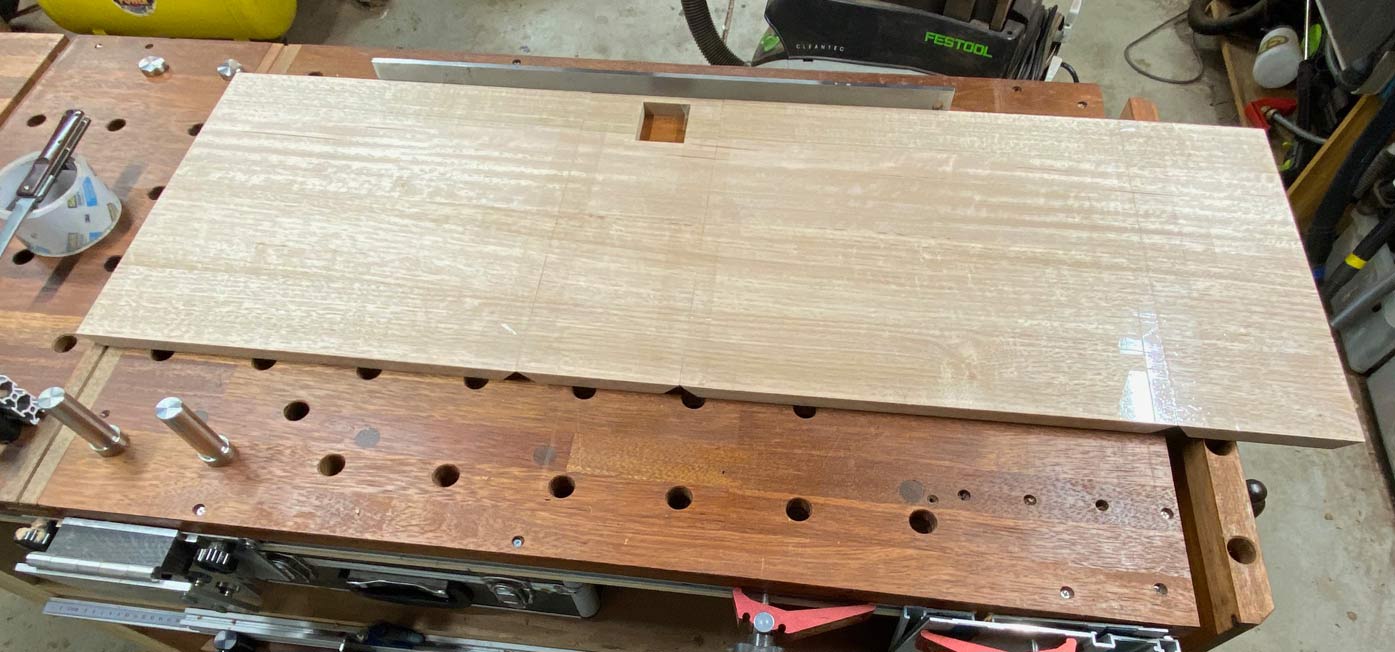
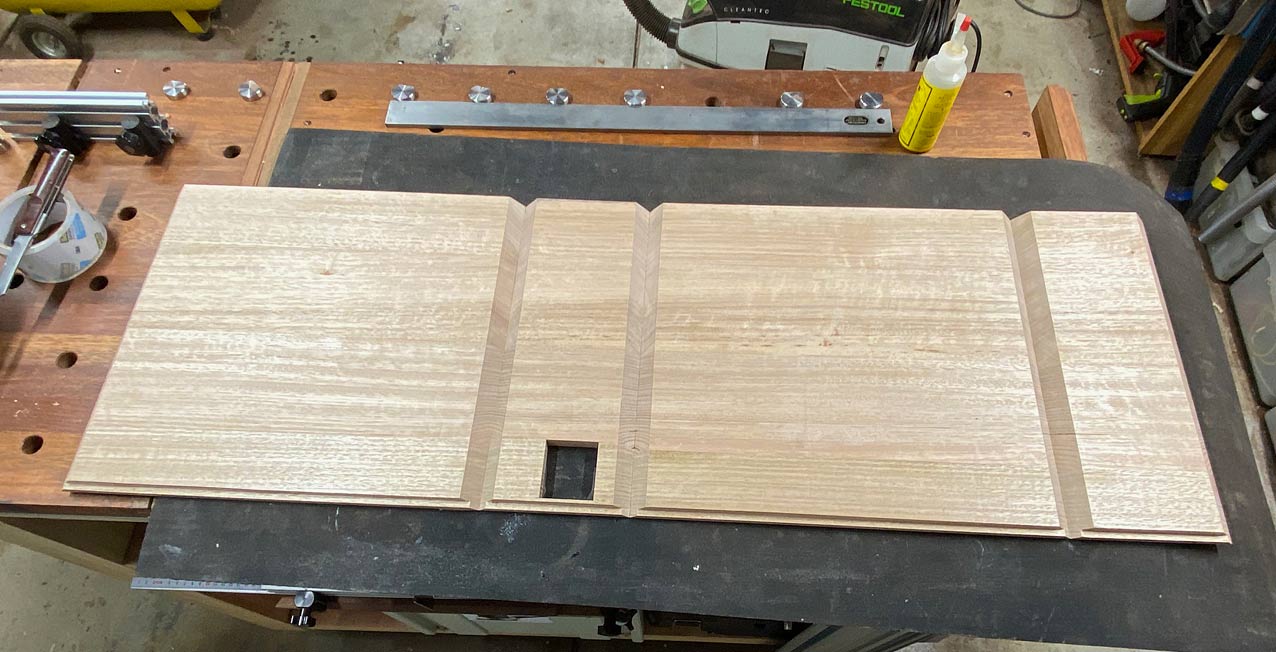
I'm making a wooden trinket/gift box, 200mm on a side, 25mm oak. It's my first serious attempt at precision woodworking and I've run into a problem (well - many problems actually, but every day's a schoolday around my workshop). I expect I approached this in a suboptimal way from the start, but I'd like to try and make to work, if that's feasible.

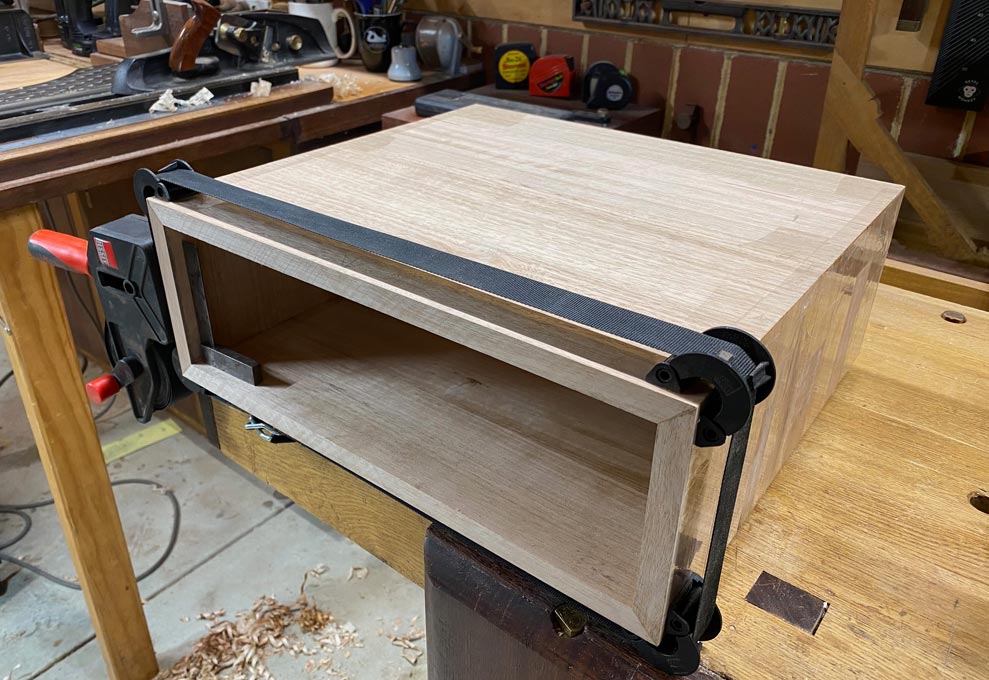
I cut and glued the sides (simple mitre joint, since it doesn't need massive strength) and it turns out that the cuts weren't quite precise enough. As a result in a couple of places, where the sides come together, the joint isn't perfectly flat. The differences is very small - 0.5mm or less; the edges themselves are flat and square. The reason that's a problem is that the design currently has the box sitting on a flat base and the imperfection means that there's are a couple of visible gaps where the sides meet the base.

I've thought of various approaches:1 Belt sander and sand the edges flat - but how to ensure I don't unflatten/unsquare the edges
1. Plane the joint flat - not sure that planing edge of 25mm oak is a good way to go
2. Router or table saw to shave a small amount all round - would require multiple passes and might be too rough and ready
3. Rout or chisel a square groove in the base into which the sides slot - requires a level or precision I might not have
4. Change the design and cut the base to fit inside the box. Also requires precision, but probably easier to achieve than idea 4
5. Break apart the sides and clean them up to make a perfect fit. Not sure of the best way to do that without causing more damage
6. Throw it away and start again

All suggestions welcome, and thanks in advance
 
Now it's all glued up do you think that planing, sanding back into shape will show up on joints it has been made up out of square?

If the answer is yes then that might bother you and friends you want to impress for a long time.

So I would say start making again, (keeping the box in line of sight will remind you where you went wrong first time)

You can put a lot of time into trying to turn a bad job good that time can be used starting again you know the old saying try,try and try again it pays off in the end.
 
mitres are very tricky, you have to aim for perfection, if one of the 4 lengths is even slightly off it won't work, the key is before gluing up making sure the long sides and short sides are exactly the same length, use your fingers to feel for it, they can feel up to 2000ths of an inch accuracy, if it were me I'd use a donkey's ear shooting board to get them to final size with a razor sharp blade, if there is a way of getting it apart without damage then try it but if not you're better off attempting it again, it's easier to make a box with dovetails than a mitred one.
 
As said above its a combination of of getting the miter angle right AND the length of the opposite side/ end the same. A shooting board can get the angles right but only stop blocks will get the lengths the same. I spent a long time messing about with shooting boards and getting the angles spot on but still having problems with the lengths. Sharp tablesaw blade and a sled to the rescue. No more problems. Dont do boxes as such but some box like things.
dulcimer build 006.JPG
Regards
John
 
Now it's all glued up do you think that planing, sanding back into shape will show up on joints it has been made up out of square?

If the answer is yes then that might bother you and friends you want to impress for a long time.

So I would say start making again, (keeping the box in line of sight will remind you where you went wrong first time)

You can put a lot of time into trying to turn a bad job good that time can be used starting again you know the old saying try,try and try again it pays off in the end.
If I can find a way to sand/plane under control I think it'll be square. It's the control of the process that's the issue for me.

Starting again is, I suppose, the sensible way. But this is the second try in itself (I screwed up differently the first time, but not ensuring the individual side pieces were properly flat in the first place).

And, yes it can be impossible to make a bad job into a good one (at least at my level of skill)

Thanks
 
mitres are very tricky, you have to aim for perfection, if one of the 4 lengths is even slightly off it won't work, the key is before gluing up making sure the long sides and short sides are exactly the same length, use your fingers to feel for it, they can feel up to 2000ths of an inch accuracy, if it were me I'd use a donkey's ear shooting board to get them to final size with a razor sharp blade, if there is a way of getting it apart without damage then try it but if not you're better off attempting it again, it's easier to make a box with dovetails than a mitred one.
I got the lengths right (clever me!). When I tighten the clamps on the glue up, there was s tiny bit of movement that raised one of the side pieces slightly so at the top edge it's that .5mm proud of the adding side at the top (and the converse - .5mm shy at the bottom). It's only visible of you look closely, but shows up when placed on a flat surface.

If I was sure I could get it apart without damage, I would - but maybe starting again is the Right Thing To Do.

Thanks
 
Don't be too hard on yourself - most of us have been there. You need two things - an absolutely perfect way of cutting your miters and cutting the lengths against a stop. Just feeling the lengths with your fingers inevitably leads to inaccuracies. I see loads of Youtubers simply taping miters together but if you are going to do this use an instant setting CA glue with the pieces on a flat table and reinforce them afterwards with splines. This eliminates the glue line you get with PVA glue. Miters are unforgiving - the slightest mistake leads to tears. You are probably better off band sawing the joints apart and starting again - sorry. :rolleyes:
 
.....
1. Plane the joint flat - not sure that planing edge of 25mm oak is a good way to go
Plane is best as long as you have a good solid bench with vice to hold the box.
Thinner sides would be easier! 10mm for a small box perhaps
If you glue up again sit the box on a board and have another board on top with a weight to keep the sides straight. Maybe masking tape or polythene to stop them sticking.
Not sure how you clamp mitred corners together - I've never done it for a small box but I've done loads with either a T&G or dovetails. If you get them right it makes the glue up much easier and you can stick top and bottom on at same time as you glue the sides, then slice off one end for the lid.
If you do a lot of boxes you can glue them and stack them with boards between and a weight on top.
 
As a result in a couple of places, where the sides come together, the joint isn't perfectly flat. The differences is very small - 0.5mm or less; the edges themselves are flat and square.


In a situation like this, use a burnisher (for a scraper) on the edges to “stretch” the wood over any offending gaps. Ultimate flatness/squareness is not important at this stage. It is not noticeable; gaps in the joins are.

With mitres, do not just clamp together when glueing up. First use packing tape when the sides are flat on the bench and aligned. Turn the lot over and glue up. The packing tape will prevent the joins opening up.

A12.jpg


Use a shooting board to flatten/smooth bevels if needed.

A15.jpg


Clamping the ends may be all that is needed.

A16.jpg


Regards from Perth

Derek
 
Taping the joint looks like a good idea!
Meeting faces still got to be spot on though, or possibly slightly under cut on the inside?
IMHO neat butted mitre like this is more difficult than DTs or T&G box joints, which are self correcting to some extent and self locating - easier clamping.
 
I've planed oak mitres. Just make sure the plane is very sharp and that you pay attention to the grain direction, and are v careful at the joint itself. I've never used a card scraper but that might be an option too.
 
Not quite sure where your problem lies. Is it the mitre itself or does your sentence
problem is that the design currently has the box sitting on a flat base and the imperfection means that there's are a couple of visible gaps where the sides meet the base.
mean that there's a gap where the 25mm thick sides meet the base ie. the flat end of the sides are not int the same plane?
Carefully planing may correct it that's the case. During glue up the best way is to clamp sideways to align the joint (in the direction that doesn't squeeze the glue) as well as clamping to squeeze the glue. Hope that makes sense.
Have fun
Martin
 
Hand plane every time, you can get a rectangular shaving if your plane’s sharp and turn the plane as you go around the corners.
 
Definitely just plane it flush. If you haven't already it's probably because you don't have a plane or aren't confident with it so I would say this is the perfect opportunity for you learn, enjoy!
 
Sharp tablesaw blade and a sled to the rescue. No more problems.
Long time since I posted the OP, and thanks for all the helpful suggestion.

This is the way I eventually (today) went. A simple sled, with a known straight edge. Strip of offcut taped to the sled to give me an accurate reference for the sides. Much looking and thinking between cuts.

Lessons learned for the next time.
 
Back
Top