Fixing tear out

UKworkshop.co.uk

Help Support UKworkshop.co.uk:

This site may earn a commission from merchant affiliate links, including eBay, Amazon, and others.
woodbloke66":37c1azn2 said:
...there, you'd have to struggle quite hard to spot it. The 'phone sits directly over it so I'm not bovvered :lol: - Rob
Ha, ha, Rob. I guess you mean that blurdy great big triangular thingie just to the bottom right of the monitor there, sticking out like a raw red smacked bum.

Actually, it's a pretty good grain match, and if it's covered by the phone, all to the good. But that's a dark wood, and patches on pale wood are much harder to hide. Slainte.
 
Haven't had the chance to work on it this week, but I don't want to remove additional material. It's getting thin already, and there is a risk after planing to have some more tear out. So I will first try to hide it.
I will try first with hard wax, and not good with epoxy and if that fails, I will try to patch it.
So disappointing to get that at the end of a project...

Sent from my VKY-L09 using Tapatalk
 
If you hand plane it with a sharp blade and well set chip breaker or a toothing plane and card scraper or a scraper plane then you will have no tearout, these are powerful techniques for the wood workworker with out access to wide belt sander.

I would hand plain it and add some strips around the edge to give the impresion of a thicker top.

I don't think any form of filling will be invisable and you will always see it every time you look at the top, which will disapoint you forever.

Pete
 
Noho12C":hl2wu6rz said:
...I don't want to remove additional material. It's getting thin already...
I'd be the same, I would just prefer to stay thicker if possible.

Not sure what colours you'll have available in the wax kit but top tip is to go with something that's at least a hair darker than the wood, melting together a mixture of wax parings in an old teaspoon if necessary.

Noho12C":hl2wu6rz said:
...and there is a risk after planing to have some more tear out.
As Pete mentions above bench plane with a well-set cap iron (well fettled, set very close) for final surfacing and tearout issues can almost become a thing of the past at the planing stage. And you can always fall back on scraping and/or sanding for any particularly challenging situations.


woodbloke66":hl2wu6rz said:
Unless you know it's there, you'd have to struggle quite hard to spot it.
I'll say! I presume I'm not the only one who was like, "What patch?"
 
Just to go back to clear fills briefly, the shallower they are the more they'll hide so anyone who has never tried it do keep it in your bag of tricks for when you don't want a coloured fill, to let in a patch, or to plane or sand down until you're at the bottom of a defect. With small defects I sometimes use just a dot of superglue, waiting for it to dry naturally to minimise chances of clouding; I've done this on woods of all colours from pine through to Rio rosewood and in most cases they just vanish into the background, occasionally are honestly invisible.

But the point of filling isn't always for the fill to be invisible. Plenty of surface defects in modern stuff filled with black or very dark brown epoxy as we all know; with the right other features in the wood the artificial fill can look quite naturalistic, if not truly natural. I've tried various mixes in recent years with various intentions and for example you can make epoxy/other resins look exactly (and I mean exactly) like softwood resin or very passable impression of a knot, avoiding the risk of leaving the real things while keeping the look.
 
ED65":38vtamlk said:
Noho12C":38vtamlk said:
...I don't want to remove additional material. It's getting thin already...
I'd be the same, I would just prefer to stay thicker if possible.

So there's tear out on two sides. Keep planing, maybe third time lucky. Just keep at it, eventually you'll (a) be very good at planing and (b) will be left with a perfect piece of veneer to use on some less special piece of wood :lol:

More seriously, if you did plan to have another go at planing, and have some spare material, I'd go with Pete's suggestion and add to the edges of the underside of the top to make it appear thicker than it is. With any repair, yes, you might only find it if you knew. But you do know, you will see it, and it will irritate you forever. At least, if you are at all like me. Or Pete !.
 
If you try filling Rippled Sycamore with epoxy the odds are that you'll be unhappy with the result. Likewise, patching figured timber is only viable if you have loads of experience and skill.

The professional solution is planing down using the correct technique so that tear out is no longer a problem. It's no surprise that Richard recommended that solution because he's a professional woodworker. Pete Maddox is a hugely experienced woodworker, so again it's no surprise that he's advocating a similar solution. Of course thicker is better, but that option was forfeited with over enthusiastic use of a wrongly set up thicknesser. We live and learn.

I'm a professional furniture maker and I specialise in highly figured timbers, I'm dealing with Rippled Sycamore and Fiddleback Maple all the time (two closely related species). Yes they can be awkward, but hand planing with a closely set cap iron guarantees good results. You don't even need a fancy plane. Here's an exquisite board of Fiddleback Maple with full width figure, unfortunately it was very prone to tear out, but a bog standard Record plane is fully capable of fixing the problem.

Tear-Out-Maple-01.jpg


Here's the same board after using a closely set cap iron, look carefully at the photos and you'll see just how close I set the cap iron on the second photo compared to the first,

Tear-Out-Maple-02.jpg


Good luck!
 

Attachments

  • Tear-Out-Maple-01.jpg
    Tear-Out-Maple-01.jpg
    63.1 KB · Views: 49
  • Tear-Out-Maple-02.jpg
    Tear-Out-Maple-02.jpg
    66.9 KB · Views: 49
custard":51qdcj2i said:
Here's the same board after using a closely set cap iron, look carefully at the photos and you'll see just how close I set the cap iron on the second photo compared to the first, Good luck!
Excellent illustration indicating the kind of results that can be achieved with decent kit, skill and patience. The second image shows there's only a little more planing required to eliminate all evidence of those pesky small 'divots' that ripple figure is so prone to.

I'm pretty sure we agree on our preferred solution, although others prefer alternative fixes: making the board or panel thinner to get rid of the tearout is our preference, but I also appreciate that not everyone has the ability and/or access to equipment to achieve that result. If that's the case, maybe the best that can be aimed for is a 'good' (depends on the worker's/viewer's definition of 'good') fill or patch job, and to live with the end result. Slainte.
 
It's good to see you posting again Custard, your expertise was missed by many.

Out of curiosity, do you have a specific set-up in your planer thicknesser for dealing with these seriously rippled and interlocked timbers so you have decent results right from the start? I had a great deal of trouble planing some very heavily rippled olive ash a few years ago with my planer knives as they were, so I put a back bevel on a set and swapped them out and the difference was night and day, I could only take very small passes before the machine bogged down but it was far better than having tear out everywhere.

Making the top thinner to remove the tear-out is the most practical solution, but I can understand why Noho doesn't want to go thinner. But as Richard said, maybe noticing a difference in 18mm down to 16mm is purely splitting hairs.
 
+1 on the good to see you back custard, even if you spell my name wrong :wink: :D

Pete
 
Trevanion":17jt8r1r said:
Out of curiosity, do you have a specific set-up in your planer thicknesser for dealing with these seriously rippled and interlocked timbers so you have decent results right from the start?

If I was equipping a workshop today I'd have a top quality spiral block in a thickneser, that's pretty much a silver bullet solution. However, I'm not in that fortunate position so I use the traditional thicknesser solutions that have served woodworkers well for many decades.

1. Slowest feed speeds and very fine cuts, ie 0.5mm or less. This can be problematic on some thicknessers with metal drive wheels that require 1mm or more to remove the indentations of the drive wheels. But I specced my thicknesser with rubber wheels to overcome this. I can't get the huge depth of cut in a single pass that toothed drive wheels deliver, but for furniture making as opposed to joinery that's not really an issue.

2. Sharp knives. In commercial workshops knives are generally changed at least since a week, so you can always schedule the work on a highly figured board to give yourself the best chance of success. However, I frequently see hobbyist workshops where the knives are way, way past their sell by date, which makes any attempt to plane a figured board just a fool's errand.

3. Keep a special set of knives with a small back bevel of around 5 degrees. I use disposable knives but I still have set with a back bevel. You need a slow feed speed and the depth of cut is severely restricted as a back bevel really makes your machine work hard, but it's a solution that genuinely does work.

After this it's a belt sander or some sort of power sanding solution.

But even then I frequently use large slabs for dining tables or desks that are too big for my machinery. So then I go old school and do the entire job by hand using a bench plane with a closely set cap iron. There's no avoiding the fact that it's a good work out, but for any reasonably fit person it's perfectly possible. I can bring an eight our ten seater table to extremest levels of flatness in well under a day using just a bench plane. And doing just one job like that teaches you more about the realities of hand planes than all the hot air expended on internet forums!
 
Thanks all guys for your inputs. I really appreciate the time you take to answer !

I wanted to avoid the hand tool method, as it is what I started with to flatten the board. However, got fed up to not manage get it flat both ways (width and length), so got pineappled, cut the board in half and put it in the PT. Looks like karma hit back and punished me ...

The patch/Dutchman method sounds like a very good method, but as noticed by Custard, you need some experience doing that. Never tried it, so that would be the least option for me, when I have tried everything else.

I was thinking at some epoxy with some blue dye, could look nice on the clear timber.

I gave a try at the hard wax method tonight. It definitely doesn't hide it, but reduces it's visibility a lot.

I want to finish this project, as the project manager (=wife to be) start to be impatient, so it will do for now.

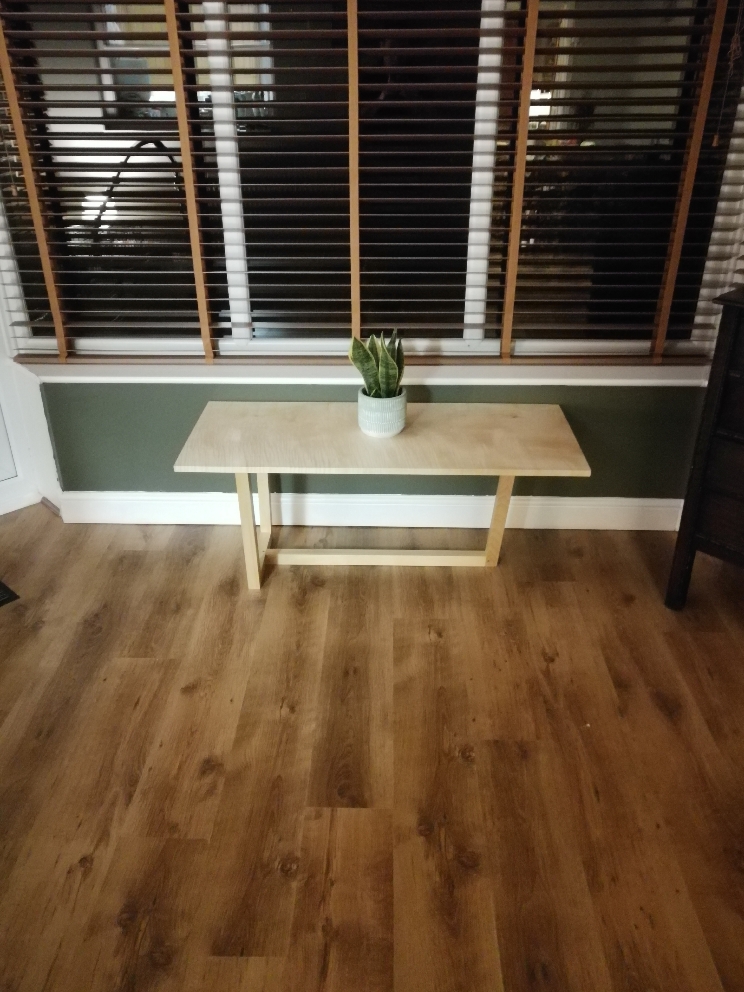
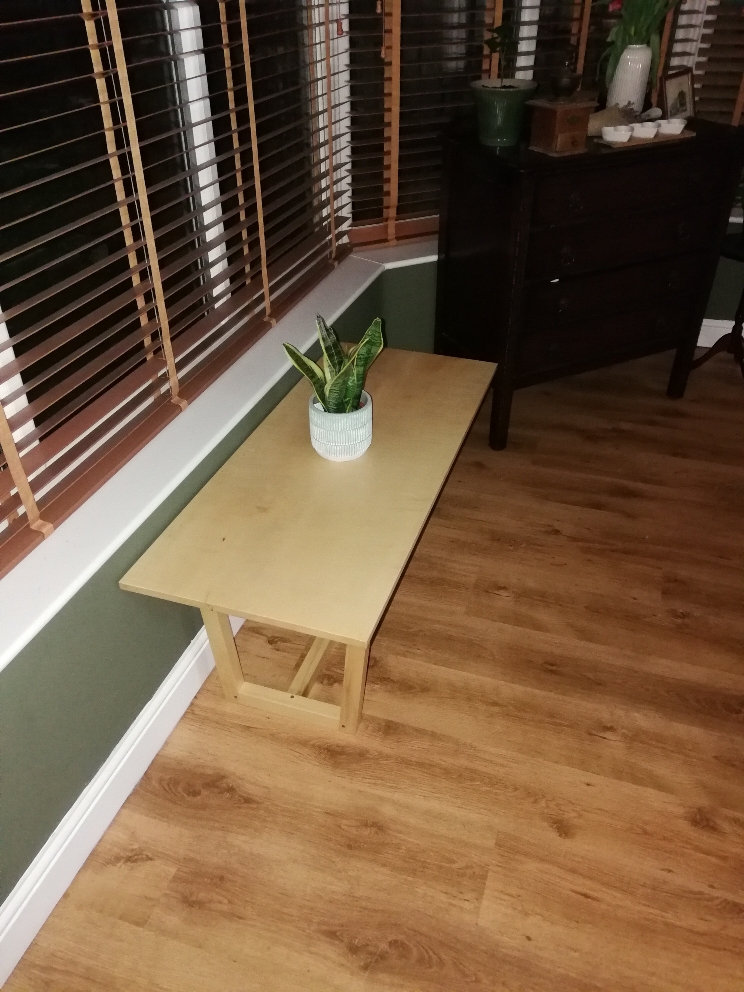
However, im not really happy with the overall design of the table (not very stable) so I will do another table later with a second slab of ripple sycamore, and use this not-stable one as a conservatory table

Then I will rework the top and plane it again by hand until the tear out disappear.

But it's really frustrating to spend so much time on a project and being held back at the end because some tear out !

I will post a pic of the finished table once finished, probably this week end.

Oh, and gonna order a new set of knives to my PT...

Thanks again a lot for your messages, really appreciate that !

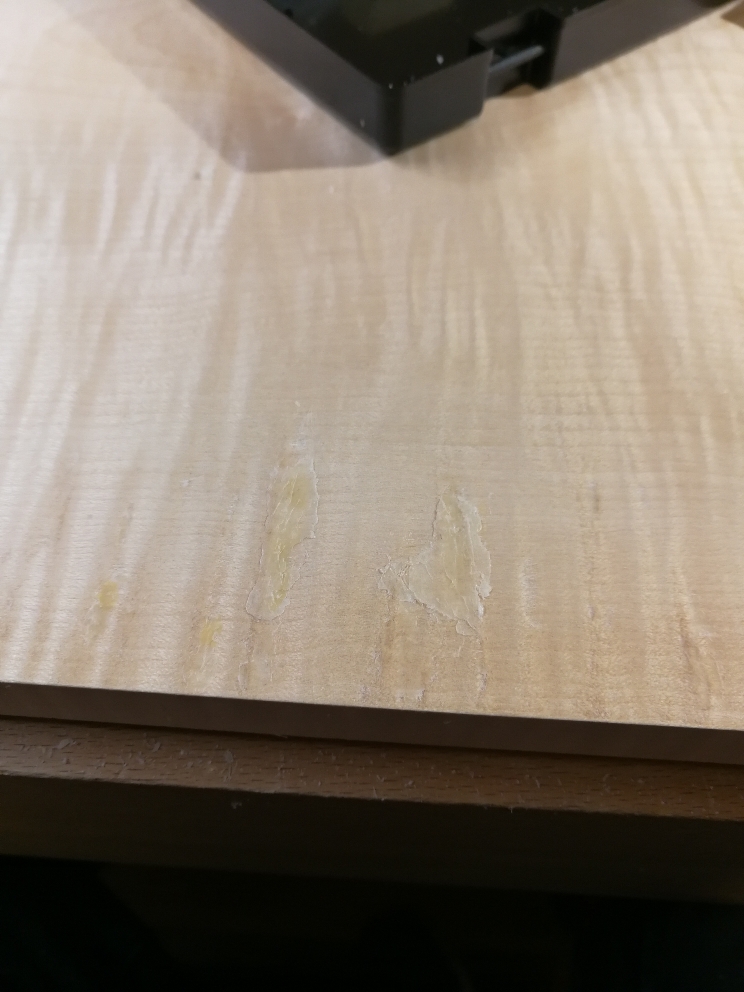
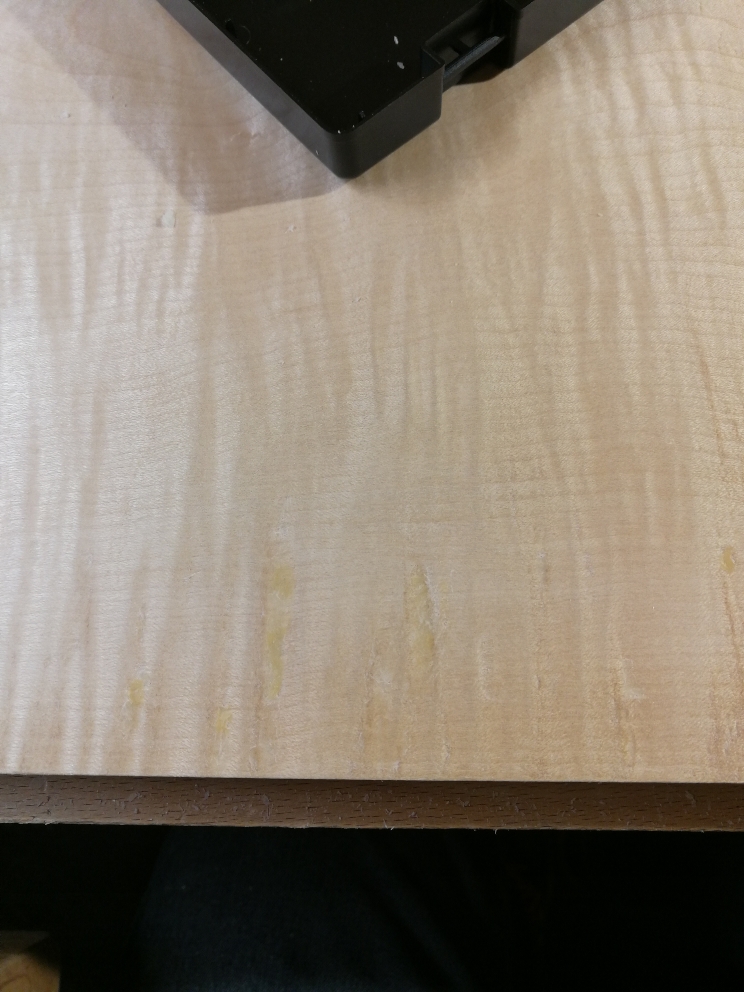
Here is a pic of the fix, before and after cleaning...

13b69c5cce29a60bc3450d31a99b6e08.jpg
cf4fdf11ab67b9d51a1a563d1841baa2.jpg


Sent from my VKY-L09 using Tapatalk
 
Look at it as a massive learning experance, you know much more not than you did before, and you won't forget it.

Use the orignal top to refine your hand plaining setup before moving onto the next piece.

You could use the first board to make a box, get it down to 12mm or so and it will be good stock for box making.
And it would look nice on the table.

Pete
 
So, finally finished the table. Not super happy with it as it's not really stable, but that was my first project with pegged tenons and angled mortices and tenons (hand cut).
It will go to the conservatory and will make another one with a frame on each side to improve the stability. And for the top I will chose something easier than figured wood :D

bd12e3c01bd08a96995dca1af980a4d5.jpg
d0048357862b843bcca26199742b1ac9.jpg
38434d1fe6902fc432bb91567f83df47.jpg


Sent from my VKY-L09 using Tapatalk
 

Latest posts

Back
Top