Burr Oak Topped table - WIP

UKworkshop.co.uk

Help Support UKworkshop.co.uk:

This site may earn a commission from merchant affiliate links, including eBay, Amazon, and others.
marcros":27tyk0p1 said:
Dodge, could you give any more detail of the process of the top. Do you cut one piece, then mark the second using it, or are both parts cut together?

Let me have my tea and when I sit down later will add a bit more detail Marcros.


As for all the other comments - thanks folks :D

Some of you know the last year or so has been a difficult time for me and my family but hopefully over the worst of it now - I have photo records of all the projects I have done over the last few months and will get round to posting them up as time allows.
 
Can we have a bracket clock WIP when you next make one Rog?
 
Right, assembling the burr oak is a lengthy and quite laborious job but after cutting the scales from the burr on the bandsaw, they were all thicknessed together one by one to give continuity in the thickness across them all.

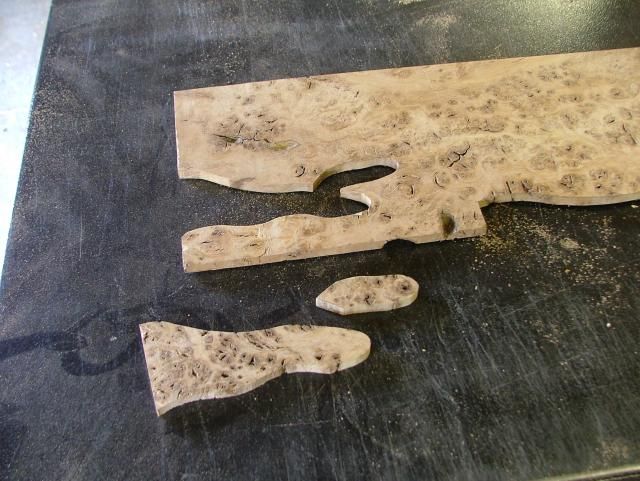
Starting with a single piece the burr was randomly cut on the fretsaw following the pattern of the burr but also skirting around the edges of the major cracks and fissures which needed replacing. once the first piece was cut it was then laid over another piece of burr that would marry up and fill the missing part of the jigsaw and the two pieces held together with double sided tape.

The two pieces were then cut together on the fretsaw to effectively form the accurate jigsawing of the pieces knowing that they would marry to together when the tape was removed. The photo below shows a couple of cut pieces ready to be glued into the corresponding aperture.


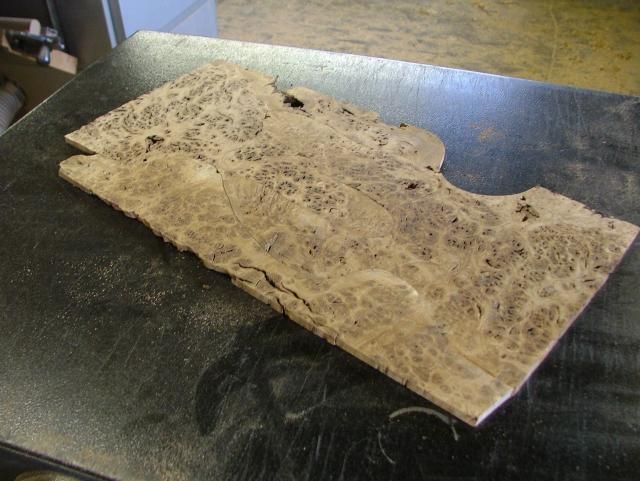
the next picture shows a piece of the burr panel made up in this cut and join manner, you can see the joint lines as at this stage they havn't yet been glued


As the panel enlarges, the pieces are held together with masking tape so that they can still be removed to align another piece to it


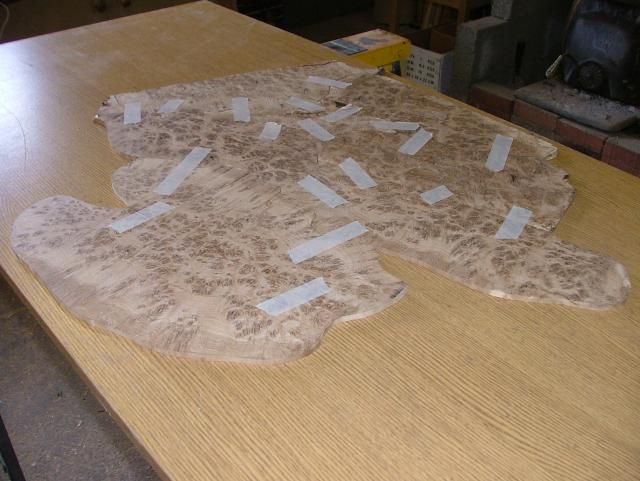
Once I was happy with an area, I would then apply some titebond original to the joints and glue them together, the glue was very sparingly applied to prevent it sticking to the board upon which I was assembling it, this was an old melamine faced desk top that I had and had previously waxed to prevent the panel sticking

Slowly this process was done over a period of a few days until the complete panel was made - Unfortunately I do not have any close up pics of cutting on the fretsaw but the pic below shows the clients who commissioned the table doing their bit!


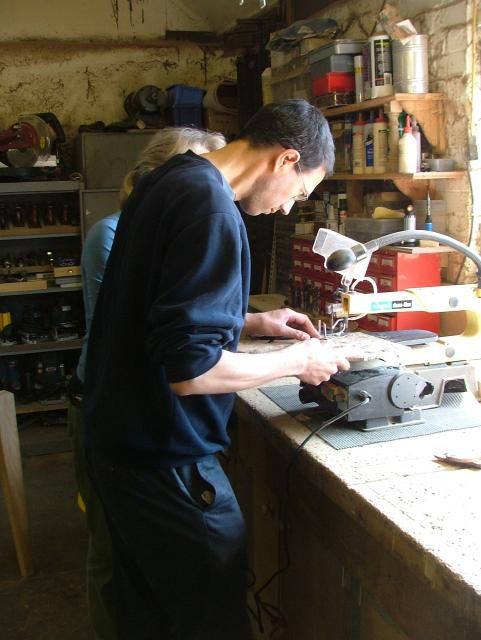
I always like to encourage my clients to have active involvement with the design, construction and on this occasion the clients came and spent a whole day with me in the workshop, helping to align the burr, deciding upon the positioning and even getting hands on with the cutting, gluing and filling.

Hope this clarifies it for you a bit more Marcros
 
marcros":tpymugpr said:
Can we have a bracket clock WIP when you next make one Rog?

Will this Walnut one do?? It was made as a 70th Birthday present for a clients father


Thank you.

I like that walnut clock- more so even than the burr oak one that you made last year.
 
Roger

Amazing as usual.

I like the not too deep table top rails. I hate sitting at a table with the rails pinching my thighs.

The burr top is stunning. So just need to make 6 chairs and then your done. :D

Mick
 
MickCheese":6i4d92ho said:
Roger


So just need to make 6 chairs and then your done. :D

Mick

In discussions with the clients - watch this space!! :wink:
 
Tremendous piece of work Roger. Made better by reading of the method of production. Thank you for taking the time to do it.
xy
 
Had it for quite a while, was bought for scrap value as thats where it was destined to go - at least it doesnt vibrate when you have a tree trunk on it!! :mrgreen:
 
Quality work great to see, Can I ask how old was the burr , And was it dried by kiln or air dried, And yes please more WIP, And projects your posts are a wealth of information and help to many.
Jim
=D> =D> =D>
 
As for age of the burr, I honestly do not know but they are slow forming on the tree - they were supplied to me as air dried but had obviously been in storage for a number of years
 
Fantastic work as usual Roger. :D
I'd never of thought of planing a burr down thinking it would just crumble??
Keep the WIPs coming :D
 
Stunning - I hope all your clients (and potential new ones) know / appreciate how many years your work will last.

Fabulous. Ever thought about putting a few pieces into your local high end retailer (John Lewis / similar) on a sale or return basis?
 
Flynnwood":1djxb71d said:
Fabulous. Ever thought about putting a few pieces into your local high end retailer (John Lewis / similar) on a sale or return basis?

No, I only ever deal with the client direct - all my work is commission based
 

Latest posts

Back
Top