


Dodge
Established Member
Well as some of you may remember I used to post quite regularly on here and have had a bit of a break but still been as busy as ever so after receiving a few PMs asking me to get off my backside (Baldhead) and post some WIPS here we go.
The brief for this commission was a simple contemporary framed table with tapered legs and a highly figured top surface - after lengthy discussion with the clients the following table is what was made - It was designed to go in their studio apartment flat so they specifically didn't want anything too big but sufficient to seat 6.
Anyway I started with the frame and four legs were cut from solid clean 4" oak and planed down to 80mm square in section

Once straight and square the legs were tapered on the table saw using a home made tapering jig leaving the bottom of the leg 40mm square having only tapered the inner faces of each leg
Each leg was then hand planed to get the tapers crisp and clean - nothing like a bit of hand planing to relax the mind!!
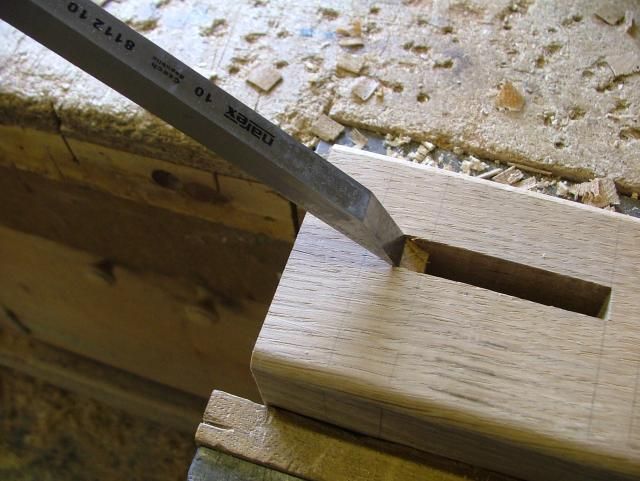
With the legs cleaned up the mortice holes for the tenons were cut on the hollow chisel morticer, taking the mortice holes deep enough to meet each other
With all the mortice holes cut it was time to turn attention to the tenons on the rails that had already been prepared - these were cut on the radial arm saw
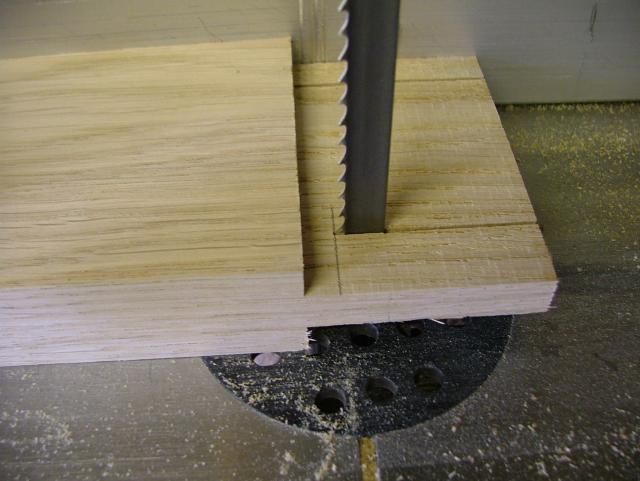
With the cheeks of the tenon removed, each one was cut down in width on the bandsaw ready for forming the sloping haunch
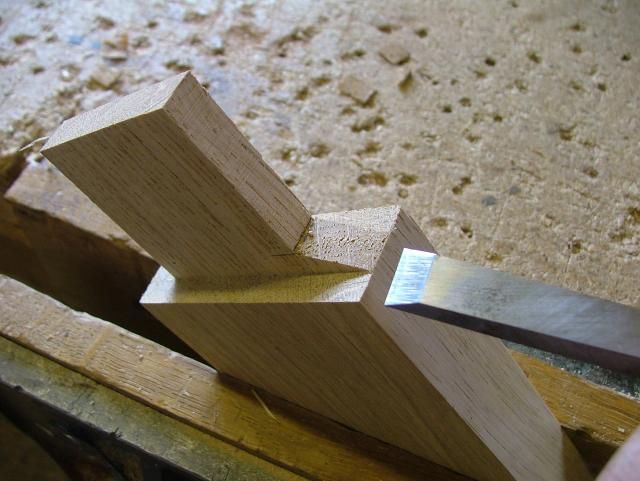
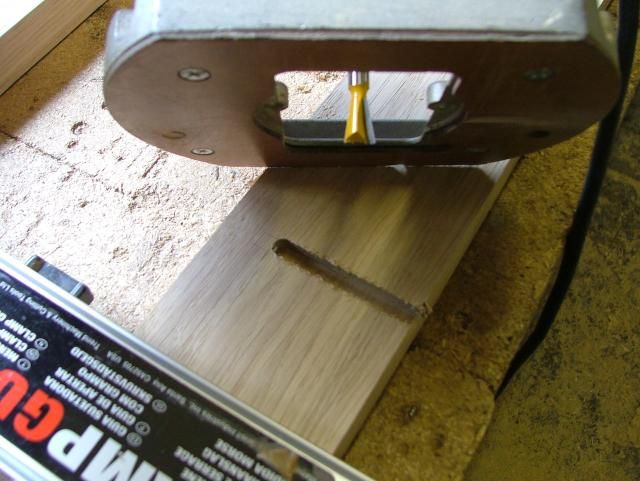
The sloping haunches were then cut with a sharp chisel
And the corresponding cut made into the mortice holes
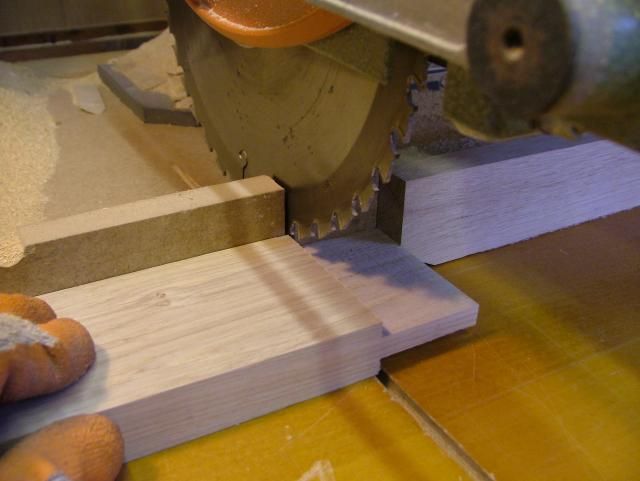
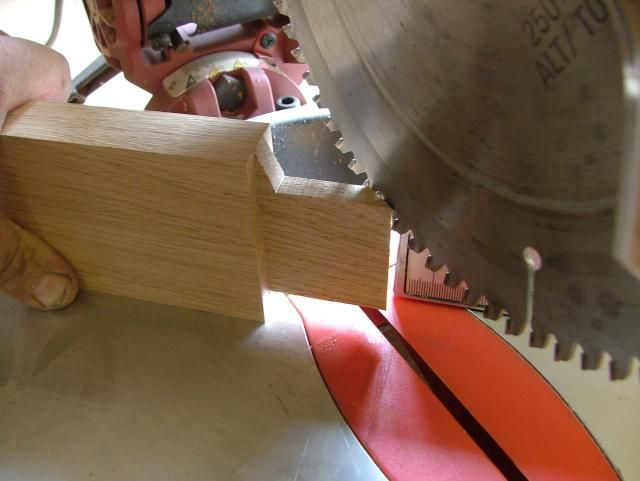
The ends of the tenons were then mitred on the chop saw to allow them to meet inside the table leg

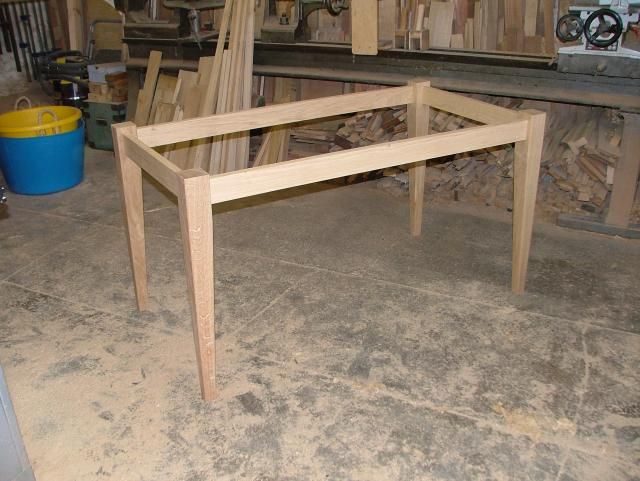
The simple frame could then be assembled dry to check for fit
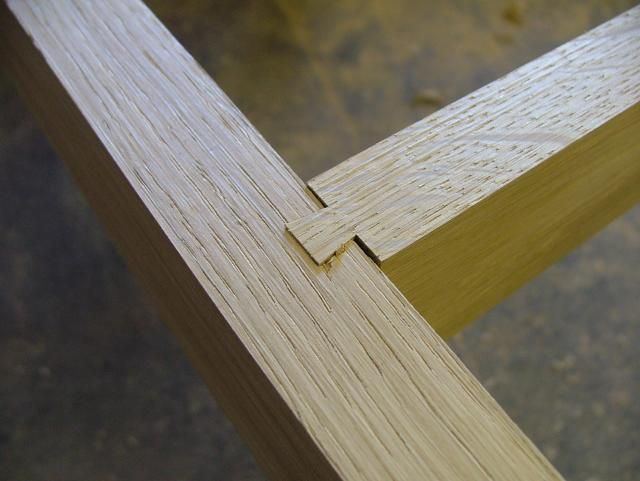
Before gluing up I decided to add a couple of cross rails to add rigidity to the top frame and these were cut in using sliding dovetails
With the construction of the frame complete i could turn attention to the top!
The brief for this commission was a simple contemporary framed table with tapered legs and a highly figured top surface - after lengthy discussion with the clients the following table is what was made - It was designed to go in their studio apartment flat so they specifically didn't want anything too big but sufficient to seat 6.
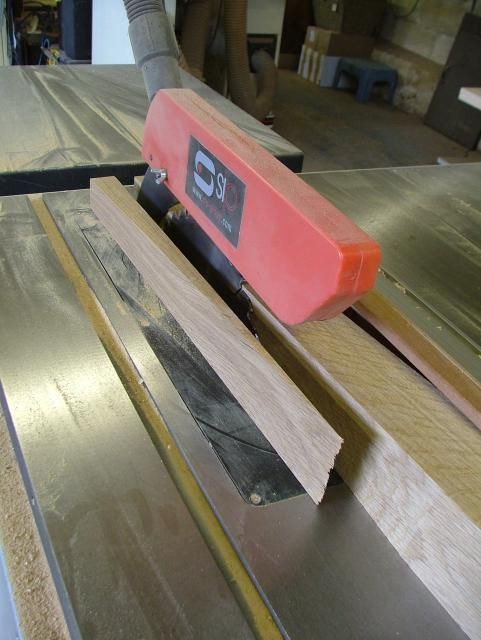
Anyway I started with the frame and four legs were cut from solid clean 4" oak and planed down to 80mm square in section

Once straight and square the legs were tapered on the table saw using a home made tapering jig leaving the bottom of the leg 40mm square having only tapered the inner faces of each leg

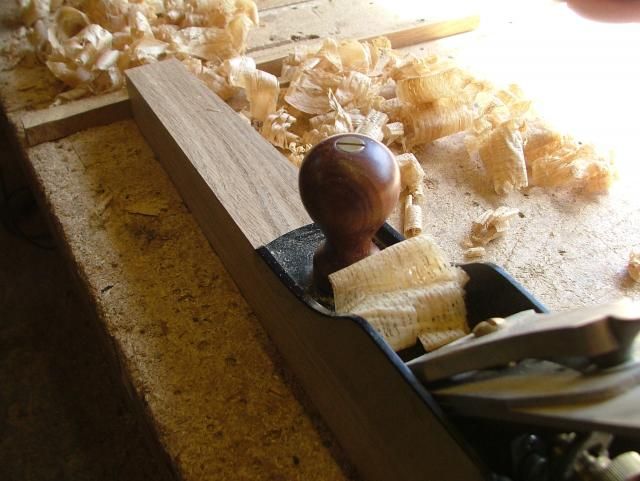
Each leg was then hand planed to get the tapers crisp and clean - nothing like a bit of hand planing to relax the mind!!

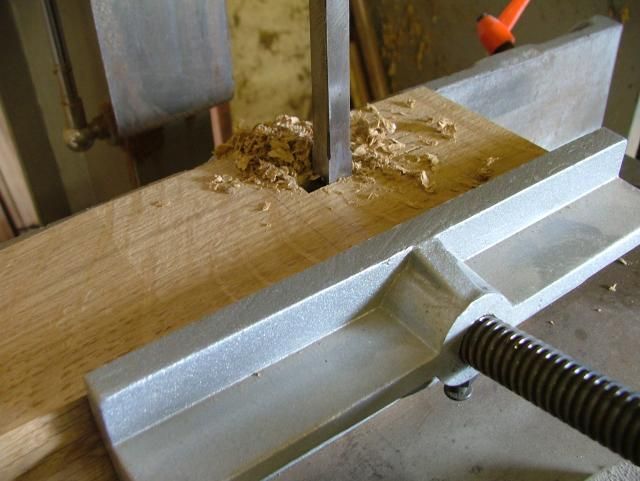
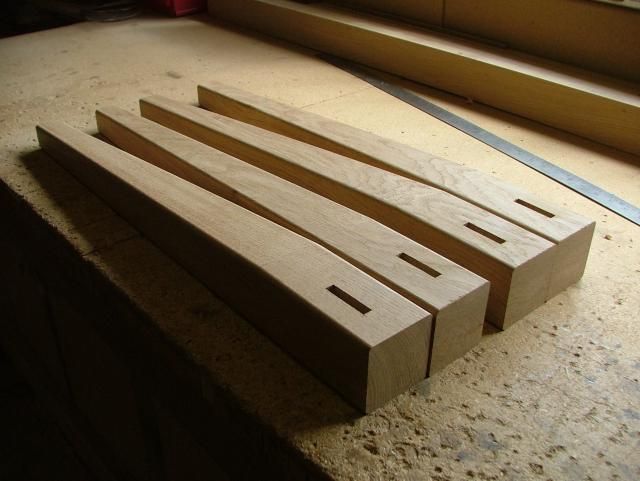
With the legs cleaned up the mortice holes for the tenons were cut on the hollow chisel morticer, taking the mortice holes deep enough to meet each other


With all the mortice holes cut it was time to turn attention to the tenons on the rails that had already been prepared - these were cut on the radial arm saw

With the cheeks of the tenon removed, each one was cut down in width on the bandsaw ready for forming the sloping haunch

The sloping haunches were then cut with a sharp chisel

And the corresponding cut made into the mortice holes

The ends of the tenons were then mitred on the chop saw to allow them to meet inside the table leg


The simple frame could then be assembled dry to check for fit

Before gluing up I decided to add a couple of cross rails to add rigidity to the top frame and these were cut in using sliding dovetails


With the construction of the frame complete i could turn attention to the top!


")