Building the Lingerie Chest

UKworkshop.co.uk

Help Support UKworkshop.co.uk:

This site may earn a commission from merchant affiliate links, including eBay, Amazon, and others.
Thanks Custard.

I've been a hobbiest all my life, which translates to self-taught. Began concentrating on handtools about 20 years ago. I acquired a thicknesser and jointer ( Hammer A3-31) for roughing out a few years ago - when you become an old fart, you either give up or you get smart. :)

Regards from Perth

Derek
 
Then I take my hat off to you Derek.

That's a considerable achievement by anyone's standards, and not just for the quality of the craftwork. It takes real dedication and commitment to see a project like that through to the end.
 
All the drawers are finally done ...

Well, almost ...

The drawer bottoms have still to be made for 4 of the drawers. After making each one separately, it occurred to me that this was the one item that I could build en masse.

Chest1_zpsymupcycr.jpg


Chest2_zpstd2pa1ip.jpg


After the drawer bottoms are in, the task will be to make the drawer fronts coplanar. They are close to one another in curve, but there are a few variations here-and-there. What I plan to do is shim the drawers by about 1/2" to raise them out an equal amount so that they all lie proud of the carcase, place the chest on its back so that the drawers face upward, and then sand the faces with a long sander made out of a 2x4.

What do you think of this method? Any other ideas?

Regards from Perth

Derek
 
Hi Derek

Like many others I have been following this thread with great admiration for your skill and the effort you have put into the build, including the clear explanations you have put out here and on your blog.

Regarding sanding have you thought of a large pad such as this http://www.amazon.co.uk/Sealey-SB68-Ext ... B000RU4OCI instead of using a 2x4. I have used something similar for sanding boat bottoms and they are easy to hold and very easy to change paper.

Good luck. Regards, tom
 
Wow, wow, and thrice wow!

I've no clue about your sanding plan - but I'm just thinking -

1 - if those drawer fronts look that good without any finish on, they are going to be amazing soon - what sort of finish will you be using?

2 - I was going to ask about the really hard design job of deciding what sort of pulls to put on the drawers, but checked on your website and found that you have already decided on special push stops so no handles are needed - all that lovely grain pattern stays visible. I agree!
 
Sailormantom":25wex5eq said:
..
Regarding sanding have you thought of a large pad such as this http://www.amazon.co.uk/Sealey-SB68-Ext ... B000RU4OCI instead of using a 2x4. I have used something similar for sanding boat bottoms and they are easy to hold and very easy to change paper.

Good luck. Regards, tom

Thanks Tom

If I use a sander, it must be long - like a jointer - the one you link to is very short. My plane is that it will be used with very fine sandpaper. This is just to mark high spots, and then I will plane these away. (Think of colour sanding a car body panel).

Regards from Perth

Derek
 
AndyT":nkvu79o5 said:
Wow, wow, and thrice wow!

I've no clue about your sanding plan - but I'm just thinking -

1 - if those drawer fronts look that good without any finish on, they are going to be amazing soon - what sort of finish will you be using?

2 - I was going to ask about the really hard design job of deciding what sort of pulls to put on the drawers, but checked on your website and found that you have already decided on special push stops so no handles are needed - all that lovely grain pattern stays visible. I agree!

Thanks Andy

I will use Ardvos Universal Wood Oil, an Aussie product. I've had terrific results with this in the past.

The drawers will have pulls - I decided that the push stops were not reliable enough. At the moment I am thinking of a double row of "cut down" Shaker pulls, something like this ...

Pull1_zpsssrxzvqg.jpg


My wife wants them in Jarrah, to blend in with the drawers. I am tempted to ebonise them. Your thoughts?

Regards from Perth

Derek
 
Derek, I wouldn't presume to offer any suggestions! But I do sympathise - the handles make such a huge difference to the look of a chest of drawers.

I expect you will make some prototypes, temporarily fix them in place (blu-tak?) and look at them from across the room where the chest will go, and decide in your own time, helped by your lucky client.
 
This weekend I returned to the Lingerie Chest to flush the drawers fronts and seal all with white, dewaxed shellac - I scraped off all the oil finish as I found this made the fronts too bright. The shellac evened out the colour as well.

The drawers are now complete (coplanar) save for the drawer handles and waxing .. which will be done this coming weekend. And then it will be time to start the top section.

In the end I did not use sandpaper to level the drawer fronts, but simply marked off the high spots and planed/scraped them.

It is difficult to see the bow fronts in this photo.

13a_zps9wrsrwv4.jpg


Regards from Perth

Derek
 
is there a difference between white shellac and blonde, Derek? i have never heard of white before.
 
marcros":17jid0r3 said:
is there a difference between white shellac and blonde, Derek? i have never heard of white before.

This is a product made by Ubeaut in Oz. It is ready mixed but I dilute it in equal parts of meths. The advantage is that it does not colour the wood. Plus, what I found, the oil I used was causing blotching.

Here is a link ...

http://www.ubeaut.com.au/dewaxed.html

Regards from Perth

Derek
 
thanks. the description of the colour seems similar to the one on the blonde flakes that I have- hardly colouring the wood beyond the wetted colour.

cracking job on the chest- looks fantastic
 
The figure on these drawer fronts was both a source of pleasure and frustration. I love the wildness of it. On the other hand, it was important to achieve a flow from board-to-board, and I only had just enough to make these drawer fronts. If I screwed up one, I would have had to start all over again.

The Jarrah fronts were also difficult to work. Very hard wood, with grain that went all over the show - reversing ... even end grain showing through. Planing these boards really demonstrated the value of the double iron as they were less affected by grain direction. It was necessary to scrape at the end since I needed to level small areas, and fortunately the scrapers worked very well.

Traversing with a LV Skew Block plane to level the faces ..

1a_zpsccygiorh.jpg


Followed by a HNT Gordon palm smoother (60 degree bed) ...

2a_zpsedwouipa.jpg


This is the type of tearout from this plane (which is a fantastic very small smoother) ..

8a_zpslko5wlnc.jpg


Removed by scraping ...

9a_zpsndsacalz.jpg


Then sanded (!) to remove marks (theis is a Mirka Abranet hand sander, using dust extraction - I hate sanding, but this excels) ...

4a_zpsfsvg4huu.jpg


And finally scraped for a fine, burnished finish (you can distinguish the scraped from sanded sections) ..

7a_zpsfdgeluhs.jpg


Lastly, two coats of White Shellac (by Ubeaut) to finish. This is a concentrate of dewaxed shellac that is thinned with methylated spirits (alcohol).

Regards from Perth

Derek
 
Derek - do you have the results from a double iron plane in pictures, too?

Wood like that is very hard to get a finish planed surface on unless you're willing to accept that it will be technically without tearout, but be level across raking light.

If I am going to sand something like that, I will usually scrape first because it's faster than waiting for the sander to work out the white spots shown in your pictures (which ultimately leads to not sanding).

I can see that it's no party with the white stuff, and time isn't a key consideration, as you say - not doing it twice is.
 
Hi David

I did a lot of planing throughout with a double iron ...

18a-planing-the-ouside_zpsijbiuyov.jpg


I do not recall taking comparison photos before - probably did, but they were not relevant to the build at that time.

I should clarify that the aim was to level the 8 drawer fronts. Some needed a little removed in spots, and others (such as displayed) required flattening across the width. All had previously been planed with a double iron, with no tearout.

The small Palm Smoother came out now to concentrate on smaller sections. For the most part it did a good job, but it was obvious when it hit reversing grain - as one expects not just from Jarrah, but also as the boards are bowed with the grain, effectively altering the grain direction. That was when the coarse scraper came out. This was smoothed off with a card scraper, then sanded, and then scraped again. (I chose not to explain this before since it sounded more complex that I imagined anyone would want to hear).

The sanding was quick: I ran through 120/220/400 grit. The Mirka grits are amazing. With the vacuum cleaner connected, it is extremely efficient. There is no waste dust to clog up the sander to slow things down, and the Mirka grit, itself, lasts and lasts.

Mirka3a_zpsdfw5u57d.jpg


Mirka2a_zps5nrxjdhe.jpg


4a_zpsfsvg4huu.jpg


5a_zpsgu6jhau8.jpg


Regards from Perth

Derek
 
While it always warms my heart to see the double iron prove itself, I'm surprised that if I follow correctly, the double iron did the job without issue.

I have had some things, quartered cocobolo comes to mind, where nothing will plane it and the softness of the early wood is so bad that it crumbles so deep that you can't just casually remove the tearout with a card scraper.

High angle plane use is starting to escape my mind, though - too long ago, though I do remember fighting the thinner/sharper/thinner/sharper battle and a slip into a deep shaving by accident creates a mess to clean up (whereas the double iron just prevents you from being able to take the dangerously deep shaving).

I do envy you that you get salvage wood that pretty. No such thing exists here - most salvage wood is barn beams, and they are usually oak.

(agree on the mirka stuff - I don't have that sander, but there is a gigantic internet dealer of mirka products a couple of miles from my parents. I've never been dissatisfied with anything made by them, and I'm not a particularly brand loyal person most of the time).
 
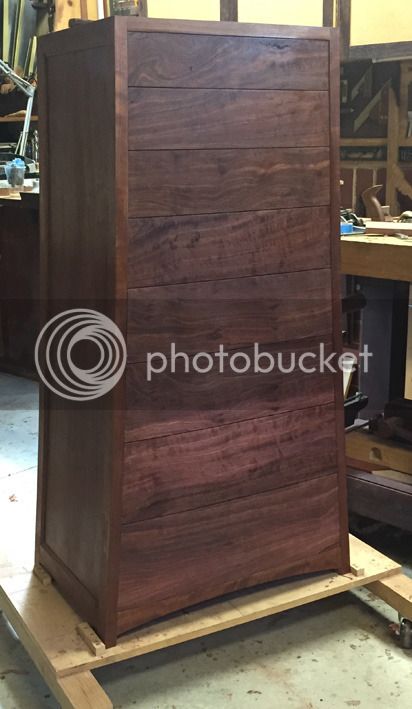
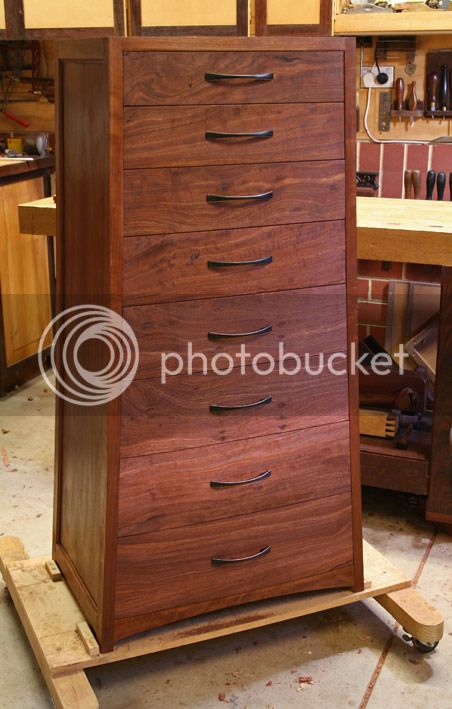
We left off last time with the drawers completed - coplaner with one another, and then finished in white shellac (Ubeaut).

It was was nice to work at a relaxed pace this weekend, since the goal was to install the drawer handles, wax the drawers (Renaissance), and complete the rear of the carcase. All nice and easy.

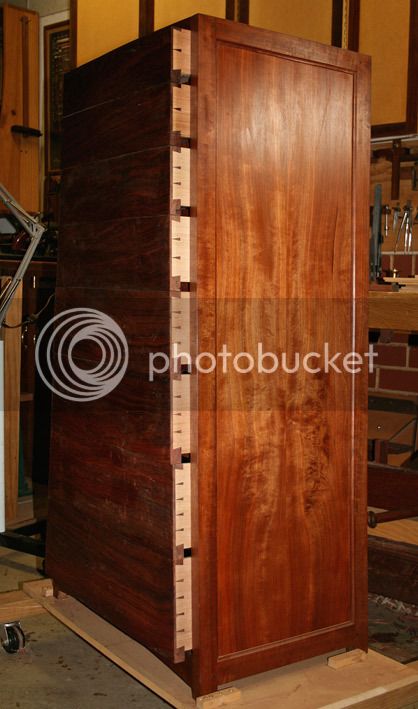
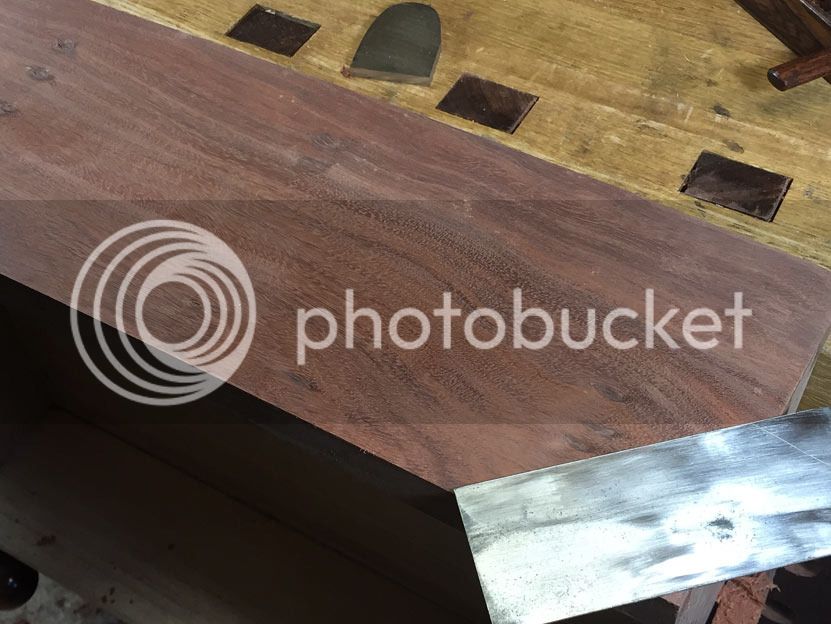
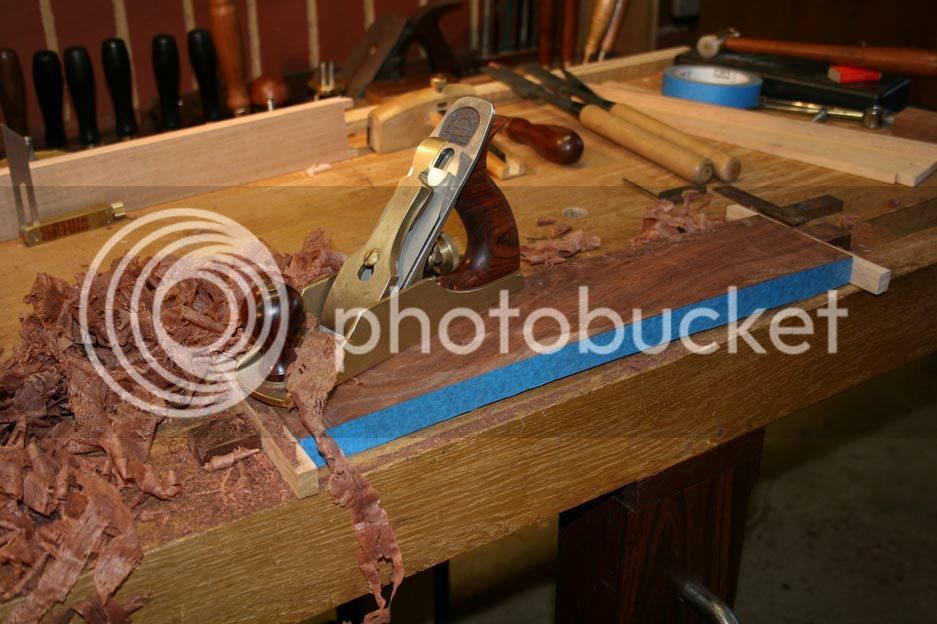
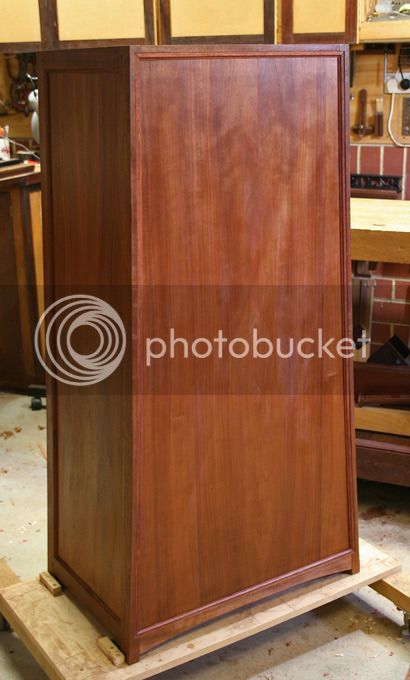
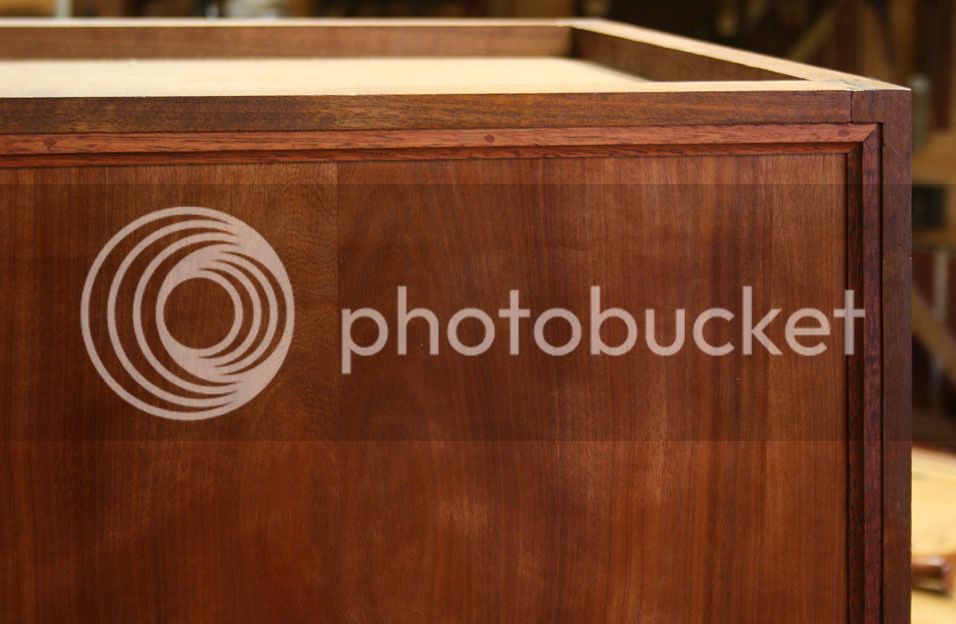
The panel for the rear is 1/4" thick Makore, as are the carcase frame-and-panel sides. I made the panel at the start of the build. It had begun as one of the side panels, but it lacked any figure, and consequently I set it aside for the rear of the carcase. This was finished inside with wax and outside with Livos Universal Wood Oil (an Aussie product), which was used on the all the other parts of the carcase.

The panel is secured with nails into the frame. The panel can move laterally via widened (drilled) nail holes. There is a coved attached moulding that tidies up the fitting. The cove matches the cove that is part of the frame-and-panel sides (which were shaped into the frames).

1a_zpstxdxgfo9.jpg


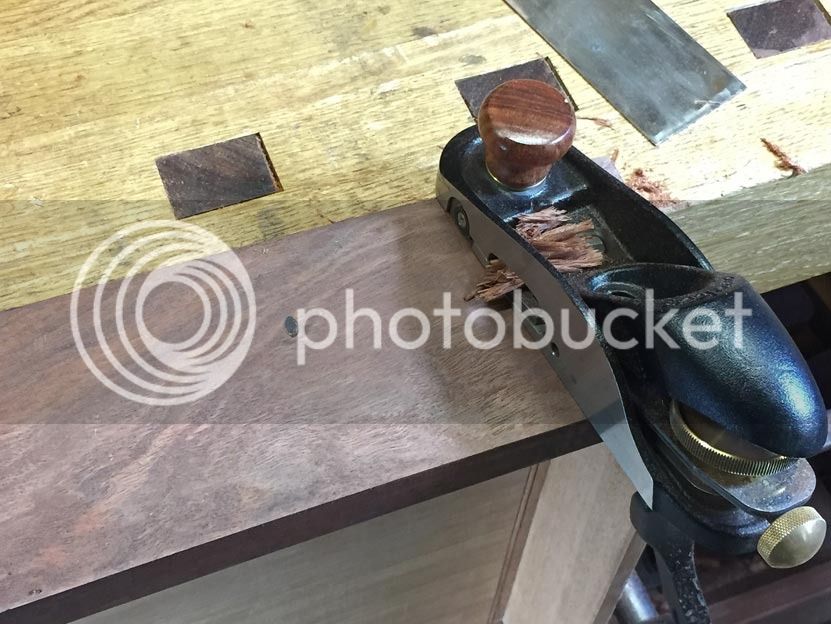
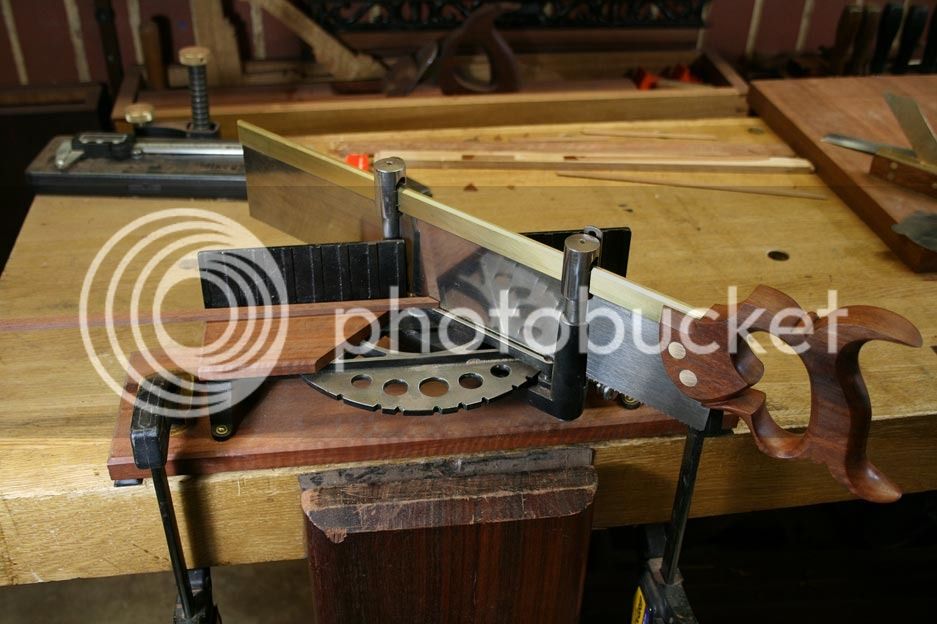
I got to use my restored mitrebox :)

2a_zpsfrkphlng.jpg


3-1a_zpsfijptznz.jpg


4a_zpsjqaiysov.jpg


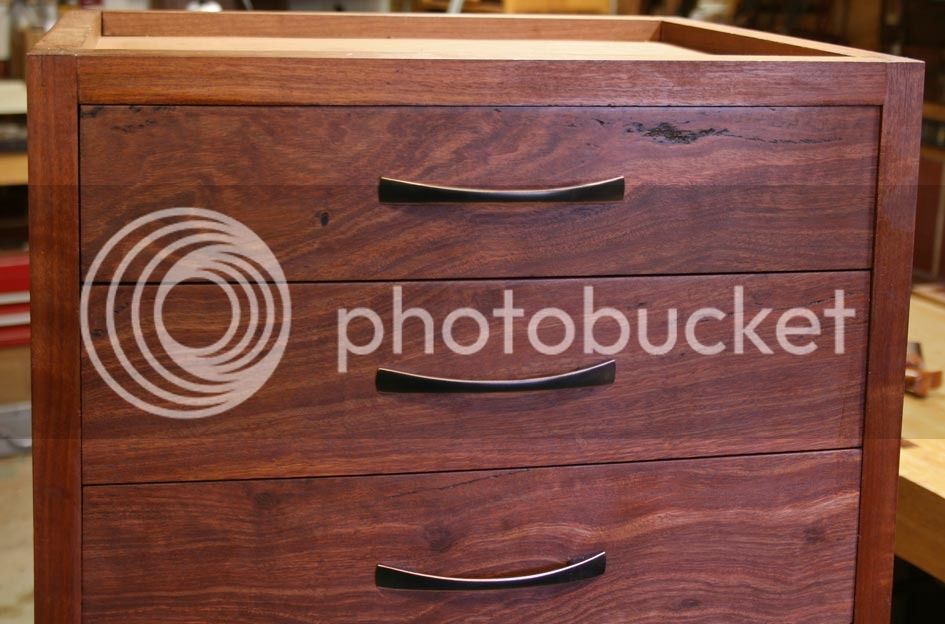
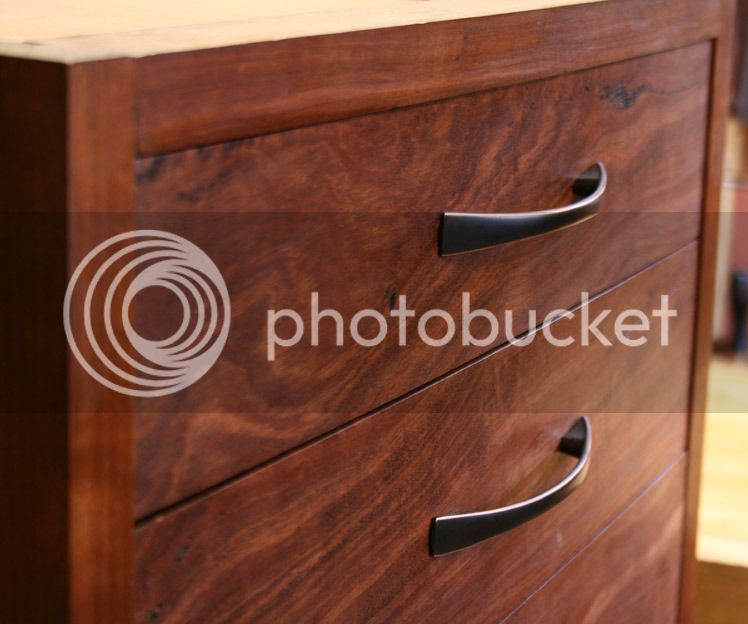
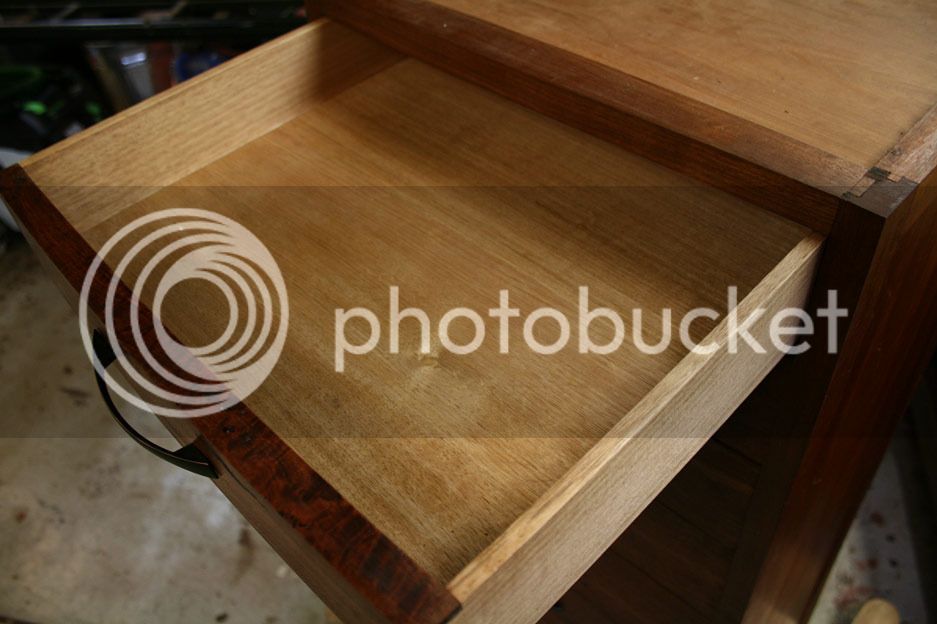
Before the rear could be done, the handles needed to be attached to the drawers. The handles had been a major headache for a long time. I knew what I wanted but could not find ready-made versions. I hunted everywhere like an obsessed dervish!. I was about to build them in Jarrah (my wife's choice to go with the Jarrah drawer fronts) when I found them about 6 weeks ago on eBay! According to the advert they are "antique bronze".

After building a template, and carefully marking, triple checking measurements, I drilled the holes and screwed them on ...

6a_zpshp0li3ib.jpg


7a_zpsn7vxmuz4.jpg


8a_zps1iyvecx1.jpg


What do you think?

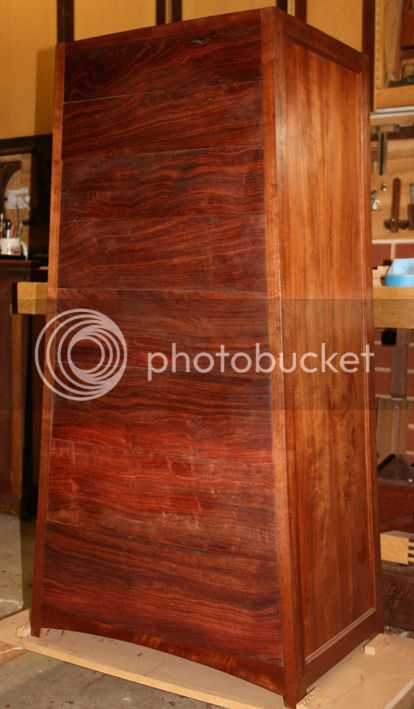
Here is a side. The bow is very subtle, softening the profile ...

9a_zpslia39wca.jpg


What's there to do? Well, I am starting on the top section. The chest needs a crown moulding. This will hide a lid. Raising the lid will reveal a mirror on the underside, plus a recess to place jewellery or cosmetics. The recess will be leather lined.

Then there are jewellery trays to fit (also leather lined). This will go in the top drawer ..

10-1a_zpsdac1fi7o.jpg


All the drawers have good extension, held horizontal by the last 1 1/2" -2".

Until the top is done ...

Regards from Perth

Derek
 

Latest posts

Back
Top