Building the Lingerie Chest

UKworkshop.co.uk

Help Support UKworkshop.co.uk:

This site may earn a commission from merchant affiliate links, including eBay, Amazon, and others.
Top of the world to you!

Well, my wife is partly Irish, and we are getting close to completing her Lingerie Chest.

My last post completed the drawers, and now attention is turned to the top of the chest ...

AA1_zpsmhnfoped.jpg


This was a saga. I built and rejected three tops before settling on the one below. There were a variety of mouldings, and none fitted in, even the subtle ones. In the end it was a case of less is more. Book matched Makore (as with the carcase) ...

AA2_zpse4kqp0sh.jpg


As seen here, the panel is reinforced by breadboard ends. The breadboards line up with the side frames.

So here is the completed carcase. I apologise for the inaccurate colour - it should be a little more red. New camera and still trying to sort out the lighting. Trying to learn to take better photographs!

AA3_zpsobcs8bdm.jpg


Here's the obligatory dovetail picture, which most have seen already. The bowed drawers (figured Jarrah) are difficult to judge in this photo, but the curves will show up in the top shortly ..

AA4_zps9wzrhrbj.jpg


So, let's see what happens when we lift the top ...

AA5_zpss9owqhja.jpg


The chest is just 48" high, and the mirror allows it to double as a dressing bureau. This will be covered in dark blue leather.

AA6_zps7ebt1fw6.jpg


The hinges for the top are heavy-duty Brusso butt hinges that have a built-in stop at 95 degrees. Holding up the top and mirror is not a problem - my concern was to ensure the lid did not fall down! I searched for months for a suitable brass stay, but could not find one anywhere. The problem was that it needed to fit into a narrow space, and all the ones I looked at needed more room than I had. In the end I designed and built my own.

AA9_zpsqtakyvsg.jpg


A brass bits-and-pieces, reshaped, fitted together ...

AA7_zpsccrk43ml.jpg


The stay and catch are french fit into the top. There is a finger hole to access the head, then swing it over and into the catch. It works really well.

AA8_zpszq3nxnky.jpg


And one last photo. Apologies for the gruesome person in the background :)

AA10_zpsagrrmnfh.jpg


I am now working on the last part of the Lingerie Chest: sliding jewellery trays in the top drawer.

Regards from Perth

Derek
 
Still stunning! You do realise, don't you, that some people making a drawer to be lined with leather would just use any old bit of MDF offcut... but not the man who rejects the first two tops and makes his own brass fittings!
 
This has got better for me each time I see it. The figure on the drawer fronts had me unsure for a while keeps improving each time I see it. Technically superb and a tribute to your skill Derek!!! Blooming well done :)
 
Thanks Andy, John and Graham for your kind words.

I had planned to post only after the Chest was completed, because I often feel like the instalments are so small in progress, that I fear that it appears that I am repeating myself. However, from my side there has been so much planning and building and planning and building ... The trouble is that I collect so many photos, and then realise that I had better post something now, because later it will be too hard to condense.

Regards from Perth

Derek
 
When you start make your own cabinet fittings, because you're dissatisfied with all the commercially available options, then you really know that you've arrived at the next level of furniture making!

=D>
 
Please keep up with posting as you go, it's both stunning and inspirational.
 
There were a few comments about the brass stay, and posted this on another forum.

I probably have the largest range of brass stays in the history of mankind, collected in the course of research ... Oh, I think that will do it! Cha-ching (sound of me paying for another stay) .... Damn, too large to fit!

Originally, I had planned to situate the stay to the right side and inside the tray. This has a depth of about 1 1/2". It was this that was too shallow for all the stays I came across. Here is what I came up with ...

I was wandering around the local hardware store looking for inspiration when an idea formed around these door closers (front) and (at the rear) box hinges ..

Stay1_zpsbiq4cfsi.jpg


I managed to find brass pipes with a 5mm hole and 5mm brass thread. The brass thread fitted the pipe to create a strong brass rod.

The "catch" (female) was modified: the wings with screw lugs were removed (needed to reduced the width and make a neater fitting), a screw hole was drilled in the centre, the springs were removed and shortened (re reduce tension), and the case ground back by about 2mm each side.

The "lug" (male) was also modified: shortened and rounded (as it needed to fit at an angle. The existing square shape only permitted entry if all parts were square with one another). The brass thread was tapped into the lug ....

Stay2_zpso0hgywsi.jpg


Here is the end with the box hinge ...

Stay3_zps9eienker.jpg


This was also 5mm diameter .... see how it was meant to be?

Once the lower section was epoxied together, the lid was morticed for the catch (to prevent it moving on the single screw) ...

Stay5_zpsbqoywhnk.jpg


Stay6_zpsd0p7fzqc.jpg


Once this was done, the stay was attached (clicked in), and the position for the pivot could be marked for drilling ...

Stay7_zpscorx2ep9.jpg


And the rest (drilling, grooving and morticing for the stay) is, as they say, history.

AA8x_zpsxkk4j7ep.jpg


Regards from Perth

Derek
 
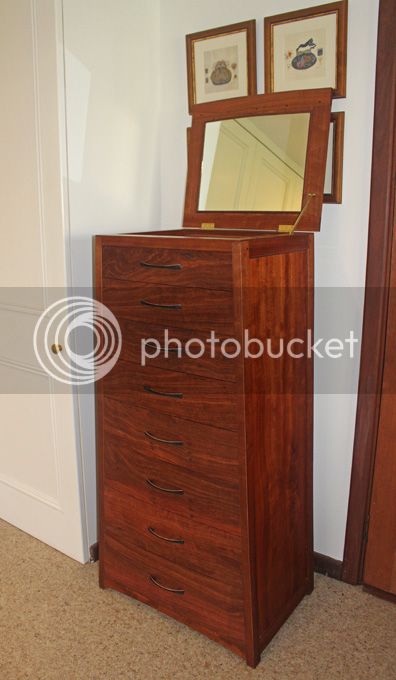
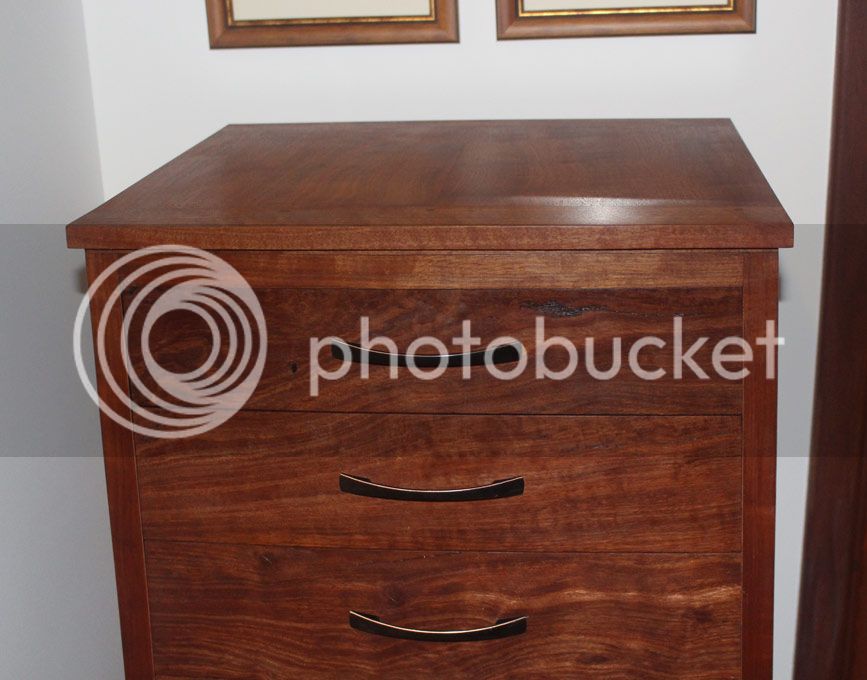
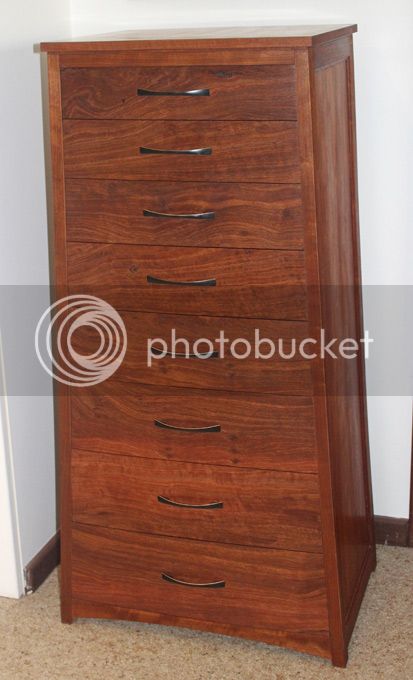
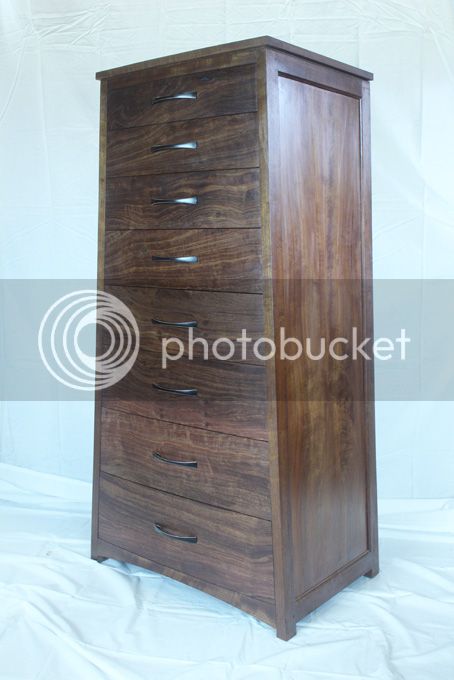
I completed the Lingerie Chest this weekend, and moved it to our bedroom to recuperate from the cold of the workshop.

It was comforting to see the pieces still looking quite good …

9%20Drawers_zpsudsjrvte.jpg


Here it is in the nook that was always to be its home.

15Presentation8_zpsqlkbx3qg.jpg


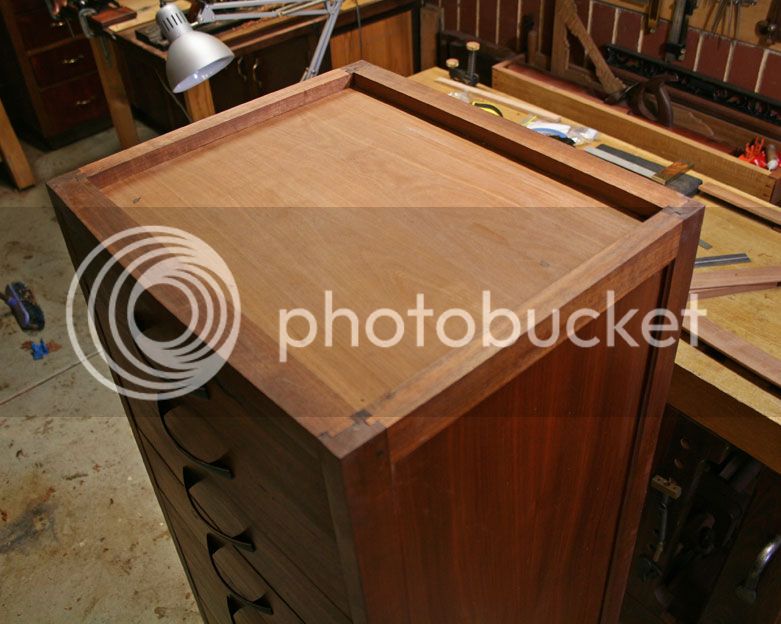
What I would like to share with you are the details that I have been working on over the past few weeks. These have been fun to do, especially as they were planned right at the outset, but left until the end.

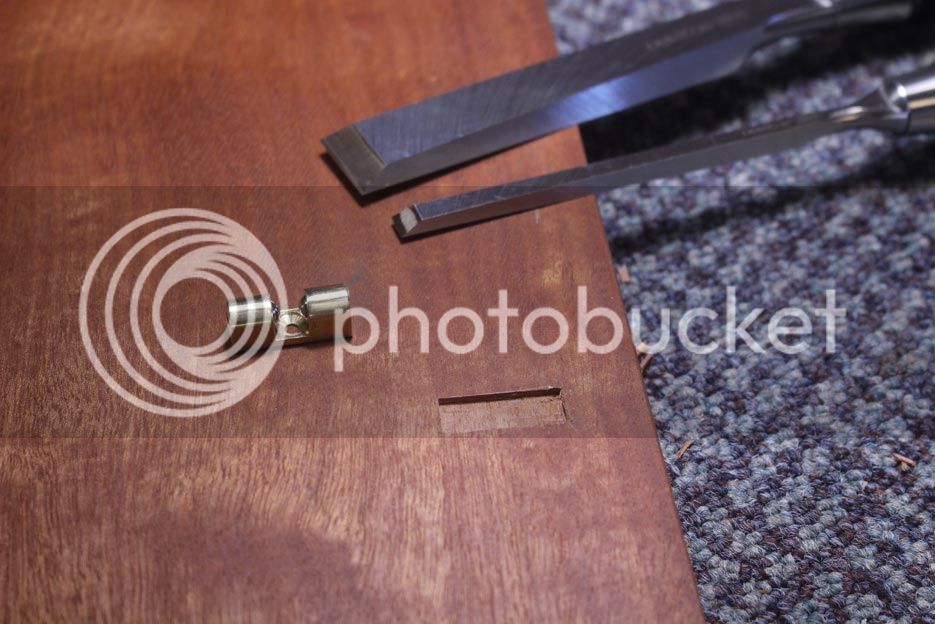
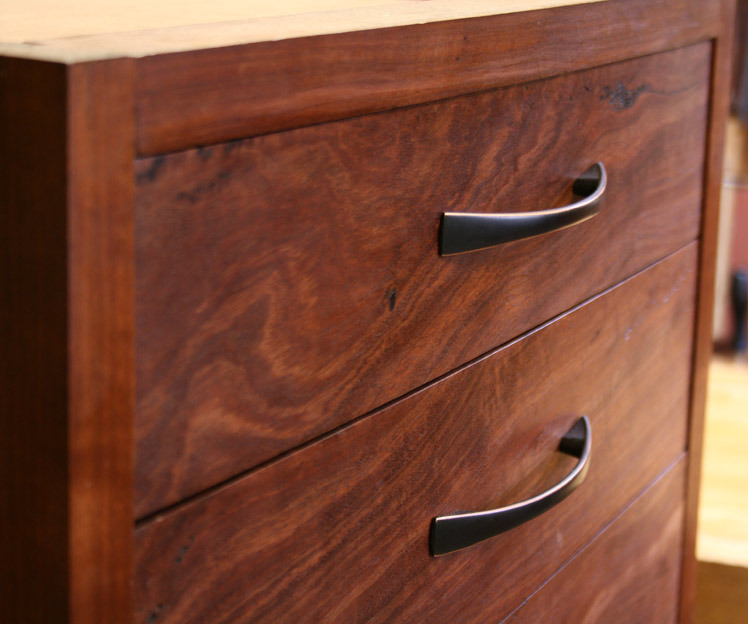
The first task was not so fun, if I am honest. In fact I wanted to avoid the risk I needed to take, and enquired of a few people whether they could spot the problem. I was reminded that, if you have to ask, then there is an issue. What was the issue? It lay with the fitting of the handles.

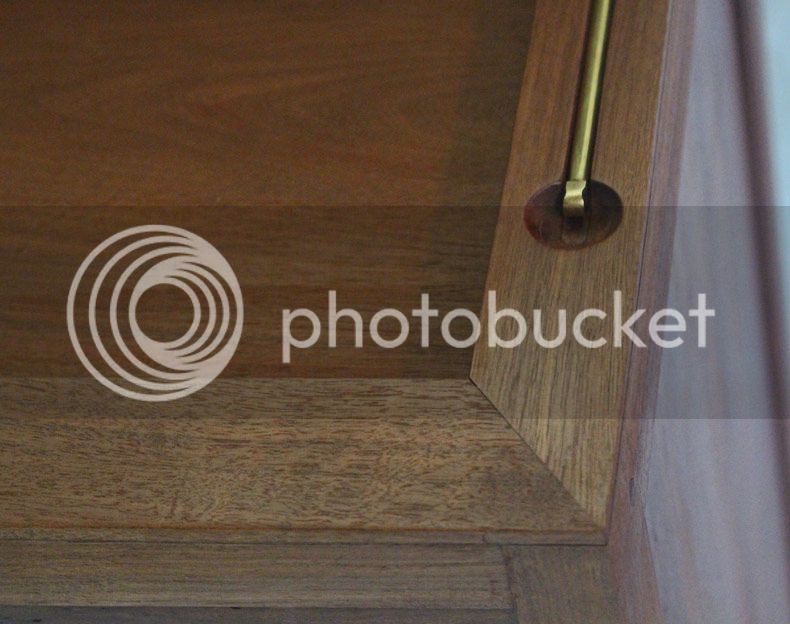
Here is an older picture of the drawers taken after the handles were fitted ..

FinishingTheCarcase_html_162ae1f2.jpg


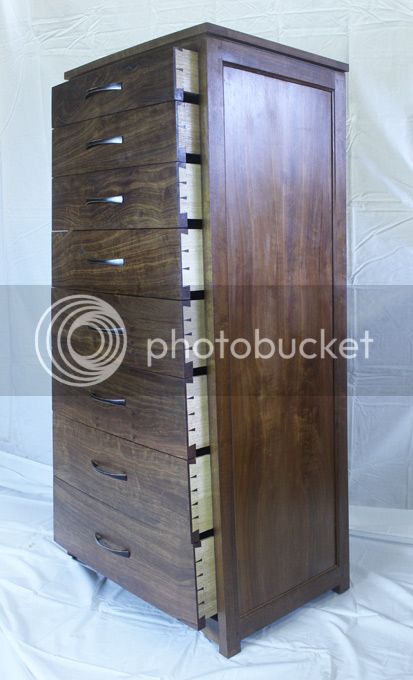
What is difficult to see is that the drawers are bowed, while the handles are designed for a flat drawer face. As a result, there are gaps at each end …

5-Handle1_zpsivogdvbl.jpg


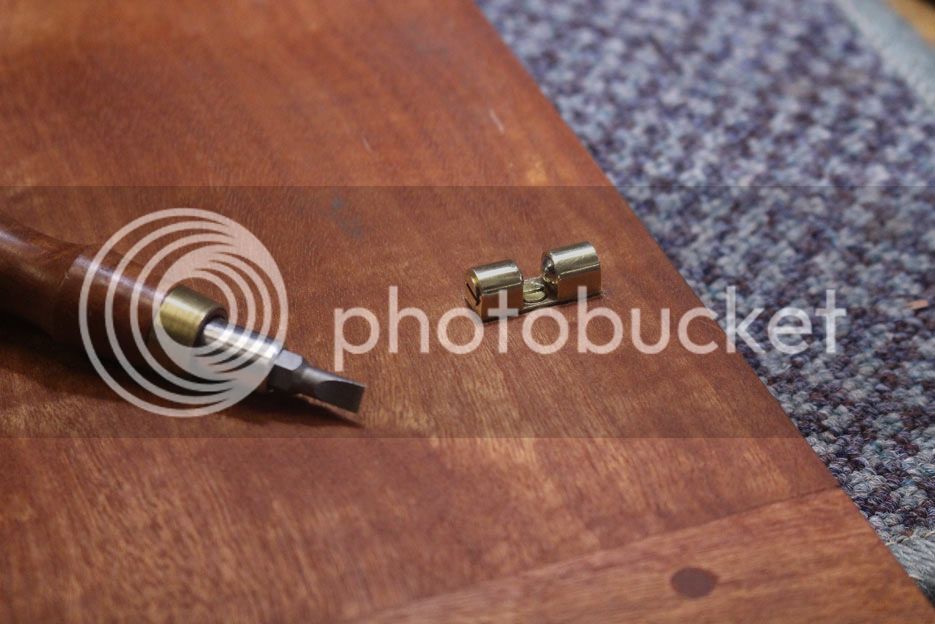
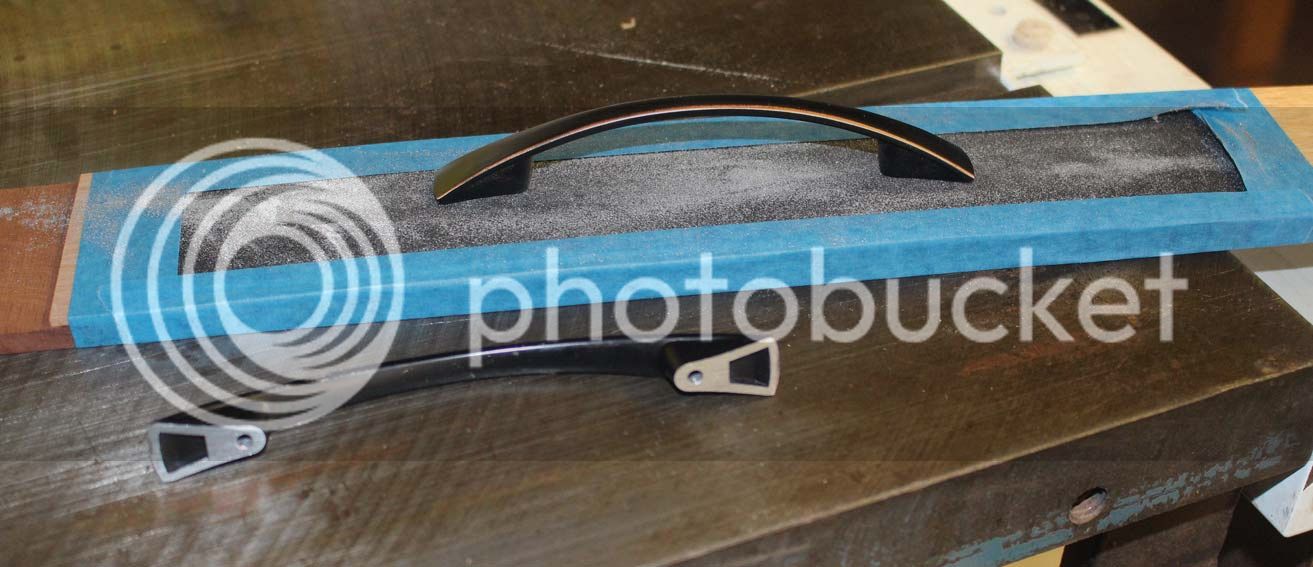
I dreaded having to chisel into the drawers to seat the handles. In the end, I knew I could not leave them like this. Fortunately I came up with an alternate plan, which was to file the raised sections of the handle into a profile that matched to drawer fronts.

To do this I build a profile of the bow, taped on 120 grit sandpaper, and lapped the handles on this …

6%20Handle2_zpsk3af7vqp.jpg


Despite fantasies of the handles disintegrating, it turned out all good.

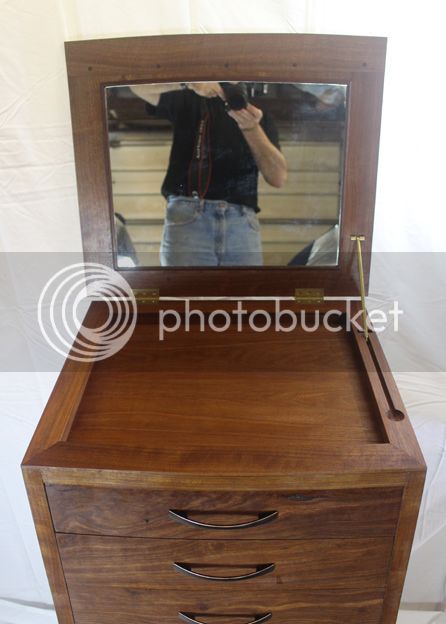
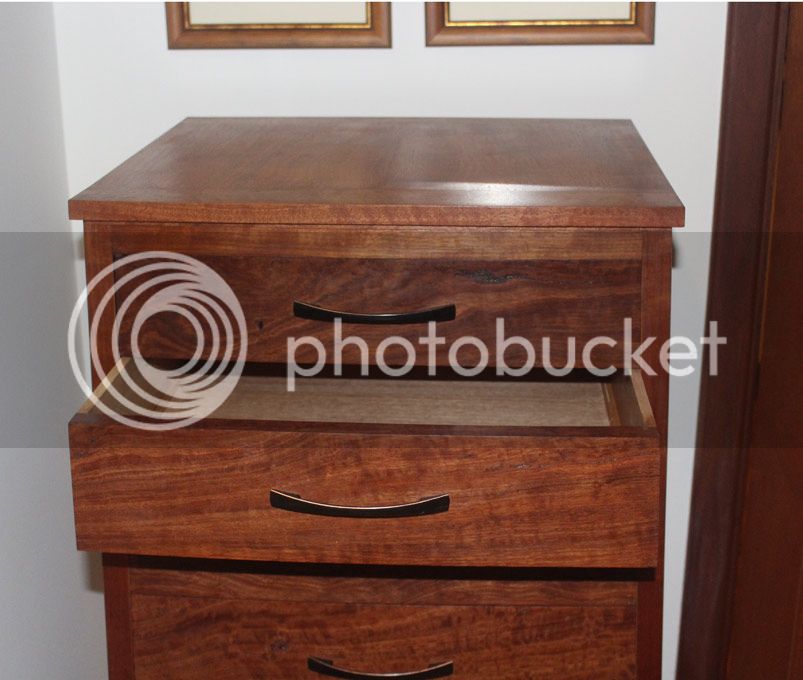
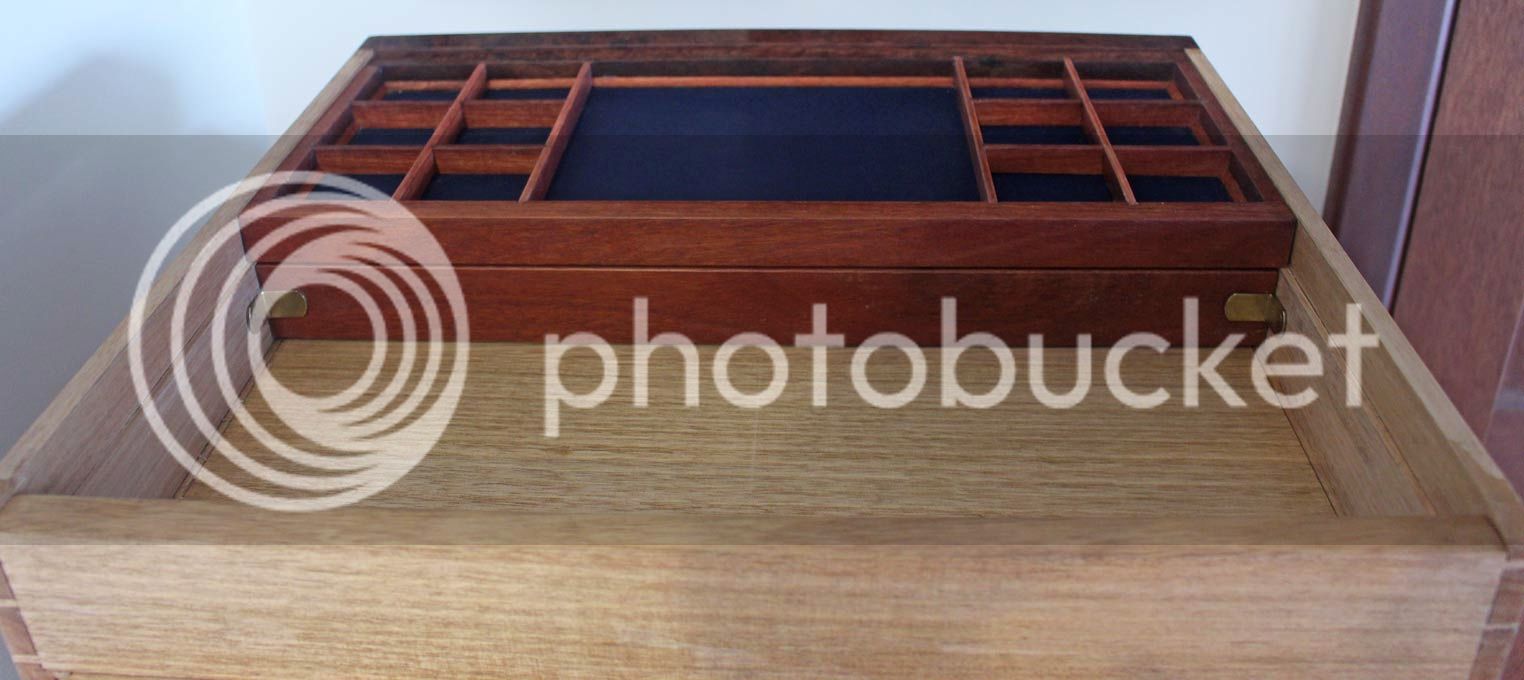
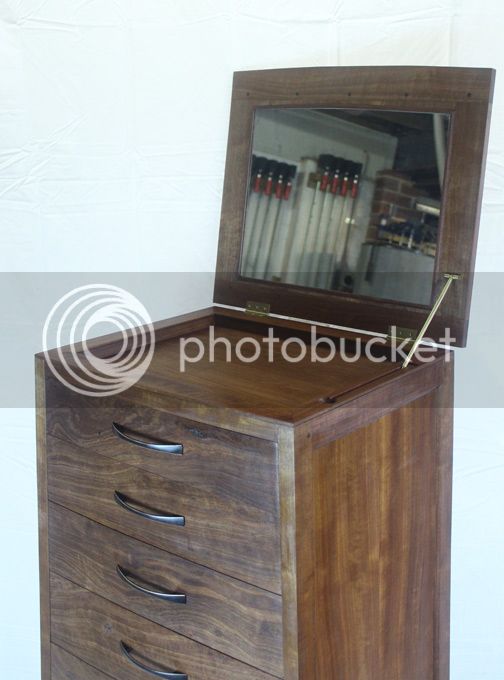
The second area involved the “jewelry drawer”.

Facing the chest (48” high), my wife is tall enough to look down into the top drawer.

10%20Presentation1_zpsbyu9jbjo.jpg

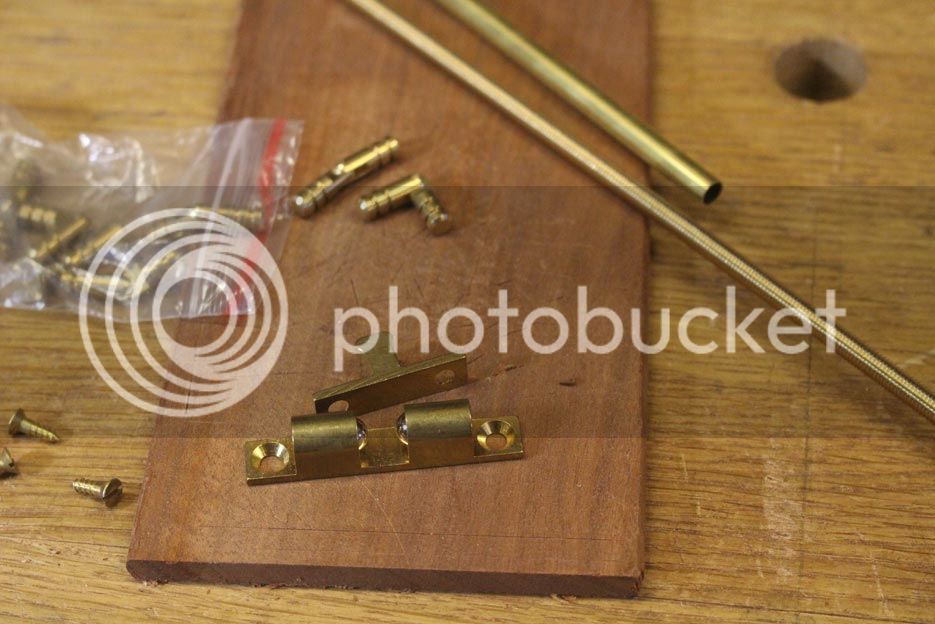
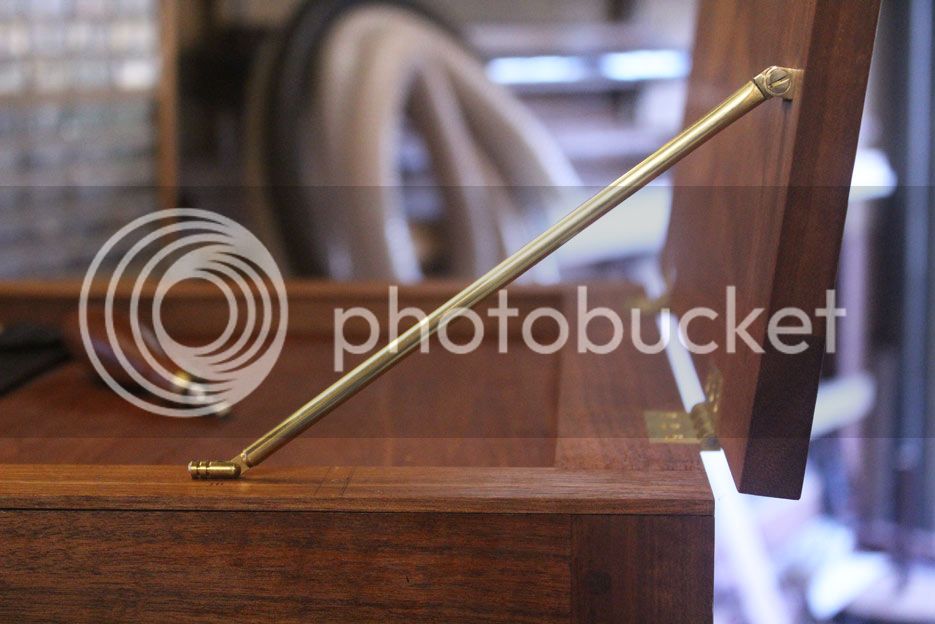
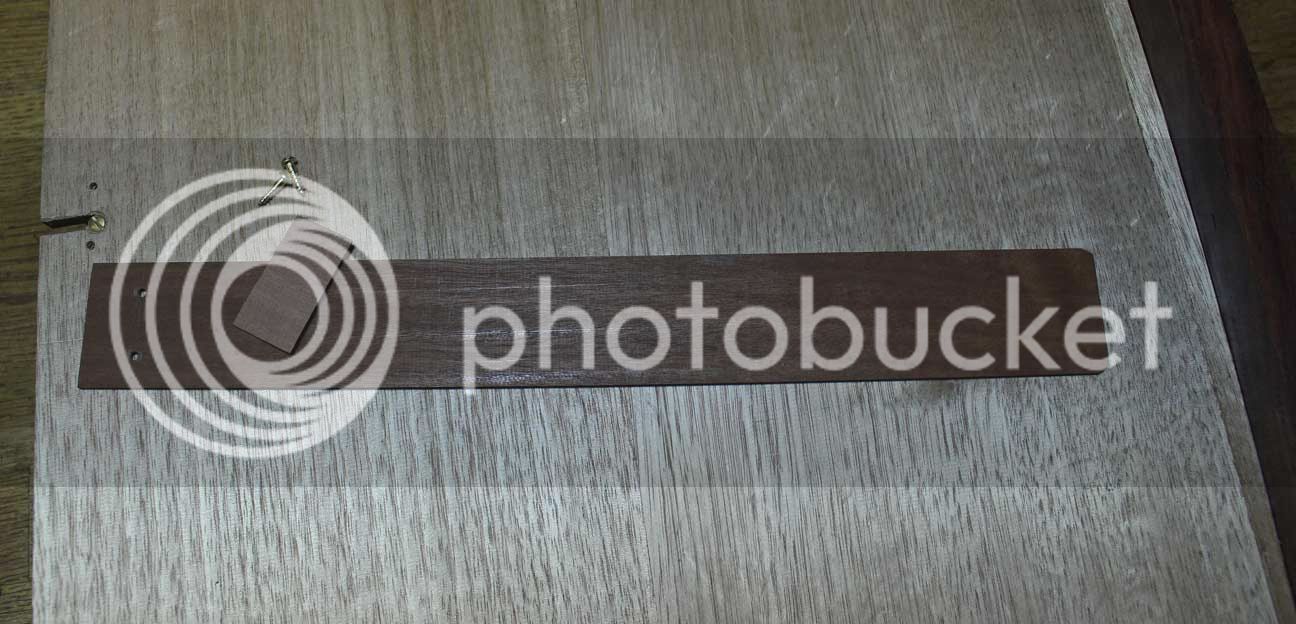
Since this drawer is to hold jewelry, it needed to be locked. I did not wish to add more hardware than necessary and so, instead of a lock-and-key, added a Quaker Lock.

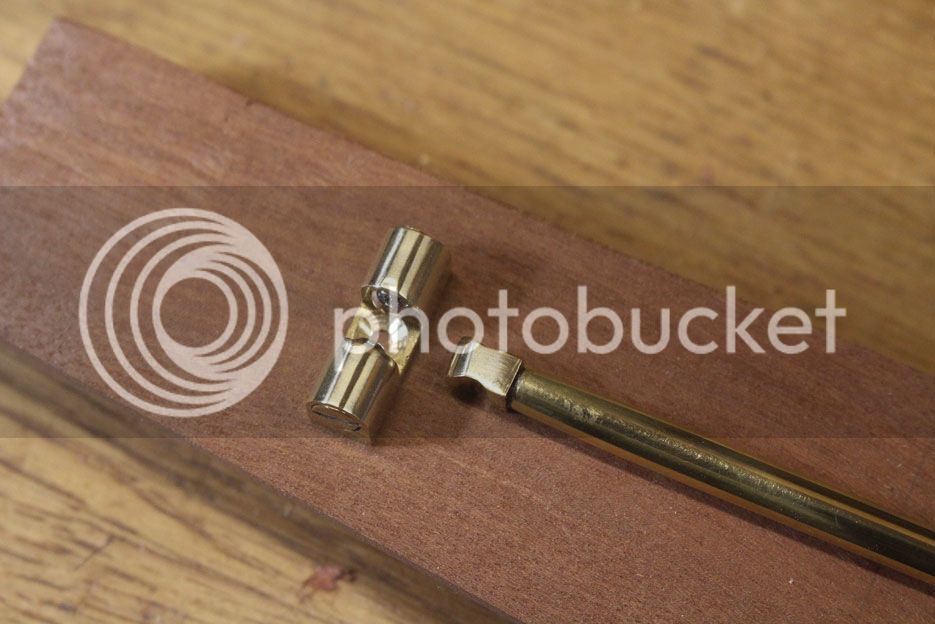
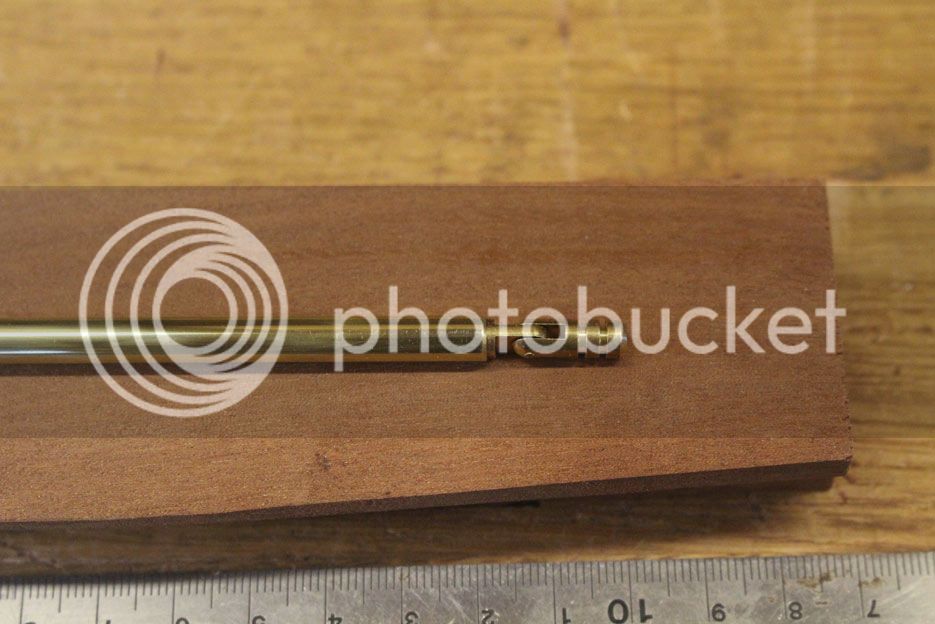
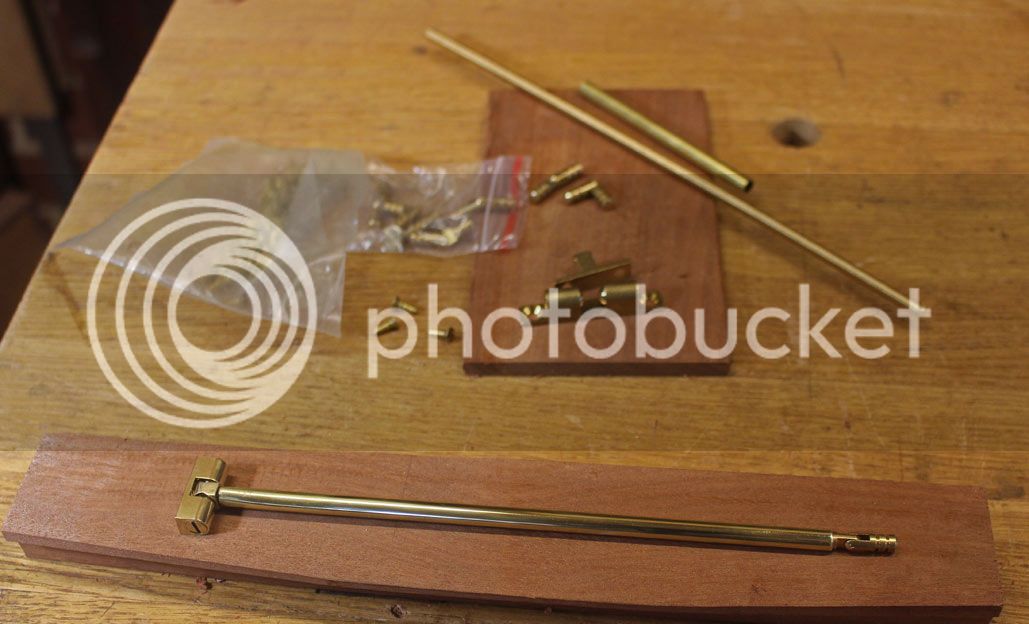
A Quaker lock is simply a spring-loaded wedge under the drawer. It is made of the following parts: thin, flexible (straight-grained) strip of wood, a thin wedge, and screws …

7%20Lock1_zpsn0fgq0zg.jpg


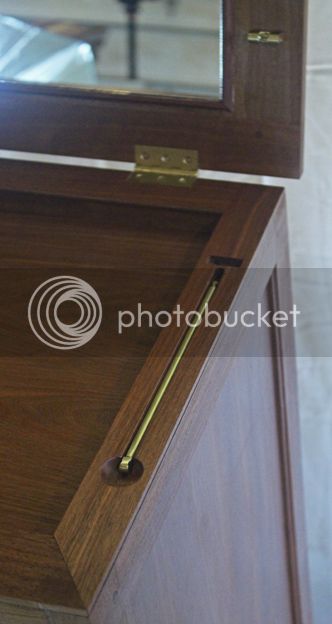
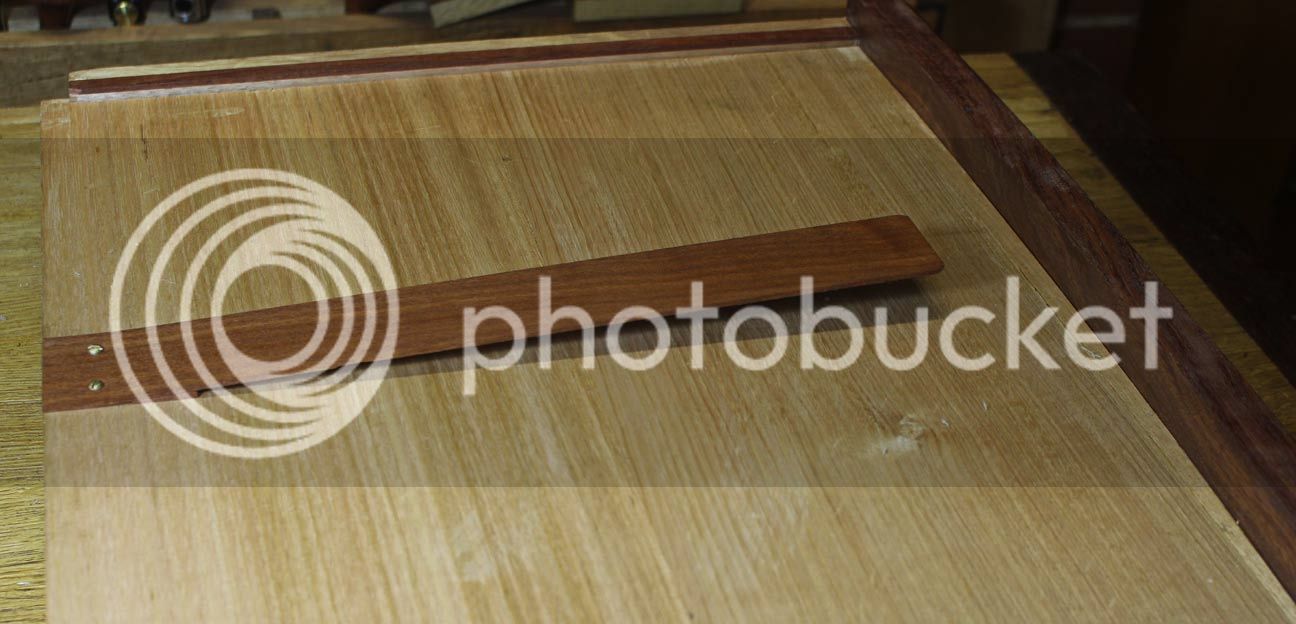
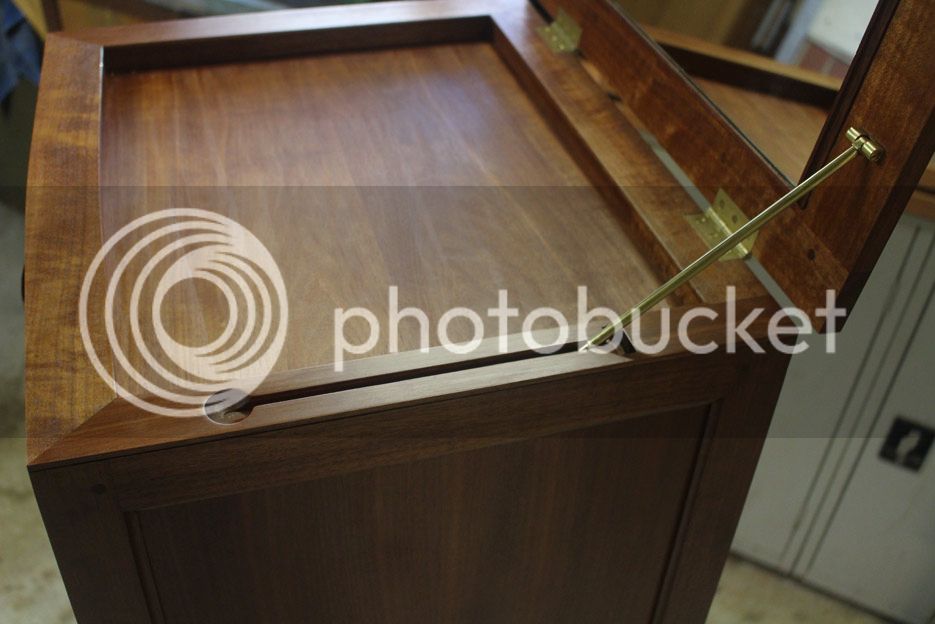
These are put together to create a spring wedge, which extends to the rear of the drawer blade ..

8%20Lock2_zpsk4xtymon.jpg


To release the Quaker lock, first open the second drawer, then reach underneath and push up the spring while simultaneously pulling out the drawer.

11%20Presentation2_zpsaemalwes.jpg


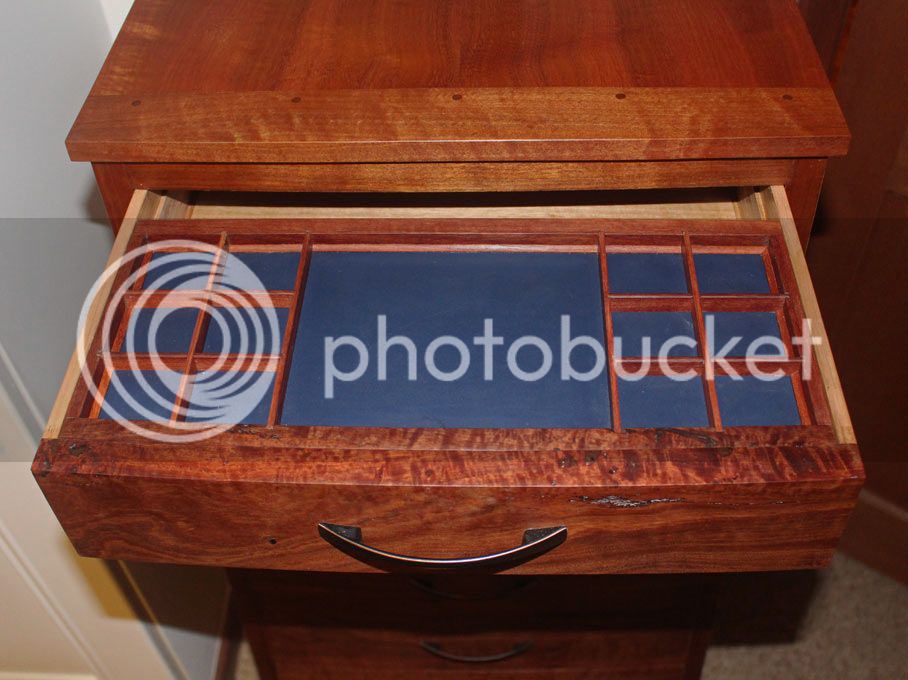
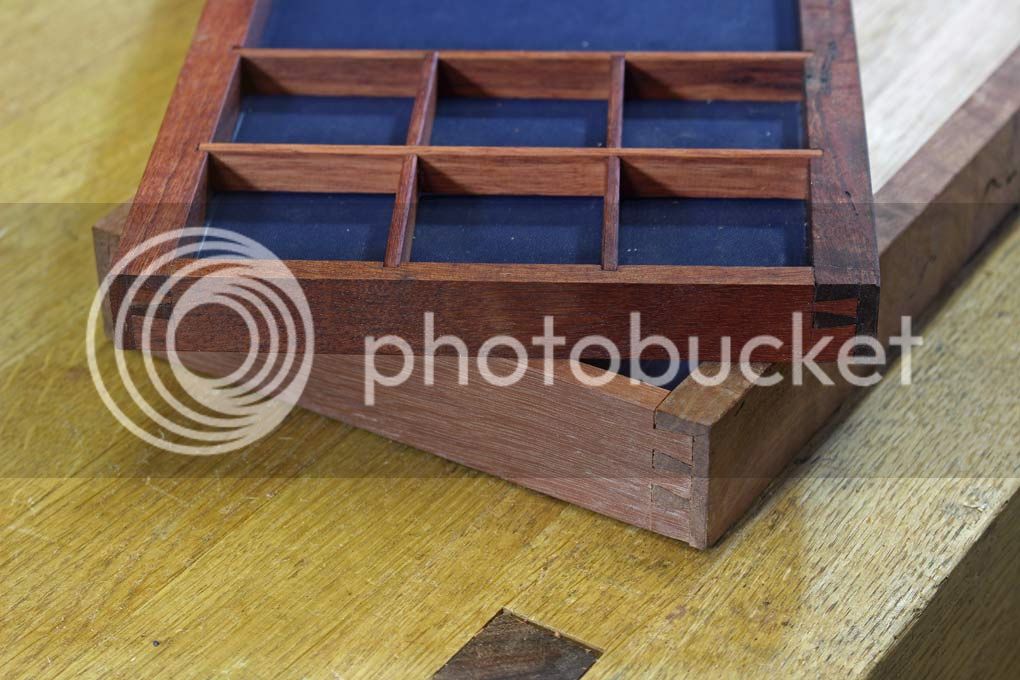
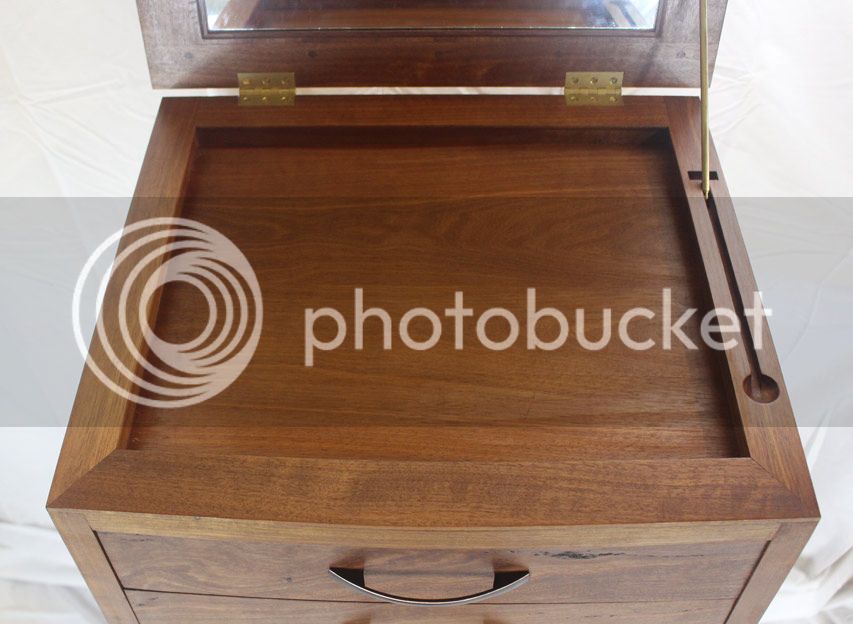
The top drawer opens to reveal the upper jewelry tray (spaces for ear rings) …

12-Presentation3_zpssoouffcd.jpg


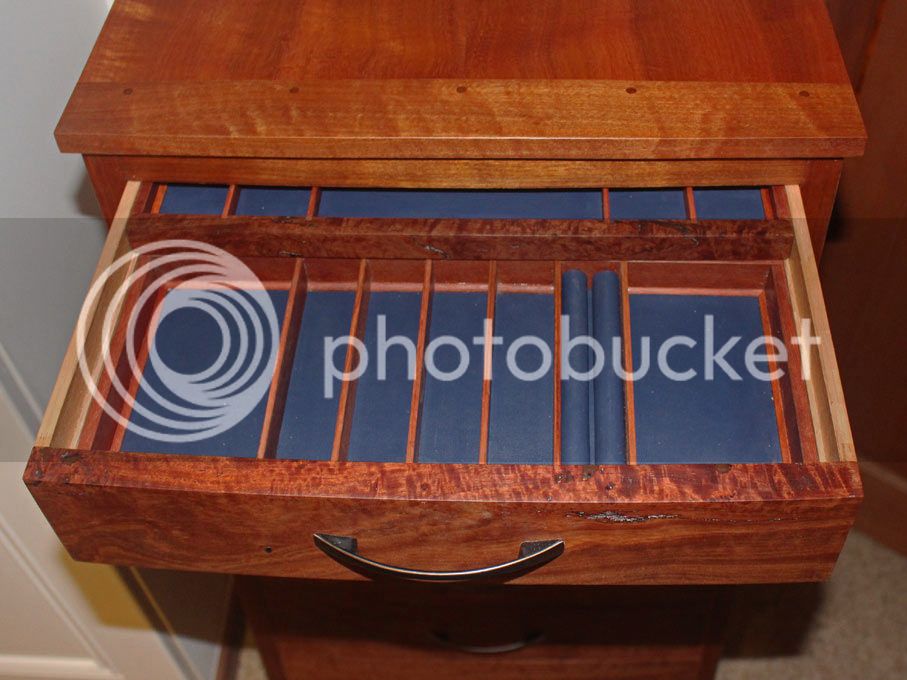
Sliding it back reveals the lower jewelry tray (spaces for necklaces and rings) ..

13-Presentation4_zpstkctdud9.jpg


The construction of these trays was based on a different design to the drawers. Slips were used in the drawers, but the trays needed to maximize the space inside, which left the 3mm (1/8”) thick drawer bottoms 3mm from the lower edge.

1%20Trays-2_zpso5hrxffh.jpg


2%20Trays-3_zpsq7aqex5j.jpg


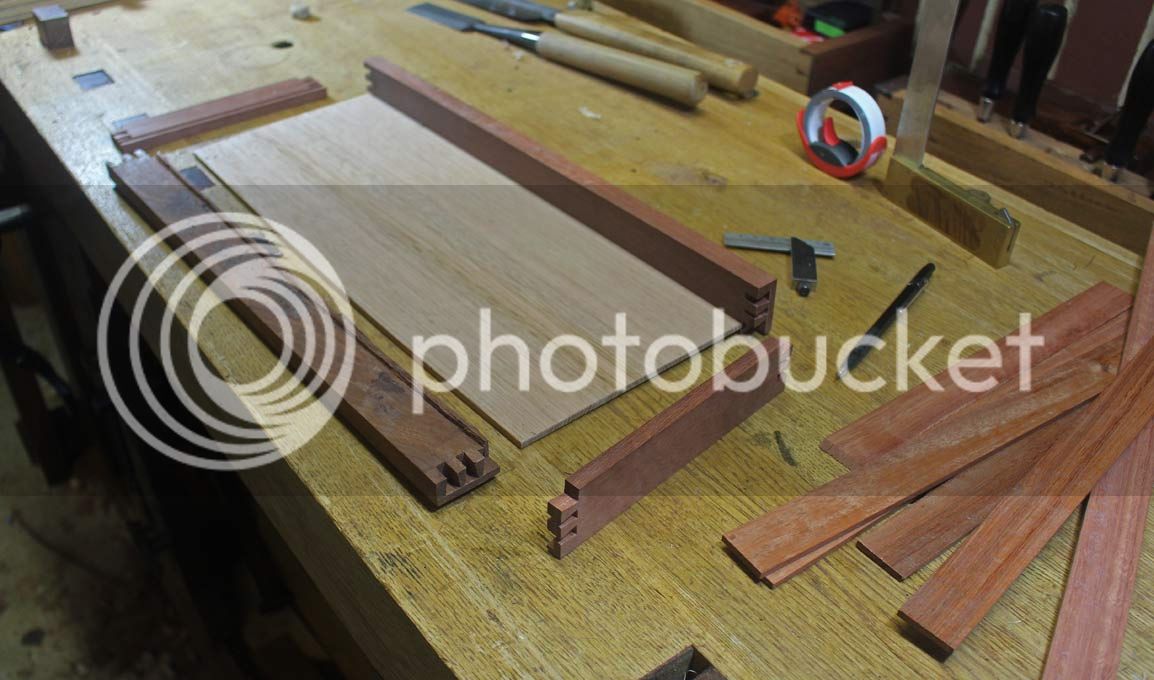
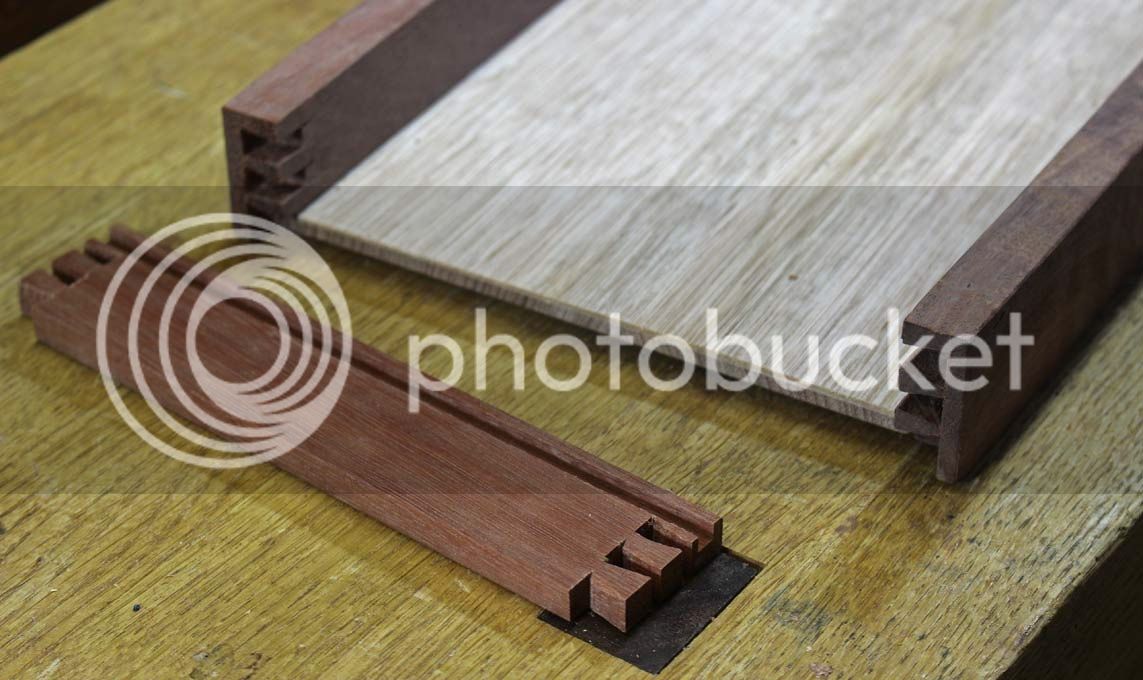
As can be seen below, the lower pin is not enclosed, which allows more space for the drawer bottom groove ..

3%20Trays-4_zps64kjuwed.jpg


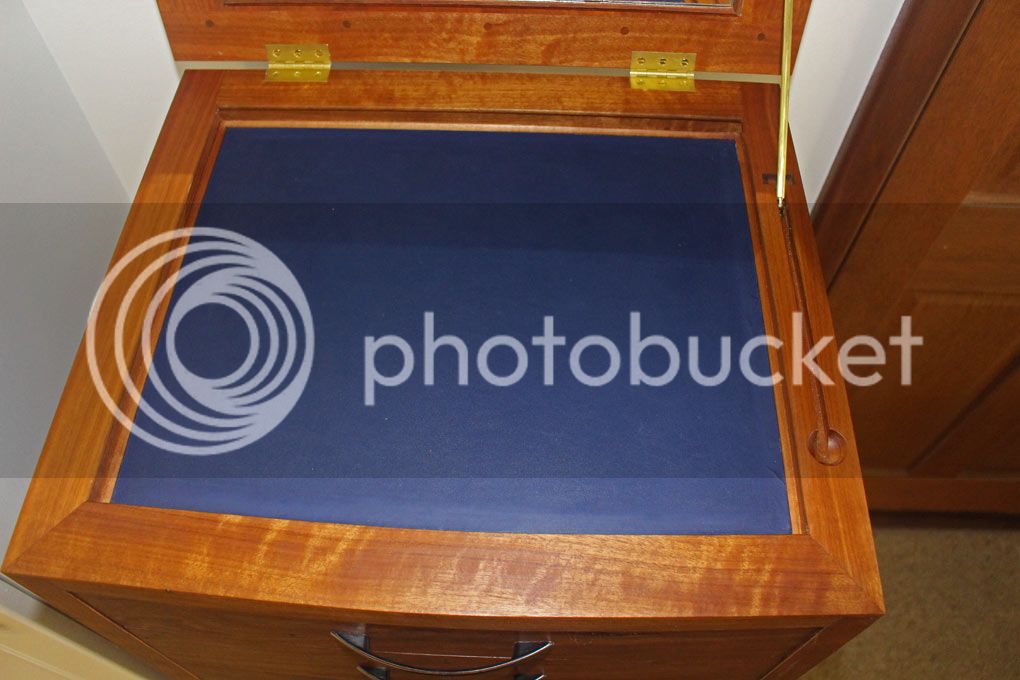
The drawer bottoms were covered in 1.2mm thick leather. This was attached with contact glue (I used a brand that permitted some movement for repositioning up to 3 minutes after placement). The edges were tidied up with coved beading.

That coved beading was a real pipper to make and fit as it was so tiny. The drawers were for the most part easy to fit. However, the compound curves behind the drawer fronts and at the top of the mirror (which curves to match the bow drawers) required extra attention.

The jewelry trays are easy to lift out of the drawer. The idea for fitting them came from the sliding tills in tool chests. To do this with these drawers, the inside of the drawer sides was squared up with filler pieces. To ensure that the lower drawer does not slide away from the front position, clips were added to the rear (they are shelf rests and just push into the sides). These can be removed if needed. There is now hidden space behind the lower tray.

14%20Presentation5_zpsqzjlodoe.jpg


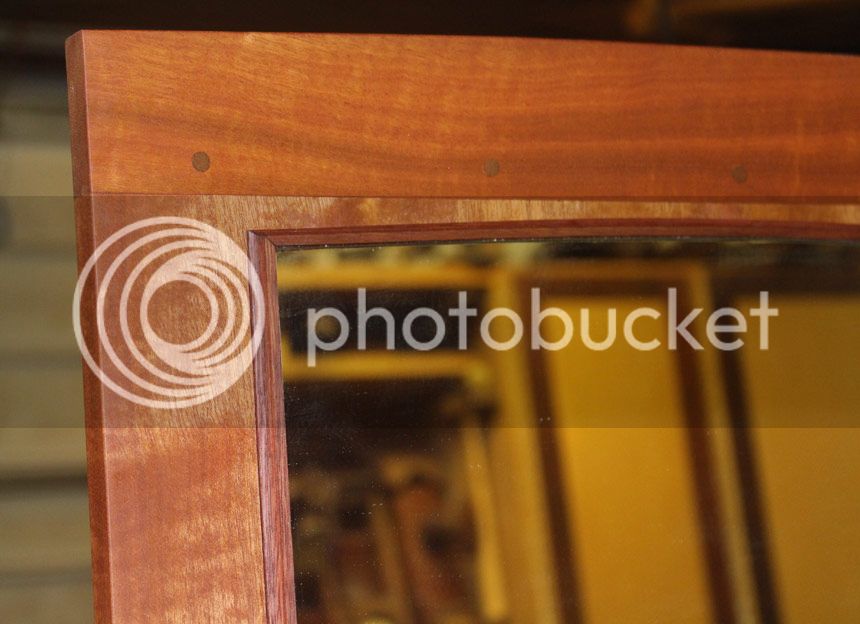
The third area involves the mirror recess. This was also covered in leather …

16Presentation9_zps9gbkfmyt.jpg


Here is one example of the coved beading around the mirror (so difficult to photograph owing to the reflections) ..

17Presentation10_zpskpmedm4m.jpg


And so we come to the end of this build. All-in-all, it stretched over 18 months (closer to 14 months of actual build time on weekends), which is my longest project to date.

18%20Final-picture_zpsnrpz2i74.jpg


Thanks for looking.

Regards from Perth

Derek
 
"Thanks for looking" ???

Are you kidding, Derek?

it's been informative, enjoyable and wonderful to read. Most interestingly that you saw fit to share your thought processes, too,

I'll never come close to that level of skill but all the same it's been most encouraging.

Thank you.

E.
 
Week, what a great build. Thanks for such an informative read. Your wife must be really pleased as the finished article is a real beaut. Simply stunning.


Sent from my iPad using Tapatalk
 
Yeh it's alright....

Kidding of course. Work of this standard is just a pleasure to see. To be guided through the process is a fantastic bonus. Many thanks for sharing the journey Derek.
Regards
Chris
 
Back
Top