Building the Lingerie Chest

UKworkshop.co.uk

Help Support UKworkshop.co.uk:

This site may earn a commission from merchant affiliate links, including eBay, Amazon, and others.
Titemark! Did I really write that?

It's a new line about to come out next April. Roll it on with the cutting gauge.

Titebond are bringing out a wheel gauge at the same time. :)

Regards from Perth

Derek
 
Thanks for the kind words.

I must say that I'm a bit perplexed. Over 300 views and three comments. Zero discussion. I put these builds up as a springboard to discuss aspects of building furniture. Is this the wrong forum? Oh well. You can look for the rest on my website.

Regards from Perth

Derek

If you want more discussion on this forum then perhaps you should actually post it on this forum ;). When all I saw was a link to another website, I moved on.
 
Derek. Your going to have to give us a bit of a clue. The thing is the whole site is aimed at discussing woodworking generally. It is then broken down into sections. So having seen your perplexed, I looked again. I am now perplexed as I do not have any idea what you want to discuss. So What aspects do you want to discuss?
 
Your work is so crisp and so precise, almost to a fault. A slightly misshapen bead might do it some good, as would dovetails spaced by eye and perhaps one with a gap or a 'little joiner' here or there. Sometimes an unlimited budget as to time, tools, and stock are an artist's worst enemy.

Here's to JUST A LITTLE imperfection. I'll drink to it.

I also think you missed an opportunity with your stock selection to do something very special.

To what extent was your wife involved in the design brief? I'm more interested in your design process than anything else. The woodworking itself will go well, indeed is going well, for the reasons mentioned above.
 
PAC1":1hq471yd said:
Derek. Your going to have to give us a bit of a clue. The thing is the whole site is aimed at discussing woodworking generally. It is then broken down into sections. So having seen your perplexed, I looked again. I am now perplexed as I do not have any idea what you want to discuss. So What aspects do you want to discuss?

Hi PAC

Keep in mind, I was just hoping to develop some discussion about design and efficient work methods. I did not think to state this simply because I have started similar threads over a number of years. Many here may be familiar with this.

Examples of possible topics:

One was mentioned earlier, that is, glueing up panels. What about the reason for thin panels - forming a curved frame-and-panel within a curved leg. Would you do this differently, such as a solid panel?

Another are the mouldings. Would you use a cove, or would you prefer something else, or nothing at all. My wife wanted a simple chamfer as a way of transitioning the rectangular frame to the panel .. until I explained that I believed a chamfer would be out-of-place with the cove around the top (to be built later). And then how would you go about making the cove in a curved leg? Would you do it differently from the way I did it?

There are many items for discussion as everything is a compound curve, and I am feeling my way. I will raise these later.

Regards fro Perth

Derek
 
CStanford":1ejnfc72 said:
Your work is so crisp and so precise, almost to a fault. A slightly misshapen bead might do it some good, as would dovetails spaced by eye and perhaps one with a gap or a 'little joiner' here or there. Sometimes an unlimited budget as to time, tools, and stock are an artist's worst enemy.

Here's to JUST A LITTLE imperfection. I'll drink to it.

I also think you missed an opportunity with your stock selection to do something very special.

To what extent was your wife involved in the design brief? I'm more interested in your design process than anything else. The woodworking itself will go well, indeed is going well, for the reasons mentioned above.

Hi Charles

Is that a compliment or a criticism? :lol:

Trust me, there are flaws. In any event, they are not deliberate. I think that the notion of deliberately making mistakes, or leaving plane tracks as "evidence" of handwork, is silly. One builds as precisely as skills allow, and handwork will naturally lead to some imperfections - just because we are not machines.

It is all relative.

A few weekends ago I attended a workshop on drawer-making. I do quite decent drawers, but the demonstrator is a high-end furniture maker, and I wanted to see how he went about the slips and muntin. He is also a judge at the annual Woodshow, where I have had pieces entered the past couple of years, and I was hoping to learn a little about what he considered important (I do not build for competitions, but was curious what is considered desirable as I thought some of the results at the last show were not what I would have chosen).

Now if you consider my work "crisp", then you should see his! It is evident that he expects others to produce results at the same rarified level he reaches (with a combination of power and hand tools). His tolerances are fractions of mm. Is this excessive? I do not know because he gets paid very well for this level of work. He is not churning out pieces - a drawer can take all day to build.

With regards stock selection, what would you do differently? What opportunity is it that you think I missed?

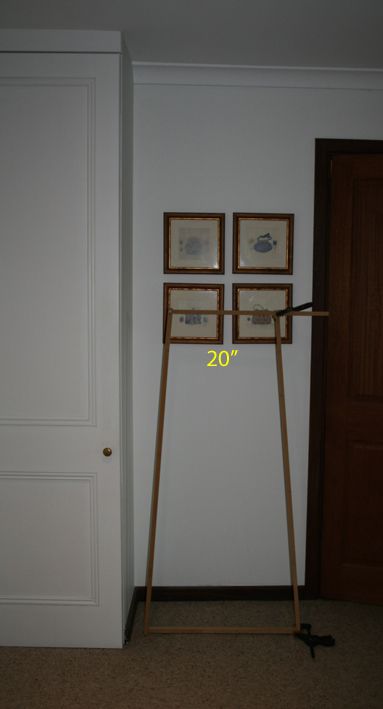
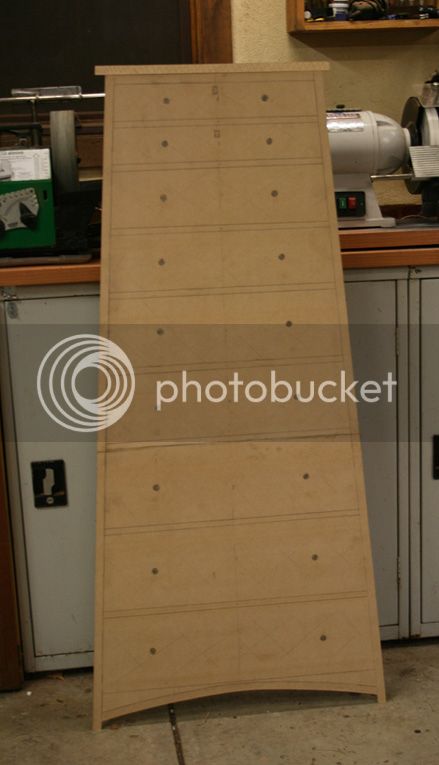
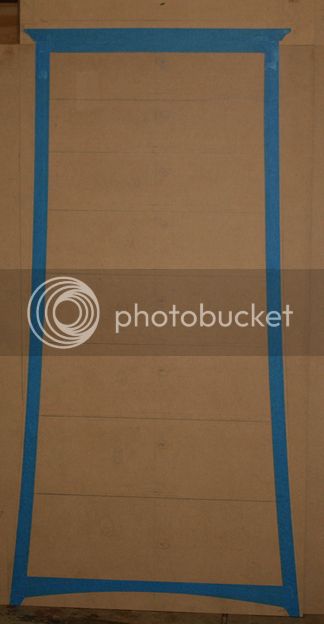
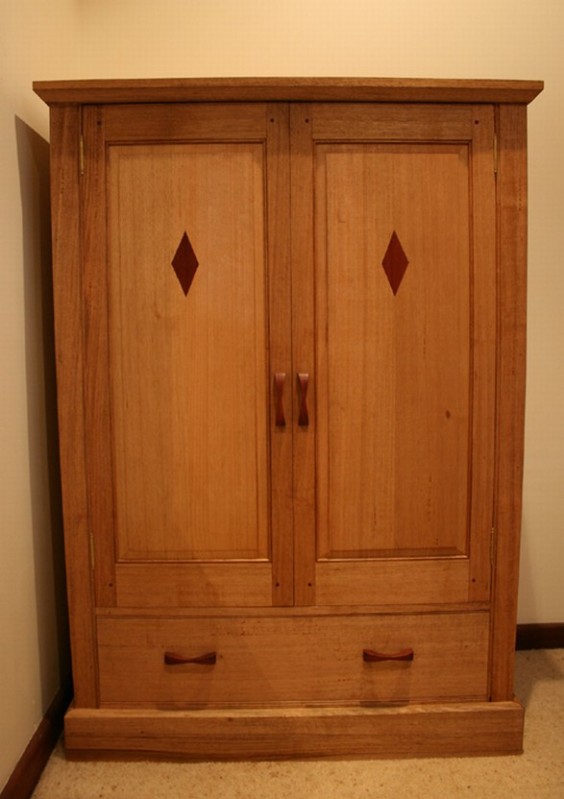
Design? I was looking for something that was softer in outline than a hard-edged chest of drawers. I played around with a fews mock ups first, trying to get a feel for it in the alcove in our bedroom ..

5_zpsab65f3d8.jpg


8_zps18024528.jpg


It evolved ...

Chest1_zps31540dcc.jpg


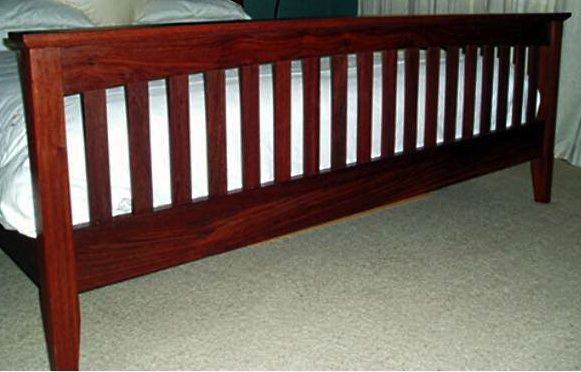
Wood? It needed to blend in with other pieces I have built over the years, such as our bed in Jarrah ..

Bed1.jpg


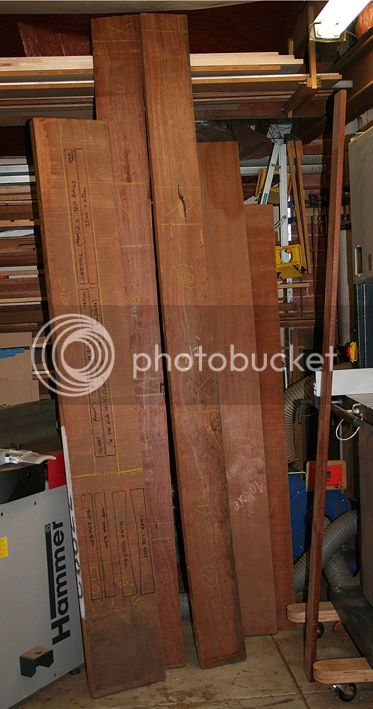
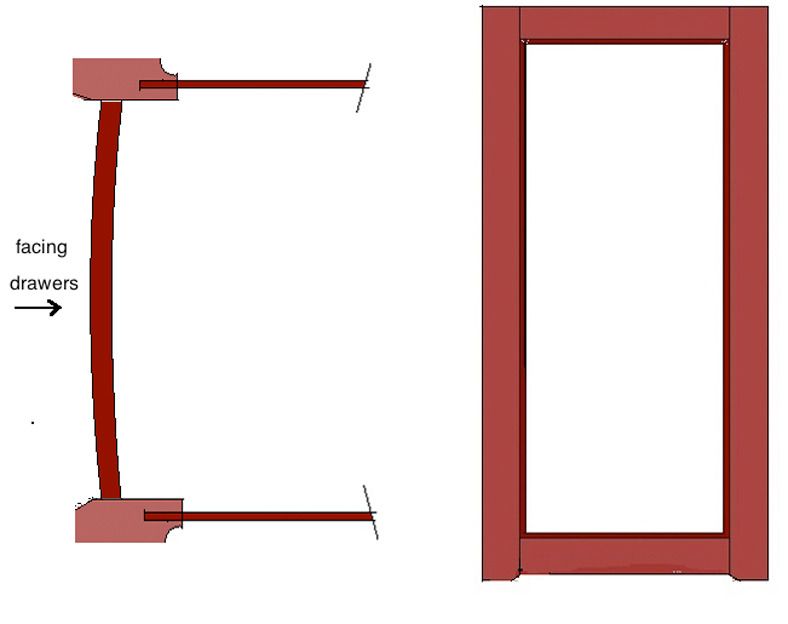
The main section is Makore (an African wood), which is a little like Mahogany but with the reddish-blown tones of Jarrah. It has a less dramatic figure than Jarrah, but lots of interest (see one of the panels in an early chapter). The Jarrah is figured, and I think that it will make complementary statement to the Makore. The drawers will curve, and be clean-lined without handles (opening on hidden Blum Tip-On buttons). I am trying for a stream-lined clean look.

Makore and Jarrah ...

Wood8_zps8d8ee6a5.jpg


Getting going with this project was delayed by my fear of working with Makore, which is high on the irritation ladder. I have taken a lot of precautions with dust extraction. So far so good. The Makore is exceptionally hard on steel, dulling everything 2-3 times as fast as Jarrah, which is pretty abrasive in its own right.

Your ideas are very welcome.

Regards from Perth

Derek
 
Thanks for the kind words.

I must say that I'm a bit perplexed. Over 300 views and three comments. Zero discussion. I put these builds up as a springboard to discuss aspects of building furniture. Is this the wrong forum? Oh well. You can look for the rest on my website.

Regards from Perth

Derek
It seems to me that your account of this project is pretty well undiscussable. You've set yourself a task and achieved it. There would only be food for discussion if people thought you had made mistakes or done something sub-optimal and that is clearly not the case. That only leaves the wildly subjective area of personal taste up for discussion. For instance, somebody might think, "I'd have put a bit of stringing on the draws" but everybody has his own ideas on things like that.

For what it's worth, your accounts of builds read (to a beginner like me at least) like master classes and perhaps it would be an idea, once you think you've got enough of them, to put them out in book form, perhaps with a little more information on precisely how you employ different tools at each stage of the build.

If you want to generate discussion, how about posting your next design brief, hold back on your own initial thoughts as other people describe their ideas and then pitch in with your own and of course subequently report on what you actually do.
 
If it's to be part of a bedroom suite, that all have to match and mesh, then I suppose any discussion of even the stock is moot. Well, it's actually moot since the project has already started. One does occassionally see an eclectic mix of styles and woods pulled off in a room, but discussion of same quickly deteriorates into a pointless debate about why I like chocolate instead of your preference for vanilla.

And of course nobody is talking about deliberately introducing ersatz 'error.'

Otherwise, as Andy Kev said, what is that we are to discuss?

I did wonder what the purpose of comparing and contrasting the Stanley 66 to Garrett Hack's scratch was all about. He does feature beads in a lot of his work and they look fine to me. I don't know for sure if they're all produced from a scratch, though:

http://garretthack.com/gallery_chests.aspx

I imagine that he uses a router for the vast majority of them.

Otherwise, the project looks to have American Arts and Crafts/Roycrofters lines in sympathy with the rest of the suite.

The mirror lifts and drawer touch latches will be a very nice feature. More information on how you spec'd these out would be appreciated, brands, and suppliers too.

You certainly laid in enough 8/4, nothing wrong with that.
 
Andy and Charles

I am not sure why you believe all is done and dusted. I've only just begun. And while I have developed ideas about what I want to do, there are still many ways to do these - regardless of what I may or may not have planned, it is simply a vehicle for discussion about planning and construction.

Charles you are one that frequently voices the desire to have the forum focus on actual woodworking, rather than just the acquisition of tools (nothing wrong with that - I do it too, but I want more than just that). So, have you (and others here) built something like the chest I am building? If so, how did you do the casework?

The purpose of contrasting Garrett Hack's scratch beader with the #66 is that I - like many others - have used his beading tool for years. It dawned on me why the classic "L" shape is better - that an arm of the "L" acts as a depth stop. Hack's beader relies on one watching the formation of the bead to know when to stop scraping. It is possible to overdue it. This would have been disastrous with a cove, which I consider much more difficult to get right than a bead. Plus, here I am doing it on a curve. The #66 overcomes this limitation.

I am moving towards the frame-and-panel assembly. Do you recall the article written by Sean Highto on Knots? You contributed to the thread and in the article. It is on my website: http://www.inthewoodshop.com/Furniture/ ... 0door.html

I have done a few over the years, but only with a bead and not a cove:

Completionoftheproject_html_57aa5367.jpg


Any suggestings how you might approach this differently? I assume that a curved frame will not make any difference?

Regards from Perth

Derek
 
Derek, I have the Lie-Nielsen version of the 66 and that is likely what I would use on a curved section if not a router. Otherwise, a Record 405 with a beading cutter on straight parts. I bought extra annealed blanks that L-N sells (used to sell?) for making my own profiles and have yet to use them all and doubt I ever will. I've made a few scratches but they're more or less superfluous (never say never though) with a 66 in the shop.

I'm not so sure that I wouldn't just leave the beading off if it's going to cause more head scratching than it's worth. Beading on that piece might essentially be mixing metaphors. Coves too.

What is the plan again for the side panels' curvature?

I do recall that post in Sean's thread and that was slam-bam woodworking (on my part) if ever it existed. But, it was to illustrate a point at the time. Torqued back 15% or so and those practice/demonstration workpieces would have been keepers. I loved that piece he made. He's very, very accomplished.
 
Hi Charles

I have an old Stanley #66 that I restored from rust. It has the LN fences and all the LN blades. However I mostly make my own from bandsaw scrap. I do prefer the thicker LN blades over the LV blades, which just working the #66, with the bandsaw steel somewhere in the middle.

The plan for the side panels is to keep it as simple as possible. Keep in mind that the panels are not simple rectangles - they curve.

Plan-and-side-face_zpsfcxbdtq8.jpg


Also included here is the curved face of the drawers and the chamfers or cove or round (not yet decided) on the legs to "open up" to the drawers.

Regards from Perth

Derek
 
Don't the side stiles curve in a sweep toward the floor? I was wondering how the panels would be processed to account for this. Sorry for my confusion.

Are you relying on their thinness to allow you to bend them into the stile and rail grooves?

Maybe I misinterpreted the elevation drawing of the sides (view from front or rear), or missed it altogether.
 
CStanford":3093apns said:
Don't the side stiles curve in a sweep toward the floor? I was wondering how the panels would be processed to account for this. Sorry for my confusion.

Are you relying on their thinness to allow you to bend them into the stile and rail grooves? ...

Yes to both ... the stiles/legs curve in a sweep towards the floor, AND the panels are 1/4" thick, fitting the 1/4" groove to bend with the sweep.

This is also the reason for the cove on the frame - so as to transition the rectangular frame to the flat panel.

Regards from Perth

Derek
 
Derek

Don't be too miffed at the lack of responses.

I, like other I'm sure, read with great interest and will return for each instalment.

Whilst I don't feel I could come close to your standards I am still inspired.

One thing I do get from yours and others write ups is that attention to details takes time and sometimes I can be a little impatient.

So for me it has to be better planning and concentrate on each stage without rushing. So, keep up the good work, I appreciate it.

Mick
 
Back
Top