Blanket Chest - Finished!! (Photo's on page 8)

UKworkshop.co.uk

Help Support UKworkshop.co.uk:

This site may earn a commission from merchant affiliate links, including eBay, Amazon, and others.
Hi Olly,

The piece is looking very impressive, well done! At the very least, I'd elect to stain the inside of the base .

Regards,
Chris
 
yep - i think stain the inside of the base to match - the outside isnt going to matter because no one can see it.

looking very good , swimbo cant wait to see the finished product ( she says she will bake you a cake by way of a completion bonus ;) )
 
I've watched this one with Great interest, its really a testament to what a skilled craftsman can do in a small space with limited machinery. Its almost harder to get a good result with softwood than it is with a hardwood in certain respects and you've got such a lovely item there. Very inspiring build!
 
Hi Olly,
I too have been watching this build with interest, the box is really coming on well, and I am anxiously awaiting photos of the finished item.
IMHO I would stain the bottom to match.

Malc :D
 
Chems":10teiiy0 said:
I've watched this one with Great interest, its really a testament to what a skilled craftsman can do in a small space with limited machinery.!

it certainly is - its also a testament to the wisdom a decision taken by an unskilled halfwit (that is me) in an even smaller workshop with very limited machinery - ie to log onto ukw and hire someone of olly's calibre to build it for me rather than promising swimbo i could do it myself and winding up screwing five pieces of mdf together. :eek: ;)
 
All was going well this morning. With the top flattened, cleats screwed in place and the thought of 'finishing' growing in my mind, this happened... :shock:

3398712548_cc55d018a1.jpg


And I have absolutely no idea why!! :x

My chamfering cutter is almost brand-new from Wealden; the grain's running in the right direction; I used a slow feed-rate, router on full speed and travelling in the correct direction... :( I used to do a lot of stop-chamfering on softwood in a previous job and I never saw anything like this happen!

I guess the best thing to do would be to plane 1mm off each end, re-cut the chamfers and just hope... :roll: :oops: Fortunately, I did cut the top a couple of mill over length (I was just going to leave it slightly long). Anyone have any other suggestions?

First thing I did (after lots of swearing...) was to come in a short while ago and have some lunch; clear my head and all that. :wink:
 
Bad luck Olly, I would trim a mm or 2 off then re cut but taking off a little at a time, its always a bit risky cutting too much off the end grain.
 
Thanks, Martin, I did exactly that - planed a bit more off the ends and re-cut the chamfers. Admittedly, they ended up 10mm wide where I would've preferred to have kept them a little closer to 6mm... But, the damage is now gone! :D

Back to this morning and this is how bad the top was looking after five minutes with the random orbit sander. :? It had also started to cup since bringing it back indoors - leaving a heavy weight on top (an out-standing project from November... :wink:) for a few days seemed to cure it.

3398484657_987988ab9b.jpg


Adding a couple of 25mm cleats to the underside will also help, I'm sure. This was after flattening with the belt sander and hand-sanding to 240g (my finest belts are only 120g). Scraping didn't seem to go very well this time, only producing dust, even after a fresh sharpening. :? The top was 19mm when it came out the thicknesser and has ended up about 18mm thick before staining, which is acceptable, I think.

3398484881_9b4ac79e1a.jpg


With my router out (it lives indoors! :) ) for the chamfers, I fitted a straight cutter and cut out some small recesses on the underside of the top, at the rear edge, for this knuckles in these hinges - as detailed by chris_d on another page.

3398484387_b4e50528a5.jpg


Here's the top after staining and a dash of knotting solution. :D

3398484523_8e5684632c.jpg


And this is the hardwood ply base, which took the stain really well without needing a coat of sealer or anything.

3399294030_397f722f43.jpg


I still plan to add a final protective coat of something - if I go to the Yandles show on Saturday, I might grab some of the Acrylic Lacquer... :-k Then, I'll add a coat of wax.

It feels so good to reach this point in the build (no more staining!! :D :wink:) and I'm pleased with my progress today. As it's birthday tomorrow (24) though, I doubt I'll get much done! :wink:
 
Thats looking great. Really top piece. No idea what that tear out was about I'm not as learned as your good-self, par for the course with softwood wouldn't you say?

I have used some Chestnut Lacquer on softwood dye this week and it comes up lovely, like really really nice. Its brushable as well so I didn't have to do all the spray gun cleaning. Takes a few coats I think to build it up, but maybe it needs a sealant or something inbetween? I didn't bother thou as it drys in 5 minutes or less.
 
Coming on nicely there Olly.

Would you need to wax over the Lacquer? I think it'll be fine with just a couple of coats of lacquer on it's own.
 
Before I get in to the troubles I'm experiencing with the lid supports I bought from Rockler, here's where I am in terms of progress. I haven't had much time on this at all lately; believe it or not, I've been working for most of the past two-weeks :shock: (though, technically, I'm still unemployed! :roll: :wink:)!

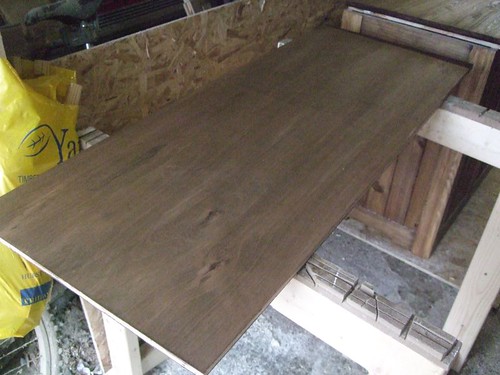
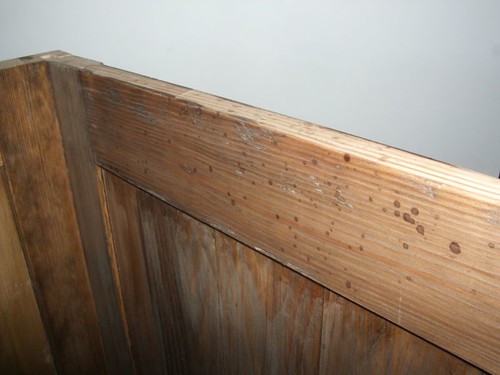
Bits of sealing and staining here and there. I bought the acrylic lacquer from Yandles last Saturday but instead opted for the melamine lacquer, purchased at the same time. Lid has now had a couple of coats and the finish is building up well. Still needs some more work.

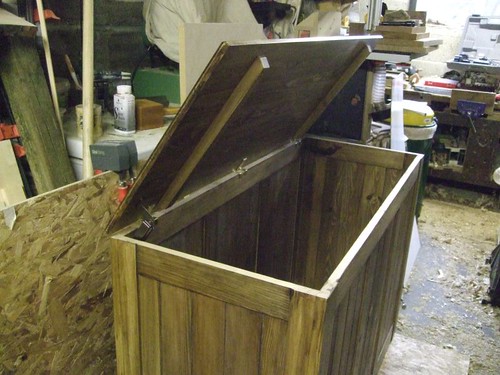
When I was staining the top, I thought I'd be clever and try to save space by using the carcase as a 'finishing bench'... A scrap of ply went on top to protect it - it was plenty wide enough but, about 2" short... Anyway, after the photograph below, you can see why I ended up scraping off this layer and re-staining it! :x

3428868587_cb8138cd13.jpg


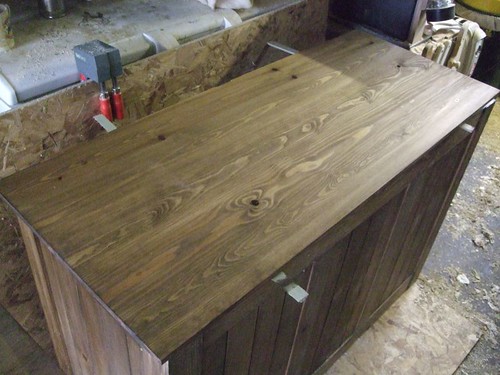
The base has been given a couple of coats of beeswax and it's come out quite nicely. That's now fixed in place and there's nothing more to be done, there! :D 
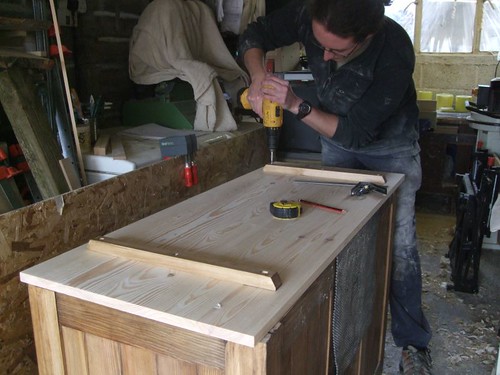
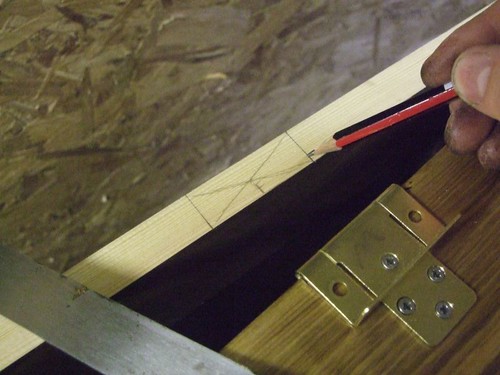
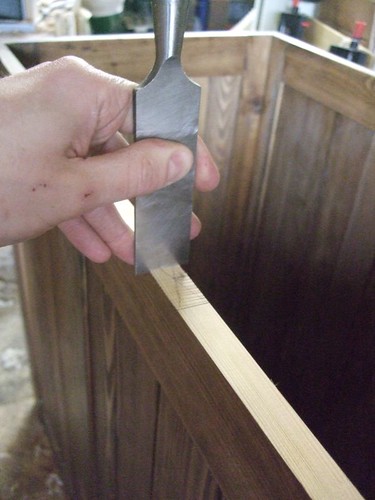
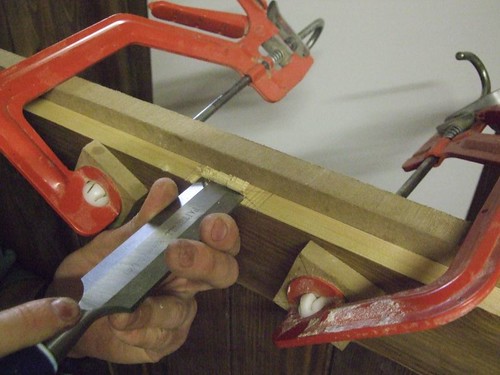
Today, I wanted to crack on and get those hinges fitted. I started by screwing them directly to the underside of the top (no recess). Then, I could centralise the middle one, chop out the waste and from that, mark out and chop the other two in to the back rail.

3429684262_174c5f1b70.jpg


3428868743_41f526fd9d.jpg


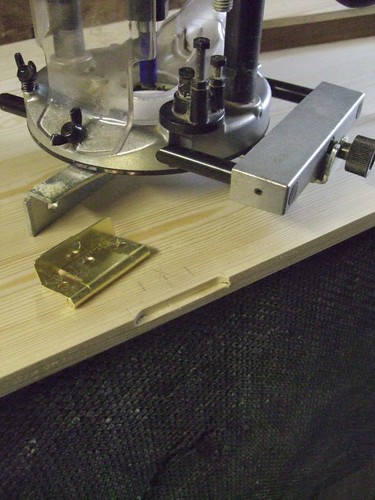
A scrap of MDF here prevents breakout. :wink:

3428868429_8d11ccc6cb.jpg


This part went well and, I'm very pleased to say, the hinges sunk in neatly first time. 8)

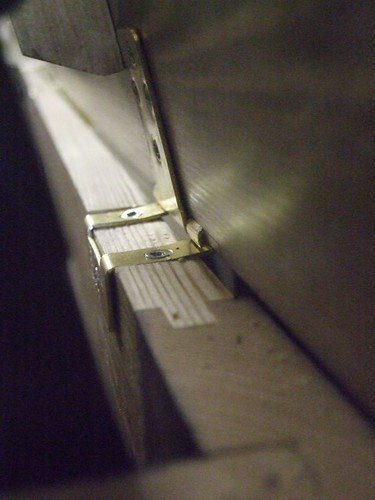
However, I've wasted several hours this afternoon fiddling with and re-positioning these lid supports from Rockler. I've been following the instructions, working off the pivot point of the hinges but, I just can't get them to work without lifting the hinges, as this next photo' will show:

3429684126_cbbee93b08.jpg


Thank God I only used short screws to hold these in place - had I found any longer ones, I'd have ripped the back rail to shreds by now!! :shock: My first reaction was that I'd miscalculated and bought the wrong ones; there felt like an awful lot of resistance, until I realised what was happening with the hinges... :? :x

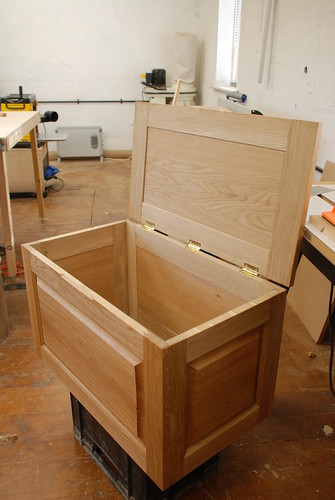
I'm using the side-mounted hinges. Perhaps I would've been better off with two back-mounted ones? Could it be the hinges; should I have stuck with butt hinges?

I can see the appeal of using these Cranked Hinges; I can fold the lid right back to 180° before it feels as though something wants to give. If it's any consolation, these lid supports do appear to work - I've only got one fitted here and there's no hint of any strain or struggle. :)

3428868821_18d323de50.jpg


I really don't know what to do right now and would greatly appreciate any advice. :(
 
Olly,

How free was the lid working before putting the support on, as it may just be the photo, but it does look as if the hinges are housed too deeply and will bind.

Dennis
 
Olly,
Is the back edge of the lid catching on the corner posts given they protrude further then the rails?
Perhaps flushing in the inside tab of the hinge will move it back a bit if that is the case.

Good build up though, just sat and read the whole thread.
Well done. :)
 
Thanks for your quick replies. :)

Dennis; I can understand what you are seeing in the photo' but the lid folds free and easily without the stays. No binding or anything like that.

However, on another forum, the question has been raised about the quality of these hinges... They are, after all, only thin bits of steel. Would anyone happen to know where I might be able to get hold of some thicker brass hinges, as close to identical to these as possible?

Night Train; thanks for your comments and for reading through the whole thread - not an easy task for a Friday night, I'm sure! :wink: I've checked the corner posts/stiles and they do not foul the back edge of the lid.
 
My guess is that they are too small. I'd reposition them (if possible) and just flush-mount them to see if it solves the problem.

Russ
 
Olly,

Have you got the correct strength supports as it sounds as if you intend fitting 2, according to the instructions if you have the correct size for using 2, then the 1 that you have fitted would not support the lid on its own as it appears to on your photo.

You could try packing under the hinges with cardboard just to make sure that this is not the cause, and if it is, it would be a case of either a filler piece, thicker hinges or plane the top edge of the chest down.

Dennis
 
I reckon its the quality and type of hinge thats the issue - they appear to be bending under the force of the lid support. Why do you need a cranked hinge? I just used standard butt hinges on this chest and they worked fine;

3240971395_04b68f92de.jpg


I think if you change to a more robust hinge that will fix it.

Cheers, Ed
 
Olly,
Are all the hinges lifting, if not, the pic of the hinge you have shown looks to be the opposite end to the fitted support, looks like the support causing a twisting effect, which will be countered by fitting the other one.
hope you get a quick fix.
Just a guess never fitted anything like this before.
 
Right. Dennis, you're on the ball with this one... :wink: I got it wrong at the checkout when I bought a pair of the strongest hinges (giving a combined counter-torque of 190-250 inch-lbs). When I weighed my top (on the bathroom scales... :oops: :) ), I calculated it to be roughly 160 inch-lbs (if not slightly more). What I need to do now is to buy one of the lower-rated stays to complement one of the stronger ones I have, which would give me a counter-torque of 140-180 inch-lbs. I could possibly get away with the smallest size and 130-165 inch-lbs of torque.

I feel like a right berk!! :x :evil:

Oh, well. At least by placing another order with Rockler I should be able to import some better-quality, solid brass hinges. I thought the Isaac Lord ones were a bit cheap... :shock:

Ed, I do think you have a point also with regards to the quality of the hinges. Why did I used the cranked type? Well, I blame chris_d (Look back through the thread)... Nah, only joking, Chris!! :D You offered me some sound advice and it was my decision in the end. I'm not keen on now replacing these with butt hinges, which was also my original plan... There are enough screw holes as it is and, I fear now that anything I try to do to hide some of the existing recesses is going to stand out. :?

I'm still not sure why the hinges are bending with only one stay fitted. This provides insufficient torque, which should mean the lid falls down... It starts to but, then, I can feel the hinges starting to bind, which is what is actually keeping the lid up. I think this only supports Ed's comments on the hinges. :)

enecosse, yes, just for the record, I have this morning tried packing out the recesses with scraps of laminate left over from my router table build. Sadly, it didn't seem to improve things. If anything, I think it made the pivoting action slightly worse and put more strain on the hinges... :oops: :wink:
 
Okay. I've decided to take Ed's advice and will revert back to my original idea of using butt hinges. :roll: Obviously, this will leave me with some working to do; filling all the little holes and patching up the mess I've made. :oops:

Hinge recesses can easily be filled (if necessary) with scraps of veneer-thickness stuff cut on the bandsaw; no worries there. Most of the screw holes (<3mm diameter?) should be hidden once the stays are re-attached but, some will remain visible... Any thoughts on how I can hide or fill these?

I've tried using hot wax with a soldering iron at college. All I learned there was that I have a terrible eye for matching grain colour! :oops:

Any other suggestions?
 
Back
Top