Blanket Chest - Finished!! (Photo's on page 8)

UKworkshop.co.uk

Help Support UKworkshop.co.uk:

This site may earn a commission from merchant affiliate links, including eBay, Amazon, and others.
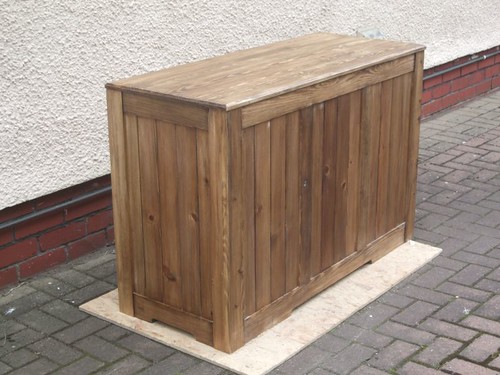
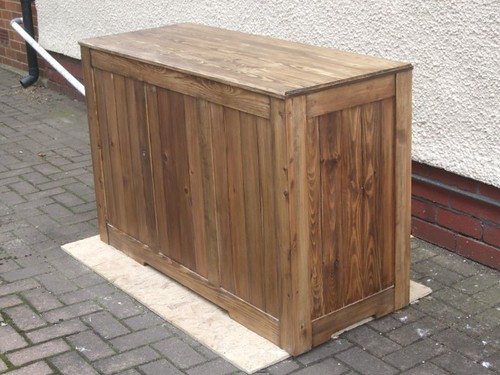
Found some time to get the new hinges fitted today, after patching up the recesses and filling the screw holes. To be honest, I don't think my mix of sawdust, glue and stain has don't a great job at hiding the screw holes... :oops: I'll give it another two coats of lacquer and have a look then.

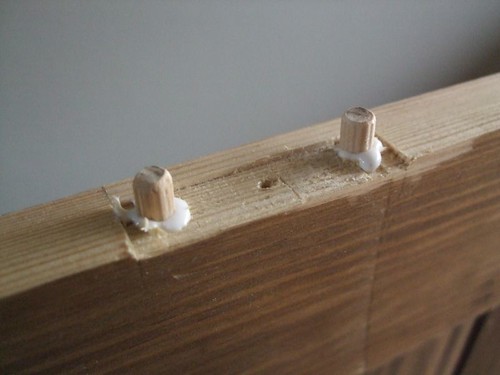
Any holes I wanted to re-drill were filled with 6mm dowels. This went well. :)

3445376678_1d6e0908c8.jpg


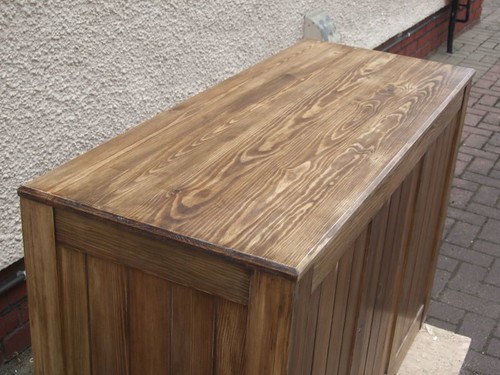
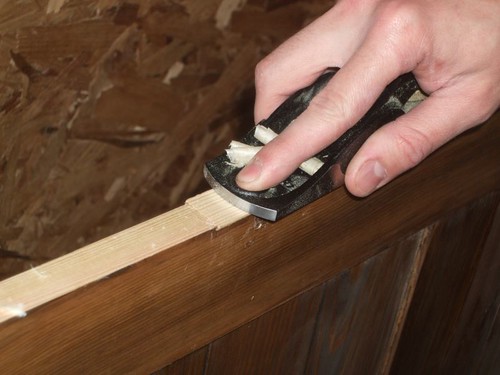
My Veritas Apron Plane made light work of cleaning everything up. Grain match isn't perfect but, it doesn't really show.

3444559321_c63cca73d2.jpg


When it came to attaching the hinges, I decided to use my Japanese marking knife to try and un-fold one of the more stubborn ones that didn't want to pivot (they were already fixed to the top at this point)... Well, have a look at what happened... :roll: :x

3444559385_a00423b4d4.jpg


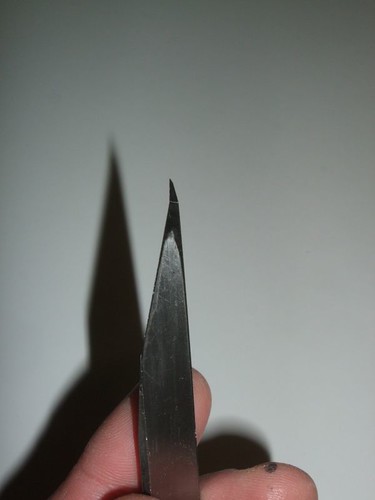
It was only the other week that Steve Maskery was talking about breaking the tip on his knife as well... It was the first tool to hand and, well, I sorely regret it now! :oops: :( I will attempt to regrind it during the coming days although, I'm not sure whether or not that'll actually work with the hollow back...? :? I suppose I should blame Steve really, for setting the thought deep inside my subconscious...!! :D :wink: Well, I guess it's the price you pay when you're trying to rush things at 8.30pm...

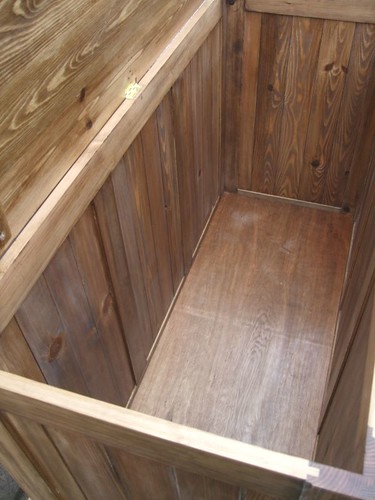
Rockler have sent me an e-mail to confirm that my latest order has been shipped. I weighed the top again and it requires 142kg of counter-torque. As this is on the fence between the small and medium sized stays then, I ended up buying one of each, just in case! :roll: No, actually, make that one pair of each! :oops: :D

Oh, well, at least I can't get it wrong this time! :wink: I did find time earlier to quickly fit one of the strong stays and, even with the butt hinges, the screws were starting to lift... :? I have only got ½" screws fitted though, that could be a problem. They're all I have in the workshop; will have to pick up some longer ones soon.
 
OPJ":1xez14qa said:
When it came to attaching the hinges, I decided to use my Japanese marking knife to try and un-fold one of the more stubborn ones that didn't want to pivot (they were already fixed to the top at this point)... Well, have a look at what happened... :roll: :x

3444559385_a00423b4d4.jpg

Olly - if you insist on using these Oriental imports :lol:... >> outa here! - Rob
 
How much pressure did you use on the lid when the screws lifted Olly.

Owing to stays being so short and so close to the pivot point, if the stay is over strength this will put immense pressure on the hinges if any force is used.

Hopefully this will be cured with the correct strength stays, and longer screws in the hinges.

Dennis.
 
Yes, I think you're pushing it with 1/2" screws into softwood to hold a lid that big. Up the screw length and I think the problem will be fixed.

Cheers, Ed
 
How's this for service... Placed my order with Rockler last Tuesday, receiving an e-mail confirming dispatch on Wednesday and, despite paying for the cheapest one-to-three week shipping, all arrived safely this morning! 8)

I now have the stays to finish the job (and longer screws!) but, one appears to be indistinguishable from the other. I can tell the left from the right, obviously but, as I bought both the smaller sets to err on the side of caution, I don't know which is which! :? I've sent an e-mail to Rockler; hopefully, they'll have an answer soon.

Bought a couple of other little goodies as well. :roll: My card reader/USB port's playing up so, I'm unable to upload any photo's right now (it takes too long to do it direct from the camera!). :(

If I can get the hinges and stays sorted in the next two days and clean it all up over the weekend - maybe, just maybe, it will be ready for delivery this time next week...! :shock: :wink:
 
You are indeed correct, Derek. Also, I noticed unique five-digit number of the back of each of the bags, which corresponds with the item number as given on their website. So, to avoid any further confusion, I've labelled each one with a strip of masking tape and a marker pen. :wink:

Further more, I'm very pleased to say that I've got the stays working!! :D All I needed to do was replace one of the 95-125 stays with either of the weaker ones (I've tried both the 35-40 and 45-50; there's no real difference, they both work well). I also fitted some ¾" screws and the hinges aren't going anywhere! :wink:

I'm back on to finishing again, with the finish line in sight. 8) I still want to add a couple more coats of lacquer to the top but, I should have it all completed over the weekend. :) I'll admit haven't done a great job at hiding all the screws holes and the staining is a little patchy in places, though I think this is more to to with the grain and how it varies from board to board. Most of the bad stuff is on the inside so, it shouldn't show anyway. I'll try and take some photo's... :?
 
Another little problem sorted hope you don't have any more you've had your fair share in this chest. Fingers crossed you don't have any more. So the end must be very close :D
 
OPJ":5f86k34u said:
This is a job I've agreed to do for big soft moose (Pete) - and, on top of that, it's also my first commissioned piece of furniture!

Olly,

I see from your profile that you are studying cabinetmaking at college, presumably with a view to following this as a career.

There's nothing wrong with what you've done with this box, but if you are going to do this sort of thing professionally you need to be able to knock out a simple job like this in a couple of days from start to finish.

You've been at it for 3 months...

Get a move on man, we're beginning to lose the will to live out here!!!

:lol:

Cheers
Brad
 
to be fair he's only working a couple of hours a day and fitting it round other commitments and all round me and swimbo are happy satisfied clients and dont have any problem with the timescale.

If i'd wanted it boshed it up in an afternoon using mdf and screws (or biscuits if feeling posh) i would have done it myself but swimbo wanted a decent piece of furniture and as i dont have anywhere near the craftsmanship that olly shows i'm more than happy with our choice to ask him to make it and what he's done.

and i'm the client - and the clients always right ;) :D
 
Hi, Dan. Don't worry, I'm fully aware of what I would need to do if I was to make something like this for someone later in life. I've learned a lot a long the way (always important! :) ) and I know that there are several things here I would've done differently, mainly to save time and money. For example; using biscuits to join the carcase instead of the bare-faced tongue I went with here.

Pete's right as well, even when I'm not at college for three-days each week, I still seem to find myself busy with other things even though, technically, I'm unemployed. :oops: My workshop is also small and very cramped - actually, inefficient is the word I like to use (there are some photo's on my Blog that help to illustrate this! :shock:) I have no intention to try 'going it alone' on my own until I've at least found a new home for the household junk and reorganised my work space. Even then, I'm realistically looking to go at it part-time around another nine-to-five job with a guaranteed income. I think this is a sensible way to slowly build up a reputation without putting everything on the line and, I haven't even mentioned the R-word yet! :shock: :) (That's enough about business - we've all read plenty about that in the other forum! :D )

I was aiming to get this out within two months but, well, you know the rest... :roll: I'm grateful for the patience Pete has shown - as he is also, for the fact that I'm not charging an hourly rate!! :D

Put another coat of lacquer on the top this evening and it's looking good. :)
 
on re reading my previous post i feel that i should perhaps also clarify that my refference to "boshing it up in and afternoon using mdf" was in regard of my own craftsmanship- or rather lack of it

it was not intended as a jibe at brad or indeed anyone else who regularly turns mdf into gold ...

in my hands it just turns into substandard furniture :D
 
At long last, the Blanket Chest Saga is over. In truth, I actually finished this almost a week ago - I've just been waiting for some clear weather so I could take some half-decent photographs. In actual fact, it started raining this morning as soon as I had finished the last shot! :D

3482387943_f62b9ed0ed.jpg


I did have a sheet of Formica which I was going to use as a background for these shots but, erm, I cut most of that up a few days ago for several other jobs... :oops: :)

3483203936_99b30245b0.jpg


Yes, this is how it should work, with the correct stays! :D I highly recommend these things; they're excellent when you get it right.

3482387471_8d292ca736.jpg


This is a shot of the right-hand side, where the timber I used for the panelling wasn't quite as clean and tidy as on the other three. Still, I think it looks okay.

3483203998_6f10b84c50.jpg


Looks quite good inside as well (if a little dusty still... :oops:). You can probably see those un-stained edges around the panelling. I have the same problem on the outside as well and I really don't know why this has happened. I spent some time the other day painting over them with a thin brush but, it didn't make the slightest bit of difference. :( Same with the top edges; you can see where the end-grain has gone almost black but, the rest is very light in comparison. It's baffled me! :?

3483203790_11bb9520ff.jpg


Top looks good though - it was, without question, certainly worth buying that extra timber! In all, I think I applied four coats of Chestnut's Cellulose Lacquer, de-nibbing it in between coats and dulling it slightly with 0000 steel wool. All that lacquer has given the top a slightly 'yellow' tinge... I only used two coats on the sides and they seemed to remain darker.

3482387631_729d49d021.jpg


Yeah, this Chestnut Lacquer is really great stuff! 8) :wink:

There are a few dents and scratches in places which I couldn't remove... They shouldn't be too easily noticeable. There's also some breakout on top of two of the stiles that I couldn't hide (it will be hidden most of the time anyway).

Assuming I can figure out how to get this in the back of my car on my own then, it's off to Pete's in the morning for an "early" delivery - I really hope you like it, Pete. :)

Staining aside, I've actually quite enjoyed making this and I'm still manage to learn and pick up a few tips along the way. I cannot wait to get back in to some solid hardwoods though. Once the cheque is cashed, I should be on my way to see Interesting Timbers about some beech for that workbench I've been meaning to build...! :wink:

Thanks to everyone who's just about held on long enough to see this one through with us until the end!! :D
 
Very Well Done Olly. Brave of you to do this warts and all WIP and hopefully Pete learned a few things for when he tackles his next furniture project.
 
That looks great olly. Lovely job, I hope my pine furniture turns out even half as good as that.
 
wizer":3vyrasab said:
Very Well Done Olly. Brave of you to do this warts and all WIP and hopefully Pete learned a few things for when he tackles his next furniture project.

and if not i certainly know who to call if i want anything elsemade - top job allround i'm very happy with that and i'm sure swimbo will be likewise.
 
Back
Top