Blanket Chest - Finished!! (Photo's on page 8)

UKworkshop.co.uk

Help Support UKworkshop.co.uk:

This site may earn a commission from merchant affiliate links, including eBay, Amazon, and others.
Mike Garnham":1rv0tddg said:
Martin,

as a matter of interest, and hijacking the thread completely, what is the white wood in the box in your avatar? Was there a thread covering the construction?

Mike
Hi Mike, believe it or not the white wood is Ash, if I didn't know I would have guessed at Sycamore :? I did do a thread, have a look here, prepare to be suprised though, its an warts an all thread
 
Thanks Martin.......

what an interesting thread that was! How does that ash look now? I'd be amazed if it looks quite so blonde....

Lovely work!

Anyway........back to Olly's box.... :D

Mike
 
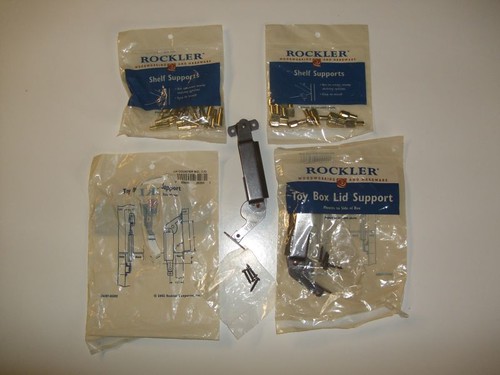
I picked up my latest Axminster delivery from the Post Office on Saturday morning Plenty of sanding sheets, some more stain and, er, that spare set of knives for my planer I've been meaning to buy for over a year now! :oops:

After a couple of hours sanding on Saturday, I'm pleased to report that the velcro-backed sheets from Hermes held on very well. I still managed to get through three of them at 80g but, they've got more stamina than the aluminium oxide stuff, that's for sure.

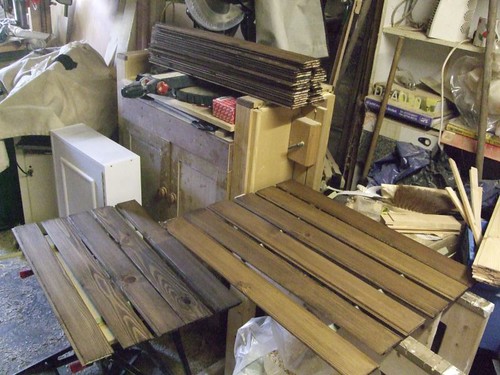
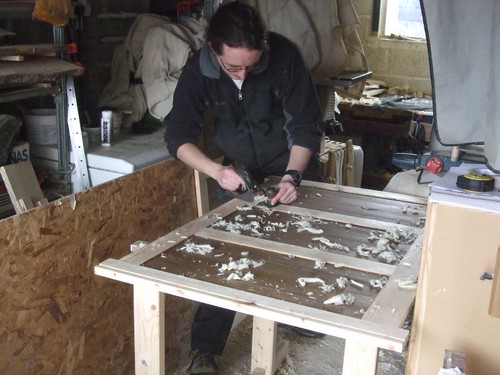
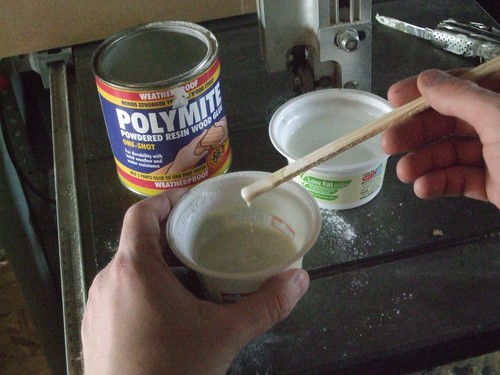
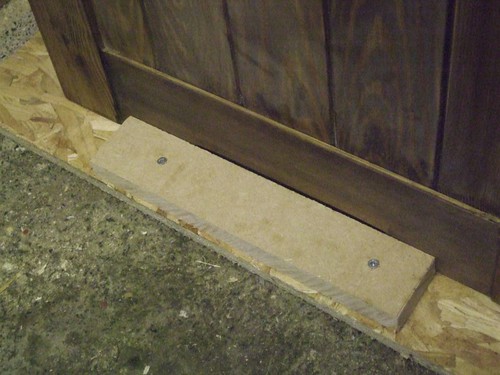
I then a applied a thin coat of sanding sealer (50/50 with thinners) to each board and the inside edges of the frame components. Got back in to it today and spent another couple of hours applying a coat of Mid Oak stain, after Pete and SWMBO's confirmation. :wink:

3323552008_52d5b4155b.jpg


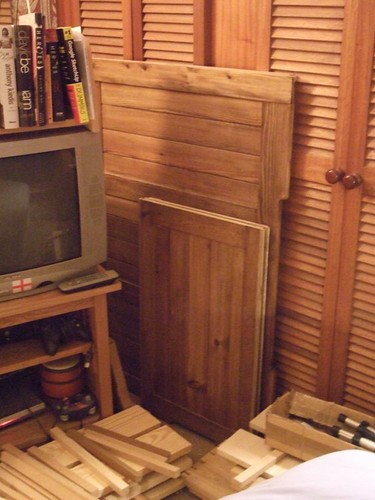
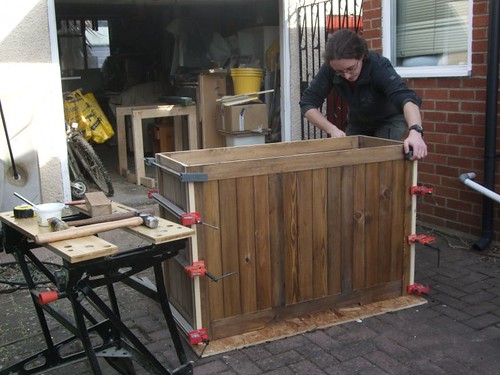
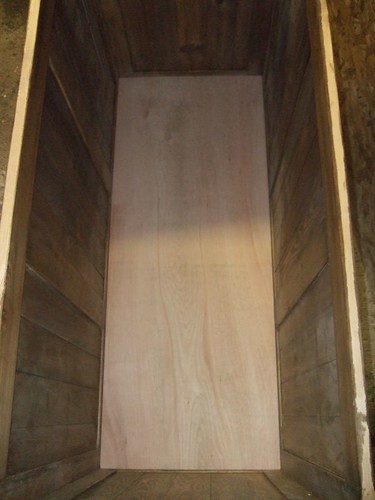
(That white MDF box/cupboard is another job I'm doing for someone else...)

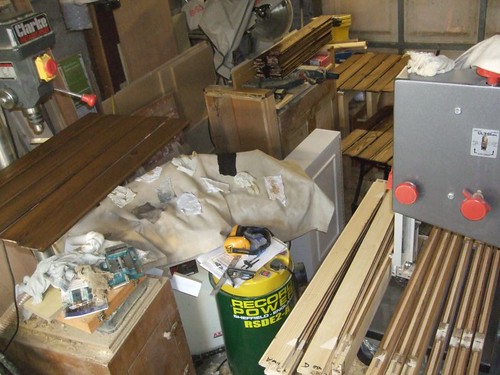
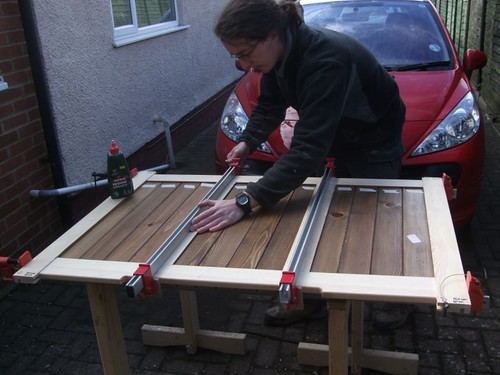
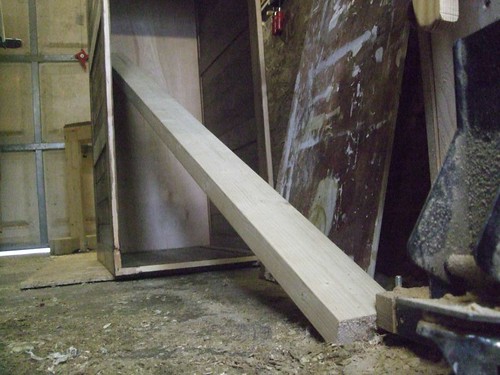
This second shot will show you just how stuffed I am when it comes to finding space in my workshop to let things dry! I wasn't able to do any other work around it. :( Fortunately though, this stuff dries within ten minutes, just like they said it would. :)

3322718803_a4bacbbb4d.jpg


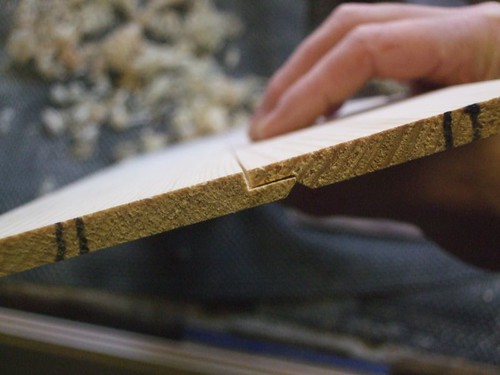
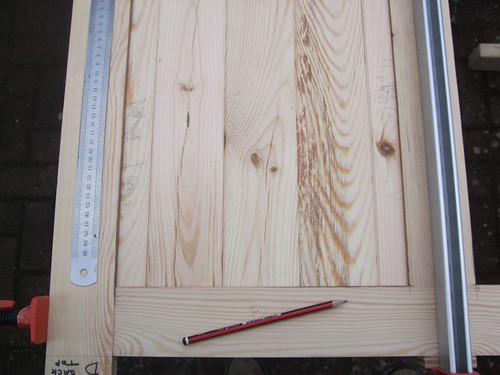
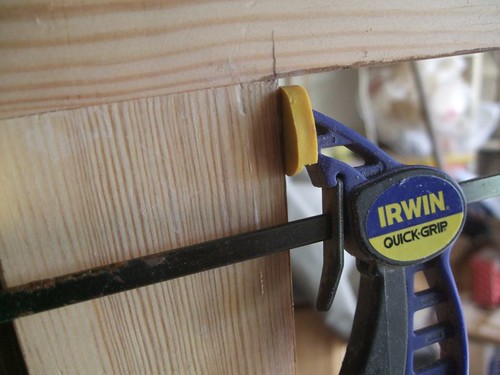
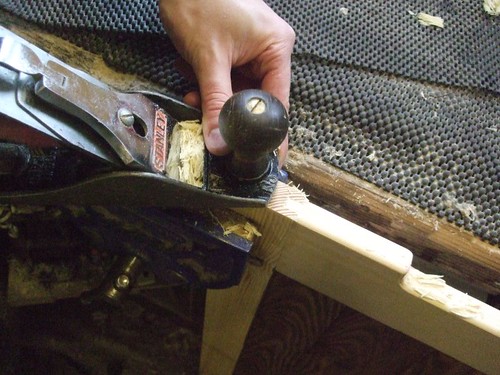
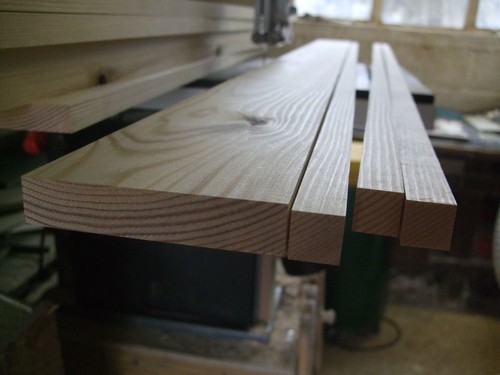
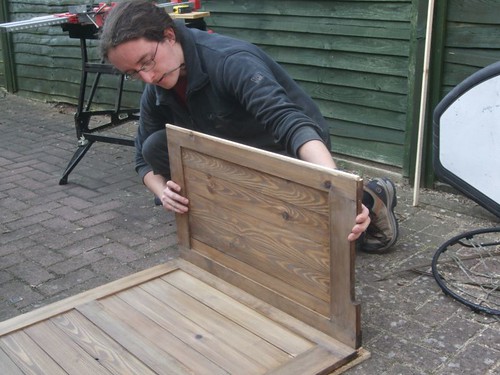
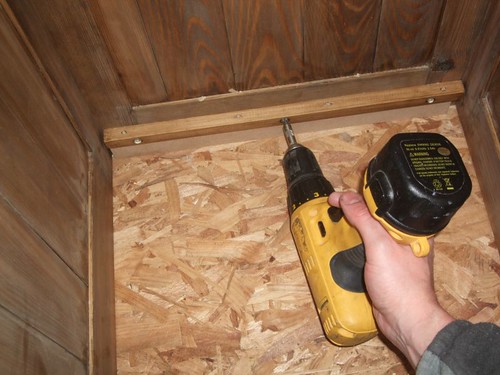
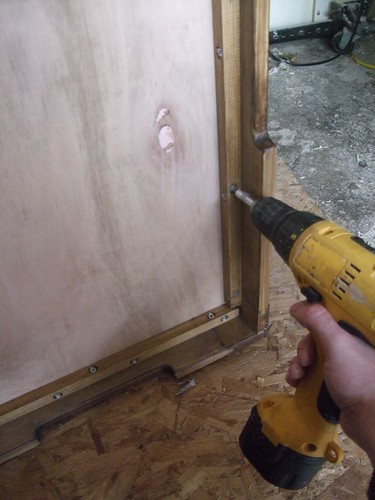
Oh! This is how the boards join together with the chamfers, if I haven't shown you already... I've hand-planed 1mm off the tongues to allow for movement (and, to ensure a tight fit on the face side :wink:).

3323551834_3c0c8e1988.jpg


What I didn't realise until I'd already started staining was that my sander had left some tiny little swirls on the surface which weren't visible before. :shock: They're not noticeable unless you get really close. There are a couple of scratch marks too. Hopefully, I'll be able to hide the worst offenders round the back... Sorry about this Pete; it's probably not as bad as it sounds but, I hope it doesn't cause you any bother... :oops:

I probably did get a little carried away with that 80 grit paper - there was plenty of evidence to show that my planers knives aren't in great nick (no pun intended! :shock:) and the boards aren't as tight a fit in the grooves as they were fresh out of the thicknesser.

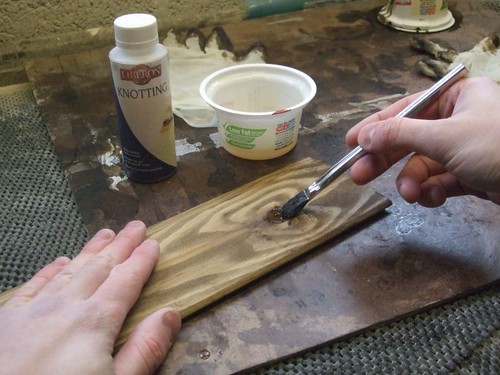
Knotting came next and was applied to all the dead knots. I almost made the mistake of applying this before the stain - until I read the label on the side of the bottle; that's not what you're supposed to do! :roll: :) I guess it would show through if you applied the knotting first? Anyway, it's looking pretty good, if I do say so myself. :D

3322719085_ca2bb37251.jpg


I'll apply a final coat of sanding sealer tomorrow. I won't be waxing all the boards as I did with the samples. I'll wax the top and maybe the outside faces of the frame... Otherwise, I'll never get this done!! :wink:
 
Got that last coat of sealer on yesterday although I couldn't find the time to get much else done (running around, and all that...). I managed to sneak back out there in the evening, under the deafening rain of hailstones above my head, to get the two sides glued up, finishing just before eight o'clock!

3328539996_6aa6734145.jpg


I've been working on the front and back this morning. Initially, I was thinking of a board layout like this: (Don't worry, Pete, these are only scrap pieces! :D)

3327705725_97e16e07f7.jpg


But, no. I decided it just looks too narrow at the outer edges and have tried to keep things looking more even.

After my final dry assembly, I dropped one of the vertical rails on the concrete floor and noticed this: :x Five-minute PVA came to the rescue! :)

3327705641_eb4e0ba567.jpg


As I only have enough long cramps to glue up one, I'll leave the front until the weekend. I do have some of those cheap aluminium Record cramps but, while they measure 1200mm long, they're capacities are actually a lot less! :roll: I didn't have the space to do this indoors so, thankfully, it didn't rain. :)

3327705581_dab0d5b830.jpg


It's all starting to come together now! :twisted: There's still a bit of sanding and staining to be done. Which reminds me, I need to buy some more sanding sealer! :roll: (Don't worry, I'll try avoid Axminster this time! :wink:) Don't have any more time on this today as I'm doing a quick job for someone later.

Oh. In case you're wondering, the strips of masking tape are there to remind me which board goes where. :wink:
 
seanybaby":qdspco8k said:
Olly, I think I'd send the sander back for a full refund and maybe get the makita version. I witnessed one fly across the workshop at college and hit the floor :lol:

Did the lecturer run out of chalk to throw at the students who were not paying attention?
 
With all four sides now glued up and ready for staining, I'm nearing the end of this build and am starting to think about working on the top. This is where I think I've shot myself in the foot a bit with my design... :?

As it stands, the back rail is set-back 3mm from the outside face of the stiles (it's flush on the inside). Hopefully this drawing will help:

3340396603_21374f7d82.jpg


I'd like the top to be flush with the back edge (meaning the stiles) but, this is obviously gonna give me some problems when it comes to fitting the hinges... What do you think I should do?

I could simply plane the rails back flush. Or, I could glue on a strip 3mm thick, although I'm not sure that'll work out too well when the screws go in...

What does the forum think? Any thoughts are appreciated. :)
 
Hi Olly,

I actually like the inset nature of the rail since it gives the piece visual depth that enhances the aesthetics. I don't think that the overhang of the lid/top to the rail will cause a problem with the hinges if you use a cranked type - furthermore, the overhang would actually help to hide the pivot point of the hinge and keep the focus on the woodwork and not the ironmongery!

Look forward to seeing finished piece.

Cheers,
Chris
 
Hi Chris, thanks for your reply.

I'm glad you like the rail/stile offset! :wink: I should've mentioned that I'm hoping to use three 50mm butt hinges... :?

My other thought was that I could chop them in to the back rail as normal but bring them in from the back edge of the top slightly, if that makes sense... Would that work? This way, the back edge of the top would remain flush with the face of the stiles (not back rail).

Or, if I set the top flush with the back rail, I could try to 'disguise' the end-grain of the stiles by chamfering them.... It won't be seen, whatever I do!

Are these the hinges you had in mind?
 
Hi Olly,

My other thought was that I could chop them in to the back rail as normal but bring them in from the back edge of the top slightly, if that makes sense... Would that work? This way, the back edge of the top would remain flush with the face of the stiles (not back rail).

Yes that is exactly what I was thinking but I suggest that you use cranked hinges so that:
1. The lid sits level with top face of carcass on all four sides;
2. The there is greater support to permit the 'protrusion of the pivot point' without creating excessive stresses.

I've sketched a diagram of the configuration (see below) to accurately convey my suggestion:

Blanket_Chest_Hinge.gif


Hope this helps,
Chris
 
Looks great Olly, really coming along quick. What do you use to fill holes and gaps then in the wood, 5 minute PVA? What will happen to that when you stain it?
 
Thanks again, Chris. That diagram makes it crystal clear! I haven't placed my order with Isaac Lord yet so, I may have to add some of those hinges to my basket! :roll: :wink:

Hi Chems. I only used the five-minute PVA (Wudcare, from Axminster) because I didn't have any super glue (cyanacrylayte) to hand, which would've been ideal... As I'm using a fairly dark stain though, the glue line doesn't really show. I'm not trying to fill lots of holes and gaps - my joints aren't that bad!! :D This was to repair the damaged edge on one of the rails.

I've bee cleaning up the four assembled frames today and managed to get a coat of stain on this evening. Leaving my sander in its box, I cleaned the pine up with my scrapers and smoothing plane, before hand-sanding. It went a lot better than the last time, I'm pleased to say! :)

Hopefully, I'll be able to get the top glued up tomorrow and, if I can find the space, I'll also assemble the frame...! :shock: :)
 
Thanks Olly, super helpful as always. I ask only as I am working with Pine at the moment and its so prone to break out or chipping that I have a few little bits I'd like to fix.
 
I've got to the stage now where all four sides are pretty much ready to be glued up. Only trouble is, most of my sash cramps are in use as I've spent today machining, biscuit-jointing and gluing up the timber for the top! :roll: :) I have been gathering cheap sash cramp heads via. eBay in recent weeks; all I need now is a load of beech or similar to make some wooden bars... :wink:

Here's yet another shot of my eternal fight against space in my small garage/workshop! I left the sander behind and went at the frames armed with my cabinet scrapers and smoothing plane. I did mange to fit the narrow end frames on the workbench... Just about! :D Seriously, I'm gonna have to bump my workbench build right up to the top of the list once this chest is finished!

3347092356_38fc1a97cf.jpg


Finally, I have something good to say about working with pine - when your iron is sharp, it takes lovely end-grain shavings!! :D

3346256185_cd3f479c0a.jpg


I did manage to find some space indoors to store the near-completed frames... Although it's far from ideal! :oops:

3347092414_a8d52f8da2.jpg


Originally, I planned to use five boards at 100mm wide to give me a 500mm wide top. Allowing for 5mm overhang all round, I forgot to consider that the back edge will have to be flush for the hinges when I made up the frames - so, my top is currently 495mm wide, made up from five 99mm wide boards... :oops: :wink:

Either way, I had to buy 5" wide timber for this. Instead of throwing away the 20mm-or so square strips, I've thicknessed them to 18mm² and I'll use them to fix the plywood base later. :wink:

3347092780_f66c576270.jpg


Yep, another glue-up on the drive way!! :D I used some more of those strips from the 5"x1" boards to protect the edges of the panel - it was easier than sticking individual bits of ply between the cramp heads. :wink:

3347092710_4307d8dda3.jpg


Here we are again then, at the halfway point in our "working" week! :wink: College again for the next two days (it seems to come around very quickly! :shock:), I'll pick up from here over the weekend.
 
looking good mate - swimbo's loving the work in progress pics ;) even if i do have to do a certain ammount of explanation of what the woody words mean :D
 
There's only so-much I can do on this project right now as I'm waiting for the lid stays to arrive from Rockler in the US. I ordered them on Monday and they reckon it could take one-to-three weeks... :roll: I would've bought them sooner but I needed to glue-up the top so that I could weight it and buy the correct stays. Turns out I require the largest size anyway!

After bringing the top back indoors following the 'problems' I encountered with my random orbit sander, I realised that the whole board has cupped! The sawn boards were stacked indoors for several weeks and I also alternated the growth rings!! :x

Therefore, I'm gonna leave the final flattening until I've got all the hardware and can screw the cleats to the underside, which will hopefully keep it flat... :? I don't want to do this now and realise later that I've put them in the wrong place, leaving exposed screw holes and all! :wink:

In amongst the DIY I'm starting now the warmer weather's coming in, I did manage to get the main frame glued up today, using Polymite glue (a modern form of cascamite).

3362557373_721f9a23f8.jpg


3363375144_838924dcda.jpg


Once again, I managed to deplete my supply of sash cramps for this one job! :D I did check it all for square but, to be honest, it's still quite flexible and probably will be until I can at least fix the ply base... :? Using the OSB sheet as a base allowed me to slide the unit back in to the workshop afterwards! :wink: With the current temperatures, it should do nicely.

3363374956_e726a758ec.jpg


Before all that, I found some time to drill countersunk holes in the cleats which will secure the base from underneath. Nothing exciting here! :)

3363375220_a99397d3ff.jpg


Now we play the waiting game... I couldn't believe the international shipping charge - $40 on top of the $6 or so that Rockler also asked for, for a couple of tiny bits of hardware!!! :shock: :evil:

Sorry Pete, I don't think this will be ready before The Big Day... :( :wink:
 
OPJ":2syxr9ro said:
Sorry Pete, I don't think this will be ready before The Big Day... :( :wink:

no worries mate - you'll gain a few weeks as we arent back until after easter , and stretching imto april has the advantage of another paycheck being in the bank (sigh this wedding larks expensive - good thing i'm only going to have to do it once ;) )
 
Good news! I collected my Rockler order from the post office this morning! :D It actually arrived yesterday morning but, I was out. Considering that it was only dispatched last Tuesday (that's seven days...), I think that's bloody good, considering I payed for the cheapest overseas shipping option at "one to three weeks". 8)

3384760355_4730723d75.jpg


They even supply the screws to go with them! Forget about those shelf support pins; I may or may not use them for workshop storage in future... I read someone else (Lord Nibbo, I think?) say how much cheaper there were in the US recently and, well, I couldn't resist; you know how it goes!! :oops: :roll: :wink:

Securing the Base

I cut two strips of MDF (one long, one short), 40mm wide, on to which the cleats could rest for securing the base - that should (and did!) help to keep them all level.

3385574508_9e1a0f443b.jpg


In order to drive the 25mm screws home easily, I screwed some scraps of MDF in place around the perimeter to give me some 'resistance' to press against.

3385574682_2e338762c1.jpg


Fitting the base required a little more ingenuity... And I found it by wedging a length of 4"x2" between my bandsaw cabinet and the ply base! :D

3384759899_780dbcdfa3.jpg


3384760069_ec6e326937.jpg


This is how it's looking with the base in place. I still need to decide whether or not to stain it to match the rest of the unit... Any thoughts? Whatever I do, I'll finish it with a coat of beeswax for that pleasant smell. :)

3384760261_6e96f254aa.jpg


So, I'm now about ready to crack on with the top... But, not before the weekend, due to college. I won't get much time to work on it before the Yandles show next week either (it's my birthday on Tuesday! :D).

Pete, I hope the wedding goes well and everything. This should be ready for when you get back. :wink:
 
coming along now, i like how you got round doing things on your own :) , i often do this i think it make you work better in the long run, if that makes sense :?
 

Latest posts

Back
Top