A pressie from my son/ex-father-in-law

UKworkshop.co.uk

Help Support UKworkshop.co.uk:

This site may earn a commission from merchant affiliate links, including eBay, Amazon, and others.

Vann

Established Member
Joined
15 Oct 2008
Messages
2,169
Reaction score
260
Location
Petone, New Zealand
I've seen a few good luck stories posted here. I never thought it would happen to me though...

My son went 'round to his grandparents the other day to help clean out their garage, before heading for work (he works part time at a local supermarket to help fund his way through university). Now these grandparents are my ex's parents (my first wife) so I'm not exactly their favourite. Poppa was a carpenter in his day. I jokingly suggested that if he came back with a plane I'd pick him up from work at 10pm (he always asks me to pick him up - I always tell him to catch the bus).

He text me to say he had one. He told me his grandfather had a huge one I couldn't have, and a smaller one that his mother sometimes borrows (!?!), but I could have this rusty one with a broken handle. So I'm thinking an old No.4 or similar.

When I picked up my son he pulled it out of his bag, and even in the poor light in the car I could immediately make out the cut-outs in the sides. A No.10 \:D/.
I stopped the car to have a closer look at the funny handles and the side knickers. It's a Stanley No.10¼ :shock: :eek:ccasion5: I'm stoked.

Sorry, yes this is a gloat.

Cheers, Vann.
 

Attachments

  • Stanley 10.25 knic.jpg.JPG
    Stanley 10.25 knic.jpg.JPG
    168.3 KB · Views: 1,279
  • Stanley 10.25 tote.jpg.JPG
    Stanley 10.25 tote.jpg.JPG
    162.3 KB · Views: 1,279
  • Stanley 10.25 & friends.jpg.JPG
    Stanley 10.25 & friends.jpg.JPG
    226.7 KB · Views: 1,279
Lovely!
Now you know we all need to see the pictures of the clean up, replacement handles, ... etc, etc.....
 
Very nice Vann..

I think the front knob on the Bench Rebate looks like a replacement. Or is it the right shape?
I have two of those planes, and do you know, I can't recall what they are like!
Nor can I be ass'd' to go and check either. Today. I am setting up the recliner on the lawn. If the Bank won't let me get at my money, then I can't spend any, so I might as well sleep! :lol:

Have fun restoring those my friends

Regards

John :)
 
Wonderful luck there Vann! Well done mate!

Those handles don't need replacing the back one will glue up with Titebond Original (clamp 24 hours) and then they will both come up handsome with some Renaissance Wax.

The jury is still out with what I would do with the metal and paintwork....mmmm difficult!

Will have a think about this today....what do you think, taking the rarity into account?

Jim
 
I'd use phospheric acid or electrolisys on the body and sand back to square, wouldnt be concerned with any pitting unless it affects the performance. I am of course assuming that you are going to use it and not sell it.
 
I'm not in the least familiar with this type of plane so please excuse this but...

Looking at the second pic, can the tote be adjusted left and right? Yeah, seems silly to me too, but the screw under the tote and the shape of the casting appear to lend them selves to this kind of action.

Eoin
 
jimi43":2m5k7e0t said:
Wonderful luck there Vann! Well done mate!
Thanks jimi, I'm chuffed.

jimi43":2m5k7e0t said:
Those handles don't need replacing the back one will glue up with Titebond Original (clamp 24 hours) and then they will both come up handsome with some Renaissance Wax.!
I think the grain showing in the existing handles is quite nice. I thought I'd try glueing the tote. I've not used Titebond. I was going to used an Epiglass two-part epoxy. What do you think?

jimi43":2m5k7e0t said:
The jury is still out with what I would do with the metal and paintwork....mmmm difficult!!
The paintwork looks to be in poor condition. I thought I might strip it and re-enamel it. But as you say, it is a rare plane, so maybe I shouldn't.

Pvt_Ryan":2m5k7e0t said:
I am of course assuming that you are going to use it and not sell it.
I'm not going to sell it. I'm not sure if I'm going to use it or put it aside for it's family connection and rarity. Either way I want to tidy it up, but my first preference is to do up the Record 010 in the first photo as my user jack rabbet.

eoinsgaff":2m5k7e0t said:
...can the tote be adjusted left and right?
Yup! As adidat says, the tote and knob can be tilted left or right in order to avoid skinning your knuckles when working in close to a vertical surface. The No.10¼ is the only one of Stanley's bench rabbets to have this feature. Lie-Nielsen make a modern No.10¼ which has the same feature.

RichardT":2m5k7e0t said:
Now you know we all need to see the pictures of the clean up, replacement handles, ... etc, etc.....
Trouble is Richard, I've got around 6 planes in various stages of doing-up, and they've been that way for around 12 months. I've only completed two "overhauls", ever :oops: , so I'm not sure I want to do anything with this one for a while (or at least until I can get my tuit working :lol: )

Cheers, and thanks for the kind words, Vann.
 
If you are going to keep it Vann and it can't be a user as is...then I would do it up with all the suggestions above. I use Titebond for clean breaks because it works and doesn't show if done right. Epoxy is good for damaged breaks where old dirt may have ingressed or their are potential cavities or external splits.

If you are going to sell it on...sell it on as is.

Collectors would want it in as near original condition as possible and pay according to work needed. Any work done by an untested source would worry them.

Jim
 
When you do have time to examine the tote, I'd be very interested to see how it moves and locks - I wonder if there are set middle, left and right positions or if it can be tightened at any point.
 
From Blood and Gore:

The tote and knob each sit atop a rounded casting that holds a coarsely knurled metallic cylinder. The usual securing rods for the tote and knob are screwed into these knurled cylinders. At the top of each securing rod is a slotted nut, which is tightened to secure the tote and knob in a slanted position, tilted from the vertical, that the user finds comfortable. The slotted nuts are often mangled from repeated use.

Often the wooden parts, especially the lower portion of the tote, are found cracked or broken off around their bases from years of use. The wooden parts are custom made for this plane, so trying to salvage a tote or a knob from a standard jack plane is pointless; original totes and knobs have a concave bottom so that they can fit over their respective convex portions of the main casting.

Jim
 
What beautiful planes!!
I collect them too and I always wished a Stanley 10 1/4.
For totes, I glued some with superglue successfully.
I use this way for keeping the parts together.

25sl944.jpg


Ciao,

Giuliano :D
 
jimi43":1v75rnvg said:
Collectors would want it in as near original condition as possible and pay according to work needed. Any work done by an untested source would worry them.
You chaps have made me too scared to do much to my 10 ¼ in case I ruin it! I don't want to sell it, but on the other hand I don't want to de-value it either. I think I’ll put the broken handle aside, and try making a new one (now that I’ve bought the correct Forstner bits for Stanley handles).

RichardT":1v75rnvg said:
When you do have time to examine the tote, I'd be very interested to see how it moves and locks - I wonder if there are set middle, left and right positions or if it can be tightened at any point.
The knob can be tightened in any position down to about 45. Here are a few pikkies of the front knob arrangement.

Cheers, Vann.
 

Attachments

  • Stan Rabbet 016.jpg
    Stan Rabbet 016.jpg
    134.7 KB · Views: 771
  • Stan Rabbet 021.jpg
    Stan Rabbet 021.jpg
    155.2 KB · Views: 771
  • Stan Rabbet 023.jpg
    Stan Rabbet 023.jpg
    119.8 KB · Views: 771
  • Stan Rabbet 026.jpg
    Stan Rabbet 026.jpg
    139.7 KB · Views: 771
  • Stan Rabbet 024.jpg
    Stan Rabbet 024.jpg
    160 KB · Views: 771
Don't be frightened at all..if you are going to use it, you are doing just the right thing.

I would take some Renaissance Wax or Camelia Oil and get all that surface (it is very little) rust off and stiop it getting any worse...

I would then make new totes exactly as you have suggested and put the old ones in a little bag in a safe place.

The mechanism and surrounding handle bits are the parts that go wrong on these and yours look almost perfect. Clean up the brass bits with very fine emery so they move smoothly and do the same with the seats in which they rest.

Fettle the iron a bit at the bevel and use her with a huge smile on your face!

I am sure Derek is your man to advise further...

Jim
 
Good grief, Jimi, I was just about to comment! :)

Vann, if that plane was mine, I'd strip it bare, then re-japan it, clean up the wood, blade and anything else needed to return the plane to as-new condition.

I do not see how on Earth you can devalue a plane that already looks like Hell. When Collectors say that they want a plane in original condition, this does not mean that they are happy to get something that looks like you fished it out of a sewer. They mean in unused, spick-and-span condition, or close to this. Your plane, although rare-ish, is in poor condition and would not command much at an auction. Why do you care anyway? You want to keep and use it. So fix it up the way that will make you happy. Do it right and you can only increase the value.

First, clean of all the old japanning. Do not leave any behind. Recoating over old surfaces looks horrible.

Second, do not use enamel paint on it - THAT will devalue the plane. Use a japanning mixture. Here is the easiest one I know (and I have used it very successfully): purchase asphaltum (it is a brown powder) from an art supplier. Mix it half-and half with marine varnish. Paint it on. This is a cold japanning method - no baking necessary. However it does go quicker if you use heat. I leave the planes out in the sun for a few hours. It takes about two weeks to harden on its own. It is self-levelling so do one horizontal surface at a time. Add several coats. It starts by looking dirty brown and slightly transparent. It gets darker - blacker - and thicker as more coats are added.

Glue and clean the tote. Sand it down, then finish it in blond shellac. This is also how the original was done. DO NOT use an oil mixture. This darkens Rosewood and obscures the grain.

You can try cleaning up the blade and re-using it. I'd add one from either LN or LV. Much better, and you can always replace it with the original if you decide to sell the plane.

Enjoy.

Regards from Perth

Derek
 
I had a feeling that would be your response Derek...and that route, whilst radical..will certainly make it a user again.

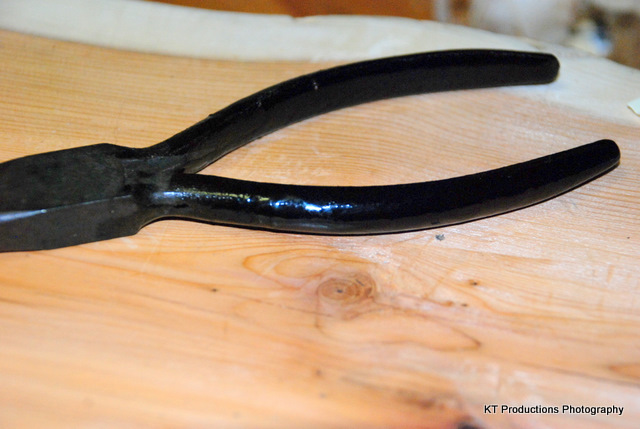
I don't know if I mentioned, I tried the cold Japanning on a test pair of plier handles and it works brilliantly. In the UK it takes a tad longer to harden "in the sun" although lately we are getting a rare heatwave so I think it might be an opportune moment to take advantage of this rare event!

The pliers came out really well and the finish is rock hard and indistinguishable from real Japanning....good tip there mate!

DSC_0229.JPG


Jim
 
I would love to try the japping method but cant find any suppliers around at all. Can anyone point me in the direction of a supplier in the UK please.
 

Latest posts

Back
Top