What did you do in your workshop today ?

UKworkshop.co.uk

Help Support UKworkshop.co.uk:

This site may earn a commission from merchant affiliate links, including eBay, Amazon, and others.
Status
Not open for further replies.
El Barto":6z01t2zz said:
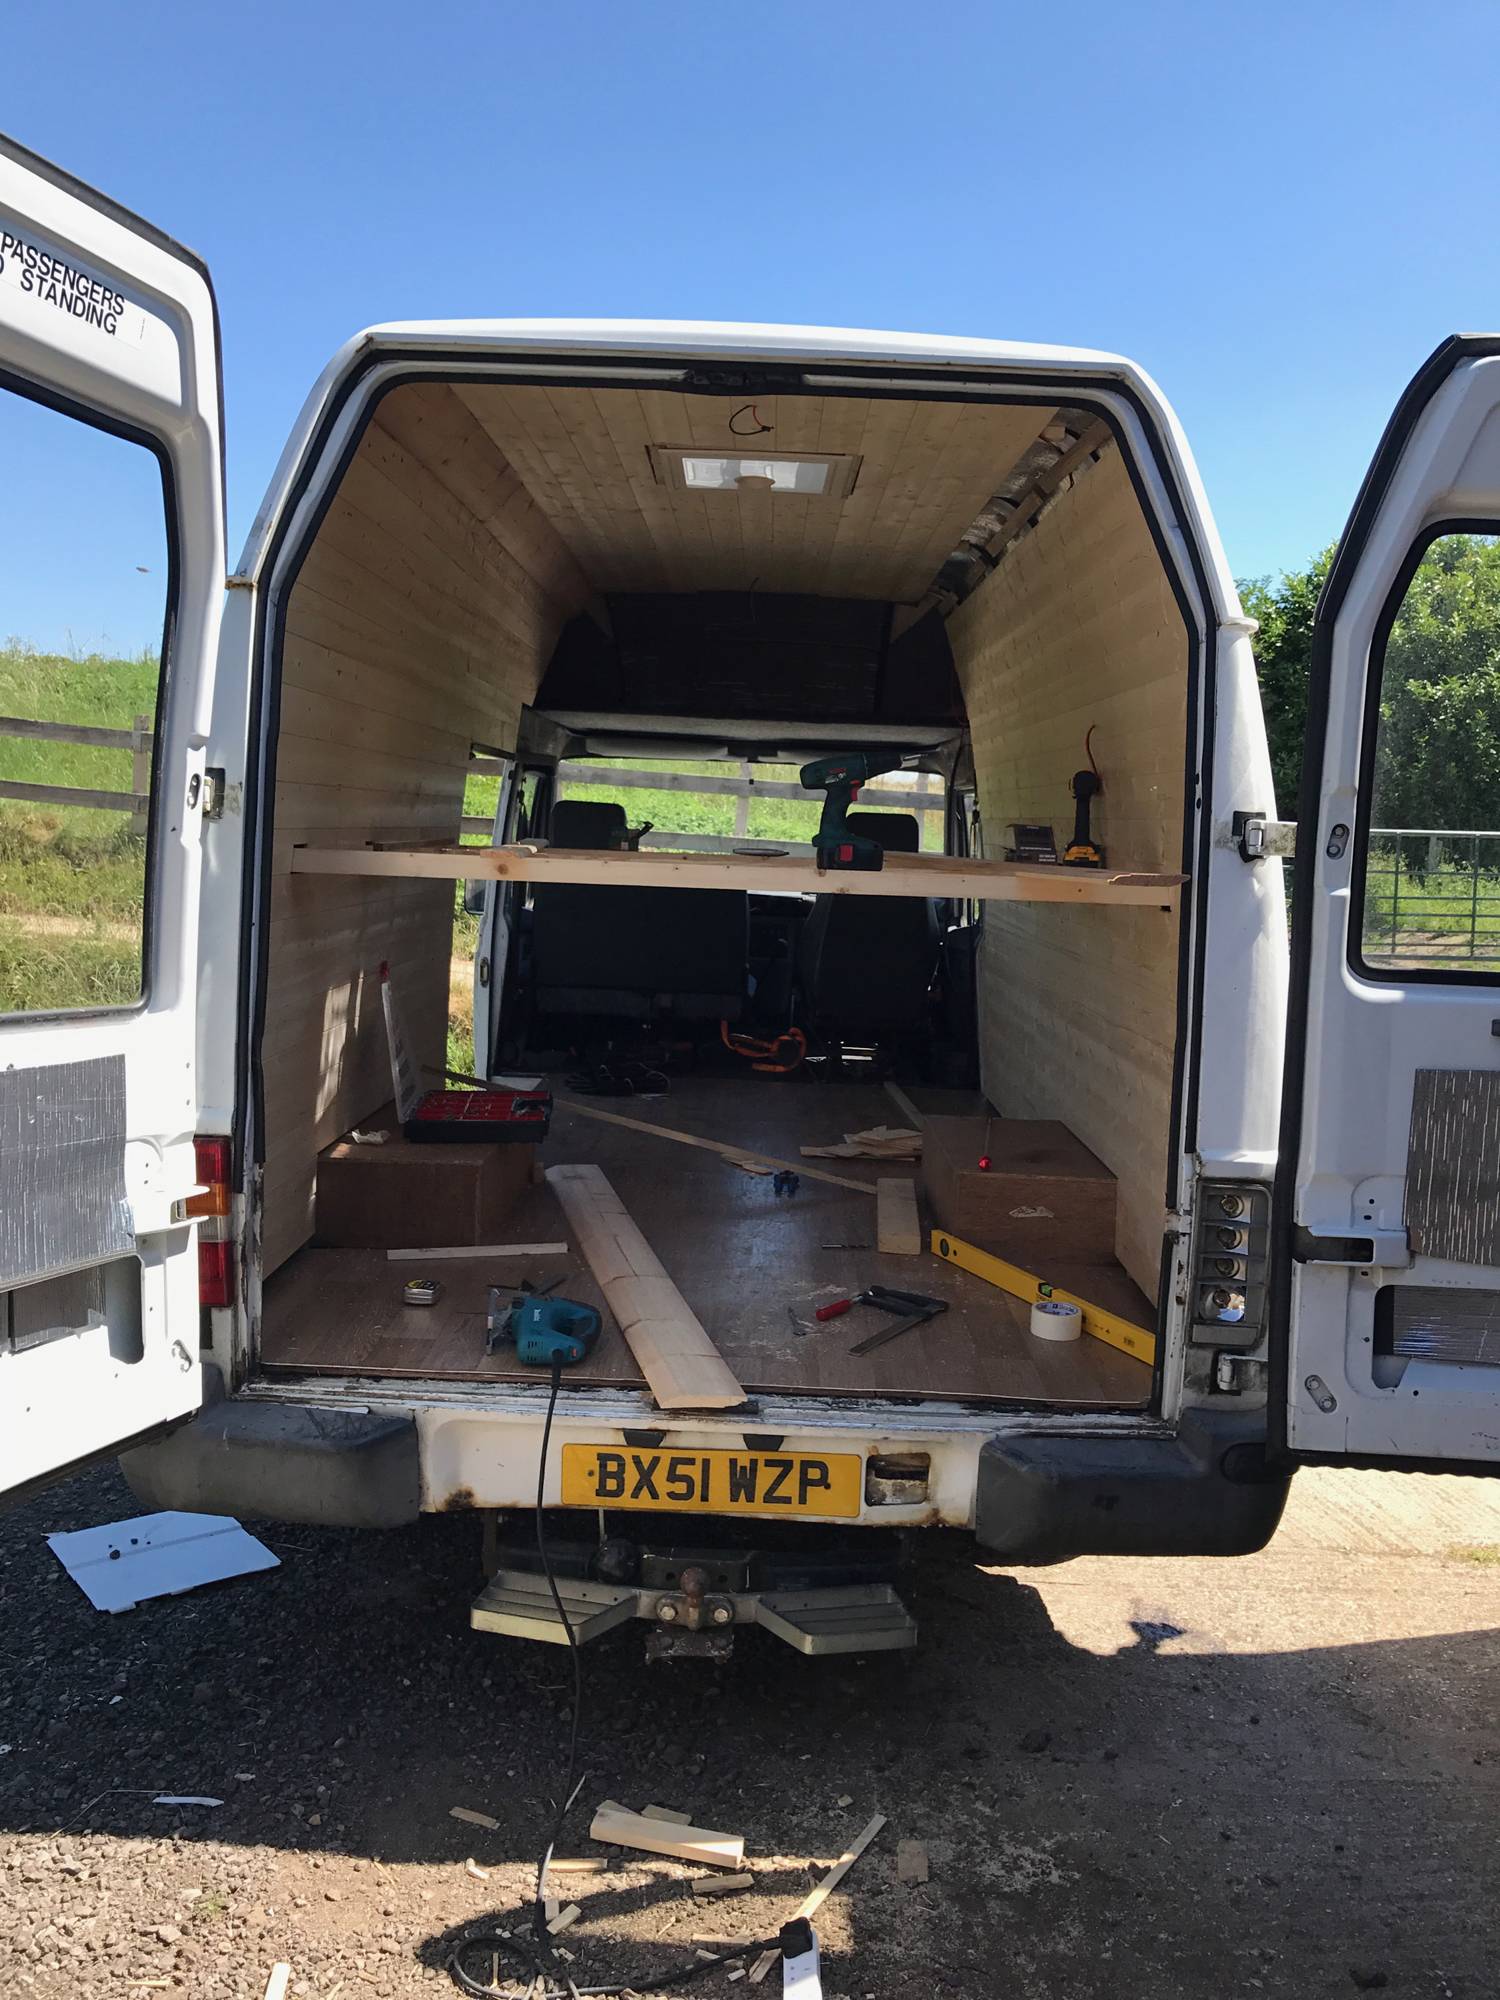
This week/today I've been working on this camper conversion. Aiming to have it at least completed enough to sleep ion for a trip to France by August. First coat of paint has gone on today as well as some various tidying up of panelling etc. I'm not aiming for it to be the most exquisite piece of craftsmanship, but it's difficult stop focussing on details sometimes. All in all it's great to be back at my bench.
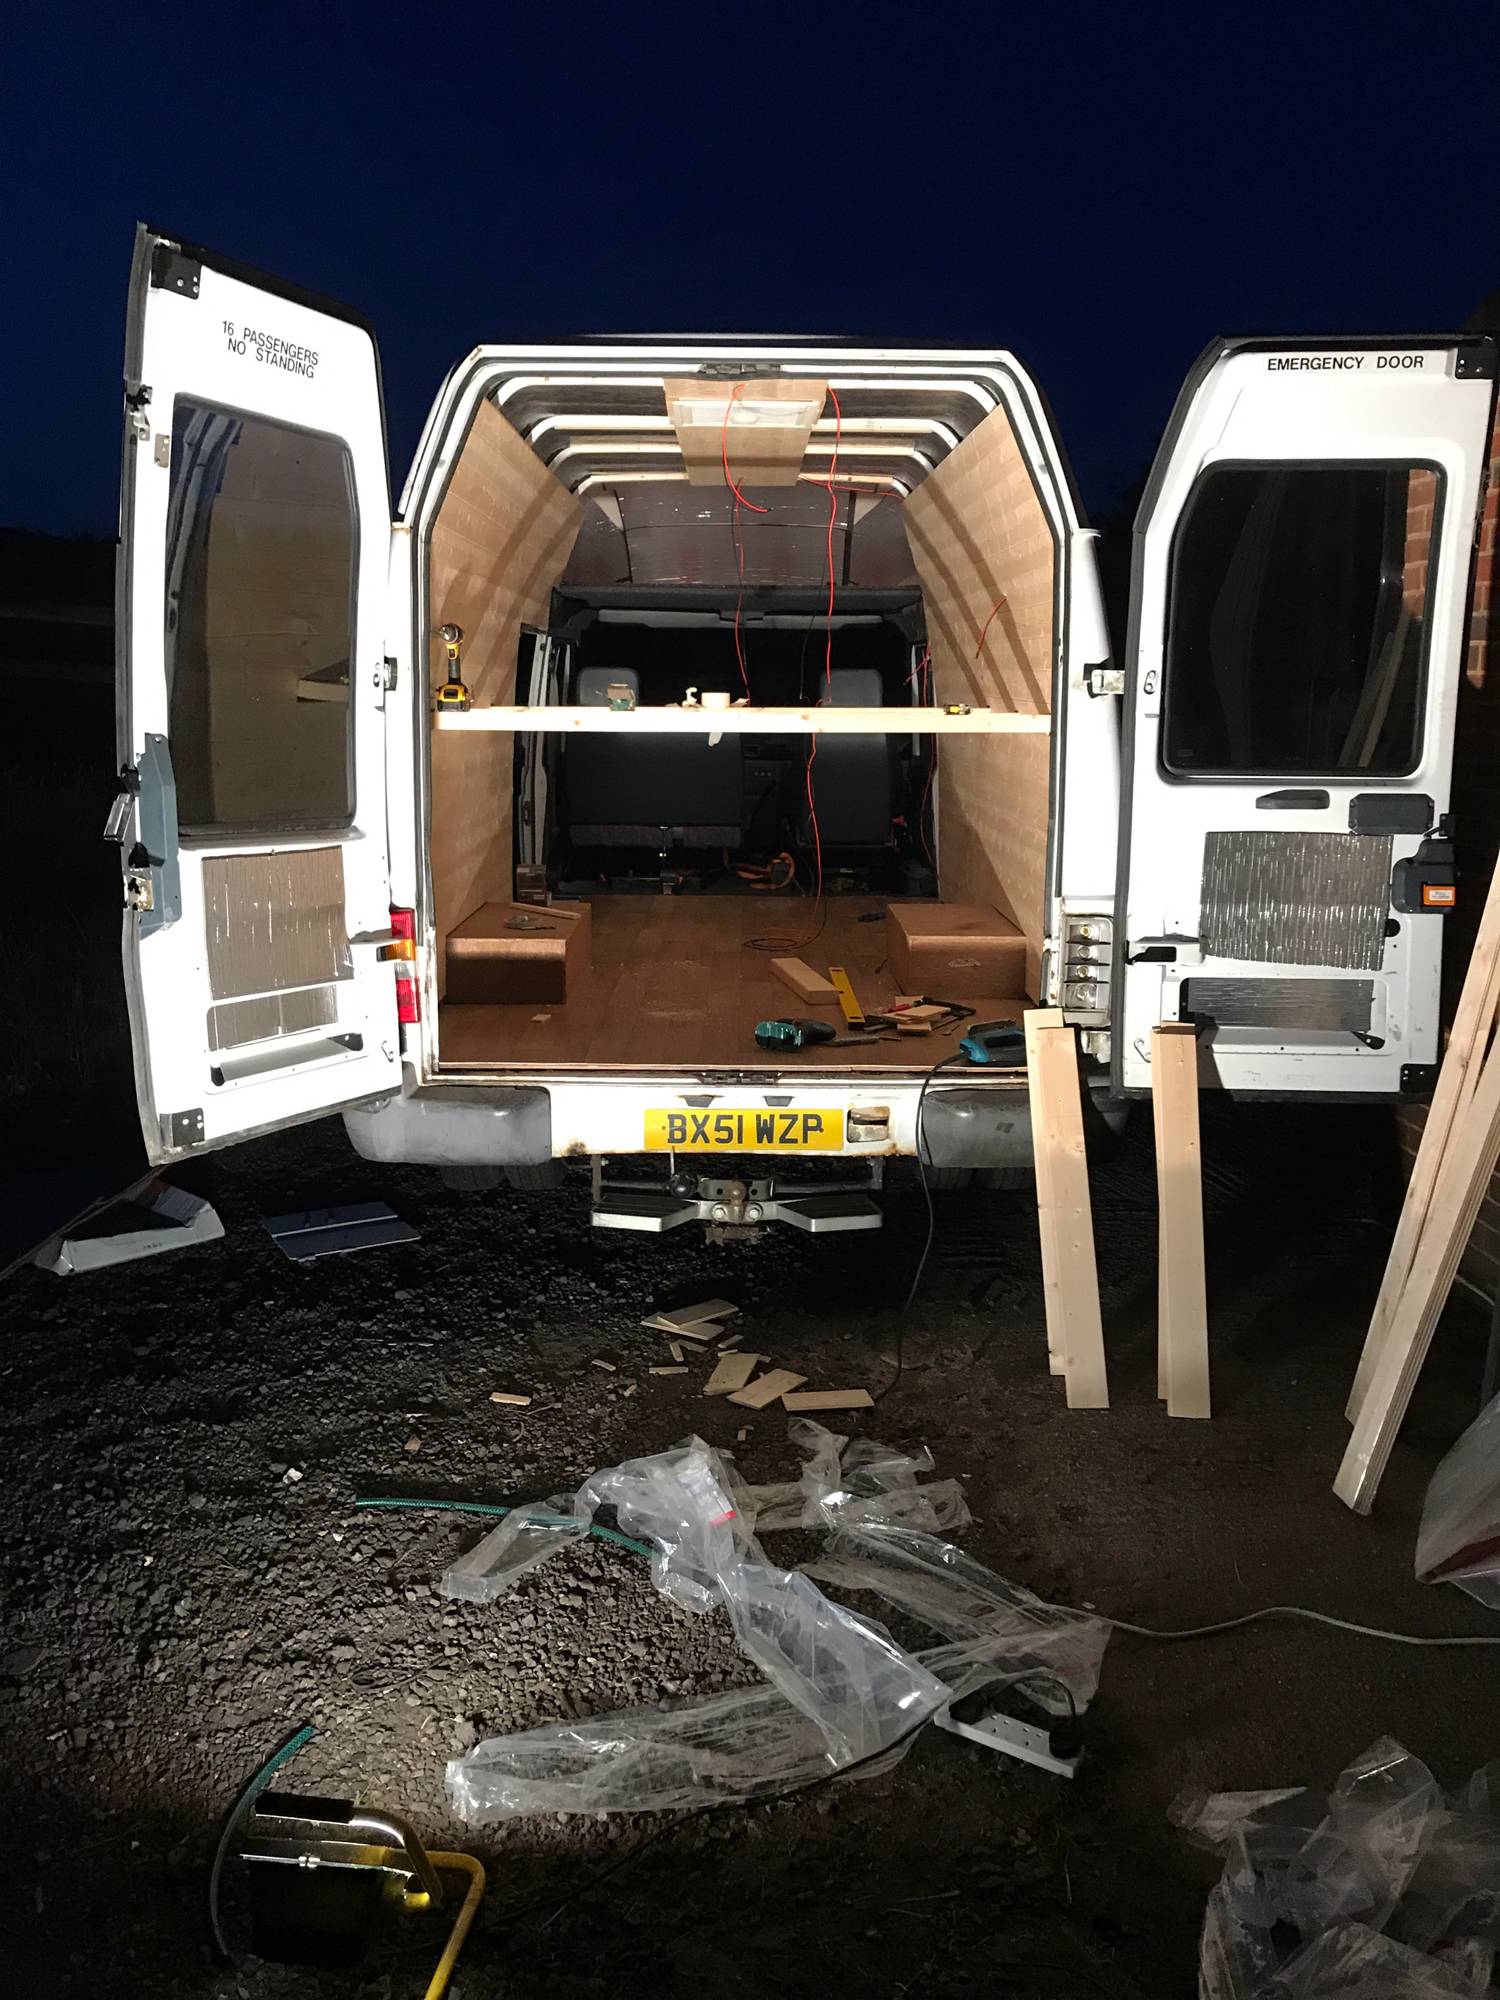
rca91Bv.jpg


KyN1FJk.jpg

nice project
hope we get updates

Steve
 
SteveF":v7h4qwn8 said:
El Barto":v7h4qwn8 said:
This week/today I've been working on this camper conversion. Aiming to have it at least completed enough to sleep ion for a trip to France by August. First coat of paint has gone on today as well as some various tidying up of panelling etc. I'm not aiming for it to be the most exquisite piece of craftsmanship, but it's difficult stop focussing on details sometimes. All in all it's great to be back at my bench.

rca91Bv.jpg


KyN1FJk.jpg

nice project
hope we get updates

Steve

Thanks! I'm definitely going to try and post updates. It feels like it's at a stage now where it'll progress quite quickly and be more interesting. Rather than waiting for paint to dry or getting rid of rust
 
Looking forwards to seeing that glasshouse going up, will be fascinating.

F.
 
Isn't a glasshouse what the armed force's keep their miscreants in. (hammer)

Mike
 
Lovely. Like to see more of this one Sawdust if you have any info to share. Far above my skillset but I like to plan for the future fella. ;) (*yn fawr)
 
Bm101":408gealy said:
Lovely. Like to see more of this one Sawdust if you have any info to share. Far above my skillset but I like to plan for the future fella. ;) (*yn fawr)


Thanks Bm101. To be honest it requires more patients (and time) than skill, it's only the 2nd bandsaw box I've ever made.

Didn't take any WIP photos unfortunately.

Well how I did it step by step was..

- With a ripping blade cut the base away on the bandsaw.
- Also cut off a thick enough piece for the lid.
- Then, using the router table, use a straight bit to remove the bulk of the centre of the sliding dovetail of the body.
- Swap for a dovetail bit and cut the angles of the dovetail.
- Then, do the same for the lid, but obviously the outside. But creep up for the fit (mine ended up a bit too loose though - note to self, improve router fence adjustment).
- Once you're happy with the dovetail (or kicking yourself) go back to the bandsaw, swap the ripping blade for the thinnest blade the bandsaw can take.
- Pick a corner of the body, try to follow the grain for the entry cut (less likely to be visible once glued) and cut out the inside of the body as cleanly as possible.
- Using the 'waste' of the inside, cut out the inner lid. I didn't swap back to the ripping blade, so rather than messing up a straight cut of a thin blade I went for a purposeful wavy cut. I also drilled out the finger hole of the inner lid at this stage.
- Now it's time to glue the main body back together at the entry cut.
- Once the glue's dried do some sanding of the inside at the oscillating spindle sander (quicker than by hand)
- I used self adhesive felt for the bottoms of the inside, so I used the body as a template to pre-cut out the felt at this stage.
- Using the waste of the inside, cut out a little 'shelf' at each end (profile should be almost prefect fit to the inside of the body.
- Tip body upside down, drop in the inner lid upside down (which is protectively taped up to protect from glue), then glue the little shelves in place with CA and activator. As the inner lid is down flat with the body the shelves should then be at the perfect level to keep the inner lid flush with the top of the body, and hence keep the sliding dovetail working too.
- I then sanded the base of the body and the bottom cutout at the belt sander to ensure flatness (could be done by hand by fixing sheets of sandpaper on a flat reference surface)
- Glue the bottom cutout to the body with many clamps...
7ea1e55d80788f021e614e8dbb425190.jpg


- Once dry it's time to drill holes for the keys (aka dowels) using forstener bits. Clamp lid to body for this to keep perfectly aligned. I drilled mine all the way through to bottom, as it's easiest to get the dowel keys out by pushing from bottom.
- From the inside offcut, I used hole plug cutters to cut out the tips of the dowel keys, trying to match the grain as perfect as possible.
- Now keeping it all 'attached' and held in place it's time for lots of sanding and shaping.
- Sanding sanding and more hand sanding.
- At this point I tried out my new dremel sander to carve the 'Diolch' to the underside of the inner lid.
- Lots of even fiddlier hand sanding for the inside.
- Once you've gone through the grits and are happy, then it's time for the finish (I did 3 coats of danish oil).
- I used libreron clear black bison wax over it all (apart from where the felt will go on the base), but the buffing (by hand) took a while as it's all fiddly nooks and crannies! But was worth doing in the end.
- Stick in the felt to the bottom, and job done :D

(Apologies for the essay)
 
This weekend I dug out foundations for my utility room. Having booked a 3 ton digger I ended up with a 1.5 ton one due to breakdowns. Turns out that tree roots from two large bay bushes are much stronger than a mini digger, and that mini digger's cab is much stronger than my wrist. ;-) Digger tipped forward alarmingly. Broke wrist, somewhat curtailing my piano playing for few weeks. Hospital had me plastered up and home inside 3 hours. Top job.

Yesterday I also managed to roll a 5 metre heavy oak beam (lifted up there on a dumper truck) off the top of a single storey frame. This landed on the hardcore and luckily did not hit my team of wife and son. No harm done apart from one of my lovely oak dovetails had a corner knocked off. Beam is now in place. Building timber frames is a bit more of challenge with one arm in plaster - eldest son has had to do most of the heavy lifting and has earned a bonus as building number 2 is now erected and ready to put the rafters up.

Framing thread (illustrated) will appear in the winter when it is warm enough to type but too cold to work outdoors.
 
Messed about getting this downdraft table up & running.

100_9128.jpg


100_9129.jpg


Place it upside-down on a table and connected the extractor... Picked the table up off the floor. :-D

Guess it's reasonably airtight then?
 
Four more wardrobe doors sprayed and fitted.

DSC01443.jpg


DSC01455.jpg


DSC01454.jpg


OH very pleased with the results. Phwee. :lol:

Mike
 

Attachments

  • DSC01443.jpg
    DSC01443.jpg
    110.8 KB
  • DSC01455.jpg
    DSC01455.jpg
    52.4 KB
  • DSC01454.jpg
    DSC01454.jpg
    59.9 KB
Further refinement to my Bandsaw extract:

DSC01461.jpg


Mike
 

Attachments

  • DSC01461.jpg
    DSC01461.jpg
    122.3 KB
Sawdust=manglitter":100j3he6 said:
Just finished making this sort of puzzle bandsaw box out of spalted beech for a friend of the OH

d3dbe99eb7a9ed851e61782e2a8f65c3.jpg


253798c3b37dba0c84e088fe9efcf24c.jpg


255b7ee53b13503f982445b1174a9d68.jpg


8740986196005c9f32b9f853ca50a3a3.jpg


43be2e4c87b6c6ca5cedbf478813f7cf.jpg


In case you wondered 'Diolch' is the Welsh for 'thank you' :D

Love the finish you've achieved. Top job. Is there anything out there similar to Black Bison but more eco-friendly?
 
El Barto":kfhwz63d said:
Love the finish you've achieved. Top job. Is there anything out there similar to Black Bison but more eco-friendly?

Thanks El Barto. When you say more eco-friendly what do you mean about the black bison? I did look before for ingredients to see if there were any animal products in it - as the OH is veggie :x
 
Sawdust=manglitter":3vpliupf said:
El Barto":3vpliupf said:
Love the finish you've achieved. Top job. Is there anything out there similar to Black Bison but more eco-friendly?

Thanks El Barto. When you say more eco-friendly what do you mean about the black bison? I did look before for ingredients to see if there were any animal products in it - as the OH is veggie :x

Just something with less chemicals etc, not necessarily animal products (although I suppose that's a bonus!).
 
Spent about 4 hours straight, cutting parts on my bandsaw. Had to stop when the motor started to get very hot, which was a blessing as i was bored rigid by then.
 
Sawdust=manglitter":bh3ra89q said:
I did look before for ingredients to see if there were any animal products in it - as the OH is veggie :x

Pretty sure it doesn't contain actual Bison. :-D
 
Status
Not open for further replies.

Latest posts

Back
Top