The UKW Infill Project

UKworkshop.co.uk

Help Support UKworkshop.co.uk:

This site may earn a commission from merchant affiliate links, including eBay, Amazon, and others.
Indeed Richard...it is so very sad. :(

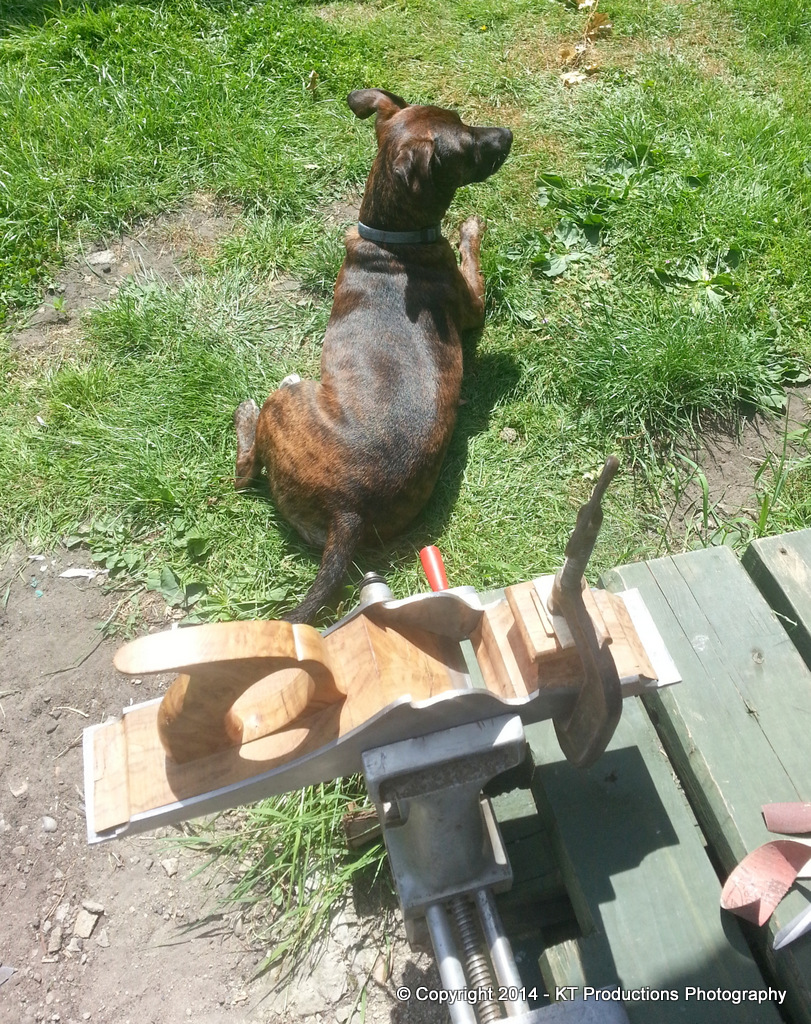
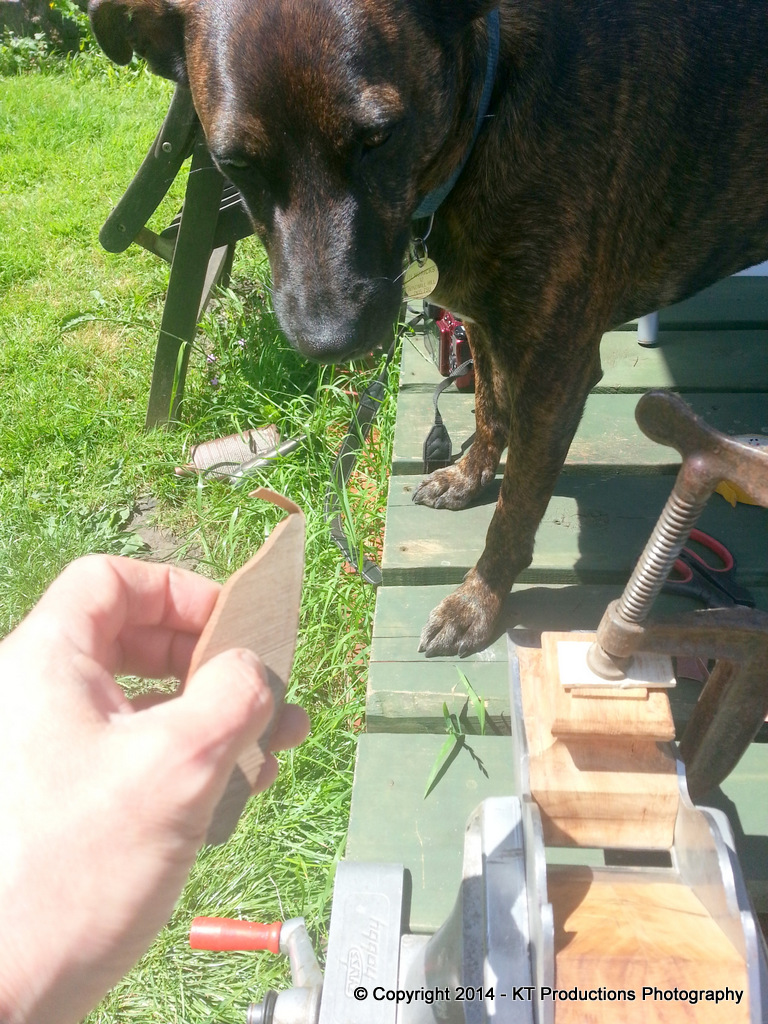
I noticed just now that on the picture with ALFIE standing...there are three tools which are being used on this plane from the UKW members.

The little Veritas shoulder was a gift from Pedder....the Jarrah marking knife from Derek in Perth and the burnisher came from Matthew at WSH!

How cool is that.

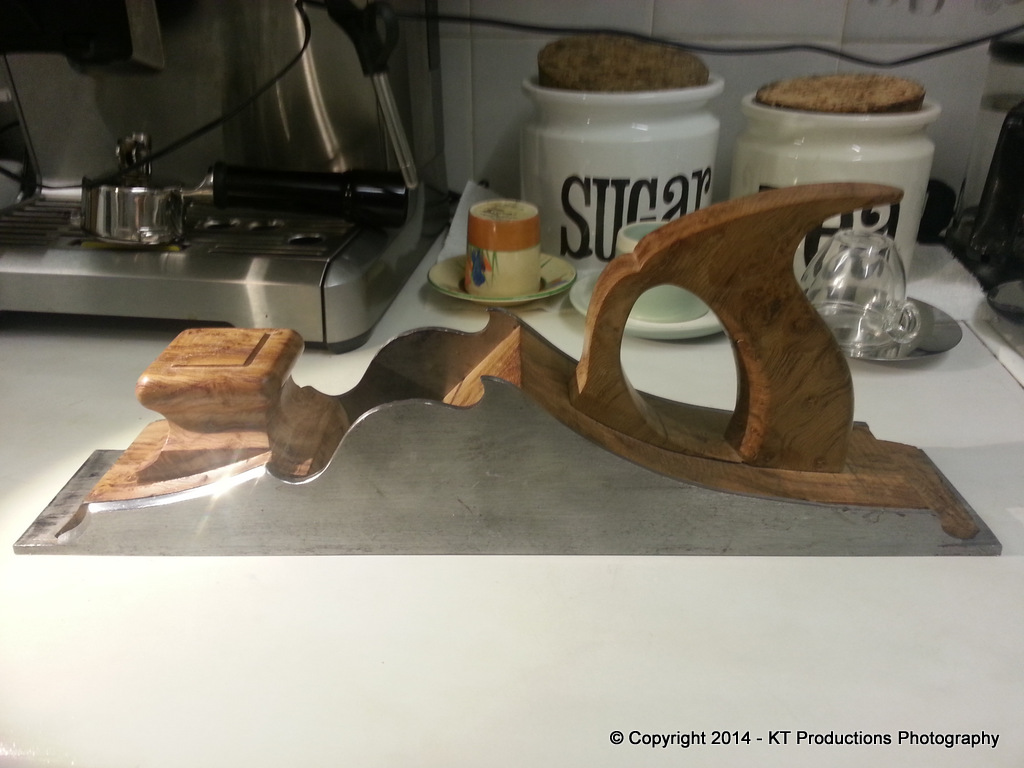
Hi Toby...I think I may make the very first convertible infill plane...with both wedge and lever cap, interchangeable by undoing the two screws!!! How cool would that be! :mrgreen:

Seriously though..there will be both made so that I can put them against the plane and decide. I have a feeling the brass lever cap will win though.

Jimi
 
Looking good, Jim.
I think the bold grain suits the bold style of Richard's metalwork.
 
Hi Jim,

that'll come out great. Amazing wood and craftmenship.

Cheers
Pedder
 
It's looking good now. Seriously good. Can't wait to see the final plane. I love that figuring.
 
Thanks to all the people at Richard Arnold's charity event who commented and gave advice on Richard's plane build...it was much appreciated.

I thought I had a problem...i.e. no ACME thread cutting gear...and today...when sorting through the metalwork cupboards looking for something completely different...I came upon a set of 3/8" 10 t.p.i. tap and die!!

Having now lost the final excuse for not getting on with the lever cap...I bit the bullet and started on the machining...with the tapped hole for the screw.

Being a cautious person...I decided to test the new tap on Corian...

2014-06-13%2021.46.06.jpg


Well that went well!

2014-06-13%2021.45.07.jpg


So....now to hit the real thing.

First a bit of research....the drill size....

Now apparently...the clearance for the thread should be different for brass than it is for steel....but trying to find how different was a nightmare of tables and weird formulae..."experts" and arguments of forums so I gave up and used the closest one I had...7.5mm

2014-06-13%2022.10.17.jpg


Then...bite the bullet and line up and start the tap in the mill first:

2014-06-13%2022.13.13.jpg


Once started I removed the chuck and used a tap wrench, backing off quite often and halfway down...completely removed the tap and using a test tube brush...cleared all the swarf before starting again on the final run. I have snapped a couple of hardened steel taps in use to take it really carefully!! Lots of cutting oil too!

2014-06-13%2022.33.57.jpg


By doing this...the cutting was amazingly easy.

Using a high quality cutter....

2014-06-13%2022.52.47.jpg


I then did a deep countersink hole which will have a shelf around it when I shape the tail of the lever cap.

I am really pleased how this came out...

DSCN4934.jpg


The threads are super clean as you can see in this macro shot...

DSCN4936.jpg


So...little by little we're getting there...now all I have to do is make the complementary screw!

More on that progress later!

Cheers

Jimi
 
It looks very good, Jim.
Before you go further in shaping the cap it might be worth putting a thread on a piece of 3/8" rod and trying it for fit. I remember that RichardT found the Acme fit too sloppy for his liking so he went to great trouble and expense to obtain a thread tap and die.
 
Thanks Pete...appreciated.

Yes rxh......I did too! The tap matches the die so it should be ok but I fully intend to tap a bit of scrap first and then try it before I make a full screw.

That's the next job....Monday.

Jimi
 
It was really miserable today so I decided to have a bit more time in the workshop and to move on to the "semi-rough" stage of the front bun shaping.

DSCN4944.JPG


Following some "handling" tests at Richard Arnold's event on Sunday...the general impression was that the concave part of the hand holding should be deeper so based on this field testing I went for a much deeper curve...

DSCN4945.JPG


This is particularly important at the back where the thumb would naturally rest as there has to be quite a bit of comfort clearance between the infill and the front of the lever cap (or wedge) when fitted.

As you can see from the "wetting" of the wood...there is now even more seriously beautiful burr figuring going on in this piece....

DSCN4950.JPG


The bottom and middle part of the bun now being where I want it I shall now just shape the top and lower the top table a bit with a channel all around it.

Anyone who has ever done infills will note that both the back...the mouth slope and the front are not touched yet. They will be done when the infill is secured with temporary fixings because they have a habit of shrinking overnight and you do them with the metal as the target depth.

I did think a bit today about the merits of inserting a brass strike button into this table...what do the team think?

More later....

Jimi
 
As the sun shone this afternoon....ALFIE and me got the Zyliss vise out and sat out on the patio to finish off the shaping of the bun...

20140617_132659.jpg


ALFIE wanted to get involved which is fine except when you are trying to do some critical shaping!

I made a little former for the abrasive pad to polish up the bevel on both the infill and the body at the same time...

20140617_131809.jpg


....and of course...nosey wanted to get involved...I should have realised what was going to happen at that moment!

The contour allowed me to keep the bevel and infill inline...

20140617_131717%20(1).jpg


This worked really well and allowed me to go up the grits and keep the same profile....

20140617_131710.jpg


However....half way through I put the sanding block down and guess what...it disappeared!

So had ALFIE!

A very guilty looking dog suddenly appeared with the chewed bits of the sanding block in his mouth! So we had to make another one...didn't we ALFIE!?

ANYWAY....we finally got the job done and a couple of coats of CELLULOSE sanding sealer on....

DSCN4973.JPG


This highlights the scratches so I know where to redo with a rough grit tomorrow...

DSCN4979.JPG


...but for now I am pretty pleased with the shape and it certainly sits very comfortably in the hand...

DSCN4982.JPG


More later

Jimi
 
Wow Jimi that's going to look fantastic the colour of the oak is fantastic.

A strike button would look good, how about end grain box or lilac?

Pete
 
Thanks guy.

I have only applied sanding sealer so far and the final front back shaping will be done tomorrow but already the colour of the burr is coming to the surface.

Of course the best grain will only emerge after polishing and I'm going to use a few coats of Tru-Oil too, so it should look the part then.

As far as a strike button...interesting thought that Pete to use a contrasting wood! I was thinking brass or steel to match whatever fastenings I use...probably brass to match the lever cap....but I will make up a boxwood disc now you've put that thought in my mind!

Cheers!

Jimi
 
Well that's coming along very nicely =D> =D> =D>

Does it really need a strike button ?

Won't it distract from the stunning grain on that delicious bun =P~ ?
 
Mr_P":2d63rk9k said:
Well that's coming along very nicely =D> =D> =D>

Does it really need a strike button ?

Won't it distract from the stunning grain on that delicious bun =P~ ?

Delicious bun? Actually, it reminds me more of a rich fruit cake (in a nice way).

Can somebody help an infill ignoramus? I assume that advancing the cut is done by tapping the end of the iron (with the lever cap screw backed off a tad), and lateral adjustment by tapping the sides of the iron, but how is the iron retracted if overset? I don't think I've ever seen an infill with a strike button, either on the front bun or on the heel. I'd always assumed you slacked off the lever cap, retracted the iron, and started over with the tapping to advance the iron to desired cut. Am I right or wrong?
 
Ok..the final stage now before fitting and trimming the front curve and back recess.

So...sharpening up my WSH scraper....the thicker one using my trusty Clifton burnisher...I leveled up the sides and the front...

20140619_203737.jpg


This leaves a level but roughish finish...

20140619_210459.jpg


The front plateau was a laugh! But I eventually got it done without hitting the sides...by taking it out! DOH! (homer)

Then running up the grits for the first time...

20140619_230845.jpg


...shows up a few errors...particularly this side where the side transition meets the front plateau...just needs a bit more blending in...but that's what this stage is for after all!

It's easy to see in this highlighted closeup in the bottom right hand corner...

20140619_231246.jpg


We'll get that sorted out tomorrow as the other side is spot on.

So for tonight...it's coming along...

20140619_232918.jpg


Tomorrow I will be also making a test thread on a piece of brass...to test out the hole shown earlier in the lever cap block.

I like this stage...it's starting to get fun now! Before it was just terrifying!! :oops:

Cheers

Jimi
 
That infill is looking better and better Jimi, cracking work.

Pete
 
Back
Top