


Another kitchen build folks. F&B Pigeon colour matched in Morrells WB lacquer sprayed with one hand coat brushed after laid down. On spraying... I was getting a lot of over spray in the shop even with the spray booth because I was having to crank the gun right up! So all the fresh sprayed stuff felt dusty and not good to the touch. I got some acetone from Morrells and gave the gun a deep clean and wow, what a difference in everything. Hardly have the gun open, very little over spray as way more controlled, even fan pattern, hardly using any lacquer (not even 5l yet and I've finished spraying) lovely feel to the pieces. Enjoying spraying again now.
Here are the plans of the proposed kitchen. Few things have changed, no bookcase on BB run. Free standing DW & WM as customer wasn't happy of energy output of integrated ones.
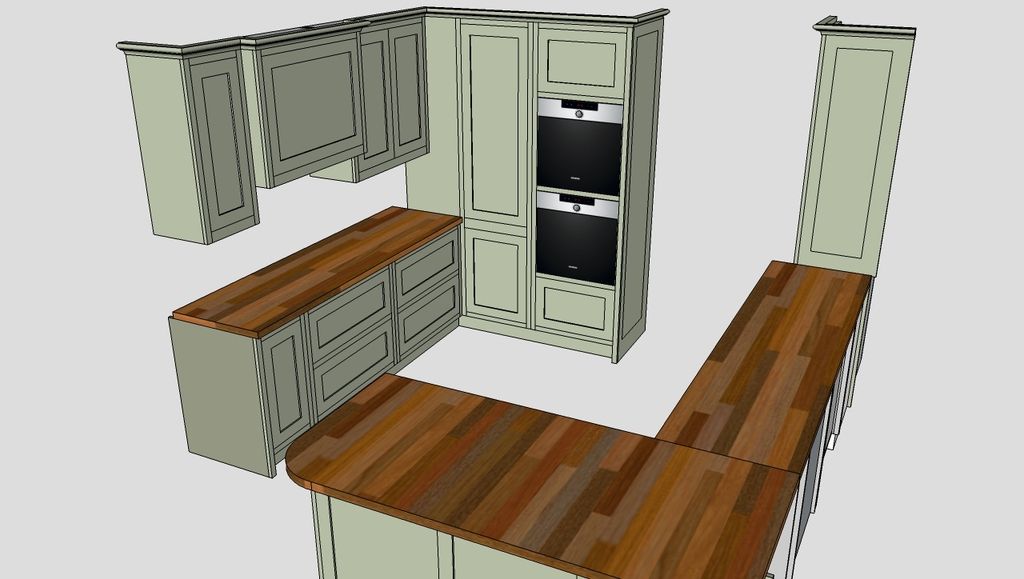
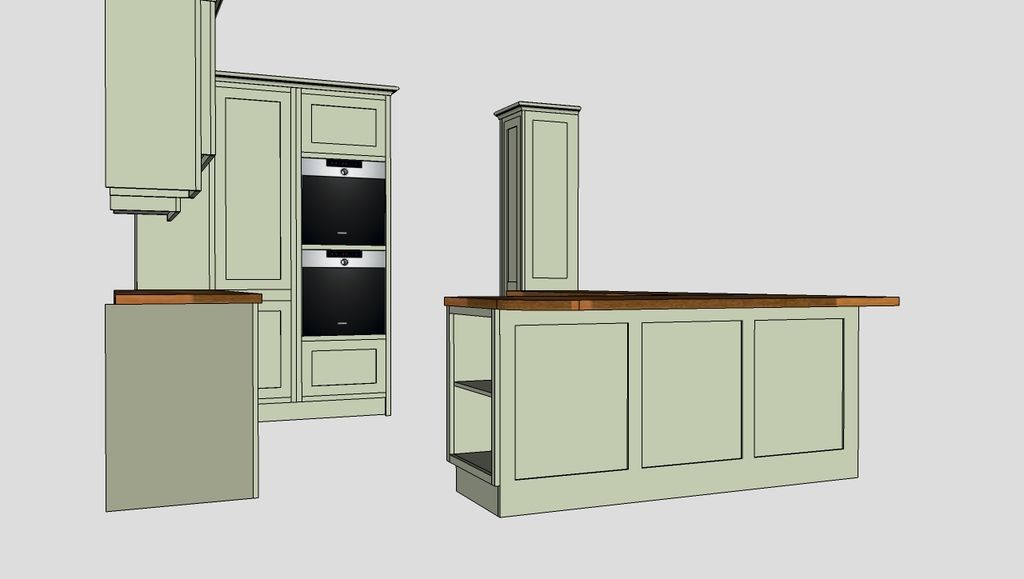
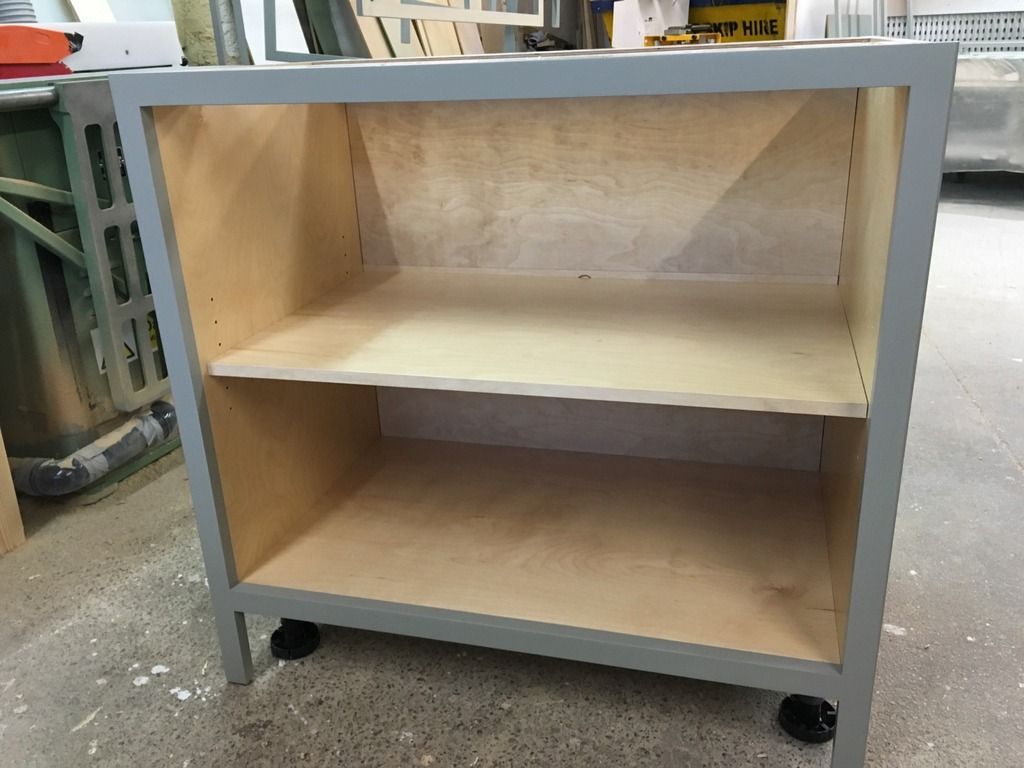
Inset doors on Blum, maple dovetail drawer boxes, Birchply carcasses already lacquered and all pieces cut via Avonplywood £1400 including. 18mm backs as all my kitchens are. Poplar doors and FF 9mm panel. Worktops are going to be Iroko from worktop express. Magic style shelving in the blind corners.
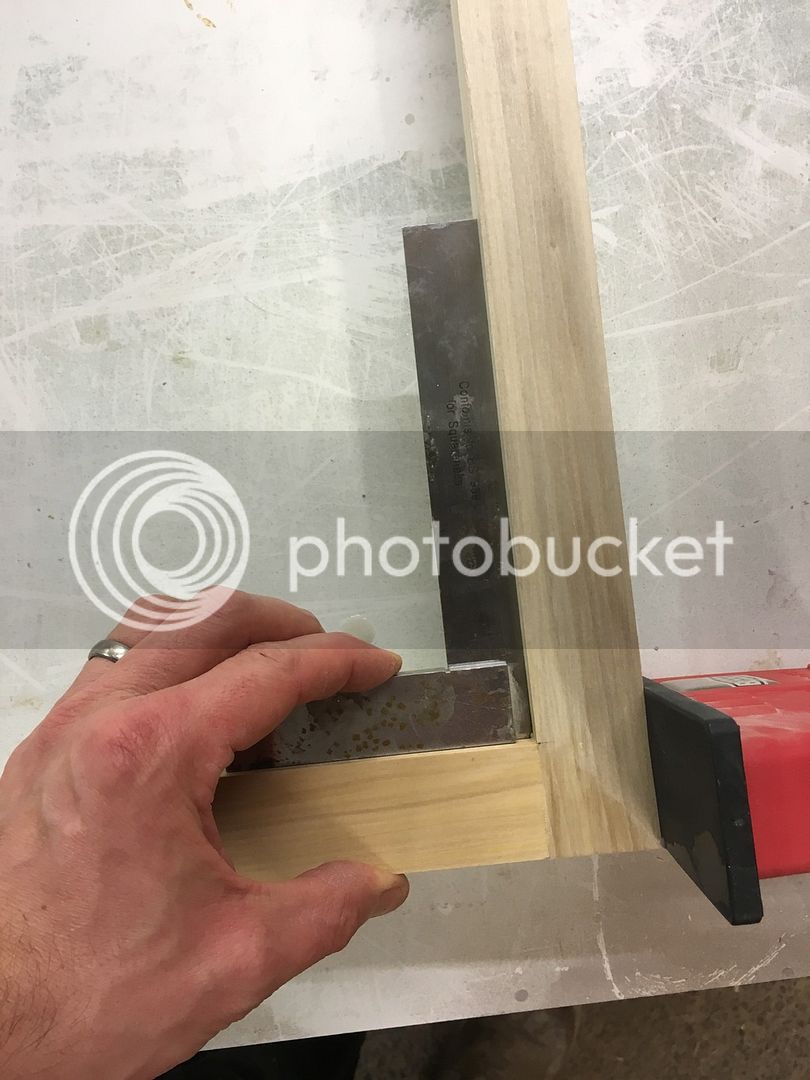
Normally screw through FF, but had a few on show on the ends etc and didn't want to fill or pocket hole. Saw various threads on here where guys use dominoes so what with new Bessey clamps I gave that ago") I very much liked it. Knocked up a quick jig just to position domino.
I very much liked it. Knocked up a quick jig just to position domino.
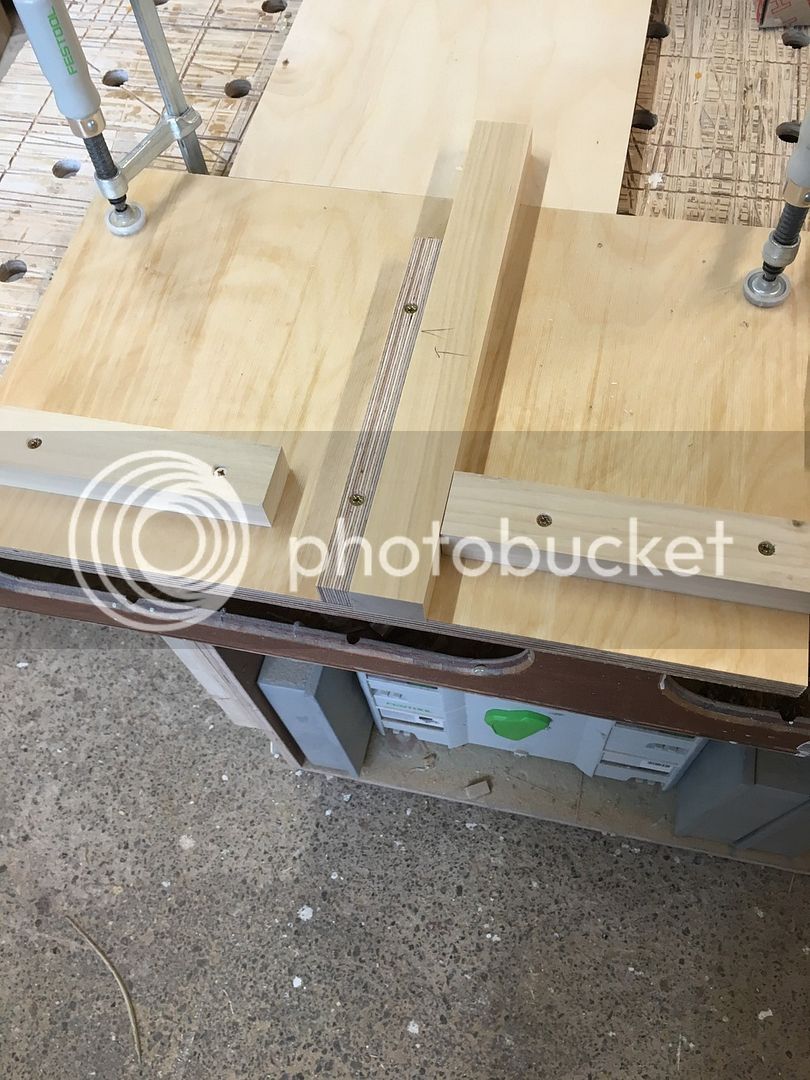
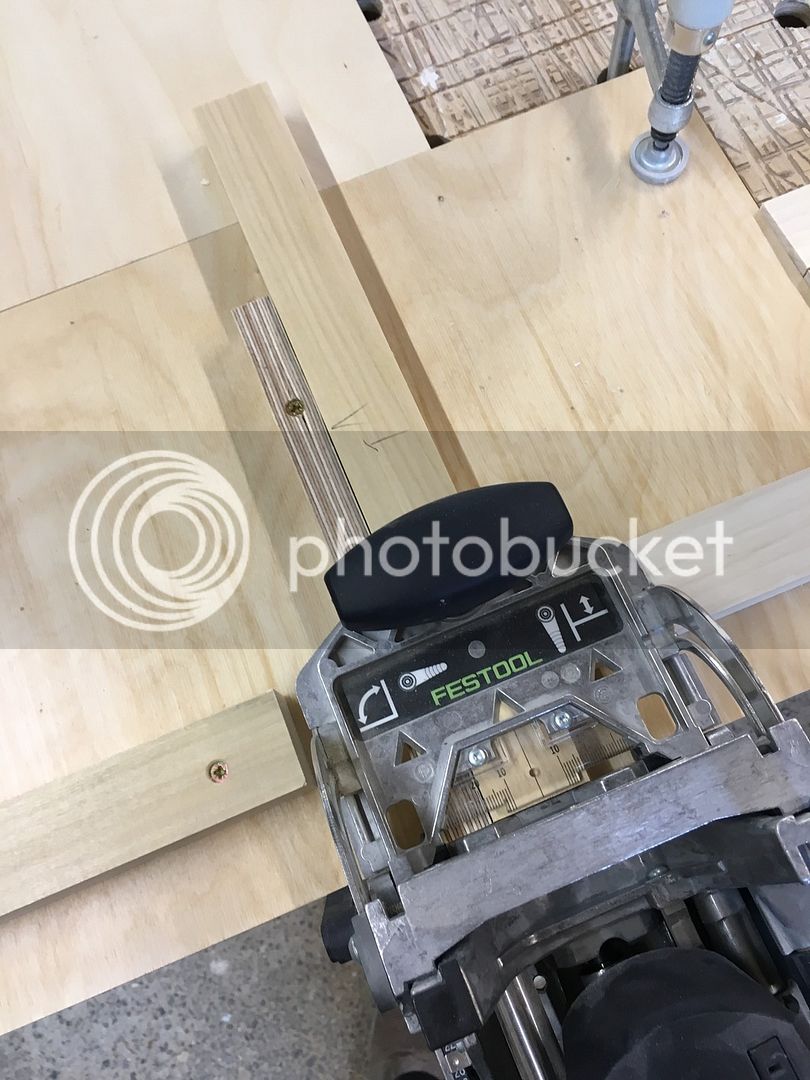
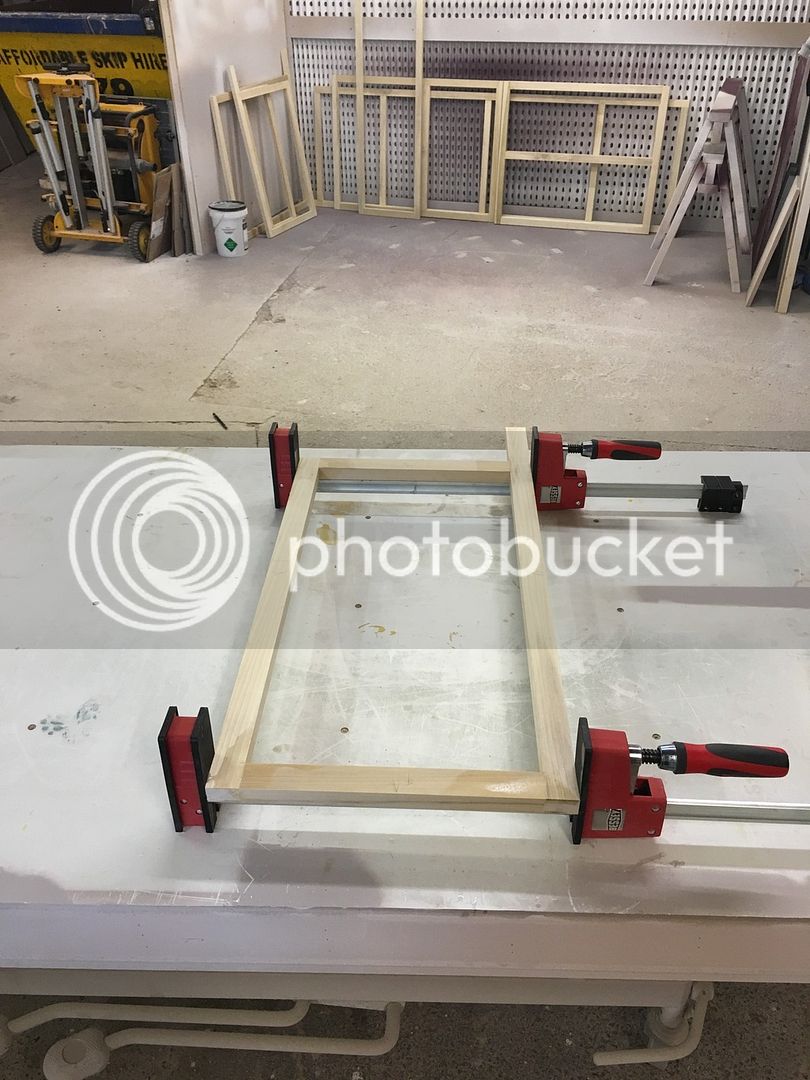
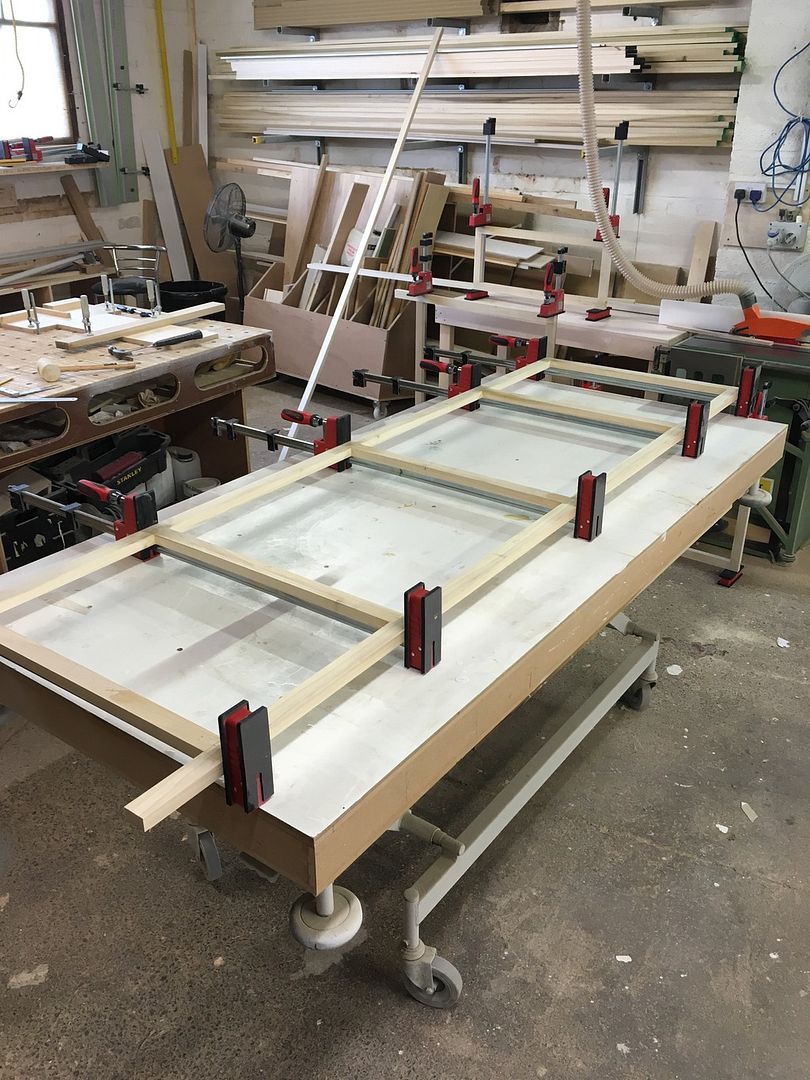
Before I knew it, had all the face frames knocked up.
Left in clamps for an hour or so, titebond 2 as it was offer at axi a while ago. I like it.
Oven housing
From trawling through here I thought I would do this kitchen differently. FF and doors made first along with panels and everything else that had to be sprayed. Left the ply stacked up. Much better this way as the workshop doesn't have carcasses hanging about. Drawer boxes also done before assembly.
Just starting the assembling now in my third week, LOTs of distractions the first two weeks.
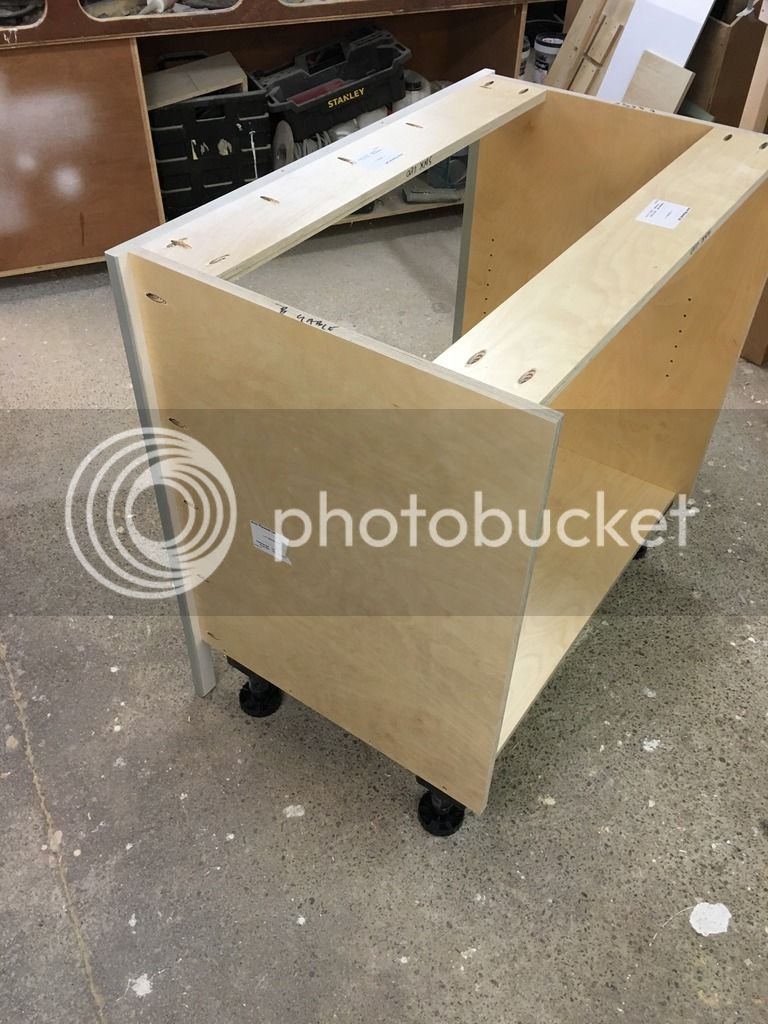
Sink cab went together lovely. Phew!!! Rear panel in two bits held on with 15mm dia magnets 6kg pull. Shelf holes with Festools LR32.
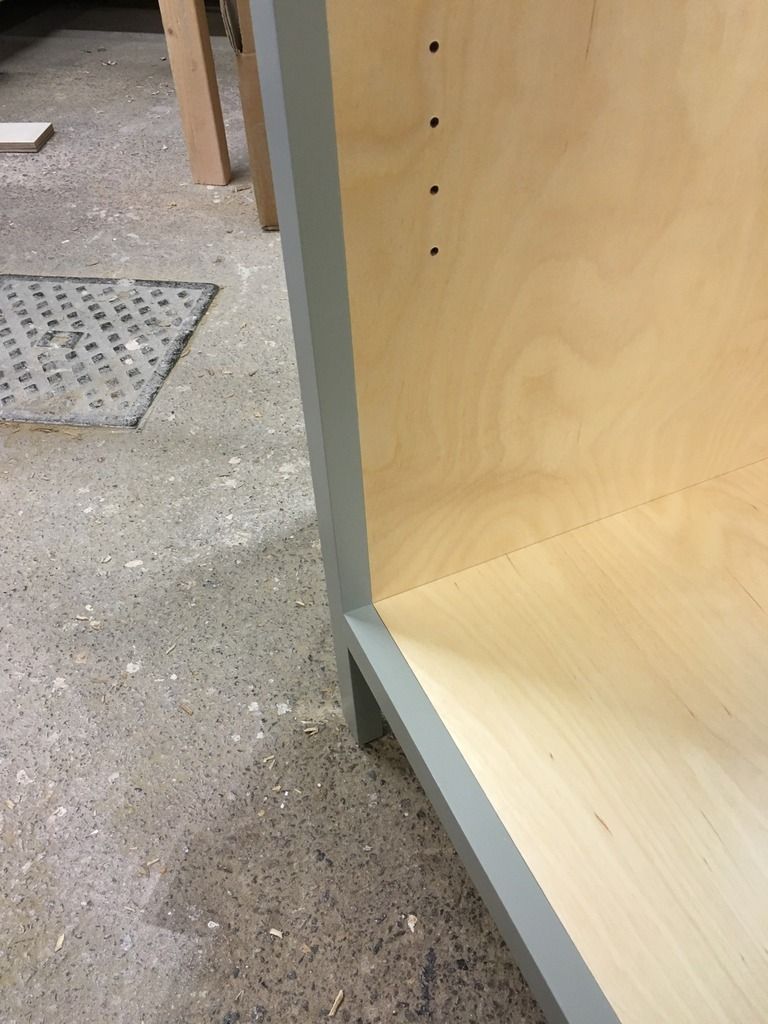
Ledgers are pocket holed from top so I can see where screws are if I have to cut out for sink.
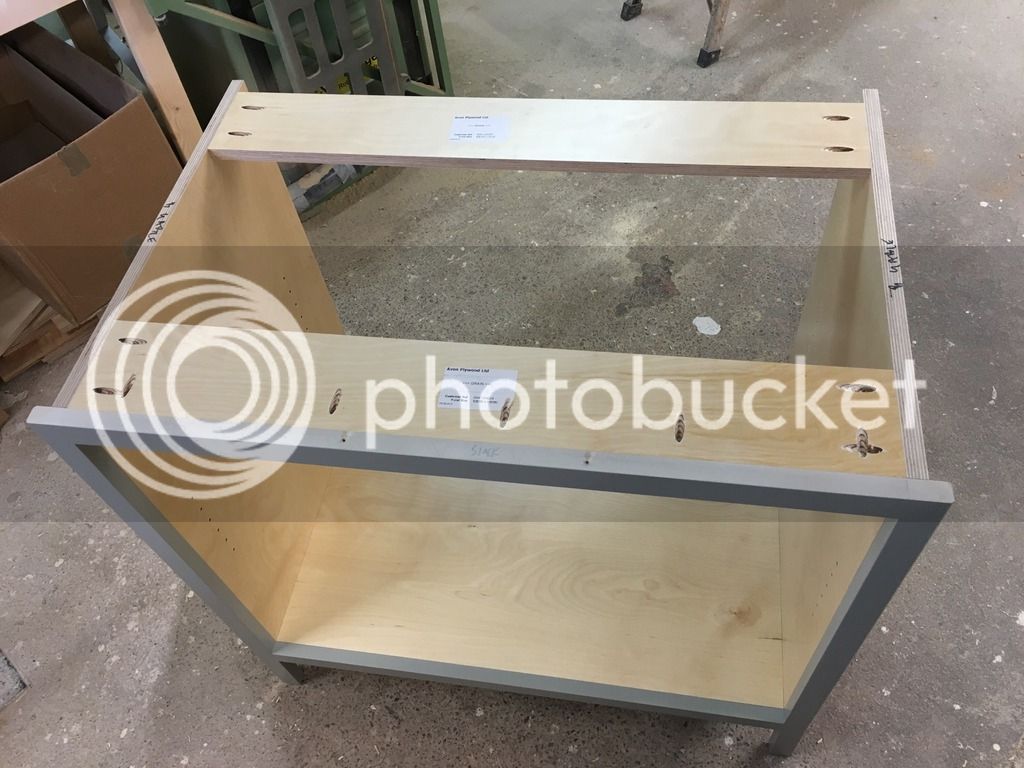
Face frame pocket holed on.
Should get more done tomorrow and I'll do my best to update.
Fitting 6th June.
Here are the plans of the proposed kitchen. Few things have changed, no bookcase on BB run. Free standing DW & WM as customer wasn't happy of energy output of integrated ones.


Inset doors on Blum, maple dovetail drawer boxes, Birchply carcasses already lacquered and all pieces cut via Avonplywood £1400 including. 18mm backs as all my kitchens are. Poplar doors and FF 9mm panel. Worktops are going to be Iroko from worktop express. Magic style shelving in the blind corners.
Normally screw through FF, but had a few on show on the ends etc and didn't want to fill or pocket hole. Saw various threads on here where guys use dominoes so what with new Bessey clamps I gave that ago
I very much liked it. Knocked up a quick jig just to position domino. 


Before I knew it, had all the face frames knocked up.
Left in clamps for an hour or so, titebond 2 as it was offer at axi a while ago. I like it.

Oven housing

From trawling through here I thought I would do this kitchen differently. FF and doors made first along with panels and everything else that had to be sprayed. Left the ply stacked up. Much better this way as the workshop doesn't have carcasses hanging about. Drawer boxes also done before assembly.
Just starting the assembling now in my third week, LOTs of distractions the first two weeks.
Sink cab went together lovely. Phew!!! Rear panel in two bits held on with 15mm dia magnets 6kg pull. Shelf holes with Festools LR32.

Ledgers are pocket holed from top so I can see where screws are if I have to cut out for sink.

Face frame pocket holed on.


Should get more done tomorrow and I'll do my best to update.
Fitting 6th June.


 [/URL
[/URL


