Shooting Board

UKworkshop.co.uk

Help Support UKworkshop.co.uk:

This site may earn a commission from merchant affiliate links, including eBay, Amazon, and others.

Pabs

Established Member
UKW Supporter
Joined
17 Jan 2023
Messages
351
Reaction score
436
Location
Highlands
Today I made a good start on the shooting board I decided I absolutely need if I'm going to make anything remotely good. I eschew the use of the mitre saw to get things nice and square. By chance I read @Derek Cohen (Perth Oz)'s post(s) of his ramped version and decided I would like to have a bash at that. Thanks Derek.

Stock used so far: Red Grandis for the base and top deck, Sapelle for the standoff (ramped). 8mm dowel to help joint it up. Undecied about the fence atm, I think either keep it sapelle or use hard maple. suggestions welcome! I have these plus english oak and ash I could use - and some beech firewood too that I've squared two sides of already.

Main Base all planed up ready for glue and dowel.
20230518_085610.jpeg

Glue up went smooth!
20230518_094808.jpeg

Top Deck ready

20230518_122938.jpeg


Lots of planing
20230518_134143.jpeg

Finished Base. Planing practice has paid off. I'm really happy with this.
20230518_134740.jpeg


Top Deck all planed
20230518_155141.jpeg

Planing the ramp.
20230518_143609.jpeg

20230518_175155.jpeg

20230518_180045.jpeg


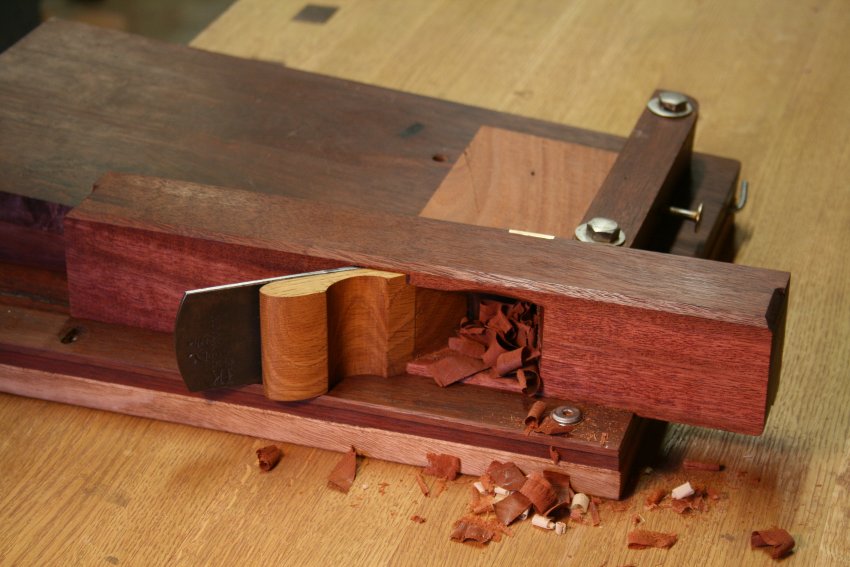
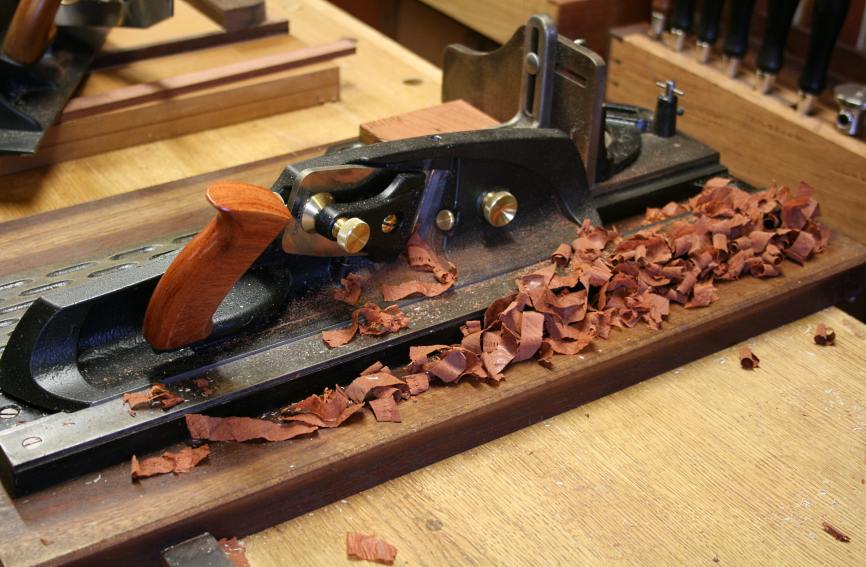
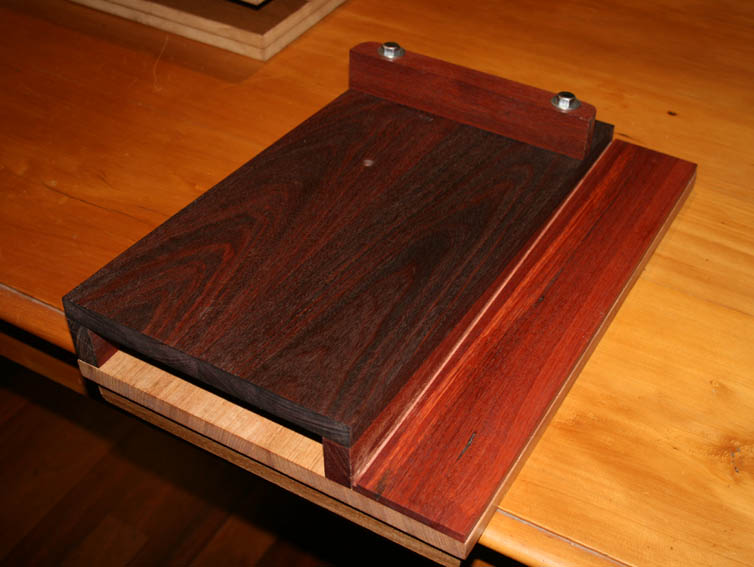
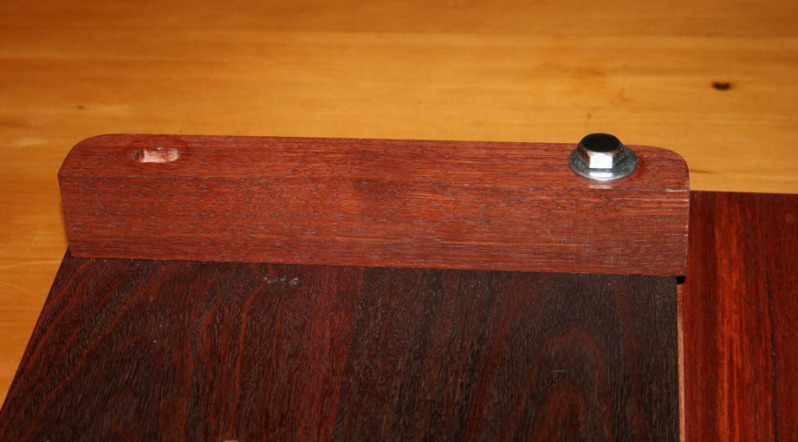
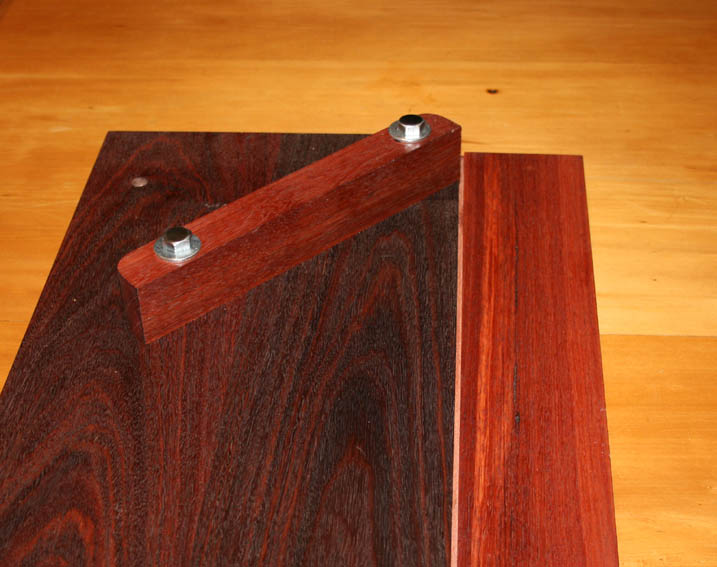
Here we are after today. Ended up being a 3.5degree slope. I've no idea if this is a good slope or not. But it's as much sloped as I can dare go with the handplane. I planed both the struts together to help keep them twins. Needed a little sanding owing to the slightly different amount of flex in the terminal end. I've put a lump of beech at the end which was firewood but I've scrub planed then finish planed two sides square. To get the most utility out of the shooting board I guess the top deck should be as thin as possible but I'll be mainly using it for 2" max so will try work out how tall the fence needs to be to achieve this. And I'll need to plane a rebate into it to accomodate the plane blade. I could perhaps wait until it's all assembled for this and just dry fire it until a rebate appears?
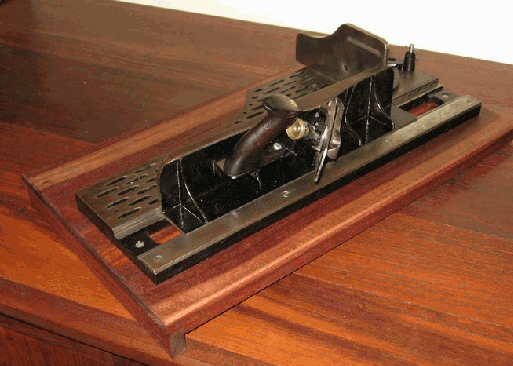
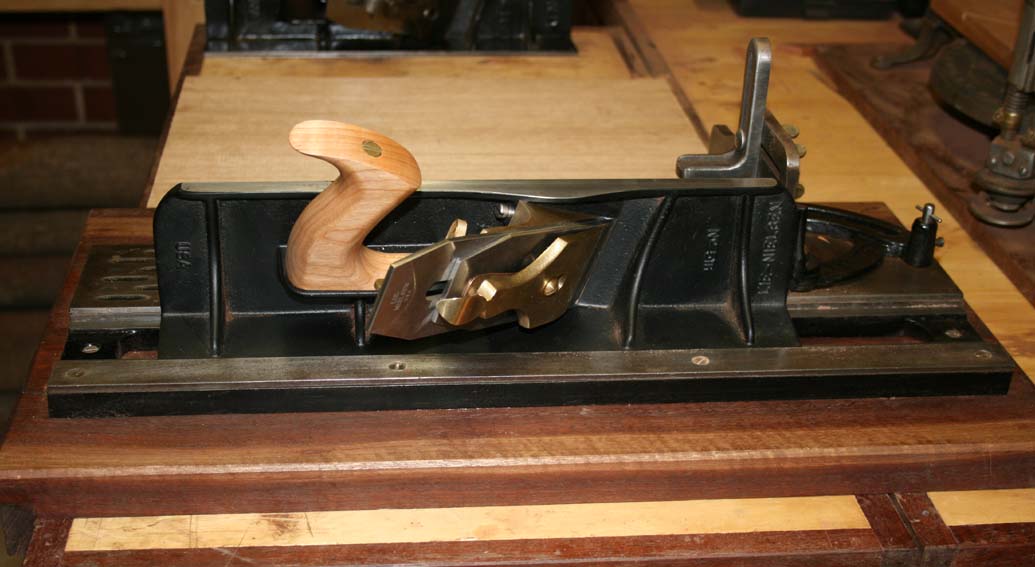
20230518_193338.jpeg
 
thanks Paul, I think some of the challenge is having the confidence to try more technical projects. especially with my limited inventory of fancy wood!
 
Looks good, though must admit the ramped board doesn't make sense for me,
as I use an old Stanley 5 1/2 what's not, or not wished to be ground square.

I can't imagine I'm the only one who want's bang on 90 degrees, after all that's what they're about...
and would not like the fact the you wouldn't see a consistent error/facet apparent, but a sloping one, when getting it 90, if being needing to be very fussy for an application what calls for it.
 
Tom I believe the ramp allows the entire width of the blade, most of it anyway, to be utilized. Not just the same part of the blade wearing while the rest of the width isn't. Do I have that right?

Nice so far Pabs.

Pete
 
Tom I believe the ramp allows the entire width of the blade, most of it anyway, to be utilized. Not just the same part of the blade wearing while the rest of the width isn't. Do I have that right?

Nice so far Pabs.

Pete
Yes Pete, it might make sense for an application, but it wouldn't suit me for my plugging of timbers, which understandingly is odd,
but as said, I can't imagine that's the only reason where a small facet would matter.

Though I find it harder to find a reason where you'd want this feature without having a plane with square sides.

Tom
 
Last edited:
Tom I believe the ramp allows the entire width of the blade, most of it anyway, to be utilized. Not just the same part of the blade wearing while the rest of the width isn't. Do I have that right?

Nice so far Pabs.

Pete

Pete, that is the common thought, but the reality is that the angle does not extend the cutting area by much. The value of a ramped board lies with the angle causing the blade to enter the wood progressively. This is at the point of impact only. What this does is reduce the jarring and make the action smoother.

My rule of thumb is that a shooting plane with a straight blade will work better on a ramped board, while anplane with an angled blade can use all.

Pabs, thank you for the compliment. You have done a beautiful job …. but the hard way (no harm done) :) I made the ramp by adding tapered sections to the sides to lift it, rather than plane the angle. For reference, I use a 5 degree ramp, but you should be fine.

ShootingBoardsfortheLNHandtoolEvent_html_m26ce620f.jpg


Regards from Perth

Derek
 
You know, shooting boards aren’t necessarily fancy, they’re a bench fixture and are just something we do. I’ve got a ply job I use with an old #8 Stanley Bailey to join guitar plates but most of the time it’s just grab a board to get the piece being planed off the bench so I can plane the edge. The photo is a half inch thick piece of Port Orford cedar with 3-M 80 grit stuck to the underside. A moment before it was a guide for sawing an endgraft. Pictured is the curly maple graft being fine tuned for the taper.
That little bit of wood lives in the bench trough.
 

Attachments

  • IMG_0242.jpeg
    IMG_0242.jpeg
    1.9 MB · Views: 0
One shooting board I find particularly useful is this “giant” …

1684631626275.png


1684631765438.jpeg


It is being used on my current project, firstly with a mitre accessory to fine tune mitres for a case …

1684631988328.jpeg


1684632037072.jpeg


And tuning drawer sides for piston fit drawers …

1684632126047.jpeg


It is LARGE and not so easy to tuck away after use! :)

Regards from Perth

Derek
 
Derek I know you’ve probably said so before but how many mitre planes do you have? How many of them can be used in more than one shooting board? I hope my questions aren’t sidetracking too much from the build.

Pete
 
Hi Pabs - your board build looks top-notch! My own is made from screwed and glued 18mm ply and looks way inferior than yours however and as important it does the job!
As Derek noted the ramp helps achieve a smoother finish with less vibration and user effort - its a bit like skew planing when you are flattening wild or dense grain boards and makes it easier to achieve a good finish by angling the plane's travel across the grain as opposed to along it
Ed
 
Thanks for the explanations re: ramped shooting boards Derek.

Could I ask some advice please - I was making up the fence y'day (by laminating) and was wondering how to attach it to the board. I could just glue it but I wondered if I could put long threaded rods through between the deck and the base and have toggle thumb nuts at the front to tighten the fence right up snug against the deck. I could put threaded inserts in the fence and slots at the front to allow for some adjustement - I was also thinking this would allow removal for housekeeping as the fence picks up wear.

Does this make sense? Uvavu or Eranu?
 
Derek I know you’ve probably said so before but how many mitre planes do you have? How many of them can be used in more than one shooting board? I hope my questions aren’t sidetracking too much from the build.

Pete

A few :)

There are planes which do double duty and function well when shooting: Veritas LA Jack, Veritas Custom #7 jointer.

I have also made a strike block plane: http://www.inthewoodshop.com/ShopMadeTools/BuildingaStrikeBlockPlane.html

Buildinga-Strike-Block-Plane-html-6e20bb98.jpg


I restored a Stanley #51/52 chuting plane and board in 2007: Restoring a Stanley #51/52

LN51-Shooting-Plane-html-m5f97a9bc.png


In 2011 I purchased the LN #51 shooting plane to replace the Stanley version, which was fragile: http://www.inthewoodshop.com/ToolReviews/LN51ShootingPlane.html

LN51ShootingPlane_html_6ed0a945.jpg


In 2013, the Veritas Shooting plane came to live courtesy of road testing for Lee Valley: http://www.inthewoodshop.com/ToolReviews/LVShootingPlane.html

LVShootingPlane_html_96d40f8.jpg


Basically, it is the latter two that are used. The LN was signed by Thomas Lie Nielsen and has a special place in my heart. It is a damn fine plane, and I keep it set up for side grain.

The Veritas is the better plane for end grain, and this lives on my Stanley #52 chute board.

Both get a lot of use, as you would recognise from my posts.

Regards from Perth

Derek
 
Thanks for the explanations re: ramped shooting boards Derek.

Could I ask some advice please - I was making up the fence y'day (by laminating) and was wondering how to attach it to the board. I could just glue it but I wondered if I could put long threaded rods through between the deck and the base and have toggle thumb nuts at the front to tighten the fence right up snug against the deck. I could put threaded inserts in the fence and slots at the front to allow for some adjustement - I was also thinking this would allow removal for housekeeping as the fence picks up wear.

Does this make sense? Uvavu or Eranu?

Here is the mechanism in my ramped boards:

It looks like the fence is connected with two bolts.

ShootingBoardsfortheLNHandtoolEvent_html_m26ce620f.jpg


Both bolts are housed in slots. These are tight to the bolt - no front-and-back movement. But if the bolt on the left is loosened, then the fence can slide back-and-forth ...

ShootingBoardsfortheLNHandtoolEvent_html_m605081d2.jpg


The reason for this is that the square fence then converts into a mitre fence ...

ShootingBoardsfortheLNHandtoolEvent_html_57e4947d.jpg


Regards from Perth

Derek
 
I tend to knock up a shooting board when I need it, from a length of MDF or anything, with a couple of laths. The work of minutes. Basically a temporary extended bench hook, with the plane side resting on the bench. Handy for thin boards.
 
Last edited:
thanks again Derek. The fence on mine will sits on the main base and abuts the sloped top (has a 3.5deg sloped planed into the underside of the fence to allow it to butt up nicely). I realise now that this was unecessary and I could have just sat it on the top deck :rolleyes:

To have it swing over the top deck like yours I'd need to have a kind of boom arm incorporated into the main fence to it can be bought aver the top deck. Complicated but this means I could have a graduated approach and be able to do different angles.

Or I could make up a separate triangle (90,45, 45) which could be clamped against the fence which would be simpler!
 
I love some of these shooting boards, will be incorporating some of the ideas into my next one.
 
A few :)

There are planes which do double duty and function well when shooting: Veritas LA Jack, Veritas Custom #7 jointer.

I have also made a strike block plane: http://www.inthewoodshop.com/ShopMadeTools/BuildingaStrikeBlockPlane.html

Buildinga-Strike-Block-Plane-html-6e20bb98.jpg


I restored a Stanley #51/52 chuting plane and board in 2007: Restoring a Stanley #51/52

LN51-Shooting-Plane-html-m5f97a9bc.png


In 2011 I purchased the LN #51 shooting plane to replace the Stanley version, which was fragile: http://www.inthewoodshop.com/ToolReviews/LN51ShootingPlane.html

LN51ShootingPlane_html_6ed0a945.jpg


In 2013, the Veritas Shooting plane came to live courtesy of road testing for Lee Valley: http://www.inthewoodshop.com/ToolReviews/LVShootingPlane.html

LVShootingPlane_html_96d40f8.jpg


Basically, it is the latter two that are used. The LN was signed by Thomas Lie Nielsen and has a special place in my heart. It is a damn fine plane, and I keep it set up for side grain.

The Veritas is the better plane for end grain, and this lives on my Stanley #52 chute board.

Both get a lot of use, as you would recognise from my posts.

Regards from Perth

Derek
Derek, i have just read your treatise on shooting board planes & I’d like to thank you for such an informative and well written piece! The downside is that I can feel a trip to Veritas in my near future! Thanks
 
Back
Top