Of course if you mortise out in the middle of the bench your back will bear the brunt in time. Front edge of the bench, just south of the vise, has always worked for me even on less than massive benches. One obviously wouldn't want to mortise on top of their shoulder vise so moving the party to the other side of the bench might be a good idea assuming the bench isn't against the wall and the bench doesn't have a tool well. A shortish bench that has a shoulder vise and tool well can be a little problematic with regard to real estate for mortising while standing upright.
You are using an out of date browser. It may not display this or other websites correctly.
You should upgrade or use an alternative browser.
You should upgrade or use an alternative browser.
Mortice vise and method
- Thread starter Derek Cohen (Perth Oz)
- Start date


Help Support UKworkshop.co.uk:
This site may earn a commission from merchant affiliate
links, including eBay, Amazon, and others.
No skills
Established Member
Thank you all.
This thread and the simple thought of making anything on the workmate again had me down the garage today getting on with a bench build that I started over a year ago.
Hopefully the next hand cut mortise I make will be a touch easier, and I can play with some of what has been suggested in the forum recently.
Cheers.
CStanford":x17jsomo said:Of course if you mortise out in the middle of the bench your back will bear the brunt in time. Front edge of the bench, just south of the vise, has always worked for me even on less than massive benches. One obviously wouldn't want to mortise on top of their shoulder vise so moving the party to the other side of the bench might be a good idea assuming the bench isn't against the wall and the bench doesn't have a tool well. A shortish bench that has a shoulder vise and tool well can be a little problematic with regard to real estate for mortising while standing upright.
by middle (If I said that), I mean on the front of the bench between the legs. I never plane or mortise in the true middle of the bench. It was painful enough just try planing and smooth planing with the grain in the middle of the bench.
My method. I got a hold of this chisel with a group about three weeks ago, maybe? I've probably cut 15 mortises with it so far, but I have a dilemma - the mallet that's not used weighs just shy of 30 ounces. It would be better, but it's verawood and it would probably kill the handle on this thing fairly soon. The urethane mallet is 20 ounces.
I did try two mortises today on my kitchen cabinet project with a buck chisel and the v method, and I was worse off. No telling if I'd be faster with it in the end. I think with this chisel, i'd have a minute less time in it with a bigger mallet. (I count about 4 minutes and 20 seconds to cut the mortise and then swish the chips out with a screwdriver). Room for improvement!
Top edge is broken out just a bit, making the mortise look wider in the center than the ends, but that's definitely not the case.
https://www.youtube.com/watch?v=gpT0KXc ... e=youtu.be
This chisel is incredibly hard (I&H sorby), it's easily as hard as the RI chisels I used to have, and probably close to the japanese chisel that I broke.
You can make fun of me if you'd like, I'm still just a curious amateur. Wish I'd have had something better for scrap laying around than a short test piece!!
Derek Cohen (Perth Oz)
Established Member
Thanks David.
The end result looks quite good. It looks like the sides walls are straight, although I can see some errant deformations.
The reason I emphasised standing at the end of the bench is that my body faces down the mortice. You are side-on from the other direction, and having to contort your body to be in line (and still never are). Since you used a holddown, you could have angled the workpiece to give you a more straight-on perspective.
I think that I will also return to using a holddown, as you did. It is just so much more secure than clamping from the side. Even non-slip (sandpaper) does not do a good enough job - there is still some movement as one wiggles the chisel free. I added a piece to the fence I showed early to acts as a holddown. This improved matters.
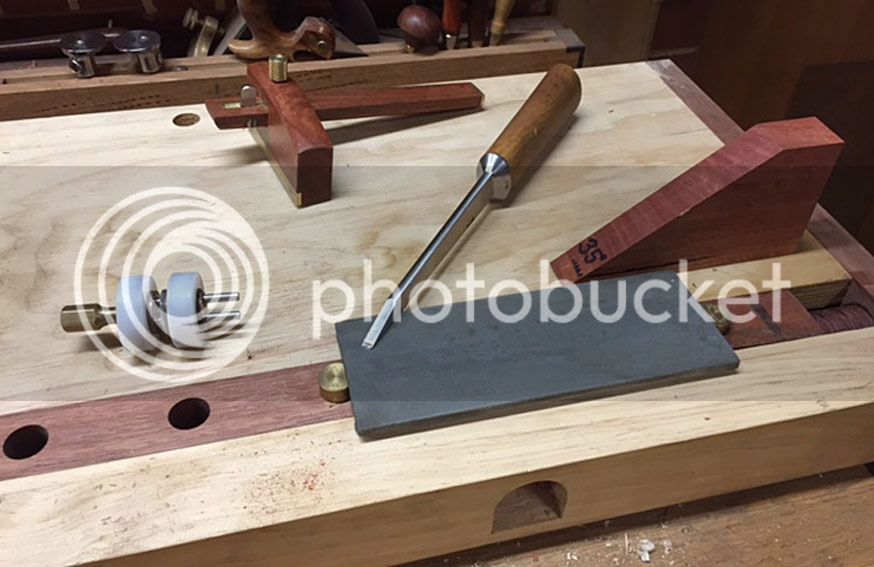
Last point: we are sharpening the mortice chisel the same way: rounded bevel. I tried guides, but they are all with faults. I am also not so confident that you kept the bevel below 40 degrees!") I made a wooden visual guide to help maintain 35 degrees. Even now I still use it.
I made a wooden visual guide to help maintain 35 degrees. Even now I still use it.
Again, thanks. The way we learn best is to share work methods.
Regards from Perth
Derek
The end result looks quite good. It looks like the sides walls are straight, although I can see some errant deformations.
The reason I emphasised standing at the end of the bench is that my body faces down the mortice. You are side-on from the other direction, and having to contort your body to be in line (and still never are). Since you used a holddown, you could have angled the workpiece to give you a more straight-on perspective.
I think that I will also return to using a holddown, as you did. It is just so much more secure than clamping from the side. Even non-slip (sandpaper) does not do a good enough job - there is still some movement as one wiggles the chisel free. I added a piece to the fence I showed early to acts as a holddown. This improved matters.
Last point: we are sharpening the mortice chisel the same way: rounded bevel. I tried guides, but they are all with faults. I am also not so confident that you kept the bevel below 40 degrees!
I made a wooden visual guide to help maintain 35 degrees. Even now I still use it.
Again, thanks. The way we learn best is to share work methods.
Regards from Perth
Derek
bugbear
Established Member
I think that I will also return to using a holddown, as you did. It is just so much more secure than clamping from the side.
Clamping from the side in a face vise is not good; but clamping from the side (leave the upper surface of the workpiece clear) is surely a good thing, with the workpiece sitting firmly on the entire mass of the bench (even better if you manage to be over a leg).
This happy circumstance can be achieved in many ways, including Wearing's "morticing jaws", held in the face vice (stolen from Memsey's post)

A Stanley #702 vise, (what Lee Valley call "Top Clamping")

Or my use of a handscrew:

BugBear
Attachments
Jacob
New Luddism. Awake and resist!
Actually if you need to clamp (it does happen!) then that looks like a neat solution - sitting on a solid bench surface and least likely to transmit marks to the workpiecebugbear":3j89sq63 said:......
Or my use of a handscrew:
BugBear
iNewbie
Established Member
Speaking of Angles. I was watching Chris Tribes video - he likes to hammer over the benches leg. Makes sense. Its about 11 mins in.
https://www.youtube.com/watch?v=ioVuK6KlOiA
https://www.youtube.com/watch?v=ioVuK6KlOiA
bugbear
Established Member
Jacob":is2zcpvw said:Actually if you need to clamp (it does happen!) then that looks like a neat solution - sitting on a solid bench surface and least likely to transmit marks to the workpiecebugbear":is2zcpvw said:......
Or my use of a handscrew:
BugBear
Who are you , and how did you get Jacob's UKW login details? :lol:
BugBear
Jacob
New Luddism. Awake and resist!
It's only me BB don't worry - I know you are not wrong about everything all the time. :lol:bugbear":uugbxheb said:Jacob":uugbxheb said:Actually if you need to clamp (it does happen!) then that looks like a neat solution - sitting on a solid bench surface and least likely to transmit marks to the workpiecebugbear":uugbxheb said:......
Or my use of a handscrew:
BugBear
Who are you , and how did you get Jacob's UKW login details? :lol:
BugBear
Thanks David.
The end result looks quite good. It looks like the sides walls are straight, although I can see some errant deformations.
The reason I emphasised standing at the end of the bench is that my body faces down the mortice. You are side-on from the other direction, and having to contort your body to be in line (and still never are). Since you used a holddown, you could have angled the workpiece to give you a more straight-on perspective.
I think that I will also return to using a holddown, as you did. It is just so much more secure than clamping from the side. Even non-slip (sandpaper) does not do a good enough job - there is still some movement as one wiggles the chisel free. I added a piece to the fence I showed early to acts as a holddown. This improved matters.
Last point: we are sharpening the mortice chisel the same way: rounded bevel. I tried guides, but they are all with faults. I am also not so confident that you kept the bevel below 40 degrees!
Again, thanks. The way we learn best is to share work methods.
Regards from Perth
Derek
I wouldn't normally stand there, but I do stand along the bench rather than at the end of it - just further back from the vise. The location of the camera sort of forces me to stand closer to the vise.
Yes on the bevel, I roll it up pretty steep at the tip. On the smaller chisels that I was using before, I sharpened them with a single bevel and a little less steep. I think you can get away with a little steeper on the final bevel if it's rolled by hand like that and the primary is kept shallow, but I don't have any proof. I do know that with a full bevel in the japanese style chisels, I didn't like it steep - the bevel has too much grip.
I don't always do the same thing at the ends of the mortise - sometimes I work bevel side and sometimes back. What I'm trying to settle is how to end up with the fewest chips in the mortise - using the chisel straight in with the back facing the ends of the mortise is easier, but I end up with more chips left in the mortise, and as you know, they get pretty tightly packed in there if there are too many.
I am definitely not in a position to give advice here, not having a huge number of M&Ts to my name, but when I made the outside door for my new office recently the stiles were considerably too long to fit on the bench I normally use.
I made a couple of very basic but sturdy trestles / saw benches and did all the mortising sitting on the work (i.e. straddling the trestles, looking along the mortice) - I found this much more pleasant than standing at a bench (and a million times better than standing at a cheap workmate as I've also done!)
I'm sure I've seen old pictures of mortising done this way and think I would do even smaller pieces like this from choice next time round.
Derek Cohen (Perth Oz)
Established Member
Excellent tip by Salko on the Oz forum on using a forstner bit in a brace. Forstner bits are the best for morticing as they can overlap. I tried this, and it works a treat ....
https://www.youtube.com/watch?v=j_unwqE ... e=youtu.be
Regards from Perth
Derek
https://www.youtube.com/watch?v=j_unwqE ... e=youtu.be
Regards from Perth
Derek
Excellent tip by Salko on the Oz forum on using a forstner bit in a brace. Forstner bits are the best for morticing as they can overlap. I tried this, and it works a treat ....
https://www.youtube.com/watch?v=j_unwqE ... e=youtu.be
Regards from Perth
Derek
Derek,
now that looks like really good fun. I'll give it a bash this evening. I've rejected the idea of drilling out mortices thus far for fear of wandering from the vertical but using the eggbeater for the pilot hole would deal with that. Two questions though: if, say, you are doing a 3/8" mortice would you use a 3/8" bit fully confident that you will be absolutely bang on or would you go for, say, 5/16" or even 1/4" so as to stay within the marked sides? The second question question would apply in any case: having drilled there are bound to be lots of scoop shapes running vertically down the sides. Do you then use a wide chisel (ideally as wide as the mortice is long) to clean up the side walls? I ask this because going along a largely chopped out mortice with the relevant width mortice chisel would surely be a mare of a Job.
Andy.
Jacob
New Luddism. Awake and resist!
If you drill, it has to be narrower than the slot unless you are doing it in a press to make it straight and vertical.
It's usually easier to not drill and just go straight for the chisel - it's much faster than you'd expect.
If you mortice with a full width trad mortice chisel you don't need to clean up the sides, it does the whole job.
It's usually easier to not drill and just go straight for the chisel - it's much faster than you'd expect.
If you mortice with a full width trad mortice chisel you don't need to clean up the sides, it does the whole job.
bugbear
Established Member
You've claimed ad nauseam that you can keep a chisel vertical by eye. Why not use the same claimed skill on a drill?Jacob":buhlnesa said:If you drill, it has to be narrower than the slot unless you are doing it in a press to make it straight and vertical.
BugBear
I accept that fully and while I'm happy that I can get smaller mortices right with a chisel most of the time, I still have problems keeping bang on track with very deep ones, so the drilling technique looks like a good alternative in such cases. One day though I'll be able to knock out a 4" deep 3 1/2" wide mortice with a chisel but the technique Derek posted a link to looks like something I could get from the word go.Jacob":1h1mtir1 said:If you drill, it has to be narrower than the slot unless you are doing it in a press to make it straight and vertical.
It's usually easier to not drill and just go straight for the chisel - it's much faster than you'd expect.
If you mortice with a full width trad mortice chisel you don't need to clean up the sides, it does the whole job.
Jacob
New Luddism. Awake and resist!
You too could keep a chisel vertical by eye BB, if you tried. It's not rocket science!bugbear":35ovb4yc said:You've claimed ad nauseam that you can keep a chisel vertical by eye. Why not use the same claimed skill on a drill?Jacob":35ovb4yc said:If you drill, it has to be narrower than the slot unless you are doing it in a press to make it straight and vertical.
BugBear
Main thing is to do it at the end of the bench and sight along the workpiece, not across.
Drills tend to be a bit wobbly esp a brace and bit.
But you don't need one anyway if you have a trad mortice chisel - that's the whole point of that big heavy tool.
If you drill out the hole you don't need the mortice chisel but you'd have to fiddle about a lot to clean it up.
It's quicker with just a chisel.
Not sure about mortice chisels above 1/2" though, I've never used one - instead resorted to fiddling about if I've had to do it by hand.
But I've got a mortice machine which I use a lot.
Which of course brings something else to bear - the importance of the bench being level.
Derek Cohen (Perth Oz)
Established Member
Two questions though: if, say, you are doing a 3/8" mortice would you use a 3/8" bit fully confident that you will be absolutely bang on or would you go for, say, 5/16" or even 1/4" so as to stay within the marked sides? The second question question would apply in any case: having drilled there are bound to be lots of scoop shapes running vertically down the sides. Do you then use a wide chisel (ideally as wide as the mortice is long) to clean up the side walls? I ask this because going along a largely chopped out mortice with the relevant width mortice chisel would surely be a mare of a Job.
Hi Andy
First of all - for perspective here, folks - there are many ways to skin a cat. Drilling out is a legitimate alternate method for mortices. And even if you were not making a mortice, this is another way to remove waste by hand (no electricity). Some need to be able to do so, and quietly.
Both questions are answered together: If I were using this method for a mortice, I would aim to leave 1/32" each side of the drilled hole. If using a drill press, one could overlap the holes and remove all the waste. However, with a brace, there is some overlap, but not all. Some waste remains. One needs to pare this away from the inside of the mortice towards the gauge line. Then one final clean up along the gauge line with a wide paring chisel.
Regards from Perth
Derek
Similar threads
- Replies
- 61
- Views
- 4K