Les Paul build - update fingerboard inlays

UKworkshop.co.uk

Help Support UKworkshop.co.uk:

This site may earn a commission from merchant affiliate links, including eBay, Amazon, and others.
Still not carving yet, can't believe it!

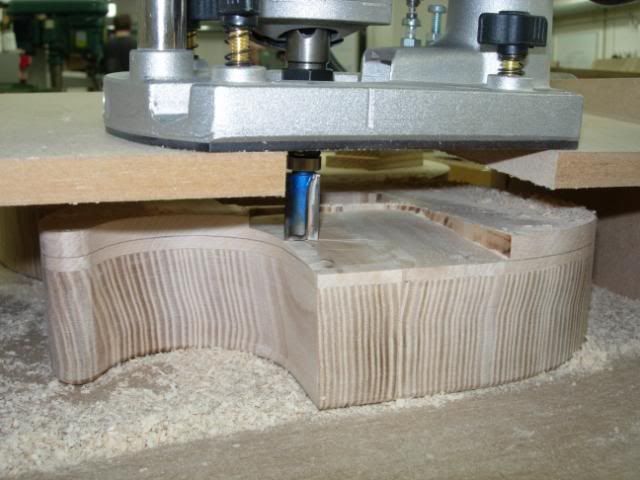
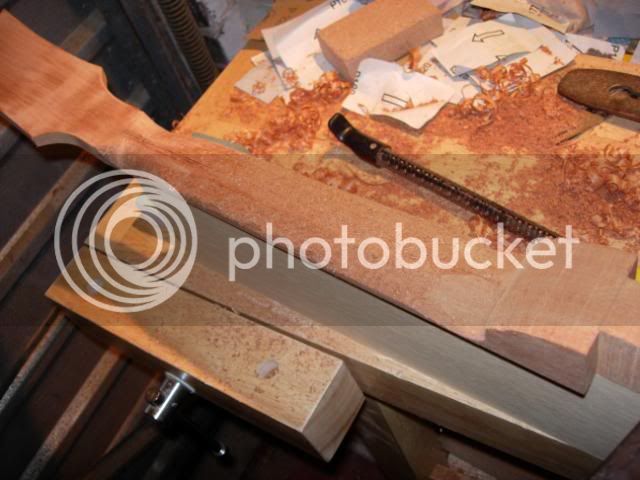
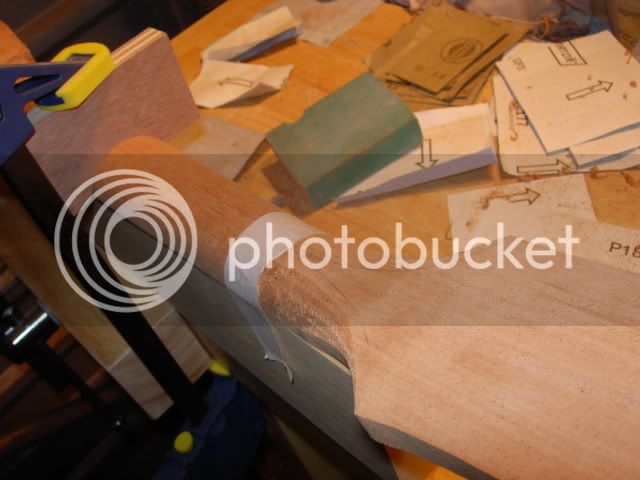
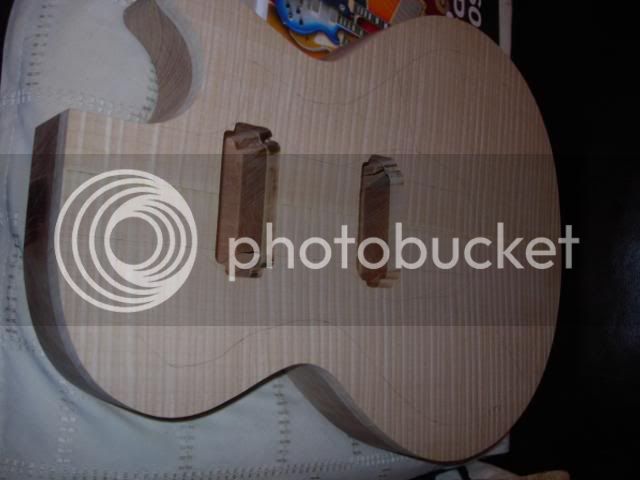
Well all the back cavities are routed out and I've rounded over the edge on the back too whilst the top was flat. Before that though I had to hand sand the edges to smooth off and take out the lumps and bumps left by the bobbin sander, not a quick job when you're doing it on 2 bodies. Fair crippled me but at least they only need a finish sand now. Also planed square the heel area where the neck is to join, took a while as it does need to be square and flat.

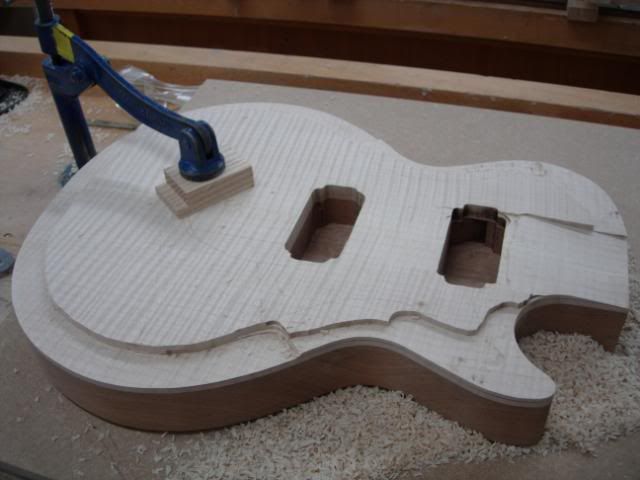
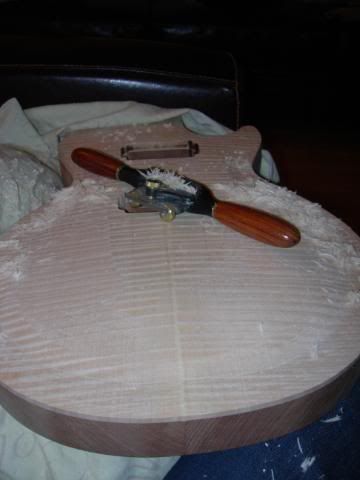
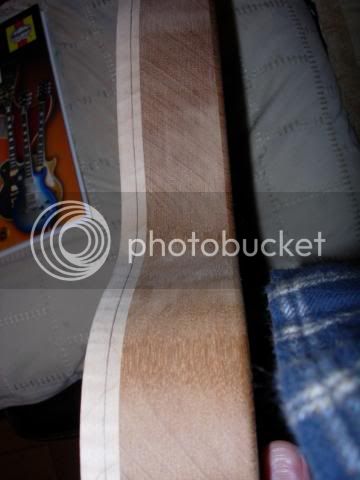
Then marked the limit of the top carve around the edge - quite a bit of wood to be removed there, it's best not to think about wastage when making guitars :shock:

lp39.jpg


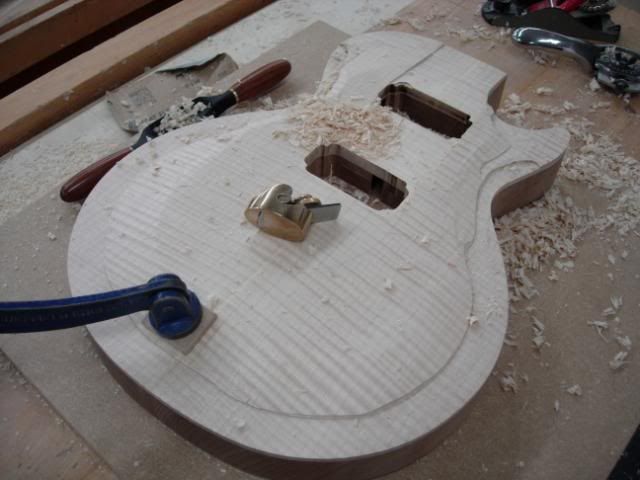
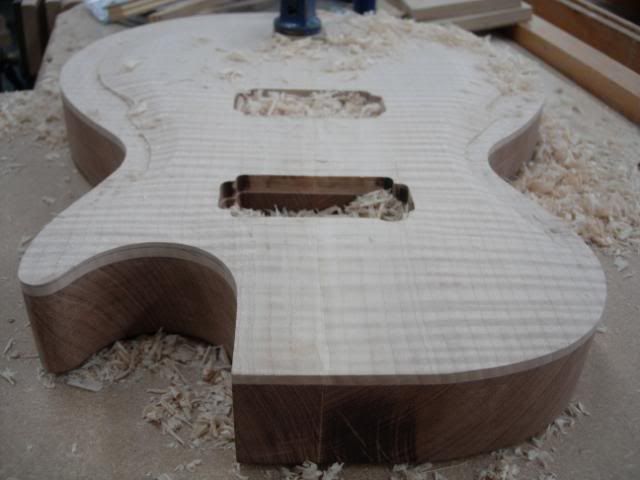
Also started rough drafting where the various carves are going to be on the top, back is not far off but I need to redo the waist and front as the transition is much sharper in places.

lp40.jpg


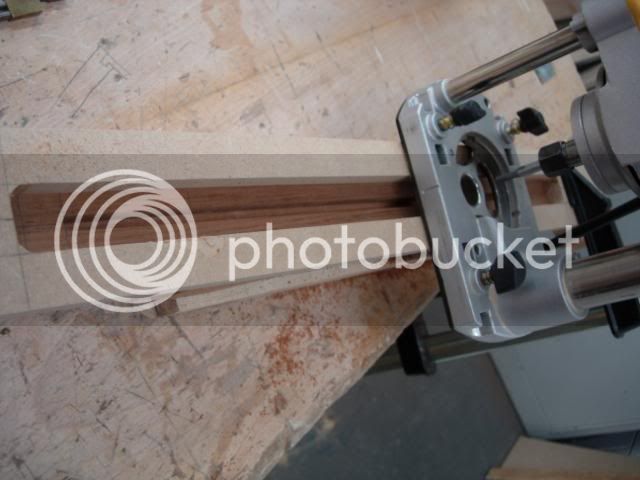
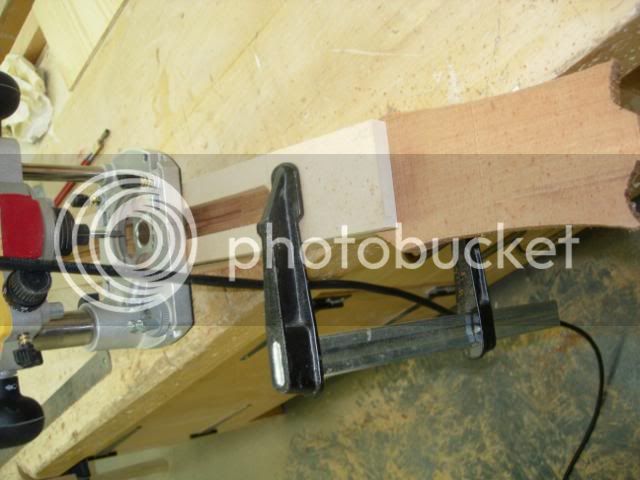
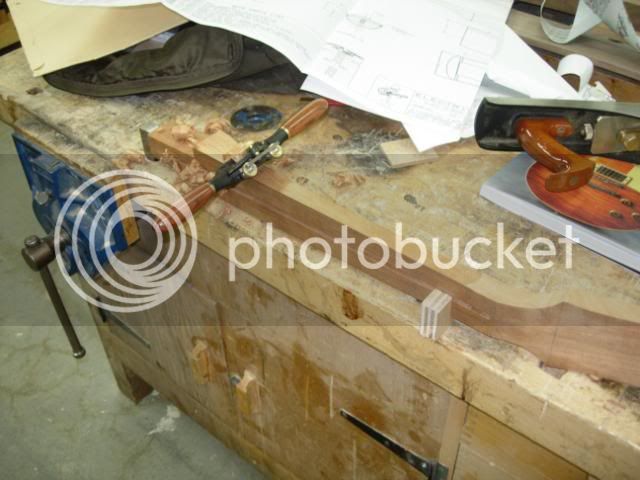
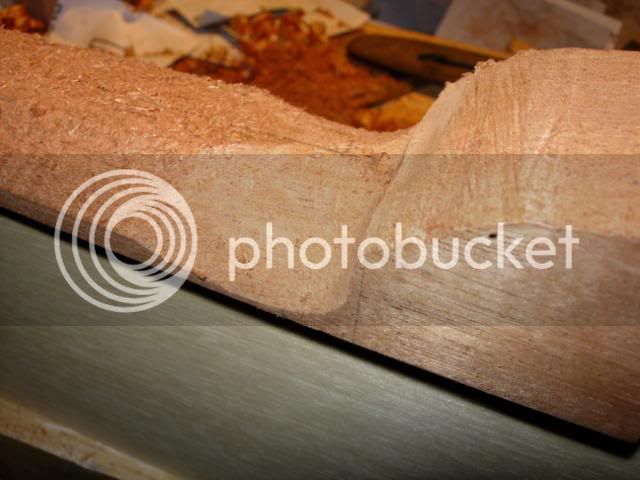
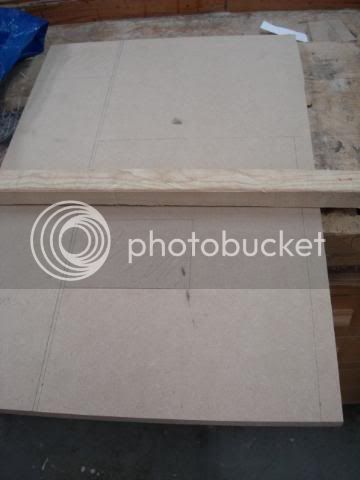
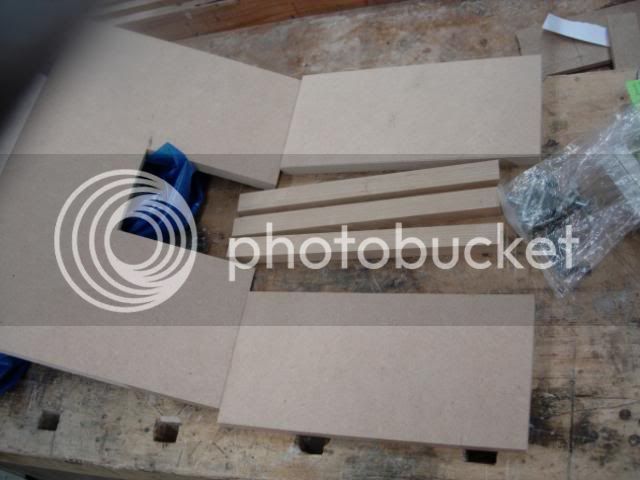
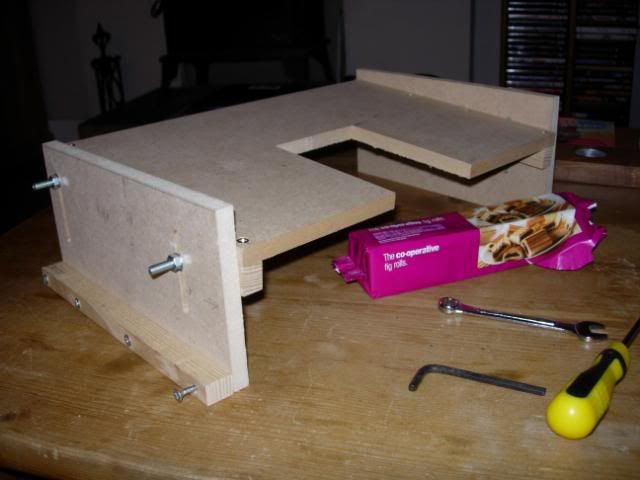
Did some more jig making this week (fed up with making jigs), this one was to enable me to accurately plane the neck angle and pick up angle. Decided to make a little platform that would sit over the body, both clamped in place and then rout from above and cross fingers with tearout. Took me all of this weeks class to make this damn jig, Steve Maskery would not be proud :oops:

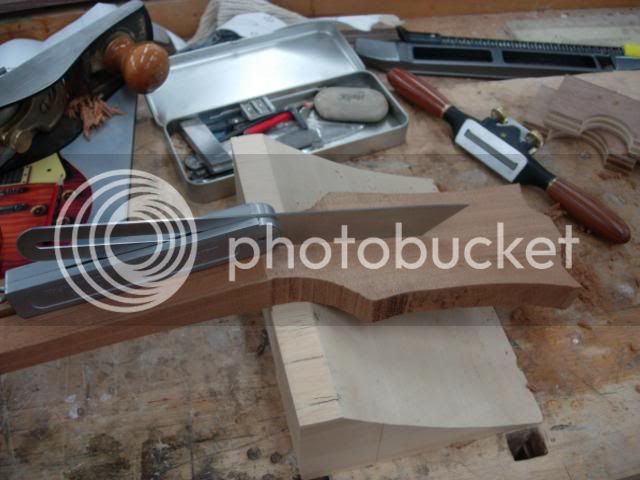
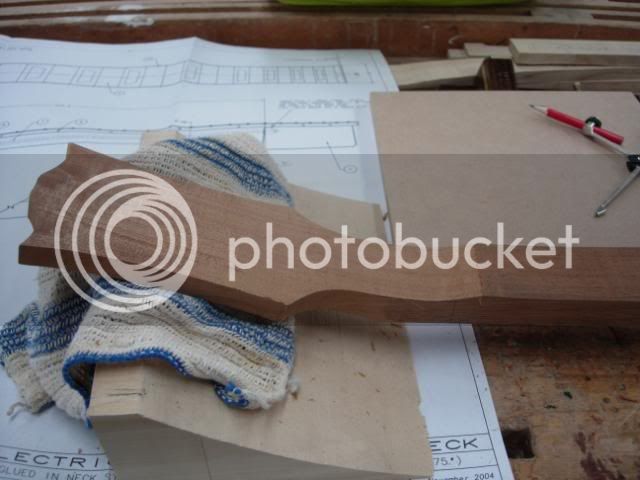
Once this is done I'll make yet another template and rout out the neck pocket and after that I can put off the carving no longer...

lp36.jpg


lp37.jpg


lp38.jpg
 
Okay then, it's been a painful couple of weeks which can mean only one thing, yes, it's top carving time.

Before that though it was time to test out the new jig and rout in the neck angle, steady as she goes for this bit as it's fairly crucial to get it right. Also routed the pickup angle, made a slight cock up there but more of that later one - hopefully can rectify it.

lp41.jpg


Next job was to rout the flat portion of the top around the edge, plenty of passes and lots of care to avoid tearout on that maple, Tornado bit did a good job here. Went a little too far on the horn, but not unrecoverable

lp42.jpg


Did think about routing the bulk of the waste away for the profile on the top but decided to break out the spokeshave and luthier plane. Spokeshave good, luthier plane hot little pointy pain device. Bad. Very bad. Still, coming along though

lp43.jpg


lp44.jpg


Almost finished the carving/planing and was able to do the bulk of it in front of the telly. Ended up using all of the luthier planes I got at Bedford last weekend (very timely). Next job is to dig out Paul Chapman's thread on putting a hook on scrapers using an mdf template and sharpen the curved scraper. After that it's sanding, lots of sanding

lp45.jpg
 
wow, looking good, would give my epi a run for its money.

I LOVE the top

Steve
 
Coming along nicely, Damien. :)

Sometimes, you've just got to take a deep breath and crack on with those parts of a project you're not looking forward to. Even if you balls it up, you'll feel more relaxed and it's usually plain sailing from then on! :wink:
 
Goldtop, on flame maple, you cheeky git :D

Goldtop will be last resort if I cock up the finish (so not ruled out yet...), I'm planning to go for something like a honeyburst
 
Okay, bit of a hiatus due to Easter Hols and not been able to work on it at home for various reasons, like painting the bloody garage roof :x

So, put the body to one side for a little bit, anything to put off the sanding of the top. Time to get the neck out.

Now I've been putting off doing further neck work since I roughed out the basic shape and then realised a little while after that I should have marked out my neck blank and routed the truss rod slot whilst I had a square piece to work with. I eventually settled on making another mdf template, this one with a slot down the middle just the right size to fit the guide bushing on the router.

A fairly simple job but made more complicated by having to do at class, which goes something like: find a piece of mdf, cut it to size and ensure square, mark up the mdf for the routing, get a router, get another router that doesn't have rattley bearings, find a spanner, find a guide bushing, find some screws for the guide bushing, find a screwdriver, set up the router, rout the slot, fit the guide bushing, make a heath robinson arrangement for holding and clamping the neck and holding the template in place. Then finally, 20 minutes before the class ends, hurriedly rout the truss rod slot...

So here we are in mid rout, had to re-position the template and clamps part way which wasn't ideal but only had a mild deviation from the previous line.

lp46.jpg


lp47.jpg


That was pre-Easter, this week I had to plane the headstock flat and at the right angle, fairly simple job, just had to ensure I didn't plane the flat where the nut will sit.

lp48.jpg


Then it was time to mark out the shape of the headstock again and off to the trusty bobbin sander to get the curves in. Had to be careful around the transition area but again a simple and rewarding job. Then it was back to the bench to plane down the sides of the neck nice and straight. Also straightforward but has to be accurate. Next job will be to sort out the angles and cuts on the tenon end before shaping the radius into the neck

lp49.jpg
 
Ooh! Like that, Neil!
Iron - you'll be pleased to know you've inspired me to make a Les Paul/Weissy crossover. Just planed up the mahogany for the blank.
Philly :D
 
I know nuffink about guitars 'cept that my son has a Gary Moore Les Paul (I changed the finger plate for him to a plain one) which he plays through a big Orange amp (same as the ones that Travis use, or used to use?) - Rob
 
woodbloke":fn59cayw said:
I know nuffink about guitars 'cept that my son has a Gary Moore Les Paul (I changed the finger plate for him to a plain one) which he plays through a big Orange amp (same as the ones that Travis use, or used to use?) - Rob

gary moore les paul, yum.....

orange amp to boot.

a man with taste!

This thread is looking very nice indeed, I`m eagerly awaiting the result.
of course with a guitar build, sound samples WILL be a requirement as well as final pics

Steve :lol:
 
Neilster, not seen a finish like that before and it looks pretty good.

Philly glad I've inspired you to do a Les Paul crossover, however if you finish it before I do then you're dead :wink:
 
Okay, more neck work, this time I had to thin down the headstock to the right dimension, so over to the bandsaw and then a bit of planing and sanding. I'd got used to the thickness of the neck as it was and was a bit shocked when I realised how much had to come off. Must take better care of it now, ie not bang it into doorframes...

lp50.jpg


Now it's the real brave pill time, I've marked up 2 points on the neck for which I have made radius templates, I thickness the neck at those two points, ensure a flat line between the two and then carve out the two sections. Those surforms remove a lot of material very quickly :shock:

lp51.jpg


lp52.jpg


lp53.jpg


lp54.jpg


As long as I keep the pencil mark on the centre line then I know I've not strayed over and altered the thickness. Now that I have the two ends radiused I can just joint the dots between the two and smooth it out. Then it's the headstock volute and heel section.

Nice to be working with handtools only at the minute, nice pace and I can hear the radio too
 
Nice job so far Damian - Shaping the neck was/is my favourite part of the process, it's very satisfying.

A tip if you have not already thought of it: If you wish to have an authentic les paul profile, you can buy or make a template out of card that matches the profile - you can then lay this over the back of your neck as you go to make sure you are on profile.

Personally, for my last neck on the explorer build, I just took a small amount of at a time until it felt right, which was quite surprising when I compared it to an off the shelf guitar, my neck was more like a baseball bat, but was much easier to play!
 
For neck shaping, I really like my shinto saw rasp for coarse stock removal, it's very quick, but leaves a vastly superior finish to a surform. It always surprises me how quick the fine side cuts *and* how smooth a cut the coarse side produces.

Looks like you have a nice spokeshave, that's a joy to use for shaping mahogany with nice cooperative grain, though you have to be careful on figured woods, I've had a few close calls with curly maple and pau ferro leading the shave astray.

For final shaping, especially in the transitions to head and heel, you'll find a decent fine cut rasp invaluable, and a curved scraper.
 
Already there Colin, on my plan they had a neck section at two points which showed depth and shape, so I made myself 2 plywood templates for checking. Once I have those two done I then just join the rest of the neck up. Going to see if I can get that part of the neck shaped tonight.

Setch nice tip with the Shinto saw rasp, might get one for the future. They have them at Workshop Heaven plus a number of normal rasps, which thinking about it I may need to acquire to help me with the heel. The surform is just a bit too vicious for that and my half round file is just that, a file, not a rasp.

Do have a curved scraper too but am finding it a real ballache to turn a hook on. Any tips for gooseneck hooks would be appreciated.

Setch do you have a guitar building site/blog? I'm sure I've studied an Ant Setchell site when researching
 
Luthier than thou, was that it?

Had a productive little session in the shop tonight, shaped the 2 sections and then joined them up along the length, I'm sure it isn't perfect but for my first neck it looks alright. Well, I think so :)

lp55.jpg


Then had time to start shaping the transition at the headstock, shouldn't take too long and quite a rewarding job too. Starting to get used to working without faces and edges and marked straight lines, it's all curves and 3D

lp56.jpg
 
Ironballs":3ur2vlj1 said:
Then had time to start shaping the transition at the headstock, shouldn't take too long and quite a rewarding job too. Starting to get used to working without faces and edges and marked straight lines, it's all curves and 3D

Hey IB, Thats looking great! I almost cant wait to start another guitar so I can carve another neck. :D

Thats a good tip raising the neck above the bench top, more clearance for the spokeshave handles and closer to eye level.
 

Latest posts

Back
Top