Les Paul build - update fingerboard inlays

UKworkshop.co.uk

Help Support UKworkshop.co.uk:

This site may earn a commission from merchant affiliate links, including eBay, Amazon, and others.
Looking good IB. How do you get away with going into the workshop at night? Every night on the train I think about what I'm going to do in the shop that night. Then I get in, make the dinner, water the garden, put the bambino to bed and any trace of motivation as seeped out.
 
Motivation can be a problem after a hard day but Mrs IB is currently working in Luxembourg during the week, so it's either sit on here and talk about woodworking with you guys or actually do some woodworking in the garage!

Mike that block served a dual purpose, it did as you say raise everything off the bench to give me room, but it also gave a reference edge to work to, ie once I got close to the neck edge I would slide the base proud of the neck so I couldn't plane or sand off width. Only came to me as I was doing it.

My inner magpie came out today though and a set of rasps are now on their way to me :oops: Plus a waterstone flattening stone, realised my 800 grit stone is looking decidedly U shaped and was making sharpening a challenge
 
Dakota from Rutlands, should do the job I need, not necessary to shell out large amounts of cash. If I find them inadequate and/or I do more shaping then I can always upgrade. Can't argue with a set of 5 for half the price of an Auriou
 
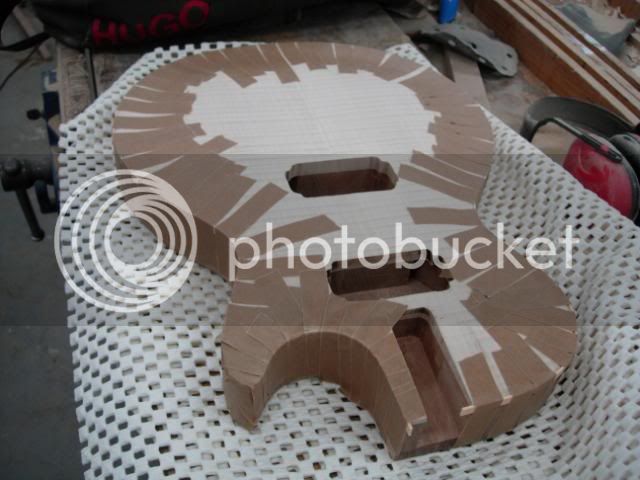
Another update, I've missed out the tedious week of scraping and sanding the top - part of which involved putting a hook on a gooseneck scraper, even more tedious.

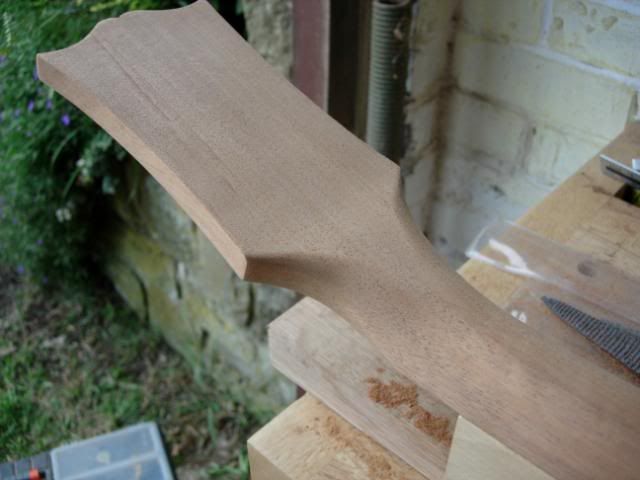
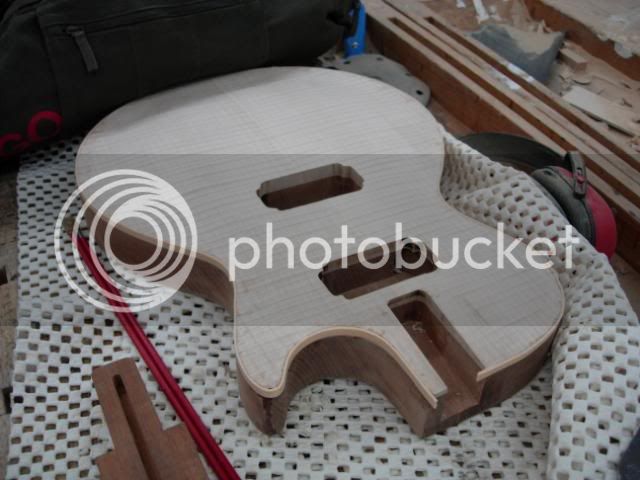
Finished off shaping the headstock transition, looks a little weird in this photo but it came out fine

lp57.jpg


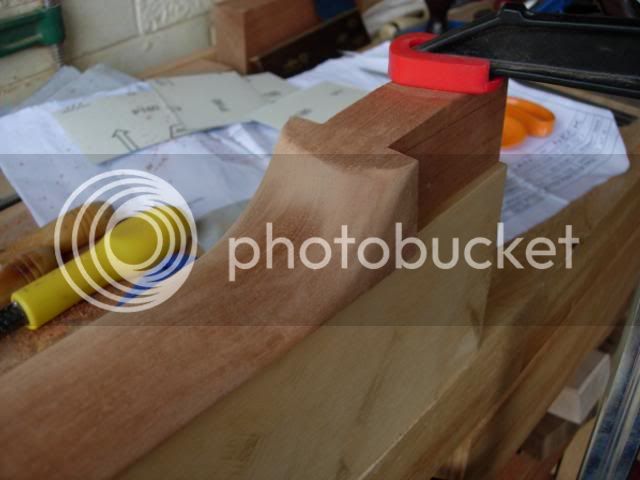
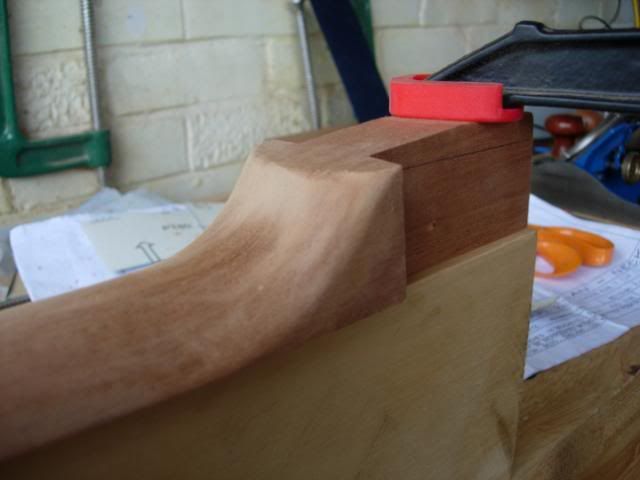
Then it was onto shaping the heel, broke out the Dakota rasps to remove the waste but they were just a little too aggressive and as mentioned elsewhere one of the rasps confirmed it's banishment to a dark corner of the garage when it popped out of its handle and landed on the neck :x There are about 5 or 6 little indents which I think will be hidden by location, grain filler and lacquer. But still...

lp59.jpg


lp58.jpg


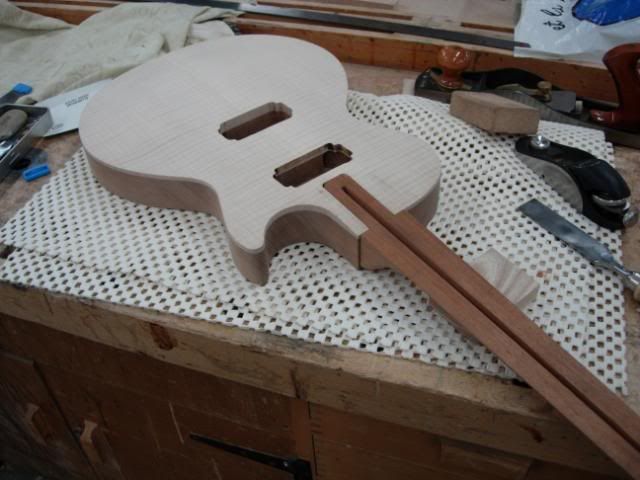
Bit of careful marking up and sawing to get a good square tenon made and an 85.5 degree slope on the shoulders.

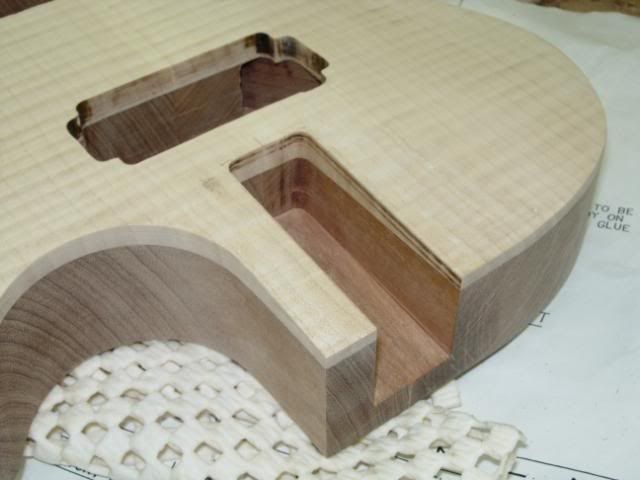
Next up was making yet another jig, this one was for the neck pocket, fairly simple u shape slot made slightly undersize to allow for some fettling. Was able to sit it on the slope of the top as planned but had to be careful as there wasn't a great deal of area for the double sided to stick onto. Made the job a little easier for myself by forstner-ing out the bulk of the waste first

lp60.jpg


Spent most of last nights class fitting the neck, initial fit once I managed to get it partly in showed a significant skew off to the right, ie 0.5cm at the headstock. Not sure how that happened but that's why I'd left a little fat in, lots of toing and froing but it fits and is striaght now, though a touch looser than I'd like - more room for the glue :D

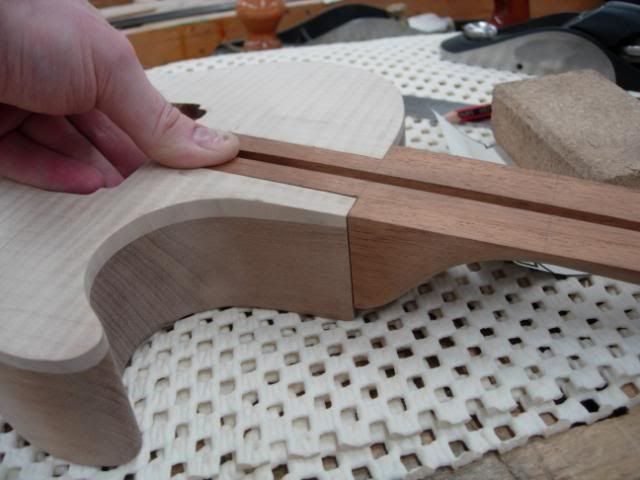
Neck shown here, big moment, so that I can mark out the final bit of body to be sanded away to merge into the neck

lp61.jpg


Sanding done here and a cloe up of the neck. You can see here that the fit is not quite as tight as I'd like, I'll have another look to see if there are any high spots to remove but to be honest it lines up straight and I could keep removing little bits here and there and make a right pigs ear of it, so may just allow a thicker glue line. Could always make some mahogany dust to mix with the glue at the surface

lp62.jpg


I've not drilled any holes in the top for the bridge yet, was waiting to finish this and a couple of other jobs first. Any inaccuracies in scale length that have crept in here can be compensated for with the bridge placement. Fairly confident I should be within 0.5 mm though.

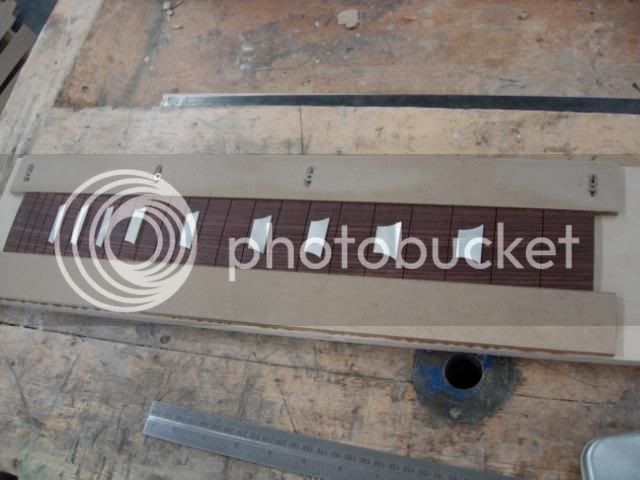
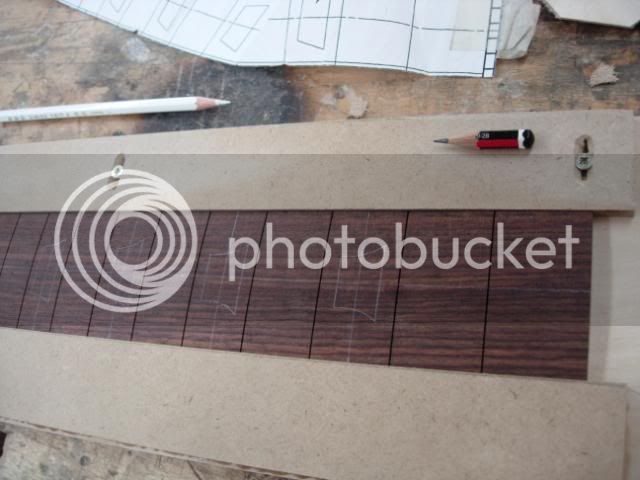
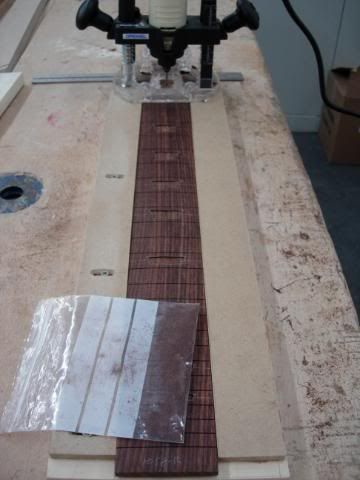
Next job is routing the binding channel on the body and routing the inlay holes in the fingerboard. Plenty more scope for Mr Cock Up to enter stage left
 
IB, glue a piece of veneer to your tenon, then reshape it to get a nice tight fit. Glue and sawdust is bad mojo :)
 
Setch, don't think that will be needed, when I went back to it the fit was much tighter (think the parts had been baking in the car all day the week before :oops: ). So that did allow me to fine tune the fit around the shoulders, which I've done and is now a closer fit.

That meant that this week was another brown trousers job, routing out the binding channel. Used a Dremel and small bearing guide gizmo from Stewmac, generally worked okay but a bit wobbly on a couple of points and was difficult round the horn and cut away. Will need some touching up/filling in those spots which is a pain but not major.

That done and it was on to another stressful job, supergluing on the binding. Thankfully I'd had the foresight to order 2 lots of binding and as one was snapped in transit I got the impression that it was a little brittle. A trial bend later and that was confirmed. Knew the horn was going to be difficult anyway so had a practice with the spare and a heat gun. Then found there isn't much between solid and runny and that it's also difficult to bend hot plastic with your fingers :shock:

Taped up the binding in the channel and then moulded it around the horn in situ, this would make the glueing easier. It isn't a 100% perfect fit but close enough, any more and I risked getting a pool of plastic and/or no fingertips.

Untaped it and then got onto the gluing, which was part fun part stressful, it worked pretty quickly and more than once I got a good covering of glue on me when I was taping the binding down. In fact all went well (apart from getting part stuck to the glue tube) until I got to the horn and ran out of glue. Thankfully the ladies in jewellery had some and I could finish the job, leaving me to bask in a warm fug of cyanoacrylate with no fingerprints.

lp63.jpg


Came back tonight and peeled off all the tape and set about scraping off the excess height and width in the binding and the various bits of gunk. Got the majority off and will now finish with sandpaper.

lp64.jpg


Decided to go with an ebony headstock veneer as I liked the look of it. Sorted the rough shape and then glued on, will finish to size once set. It's mad panic for the show time at the college, so finding these clamps was no mean feat.

lp65.jpg


lp66.jpg


Next jobs are drilling a few more holes in the guitar and sorting out the inlay in the fingerboard
 
Forgot to add/ask, if anyone knows of a binding supplier that is better than that brittle rubbish from Stewmac I'd be glad to hear of it. A rare rubbish product for them
 
Ironballs":2qk6kkcn said:
Forgot to add/ask, if anyone knows of a binding supplier that is better than that brittle rubbish from Stewmac I'd be glad to hear of it. A rare rubbish product for them

Have you tried Dave Dykes? Ive bought things like truss rods and fingerboard blanks from him and always been pleased :)
 
He's on the list, that's where I got the ebony from. Got some binding from Smallwonder Music and that looks as brittle as the Stewmac and is a whiter cream too
 
I've just had some delivered from UK Allparts - let you know how I get on.
I've been searching the UK for a source that doesn't rip you off for the postage - and have the items in stock.
Cheers
Philly :D
 
A friend uses the binding from Touchstone Tonewoods - seemed to get a sucessful result as his Ricky copy is very nice!
 
Okay time to move onto the fingerboard, rosewood and bought pre-slotted from Stewmac as the price difference was negligible and it saves me a very fiddly and time consuming job with lots of scope for cock up.

Made up a simple jig that will hold the board and allow the dremel to sit squarely on top. Whipped out the mother of pearl crown inlays and sprinkled them on the board to see what they looked like.

lp67-1.jpg


Onto the fiddly stuff, had to get them centred in their positions so marked up the board and the inlays. Took ages, very dull...

lp68-1.jpg


Then double sided taped them into place and marked round with a scalpel and then over with a white pencil to aid routing

lp69-1.jpg


Then onto the routing, took a shallow cut using a little spiral cutter and went just inside the lines. This was the first pass and will go down to final depth with the next one. Half expected the cutter to break as I moved it around but it was faultless - don't know what I'll do with the 2 spares :roll:

Thinking ahead I kept the rosewood dust in a little bag in case I need something to mix with the glue and fill any gaps around the inlays :wink:

lp70-1.jpg
 
forgive my ignorance but is the fingerboard flat on a les paul or does it have a radius? (D cross section), I don;t have mine to hand and honestly can't remember? if it does then wouldn't you be routing out too much at the centre and too little at the sides (depth)?

I`ve just had a quick look on wiki:

http://en.wikipedia.org/wiki/File:Finge ... scheme.svg

apparently for a les paul r = 12"

Steve
 
It's very rare to have completely flat fingerboards, almost all have a radius of between 7" and 16"

12" being the most popular for gibsons.
 
A Les Paul is indeed 12", the board is pre-radiused but not final finished. My plan is to have the wood a little proud in the centre and the inlay a little proud at the edges, then it's out with the radiused sanding block to take it down to the correct dimension and the final finish
 
Ironballs":1n6r44ry said:
A Les Paul is indeed 12", the board is pre-radiused but not final finished. My plan is to have the wood a little proud in the centre and the inlay a little proud at the edges, then it's out with the radiused sanding block to take it down to the correct dimension and the final finish

Ah! I see such a simple solution!
Steve
 
Hold your horses Chems, we've not arrived at the finished product yet! You'll have to see how many "imperfections" I'm prepared to live with :D
 
Back
Top