Information needed Goodell Pratt 5 1/2 B

UKworkshop.co.uk

Help Support UKworkshop.co.uk:

This site may earn a commission from merchant affiliate links, including eBay, Amazon, and others.

RussellT

Member
Joined
25 Jul 2016
Messages
15
Reaction score
0
Location
Derbyshire
Hi All

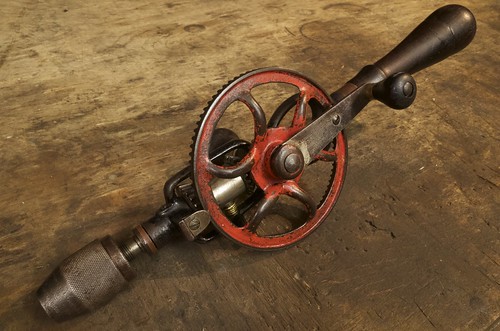
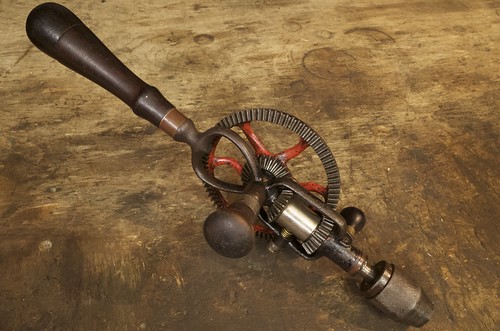
I am trying to repair a Goodell Pratt 5 1/2 B hand drill that belonged to my father and to his father.

drill.jpg


I've made a bit of progress but I still have some questions.

My questions are: Does anyone have or know where I can get a slow speed pinion?

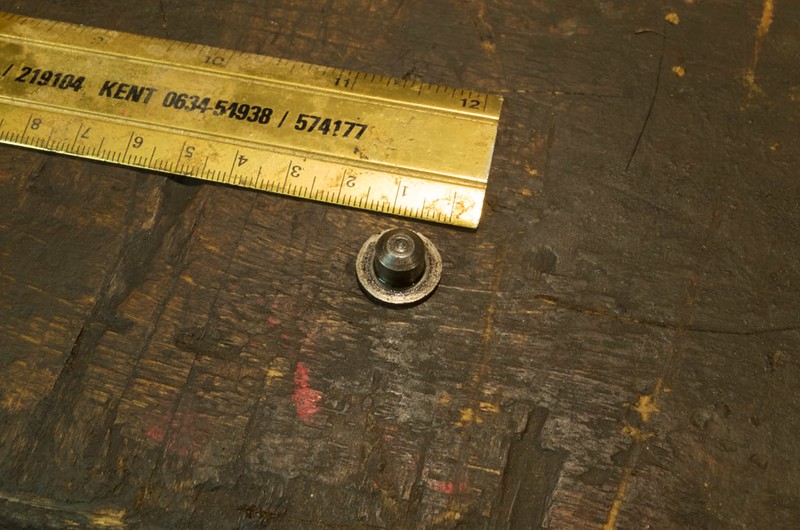
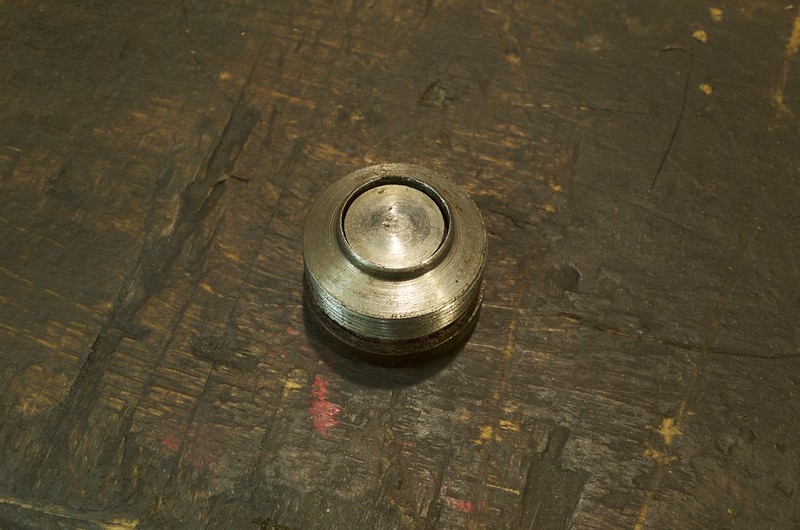
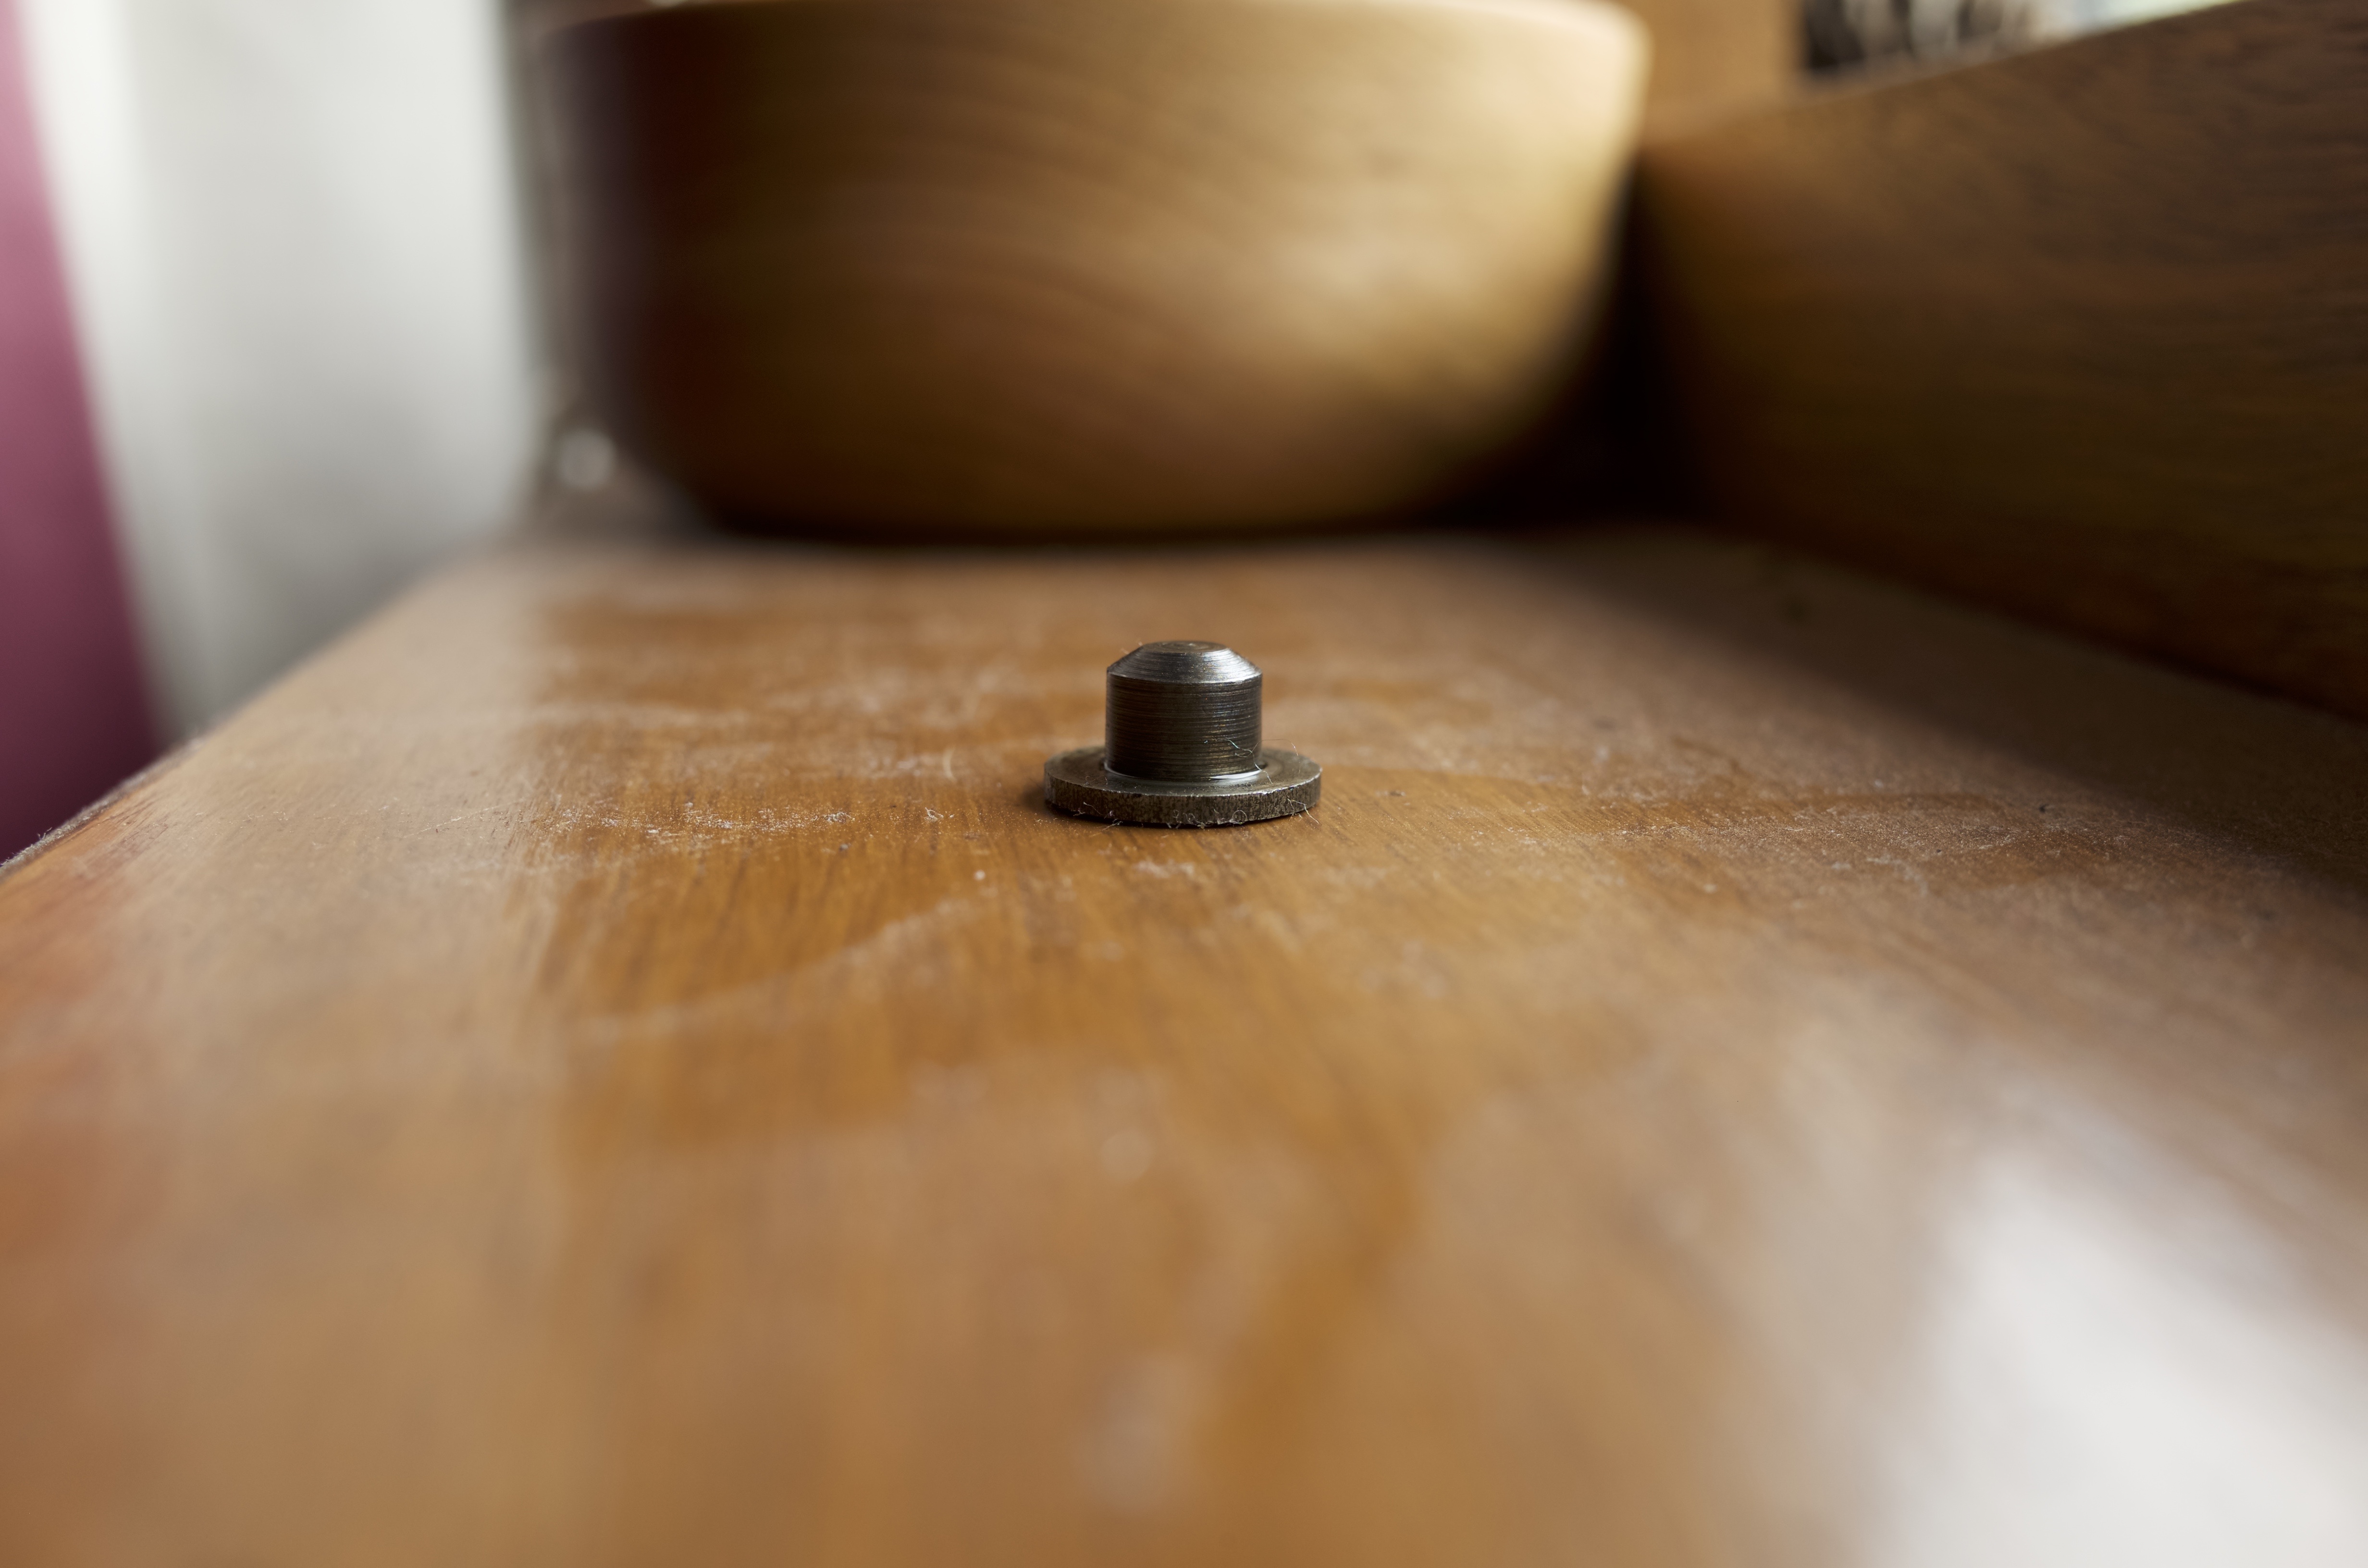
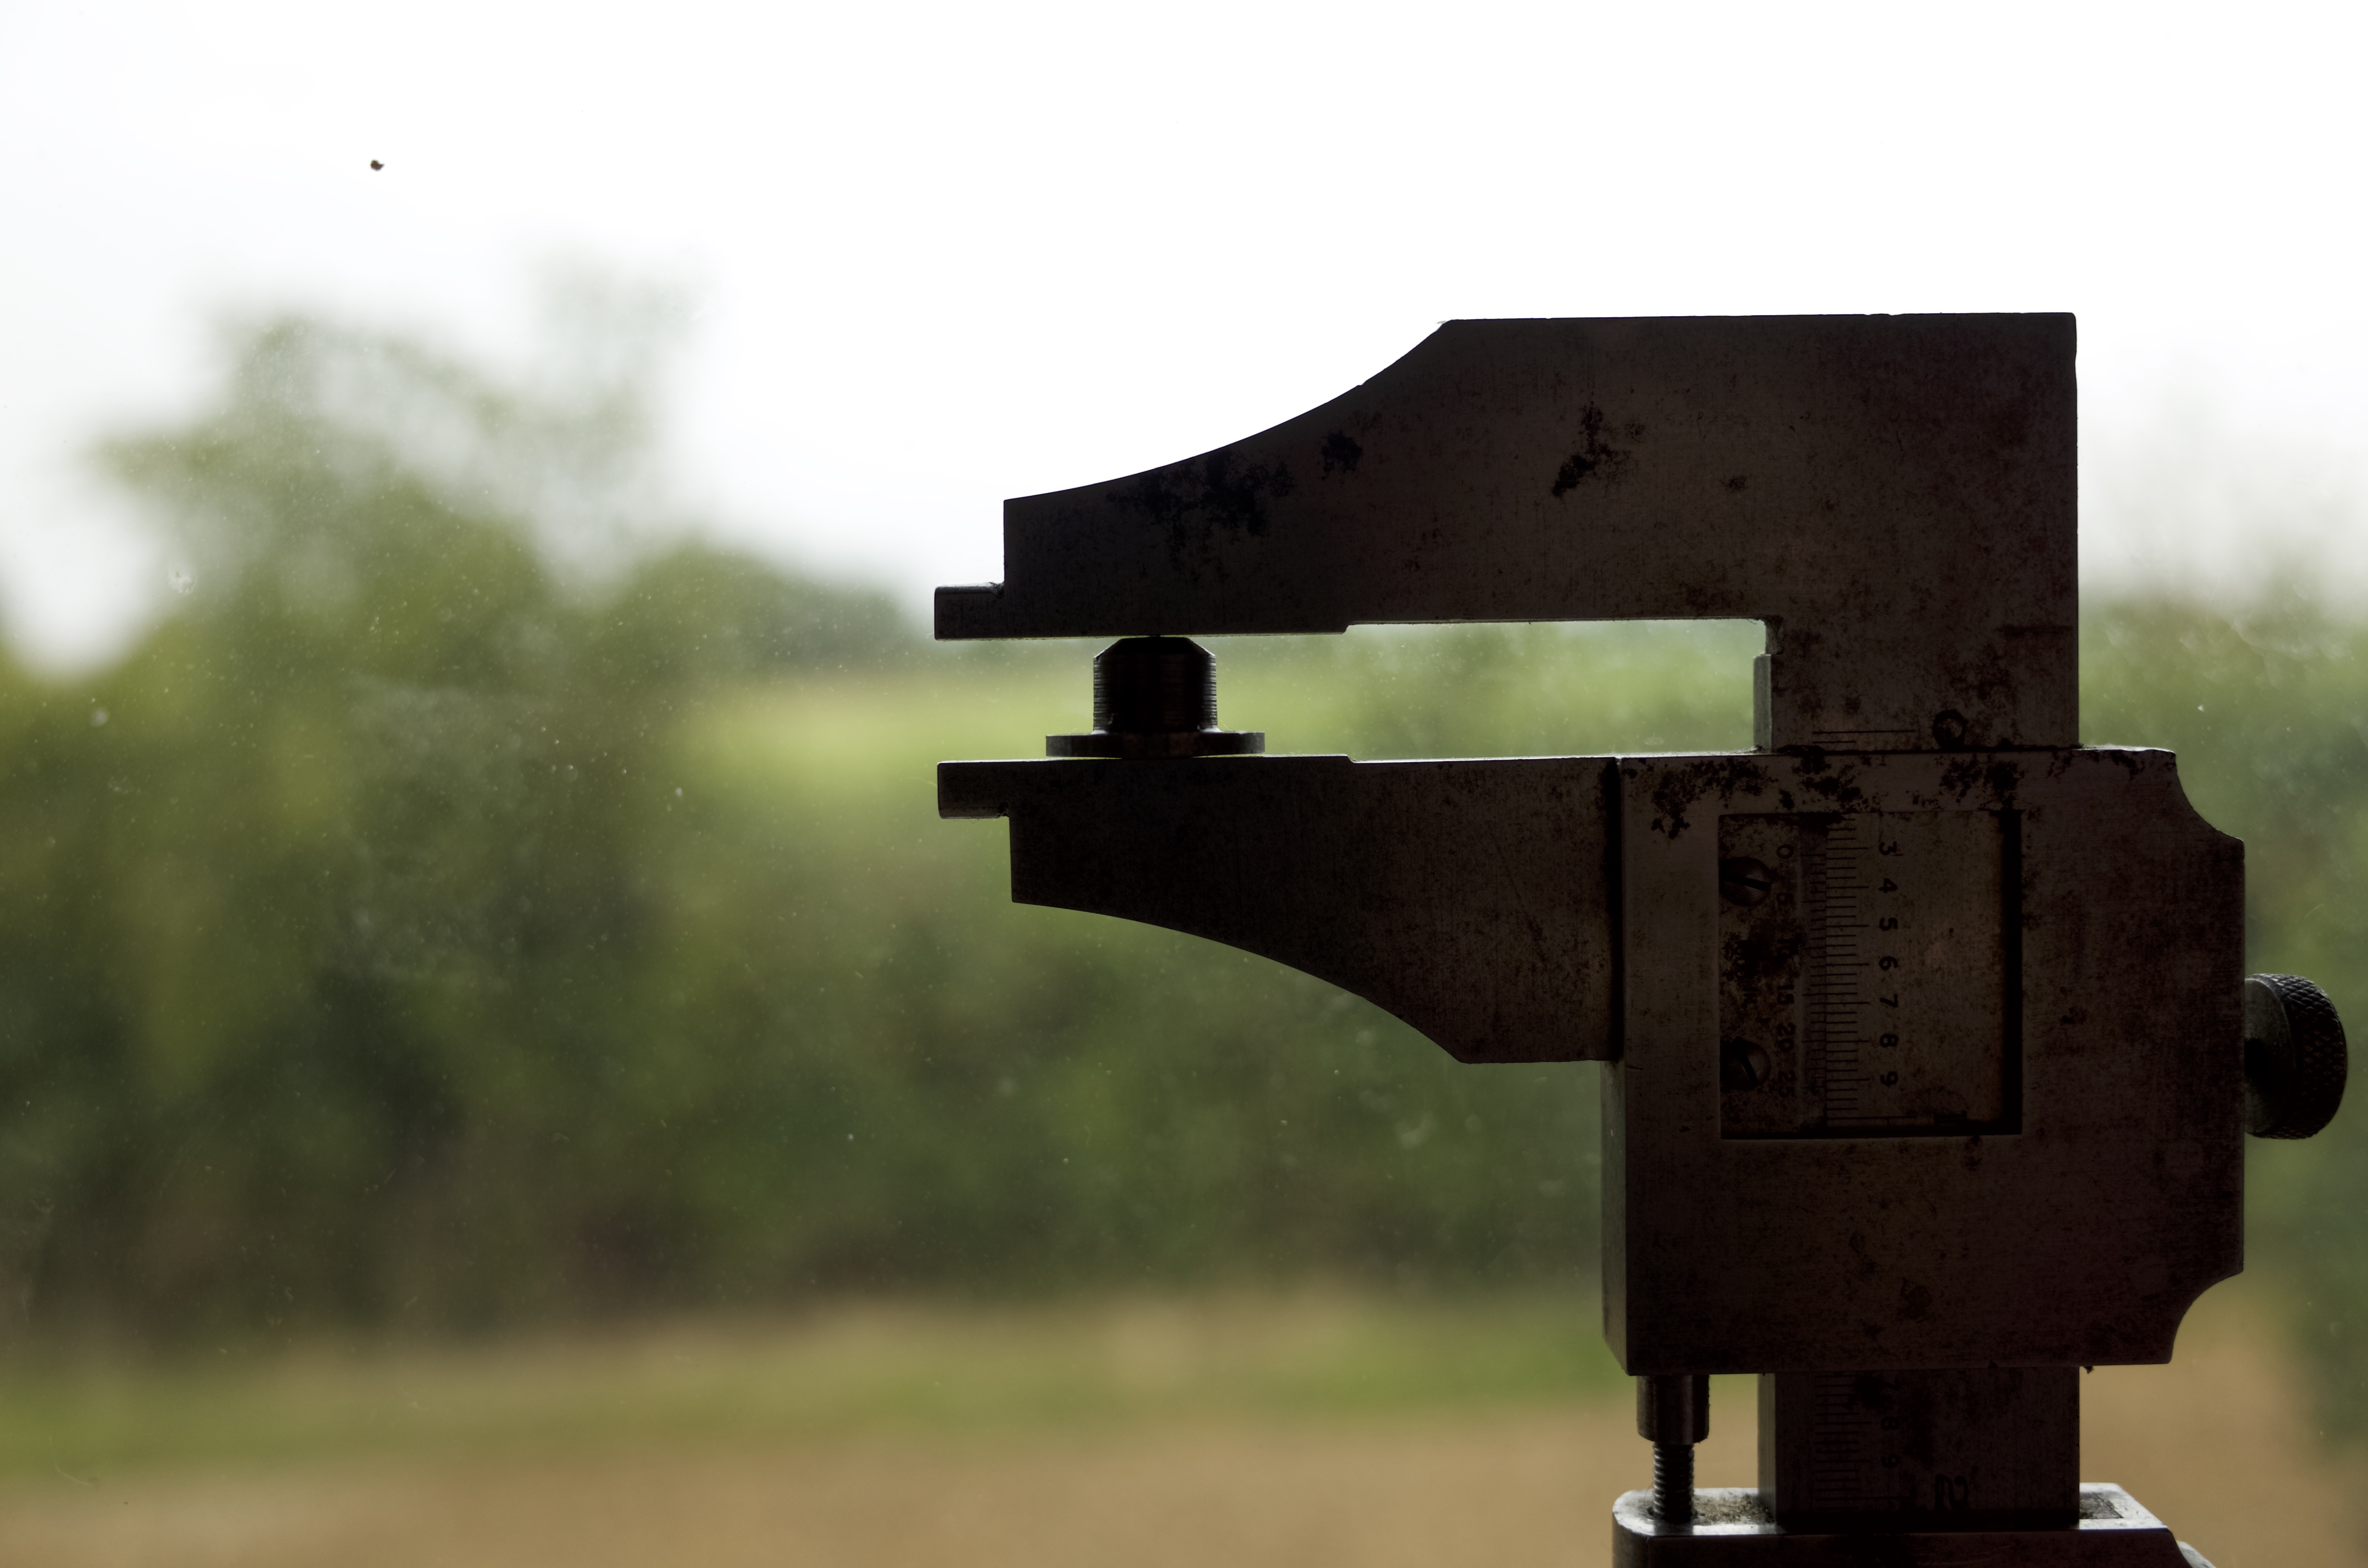
Could anyone provide a dimensioned sketch of the mushroom inside the chuck? The chuck is the type with three coil springs.

Can anyone date this drill for me?

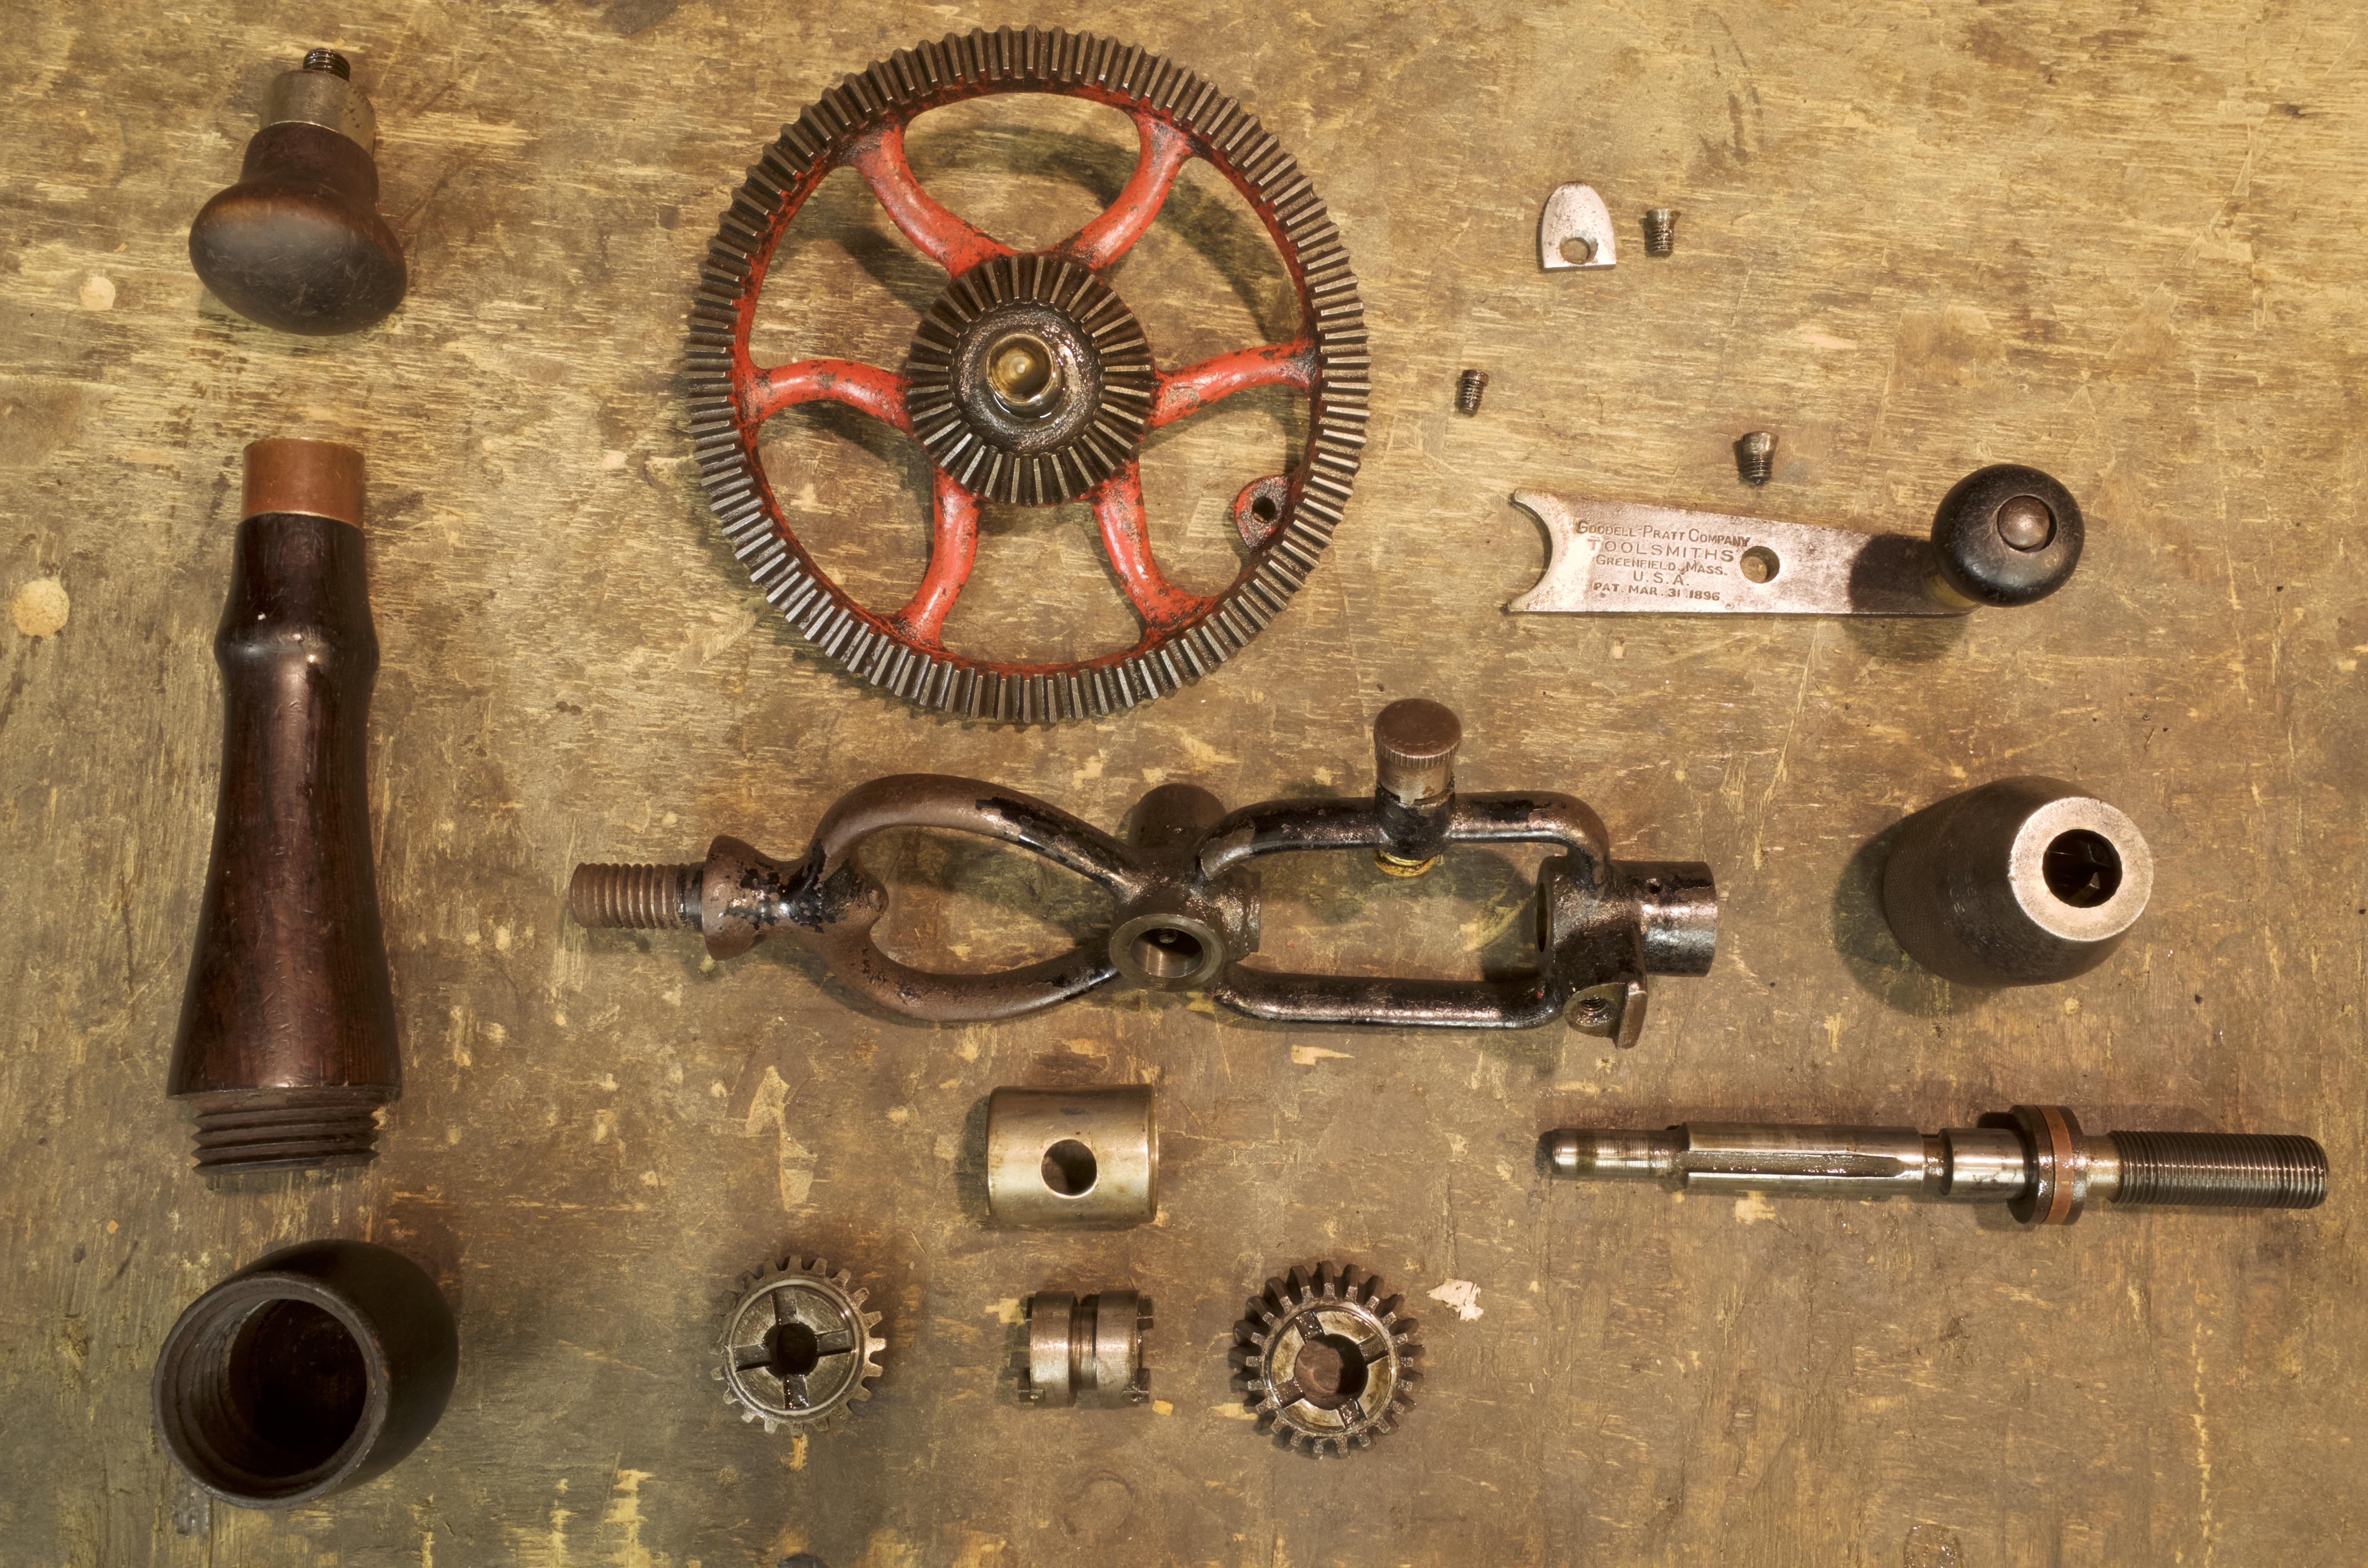
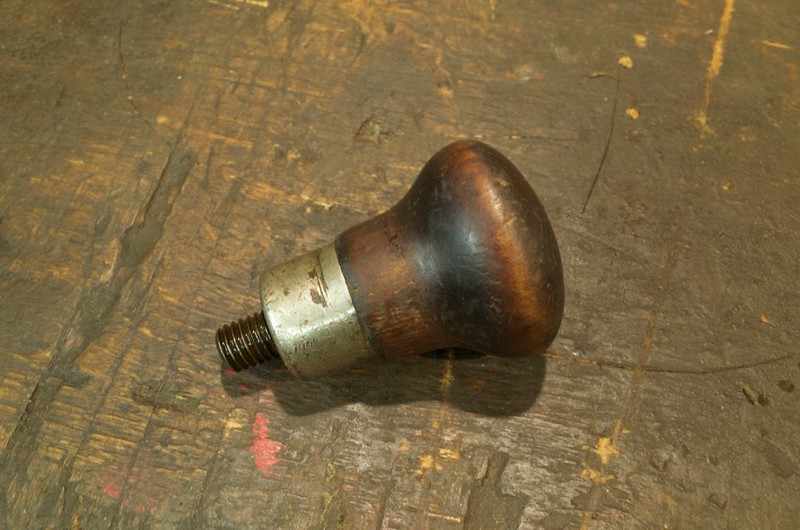
The main handle on the drill had clearly been repaired before and the ferrule had been redrilled and had a "pin" retaining the handle. The pin was six strands of copper wire with nasty sharp ends.

ferrule.jpg


I took the pin out and removed the handle. I discovered a piece of wood had been let into the handle and the extra hole through the ferrule had been drilled through the threaded iron of the drill. Unfortunately it had missed.

thread1.jpg


The metal between the original and the new hole had also cracked.

thread2.jpg


After some thought I decided that this had to be fixed. My objective is to make this a usable tool and this would eventually have broken. I cut the old thread off and drilled the frame with an 8mm hole. I found a bolt with the same thread as the original and turned that down to 8mm and loctited the two together.

thread3.jpg


The next problem I tackled was that the crank knob wouldn't rotate. I thought this was probably due to rust on the shaft. I drilled off the riveted over end and removed the knob. I hit a big snag here. I thought the shaft was tight in the knob because it was rusty. It turned out that the shaft was too short because of previous attempts to tighten up the riveting. That had also swollen the end of the shaft inside the knob, so the knob split as I tapped out the shaft. I glued it back together. I used superglue because the low viscosity meant I could get it in without having to remove the small brass ferrule from the knob. I turned a new shaft and re-riveted the knob in place.

crankhandle1.jpg


crankhandle2.jpg


The remaining jobs are:

To repair the main handle - I think that should be OK once I've worked out how to hold it in the lathe to clean up the hole so I can let in some new wood.

To make a new mushroom for inside the chuck. Can anyone help me with dimensions please?

To replace the slow speed pinion. Any suggestions will be gratefully received.

pinion.jpg


Russell
 

Attachments

  • drill.jpg
    drill.jpg
    245 KB · Views: 2,325
  • ferrule.jpg
    ferrule.jpg
    227.1 KB · Views: 2,325
  • thread1.jpg
    thread1.jpg
    44 KB · Views: 2,326
  • thread2.jpg
    thread2.jpg
    44 KB · Views: 2,326
  • thread3.jpg
    thread3.jpg
    61.6 KB · Views: 2,325
  • crankhandle1.jpg
    crankhandle1.jpg
    53.6 KB · Views: 2,324
  • crankhandle2.jpg
    crankhandle2.jpg
    45.2 KB · Views: 2,324
  • pinion.jpg
    pinion.jpg
    44.5 KB · Views: 2,326
Wow, that's impressive work so far - a real labour of love.

The only source of information I know of is here http://oldtoolheaven.com/related/goodel ... drills.htm at Randy Roeder's website - it may be worth contacting him direct, as I assume he has quite a large collection of drills in various states of completeness.

He notes that the same design was offered under the Millers Falls name from 1931 on, so you may find something on a MF drill - they are slightly more common than GP, but obviously much rarer over here than in the US. I think your best bet will be bought in the US and cost you extra postage etc.

You could also contact Wiktor Kuc at WKFinetools.com - he restores and sells Millers Falls hand drills.
 
Thanks AndyT - I emailed them both.

I've made a bit more progress with this drill.

The handle had already been repaired once but the new bit of wood disintegrated as I took it to pieces. The first task was to clean up the hole in the handle and make it round.

That was easy once I'd worked out how to hold it in the lathe.

faceplate.jpg


The next step was to make a wooden threaded insert for the handle. I tried making a tap from a bolt with the right thread but couldn't cut a thread in the end grain. I decided to use a dremel type tool to cut the thread. I made a special cutter for the tool,
threaditool.jpg


and a special tool holder for the lathe.
threading.jpg


Here are the bits,
insert.jpg


and this is how they go together.
trialfit.jpg


Next job the ferrule.

I still need dimensions for the mushroom shaped piece inside the chuck and I'd still like to find a slow speed pinion.

Russell
 

Attachments

  • faceplate.jpg
    faceplate.jpg
    55.1 KB · Views: 2,193
  • threaditool.jpg
    threaditool.jpg
    18.3 KB · Views: 2,198
  • threading.jpg
    threading.jpg
    43.9 KB · Views: 2,193
  • insert.jpg
    insert.jpg
    34.5 KB · Views: 2,194
  • trialfit.jpg
    trialfit.jpg
    48.3 KB · Views: 2,192
What a beautiful thing to inherit, in my opinion these are some of the best looking hand tools ever made. I always like seeing one being given a new lease of life :D

I have a 5 1/2 that I believe is identical to your 5 1/2B minus the main handle.

Goodell-Pratt No.5 1/2 by Rhyolith, on Flickr
Goodell Pratt No.5 1/2 by Rhyolith, on Flickr

For the pinion, thats tricky... There are few sellers in the US that sell parts of Millers Falls drills they have dismantled and there may be some Goodell Pratt bits in there... but they are expensive. Probably your best bet is to look for another 5 1/2 thats been wrecked and use it for parts.

When you say the mushroom shaped piece, do you mean the plate behind the jaws? I can measure mine if thats helpful?

Let me know if there is anything else I can measure and photograph off my drill to help :)

Edit: this might be helpful:

Goodell Pratt No.5 1/2 (dismantled) by Rhyolith, on Flickr
 
Thanks Andy, Rhyolith, Dave.

Rhyolith. Thank you for your offer of measuring. I'd be very grateful for dimensions of the side handle and the missing chuck part..

As far as the chuck goes there appear to be two types. I've found a web page that shows two types but I'm not allowed to post a link.

The one I have is this one.

Goodell-PrattChuckApart03-639.jpg


and mine is missing the mushroom shaped component third from left. Dimensions would be helpful but if all else fails I could copy this picture.

As far as the pinion is concerned I think a US forum is probably my best chance of finding a replacement. Finding a used drill that's in worse condition than this one was seems unlikely and I don't really want to scrap one that could be repaired to fix this one. I think I have - or could make - all the equipment needed to make a replacement pinion. Whether or not I have the knowledge and skills remains to be seen.

Russell
 

Attachments

  • Goodell-PrattChuckApart03-639.jpg
    Goodell-PrattChuckApart03-639.jpg
    72.6 KB · Views: 2,146
I think that chuck is the same as mine.

I will dismantle the drill, measure and photograph those two components for you later today.

I don't know how to measure the pinion to help you make a new one, though I am happy to try :)
 
Goodell Pratt 5 1/2 Chuck part by Rhyolith, on Flickr

Plate (largest diameter bit) diameter - 14.4mm
Protrusion (smaller diameter bit) diameter - 8.05mm
Diameter at end of taper - 4.5mm
Plate Depth - 1.5mm
Taper depth - 1.7mm
Total depth - 8.0mm

Goodell Pratt 5 1/2 Side Handle by Rhyolith, on Flickr

Largest Diameter - 34.5mm
Ferrule Diameter (measured in the middle) - 19mm
Length (not including thread) - 44.0mm
Ferrule Length - 5mm
Thread length - 9.6mm

Hope thats useful, I have done my best to be accurate.

I have the drill here on my desk now, right next too the vernier callipers so let me know if you need anything else measuring that I have left out :)

This shows the fit of that first bit into the back of the chuck, just so you can see how it fits.
Goodell Pratt 5 1/2 Chuck Piece by Rhyolith, on Flickr
 
Thanks Custard.

Thank you very much Rhyolith - that's brilliant - the dimensions seem to tally with my drill chuck as well so that's especially good.

I have a couple of questions though - I'm sorry for the delay in replying - you've probably put it all back together now.

I'm surprised by the flat end on the stalk of the "mushroom". I had expected there to be a point to mate with the dimple in the end of the drill shaft. A point would help to minimize friction and balance the load on each of the jaws. Examination of the socket in the end of the shaft on my drill isn't much help. There is a shiny ring about 1/16 inch in diameter showing wear. Looking at your photo I can see something in the centre of the flat point of the mushroom stalk but I can't see what. Do you think there could have been a ball bearing in there at some time?

mushroom.jpg


My other question is much simpler. Is your dimension for the ferrule length a typo?

Thanks again.

Russell
 

Attachments

  • mushroom.jpg
    mushroom.jpg
    188.7 KB · Views: 2,017
Russell, I've had a quick look at my superficially similar MF 1980 and I think I can offer an extra comparison until Rhyolith gets back.

When I took the chuck off, there did appear to be something on the back of the mushroom, as per your drawing, but it was just grease, piled up in the middle.
There was space in the middle because there is a blind hole in the end of the main shaft. That hole is just the way that metal parts were held in the lathe during manufacture, on a conical centre - you'll see it on all sorts of small round things from the past.

The parts were sized so that the whole of the flat end of the shaft bears against the back of the mushroom; two faces machined at right angles to the axis. As they only move against each other while the chuck is being tightened, I don't think a ball bearing would improve things at all. The flat surfaces are fine.
 
There does appear to be a very (very!) slight dimple on the component. It about (hard to measure accurately) 1.5mm in diameter and something like 0.0.5mm high (something of guess as I cannot directly measure that small without being able to use the callipers).

Goodell Pratt 5 1/2 Chuck component (close up) by Rhyolith, on Flickr

I don't see the dimple performing any function without a ball bearing due the shape inside the thread on the spindle. I have never known a chuck of this type to have such a bearing (and I have seen a lot of examples) however it does look like there should be one... maybe the original design had one and was later removed to save on production costs?

Here is the inside of my ones spindle, see if its the same as yours:

Goodell Pratt 5 1/2 Inside chuck attachment by Rhyolith, on Flickr

I have tried to show the dimple here and noticed that the bottom plate has a very flat cone shape which protrudes an estimated 0.05mm beyond the plate thickness (1.5mm).

Goodell Pratt 5 1/2 Chuck part by Rhyolith, on Flickr

Now I have the rule up here I measured the distance on the protrusion from the plate to the start of the taper, it's exactly 5mm. So with that, to check the depth measurements I added them all together to see if it came to 8mm:

0.01 + 1.5 + 5 +1.7 + 0.01 = 8.04

I thought the taper was the mostly likely thing to be wrong, so after re-measuring a few times with a steel mini rule, I think the taper is 1.4mm deep rather than 1.7mm.

Goodell Pratt 5 1/2 Chuck part taper by Rhyolith, on Flickr


I forgot to add the 7.62mm for the callipers, so its 12.6mm for the ferrule length, I have doubled check this with the steel rule.
 
Thanks Andy.

Thanks Rhyolith for going to so much trouble. I'm reasonably confident I can make something like that part now.

I'm still slightly puzzled by the way this is constructed. The hole in the end of the shaft isn't a centre for turning but as far as I can see the end of the mushroom just sits in it and doesn't contact the bottom but there's definitely some sign of wear there. I suppose if it has been used without the mushroom part then drill bits could have sat in the bottom of the hole. It doesn't look quite right though.

shaftcup.jpg


I've made a bit more progress. The handle is back on and there is a cross drilling for a pin.

handleon.jpg


Thanks again.

Russell
 

Attachments

  • shaftcup.jpg
    shaftcup.jpg
    169.7 KB · Views: 964
  • handleon.jpg
    handleon.jpg
    141.7 KB · Views: 964
All I needed to do was read the information on the chuck. Here's the patent drawing. I still needed the dimensions though. Thanks again Rhyolith.

patent.jpg


Russell
 

Attachments

  • patent.jpg
    patent.jpg
    63.3 KB · Views: 960
More progress.

mushroom2.jpg


I had to deburr the socket in the drill shaft but it fits in the chuck nicely.

chuck.jpg


All the bits are together and it drills holes.

drill2.jpg


Thanks again Rhyolith for the help with the measurements.

Russell
 

Attachments

  • mushroom2.jpg
    mushroom2.jpg
    53.2 KB · Views: 942
  • chuck.jpg
    chuck.jpg
    216.4 KB · Views: 940
  • drill2.jpg
    drill2.jpg
    205.8 KB · Views: 940
Nice job!

In theory, with your turning skills, and the holder for a rotary cutter you have already made, you could have a go at machining your own extra pinion. It would be a job way out of proportion to the end result, but could be rather satisfying.

What do you think? Or have you already started? :wink:
 
If you could make pinions for these drills we could become very good friends ;) The number of otherwise nice drills I have that are ruined by a missing gear tooth :(

I see your chuck springs are in good condition, mine really are not. Would you be able to provide me with some measurments of yours so I can order new ones? The required measurements were discussed here: chuck-springs-t98475.html
 
Back
Top