


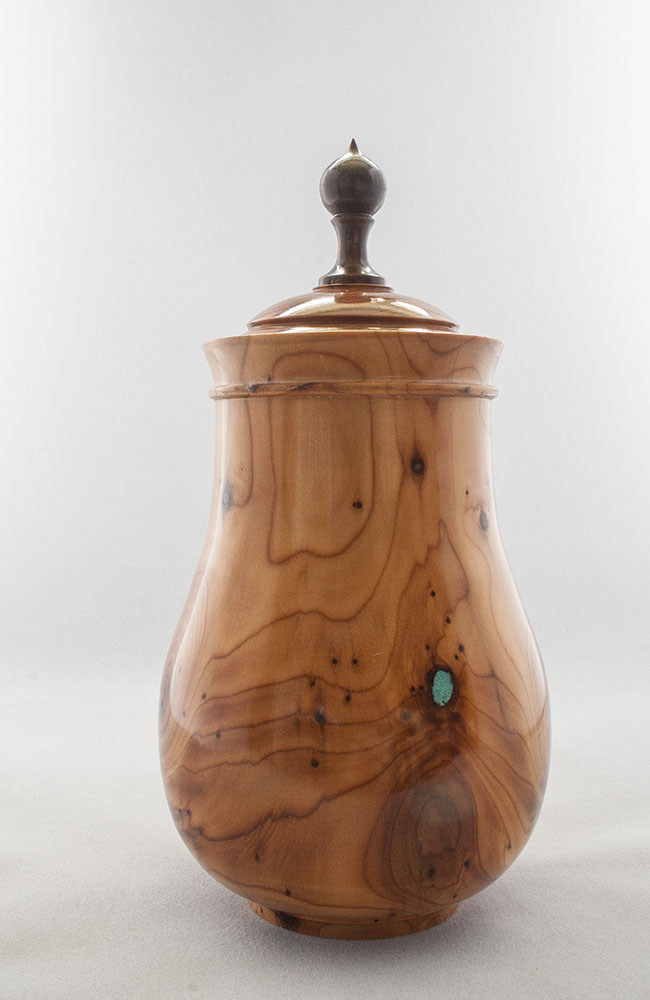
This Yew Pot looks reasonably straightforward eh? Well, it was at first, but then the original lid I had made flew out of my hand during the buffing stage and acquired 2 dents right on the rim, no way to rescue it, it had to be replaced. Trouble is, I have very little Yew left, a search through the various woodpiles though dredges up the remains of a branch, the diameter is barely sufficient. I get it mounted in the lathe and turn the inside first, deciding on a small safety factor I decide to incorporate a recessed area for an expanding collet, this will be a less marking means of remounting for the outside.
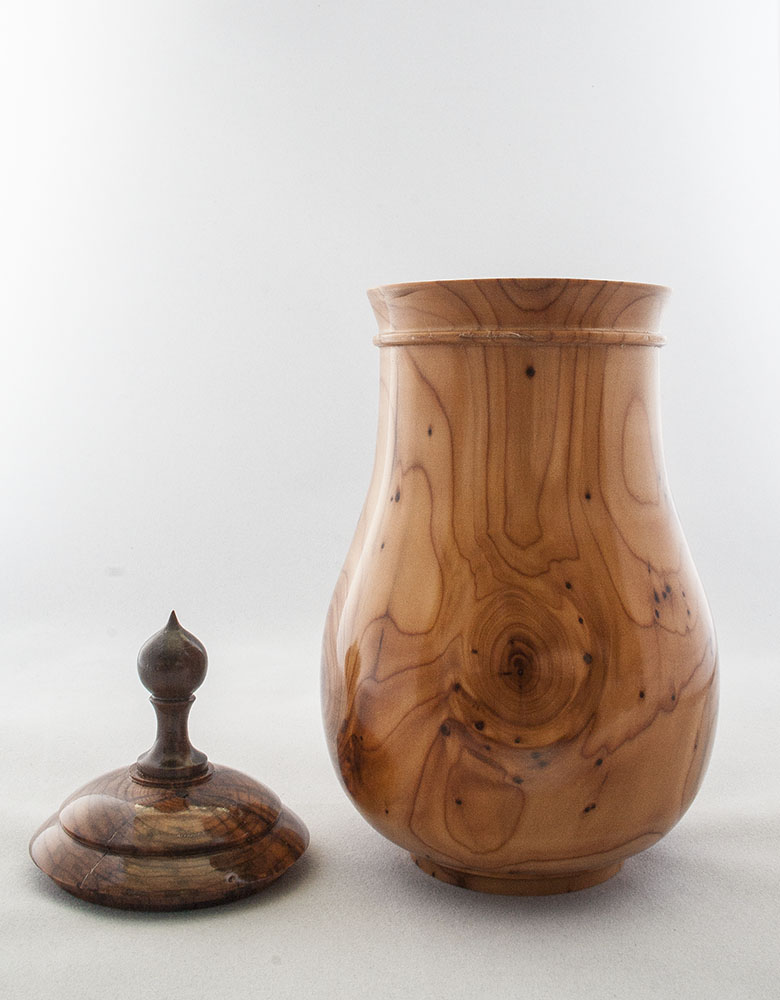
Having completed the interior, which had two steps to accommodate the rather unusual arrangement I had cut into the body (this was because I was rather making it up as I went along, no plan!) I remounted it and started to cut the outside, but just as the final details were being cut a chunk flew off, a weak section from the pith had split away.
I immediately found the piece on my very clean floor (translation, I searched for ten minutes through a three day heap of shavings) and found the offending bit, much muttering accompanied this part of the task.
I got lucky though, a good dollop of CA fixed it back and an hour later I was able to finish the cuts. The little finial lid is made from a bit of Lignum from an old bowling ball.
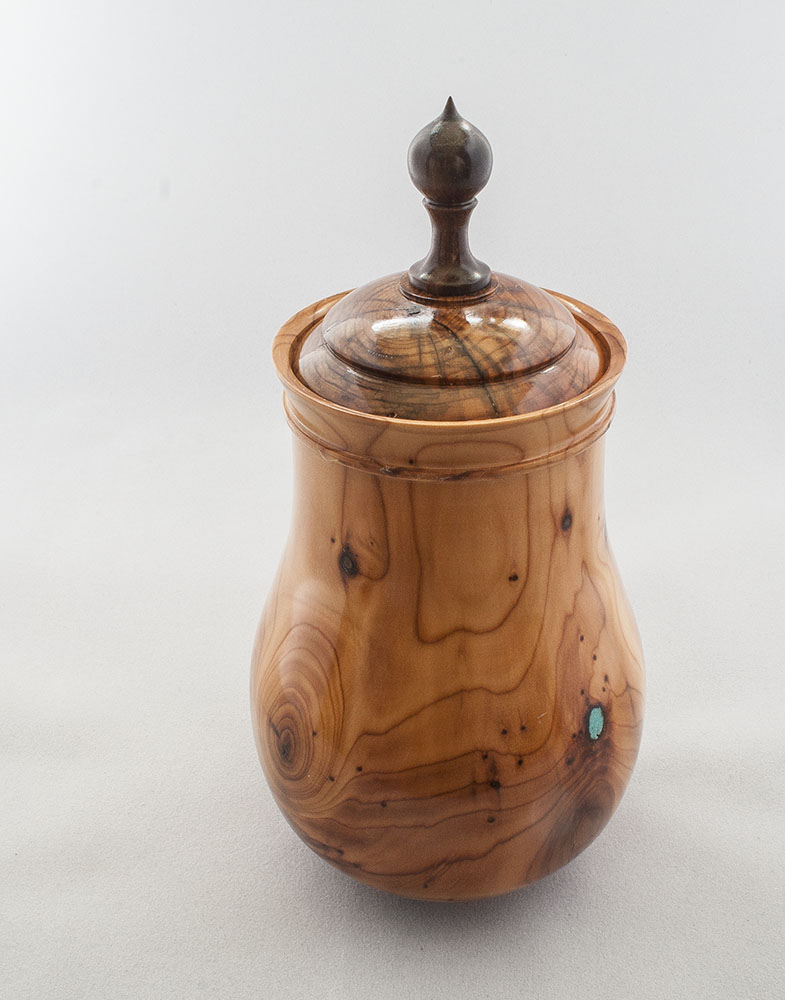
The finish of the body is once again chestnuts gloss lacquer, cut back with 400 grit and buffed to a gloss with the 3 wheel system. The lid though is an experiment with Shellac, I bought some IDA and a packet of best blonde dewaxed Shellac, made up an equivalent 2lb cut mix in a small jam jar, (this was done a week or so back) I applied the shellac in thin layers using a small artists brush, I built up about six layers (it drys pretty quickly, each layer though needs to be at least partly dry before adding the next) This was then left overnight to fully harden, then I cut it back with 400 grit by hand (i.e. not on the lathe) and finally used the three wheel system to bring it up to high gloss. It gives a very nice look to the wood, colours it very little and doesn't look plastic, but it is quite time consuming and tricky to get an even coat. I intend to try other pieces by this method to see it is a worthwhile method.
The Turquoise dot is a fill of real Turquoise powder, kindly sent to me by George Watkins, it is a technique he uses for filling small gaps in some of his boxes, for me it looks very eye catching.
Having completed the interior, which had two steps to accommodate the rather unusual arrangement I had cut into the body (this was because I was rather making it up as I went along, no plan!) I remounted it and started to cut the outside, but just as the final details were being cut a chunk flew off, a weak section from the pith had split away.
I immediately found the piece on my very clean floor (translation, I searched for ten minutes through a three day heap of shavings) and found the offending bit, much muttering accompanied this part of the task.
I got lucky though, a good dollop of CA fixed it back and an hour later I was able to finish the cuts. The little finial lid is made from a bit of Lignum from an old bowling ball.
The finish of the body is once again chestnuts gloss lacquer, cut back with 400 grit and buffed to a gloss with the 3 wheel system. The lid though is an experiment with Shellac, I bought some IDA and a packet of best blonde dewaxed Shellac, made up an equivalent 2lb cut mix in a small jam jar, (this was done a week or so back) I applied the shellac in thin layers using a small artists brush, I built up about six layers (it drys pretty quickly, each layer though needs to be at least partly dry before adding the next) This was then left overnight to fully harden, then I cut it back with 400 grit by hand (i.e. not on the lathe) and finally used the three wheel system to bring it up to high gloss. It gives a very nice look to the wood, colours it very little and doesn't look plastic, but it is quite time consuming and tricky to get an even coat. I intend to try other pieces by this method to see it is a worthwhile method.
The Turquoise dot is a fill of real Turquoise powder, kindly sent to me by George Watkins, it is a technique he uses for filling small gaps in some of his boxes, for me it looks very eye catching.


")