Veritas marking gauge...

UKworkshop.co.uk

Help Support UKworkshop.co.uk:

This site may earn a commission from merchant affiliate links, including eBay, Amazon, and others.

Rosewood

Established Member
Joined
30 Jul 2011
Messages
26
Reaction score
0
Location
Dorset
While I'm waiting for the glue to dry, I started comtemplating my wheeled marking gauge, I have it set up as it came, with the bevel on the inside, but I got thinking about it, and does it not make sense for it to be the other way round? After all my good edge is the one I'm referencing off and so this marking gauge is putting a slight bevel on the none waste side of my line.

Which way round do you have the cutting wheel on your Veritas or other wheeled marking gauge?

All the best,
RW
 
Rosewood":2h2ese4f said:
While I'm waiting for the glue to dry, I started comtemplating my wheeled marking gauge, I have it set up as it came, with the bevel on the inside, but I got thinking about it, and does it not make sense for it to be the other way round? After all my good edge is the one I'm referencing off and so this marking gauge is putting a slight bevel on the none waste side of my line.

Which way round do you have the cutting wheel on your Veritas or other wheeled marking gauge?

All the best,
RW

Always "bevel in the waste", applies to cutting gauges too.

Which side of the line is waste can vary.

BugBear
 
bugbear":3eu27b6w said:
Which side of the line is waste can vary.

BugBear
Yep...which is why you need more than one marking gauge and if you buy these wheel marking things, it'll set you back a lot of wonga, so much better and lot less heavy on the pockets (and just as effective btw) to make your own. I currently have four over the bench so that as a critical dimension is set (and I don't want it altered) I can use others. The best one I've come across (if you insist on buying them) is the Japanese one from CHT, around £12 iIrc - Rob
 
The reason is that the bevel draws the gauge against the wood tightly. Done the other way it will have a tendency to push gauge away from the piece.

The gauge is set up so the edge of the bevel us the correct mark, hence you will not have a bevel on your final piece.

Personally I find this tool great for these reasons, and the micro adjust. you can use a pin gauge, however then you are effectively being bevels on both sides of line, AND inside your desired width so that is actually worse! You can take a pin gauge and file to a knife shape, however if you have the veritas and understand thatyou do not have a bevel on your work you'll be ok.
 
Hi,

I have made a few beval gauges with knives, the top one in this photo
DSC_0003-1.jpg


And these copys of Stanley 5601
DSCF0012.jpg


Close up of the knife.
DSC_0006-2.jpg


I make two so I can have the bevel on the waste side of the work i.e on the inside of mortce.
David Charlsworth explains the useage in one of his books.

The beval won't affect the tracking of the gage unless its at an angle to the head.

Pete
 
Racers":37unqq3k said:
The bevel won't affect the tracking of the gage unless its at an angle to the head.

Pete

It would also depend on the size of the blade - it's a question on wether the "authority" of the blade exceeds the authority of the fence.

Authority in this sense is stolen from aircraft and ship terminology, and refers to how much turning force something (e.g. a rudder or aileron) can generate.

I suspect a D.C. style ground pin (as you illustrate) has low authority, with a large japanese style gauge knife has lots.

BugBear
 
Hi, BB

I think the sharpness will have an affect as well. pins tend to follow the grain.

How save is a round blade on the end of a stick? not very if you ask me.

Pete
 
bugbear":3nw9zpol said:
Racers":3nw9zpol said:
The bevel won't affect the tracking of the gage unless its at an angle to the head.

Pete

I suspect a D.C. style ground pin (as you illustrate) has low authority, with a large japanese style gauge knife has lots.

BugBear

Agreed BB. I have severial of MrC's ground away pin types (actually it's a masonry nail) but none of then work as well as my cheap white oak Japanese marking gauge that my daughter got me for a Christmas present last year. In addition, the large area of the stock (wot rests against the wood) means that it's really hard to make the thing go in anything other than a straight line, regardless of the 'iffiness' of the grain - Rob
 
I made these a while back from a magazine article ( in Ebony ):

markinggauge2.jpg


Works OK but one I kept failed a drop test so not the strongest of designs?

Still some Titebond glue has managed to stick it together again :)

Rod
 
The concept of 'authority' is good I think, and personally I like a very small radius or a point. Having the bevel only one side seems to me to introduce tracking problems. This seems logical as it's a bit like a chisel, the entry angle bisects the vee of the blade or point so a one-sided bevel will tend to pull one way or the other.
Whilst it is ideal to have the bevel on the waste side, changing the wheel over to do that would drive me mad. On Jim's recent marking gauge I spent some time changing the shape of the cutters and settled on a tight radius and low angle bevel, but the other that works well is a sharp point, a bit like a scalpel blade although that only works in one direction.
Rod's above is interesting as it is close to a 2-sided blade - small radius symmetrical bevel one side, and a near point the other. I like the traditional ones as you can tune them (sharpen the point for example given a point is a very small radius anyway).
 
Hi,

I have found with mine a sharp blade is very important, it cuts the wood instead of following the grain.

Pete
 
condeesteso":17jpaaka said:
Having the bevel only one side seems to me to introduce tracking problems.
Not necessarily. What I noticed on my Japanese gauge is the although the blade is wide (around 10mm) it's not parallel to the stock...there's a bit of 'toe in' by around 10deg which I thought was odd at first but later realised that it's there to keep the gauge tracking correctly as it's pulled through the wood - Rob
 
Yes, bevel in the waste.

My favourite gauge type is the Kinshiro, of which I have this fabulous mortice gauge ..

CuttingGauges_html_m273e5df2.jpg


A few weeks ago I built two cutting gauges modelled in the style, one in Tasmanian Blackwood and Ebony, and the other in Curly Myrtle and Jarrah ..

CuttingGauges_html_m6adcaa26.jpg


This one is my favourite ..

CuttingGauges_html_10c4ced5.jpg


Details here: http://www.inthewoodshop.com/ShopMadeTo ... auges.html

Regards from Perth

Derek
 
Enough Derek!

Stop posting all that tool porn and exotic timber!


:D

Pete

Very nice as usual.
 
Hello,

This is the my favourite pattern of marking/cutting gauges. The one in the picture was made by me, from maple and walnut, and a reground piece of high carbon jigsaw blade.
pv.jpg

You should push the stock/fence firmly against the edge of the workpiece anyway, so the orientation of bevel is not a real issue, except for splitting up thinner stock, where the cut is deep. I try to mark relatively shallow gauge lines on my work, an in those "depths" of a fraction of a millimetre the orientation of the bevelled side does not really matter.

Have a nice day,

János
 

Attachments

  • pv.jpg
    pv.jpg
    60.6 KB · Views: 3,555

Did you use a metal insert to hold the bolt that tightens onto the cutter, or is the wood hard enough to hold a thread itself?

Oh - with regards to the "toe in" discussed in this thread for the blade/cutter, I would consider using a fine hacksaw to cut a screw slot in the blunt end of your cutter, allowing the angle to be easily adjusted.

BugBear
 
Hi BB

Good idea about the slot. That will help with adjusting the cutter. Thanks.

The wood in the beam is hard enough to be threaded. The cutter is a knife shaped from a 3/16" diameter HSS rod ...

CuttingGauges_html_54f84c56.jpg


Both gauges cut a nice clean line.

I recall you converted a pin gauge to a cutting gauge. Where is the picture?

Regards from Perth

Derek
 
I recall you converted a pin gauge to a cutting gauge. Where is the picture?

In this (well worth reading) thread:

marking-cutting-gauges-t24547.html

For my write up in the archive:

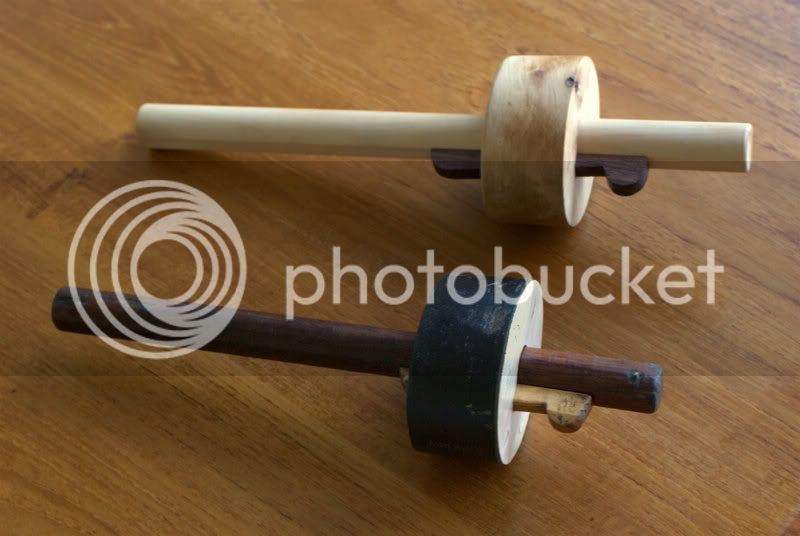
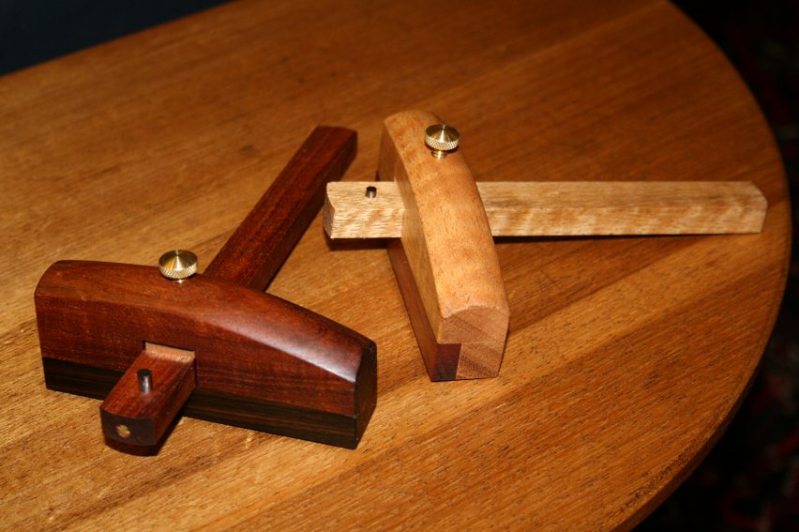
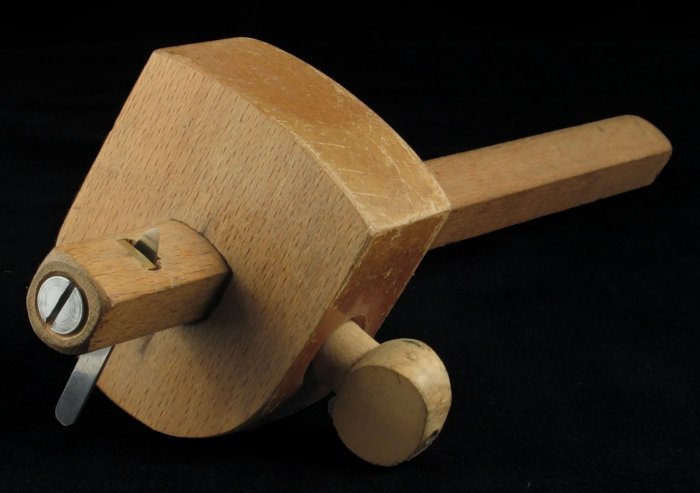
I converted a marking gauge to make this; I can make most things, but boxwood thumbscrews are beyond me... anyway, car boot marking gauges are cheap and common.

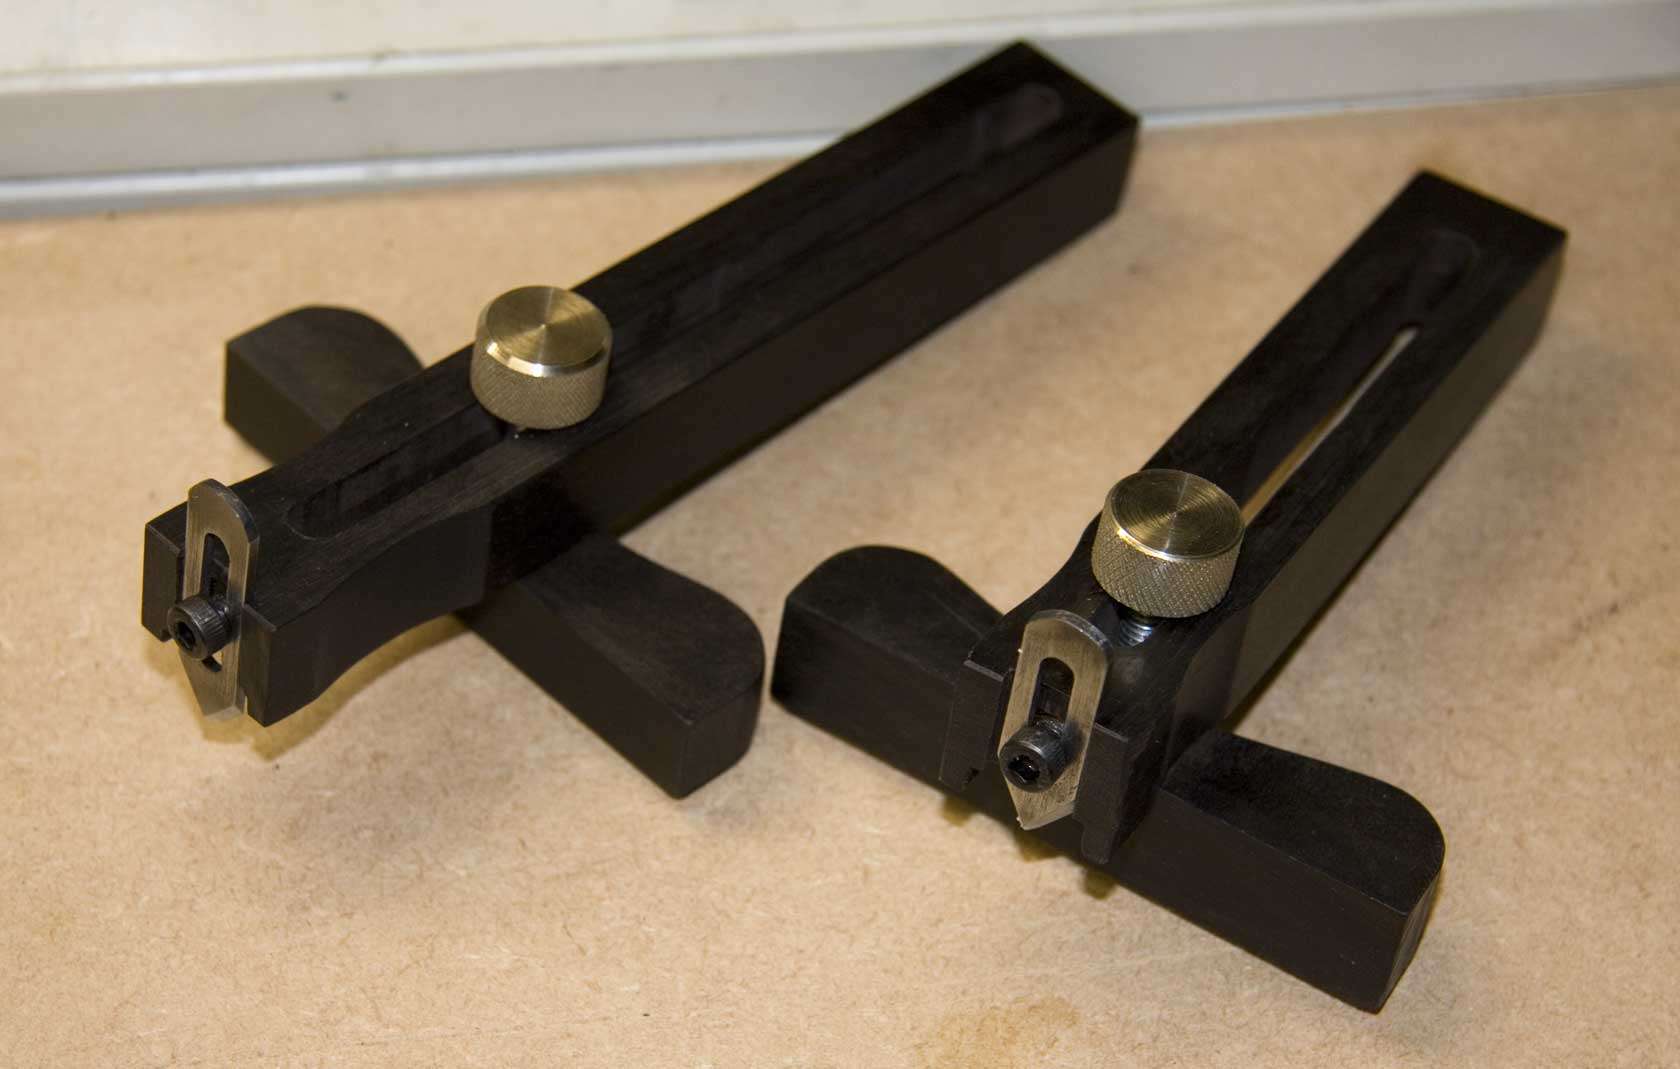
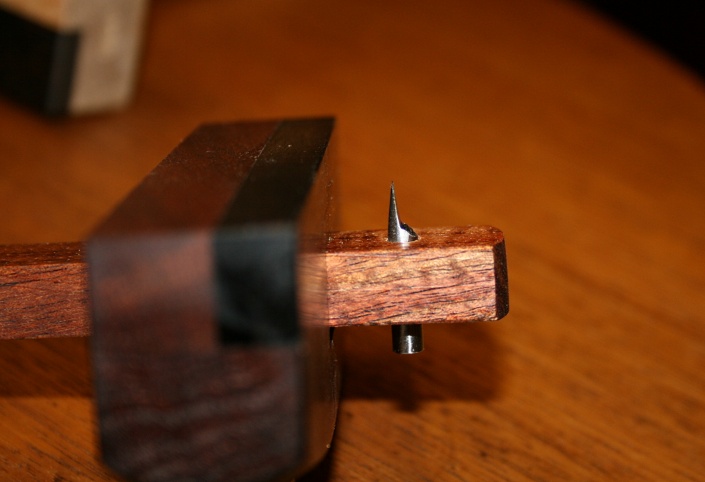
The conversion was done by making a 25x5 mm strip of power hacksaw blade for a cutter. This involves simple sawing.

Hah! Have you ever tried to saw a power hacksaw blade? They're fully hardened all the way through, unlike hand hacksaw blades. I cut them with a Vitrex carbide coated rod saw, and it takes around 20 minutes. Having done this, grinding and sharpening proceeds as normal.

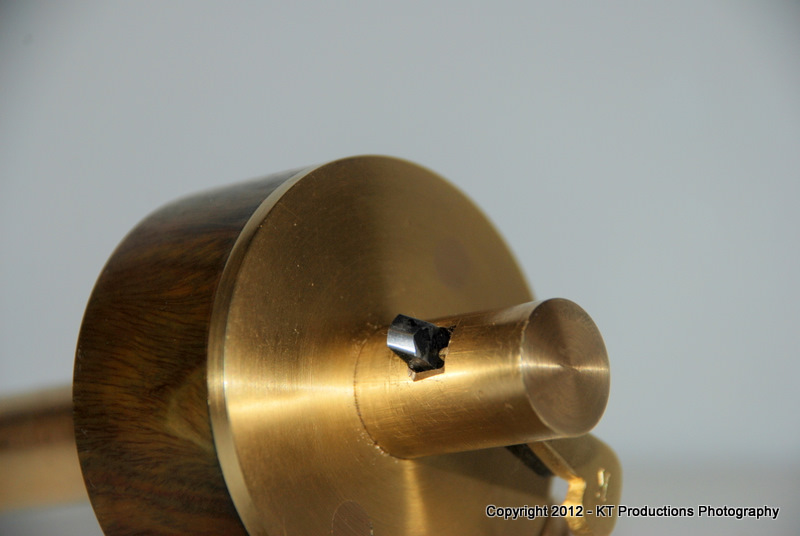
Holding the blade can be done with a brass wedge, which is attractive and traditional.

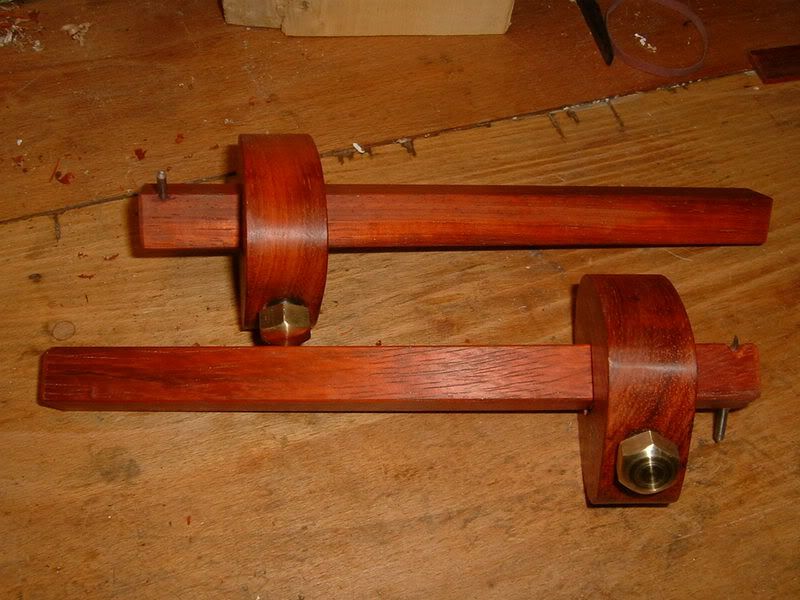
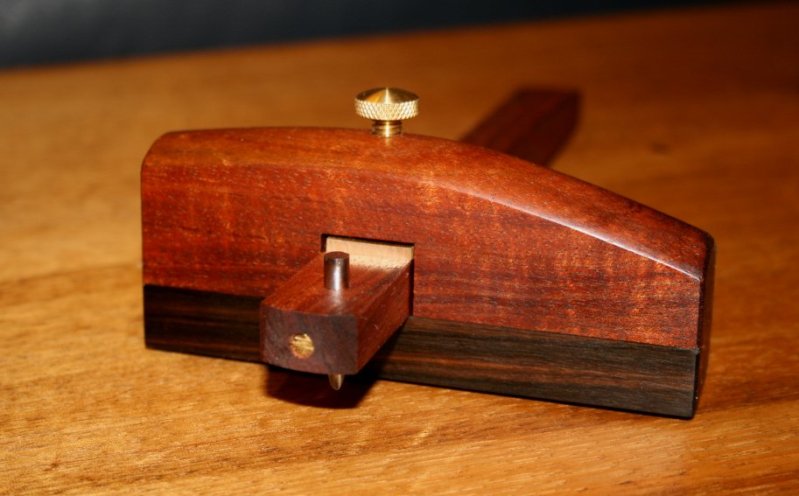
I opted for a simple retaining screw. I could probably have simply threaded the wooden stem, but I used a brass "slug" with a 3/16 BSF thread cut into it. The screw is a raised head type.

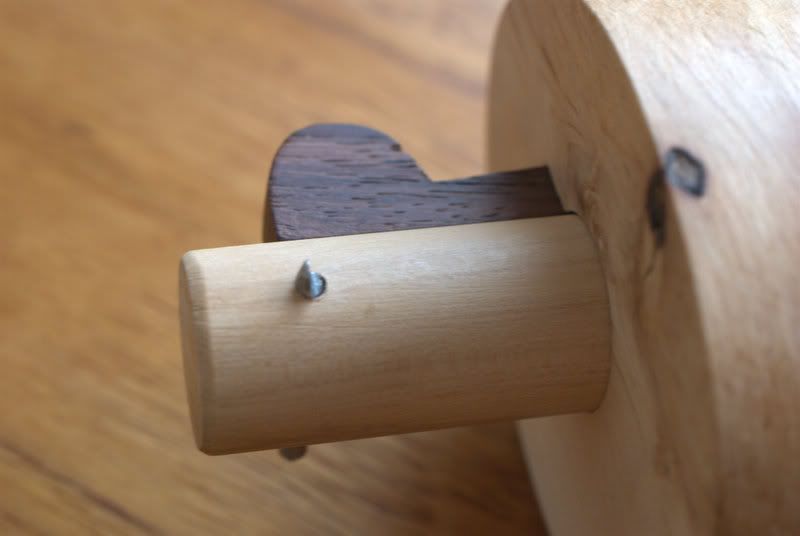
The neat appearance (neater than my user gauge, which I'll modify soon) is obtained by make a tiny counterbore in the top of the stem, and making the screw short enough (careful!) to go into the counterbore.

Making the rather small mortices to hold the blade and slug is just fiddly work with slender chisels.

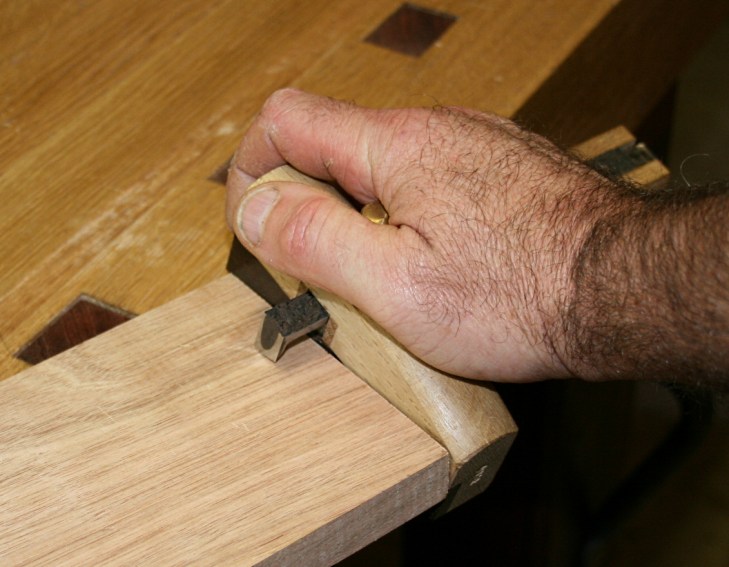
And cutting gauges work really well. A better line (IMHO) than even a Tite-Mark, since the blade is easier to sharpen.

Charles Hayward (in his minimal tool set for a beginner) lists a cutting gauge in prefereance to a marking gauge, although everyone (of course) should have both :)

cutting_gauge.JPG


Just to have everything in one place, herewith my (somewhat unusual) thoughts on cutting gauge sharpening:

http://swingleydev.com/archive/get.php? ... 19#message

In short, I came to the conclusion that a cutting gauge being used for actual cutting (AKA slitting) e.g. of veneer should have a shallow bevel for maximum penetration, and that conversely, cutting gauge being used for marking should have a steep (but sharp) bevel for greater visibility and reduced penetration.

BugBear
 
This is a fascinating thread and full of wonderful ideas which extends my testing programme on the type of cutter used in my recent gauges.

The variables are...pin or blade, if blade how thick? What type of edge...etc...etc...

As Douglas has said...and since he is my chief "tester" 8) each has merit for different reasons and performs best in certain circumstances though less in others.

Sometimes it is also a question of taste...the feel of the tool.

If we come right down to brass tacks (no I don't use brass tacks! :mrgreen: ) my measure of performance is - does it cut a straight fine line through the fibres without grain tracking with and across the grain?

This cutter:

DSC_0810.JPG


...which is the latest to be tested and is a rounded, one-sided bevel on thickish stock, hardened end only cuts through the grain across it, does not track along the grain and can be indexed from the plate.

So in my testing...this one came out the best so far.

And being left handed....it can cut both ways! :wink:

I am watching this thread very closely as it is a subject of great interest at the moment and I shall be testing all the other ideas I have seen above as time permits. The gauges get sent out tailored to the customer requirements anyway so I am not fixed to what I think is right. :wink:

Jim
 
It is indeed a fascinating, essential and under researched topic.

I reckon my very cheap gauges work better than Colen Clenton's for the following reasons;

1. I can see the far side of the curved cutting edge. This is important to me as I do not gauge across the outside of through and single lap dovetails. i.e. my cut line must be stopped and started frequently. A small cutter is also useful here.

2. Colen's gauge pin only has the flat side out. This is great for almost all marking except thicknessing.

Now obviously mine are cheap and cheerful, but I ask students to have 5, one for a pencil gauge, three flat side out and one flat side in.

best wishes,
David Charlesworth
 
Back
Top