Okay, here are the WIP pics.
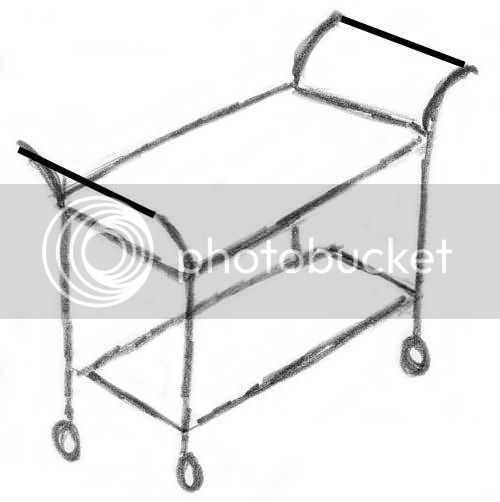
First I made a sketch of what I wanted, like this:
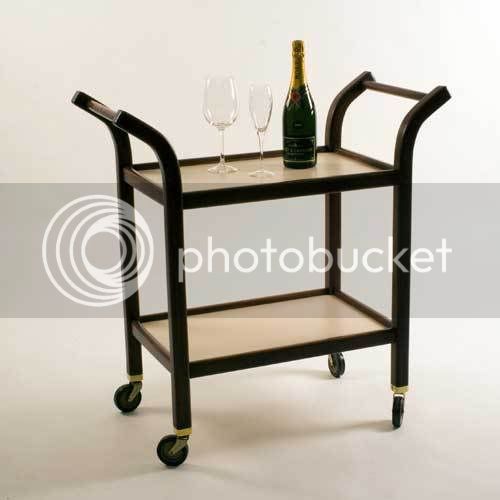
This followed pretty closely the design of the existing one which has now finally collapsed (I sat on it…!!) :lol: :lol:
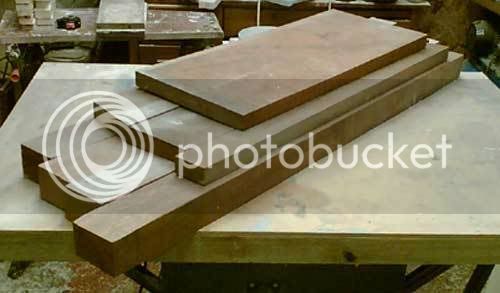
Then I bought some mahogany
It cost me about £40 from some nice people on Ebay. The four pieces of 3” x 2” at the bottom of the stack were going to make the legs. I wanted to bend the tops of the legs to form support for the handle so I would have to cut the mahogany into thin strips, like this:
I bought a thin kerf blade from APTC for my table saw. I had planned to use my bandsaw to resaw the wood, but I was having problems with the blade wandering. I didn’t realise straight away but the thread on the tensioning bolt had stripped and it was therefore impossible to tension the blade properly,
perhaps this (and how I resolved the matter,) is a topic for another thread at some time.
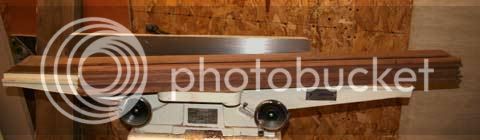
I don’t know if you can make out from the picture above but I cut a total of 28 strips about ¼” by the 2” thickness of the wood. I jointed the edge and then placed this jointed edge against the rip fence on the saw while I made the cut, and then jointed the edge again before making the next cut on the table saw. I did this for all 28 pieces.
I planned to steam the wood because it was not going to bend without it. I’ve since learned that mahogany is not a good wood to steam bend (something to do with the grain being short and brittle I think) but I didn’t know this at the time so I built this:
I saw Norm Abram use something similar when he built his bentwood hat rack. I can’t remember where he got his steam from but I used a wall paper stripper and it worked really well.
I could fit seven pieces of the thin strips in the steamer which worked out fine because I was to use seven strips in the making of each leg. For the first leg I steamed the wood for two hours and when I bent it around the form, the piece on the inside of the curve split slightly. Consequently, when I did the other legs I steamed them for three hours and I didn’t have any further splitting problems. Mind you, you have to work pretty quickly bending this wood, I was only making a gentle curve but it was a struggle to get it bent before it cooled down. You have to make sure all the kit you need is ready and to hand before removing the wood from the steamer. After I had put it in the bending form it looked like this:
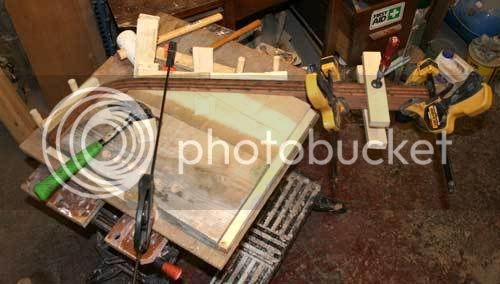
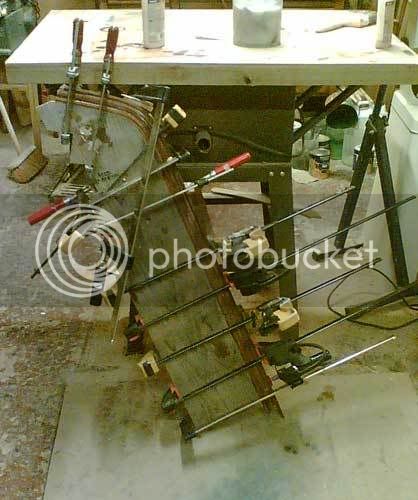
I made the form from a piece of ¾” ply and a couple of lumps of 2” x about 8” screwed from the underside. I fastened a piece of wood to the underside so that the whole thing could be clamped to the B&D Workmate. The main part was held in the form with wedges against some dowels in the base of the form. This was hot stuff!
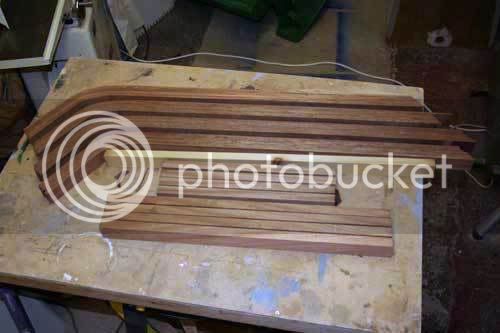
You will notice on the straight bit where the clamps are used that one clamp is used to hold the pieces in line because the wood wanted to wander at this point. I was concerned about this wandering; I didn’t want the wander to still be there when I removed the pieces from the form. As it turned out all the legs turned out okay but I did have the same wandering problem with all the legs.
I left each leg in the form for a week to thoroughly dry out, I’m afraid I don’t have Norm’s luxury of a massive oven in the kitchen to dry the wood. A week in the bending form and then the glue up.
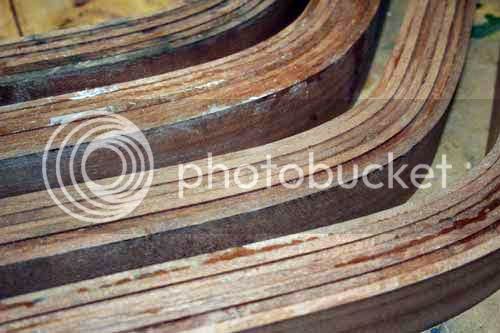
For the glue up, I made another form, this time just a piece of 2” x 8” with the appropriate curve cut at one end. The glue up also stayed in the form for a week. This allowed plenty of time for the glue to dry and also allowed extra time for the wood to dry, because it still felt slightly damp when removed from the bending form. For those who are interested, I used Titebond dark wood glue, with it being mahogany, and it did a good job. There were some minor issues with the joints not being perfect and every so slightly open, I put this down to the twist that I got in the wood when I bent it which prevented a perfect joint. This I would have to deal with later.
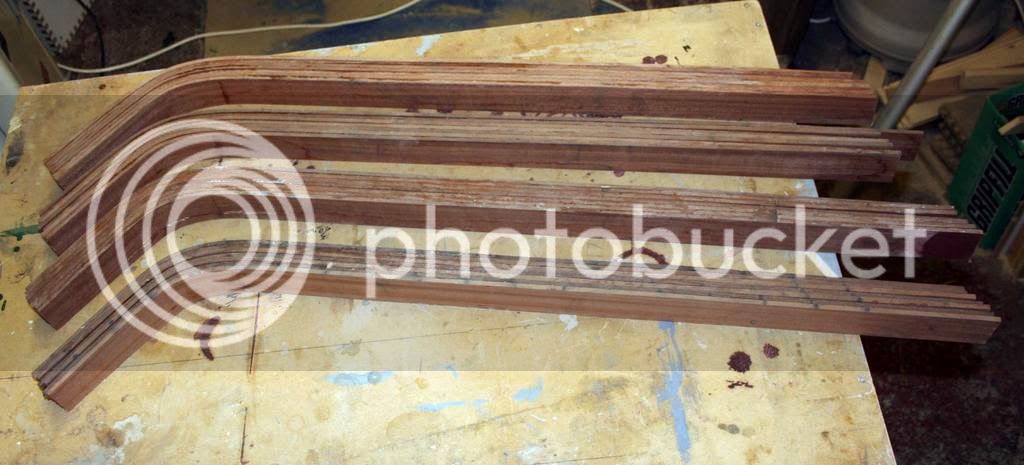
The glue up looked like this:
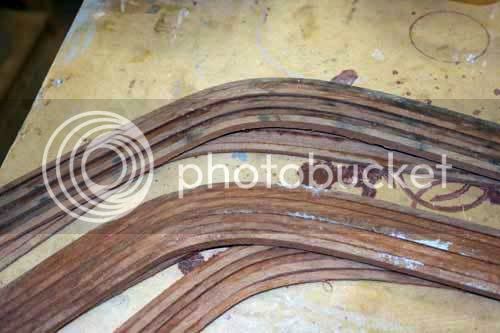
The legs looked a bit rough when removed from the forms as you can see from the next picture, so a bit of cleaning up was in order.
The next picture probably shows this better:
First thing to do with these was to joint one edge (for those hand tool aficionados here I apologise but I used my Axminster CT1502, since my hand planning skills are a little lacking). After jointing one edge I then trimmed them to just over final size on the table saw and then a couple of passes over the jointer and this part was finished.
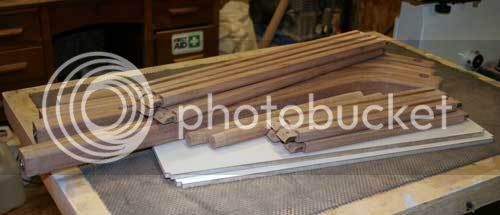
It was now time to turn my attention to the rails that would go around the sides and support the trays. This was cut from some of the remaining wood from the original pile with a finished planed size of about ¾” by 1 ¾”. I then had this pile of wood ready for cutting M&T joints:
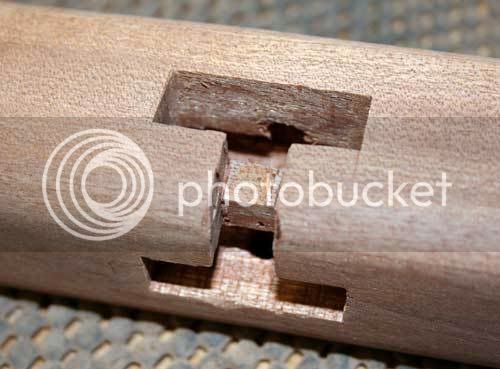
I cut the mortises using a hollow chisel mortiser before starting on the tenons. I haven’t actually made a mortise & tenon joint since I was in school and that is more years ago than I care to think about! The tenons were cut using the table saw for the shoulder cuts and my new tenoning jig from Rockler for the cheek cuts and finished off on the bandsaw. If you’ve ever watched Norm make mortise & tenons then you know exactly how mine were made – with one minor difference, a small cut-out for the trays.
You’ll notice that the corners have been rounded over and this was done with both the legs and the rails to soften them to the touch. You can also just about see on the photo above the hole that would receive a dowel to help hold the tenon in the mortise.
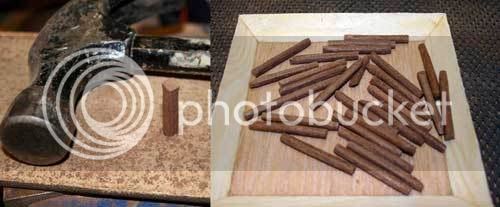
I used some of the off cuts from trimming the legs to make the dowels.
I drilled a 6mm hole in a piece of ¼” steel plate and used some pieces from the off cuts and hammered them through the hole. This made very nice 6mm dowels.
I tried to buy some ¾” mahogany dowel for the handles but was unable to find any so turned the handles on my small lathe attachment which uses an electric drill as a power source. It is okay for small jobs like this but not much use for large projects mainly because of the speed of my drill but also you simple can’t fit big things on it.
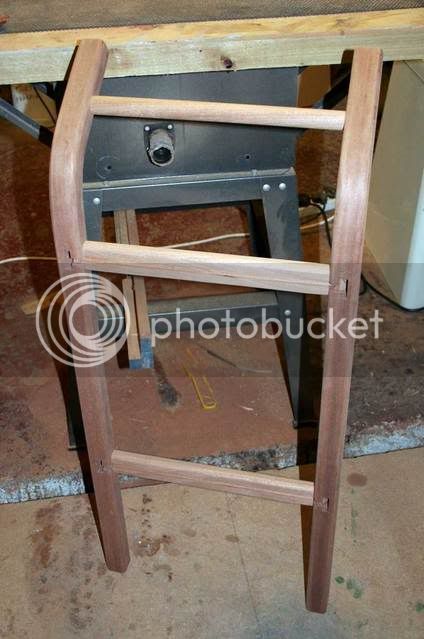
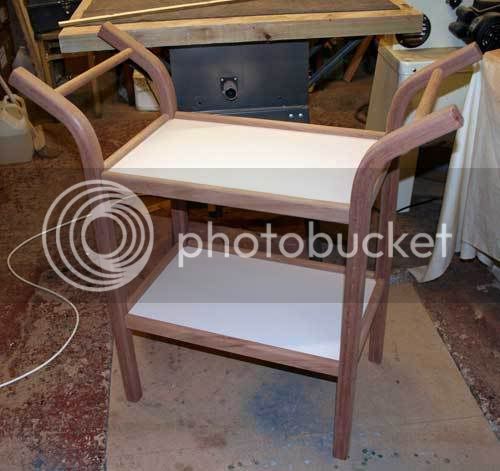
I still had to find something for the trays but was keen to do a dry fit at this stage. I assembled one end (two legs, two rails and a handle) and stood it on the floor and was well pleased that it stood up on its own with no support:
And no, it’s not leaning against my table saw…
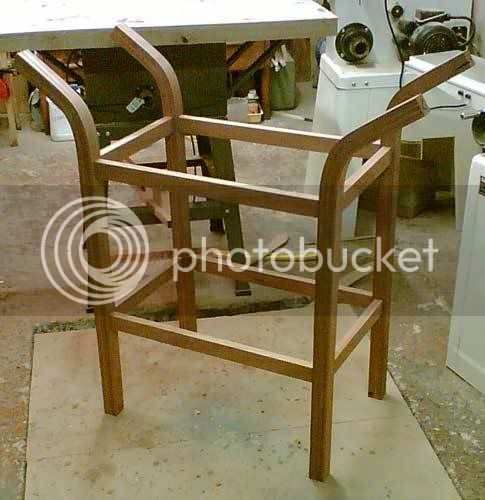
Then another dry fit:
With all the M&T joints cut I went looking for something to use for the trays. I finished up using some pieces of MDF which I laminated on both sides with Formica. I used evilstik for gluing this on – what a pong..!!
I now had all this to put together:
Notice the corners of the trays cut out to fit around the legs.
And the final dry fit:
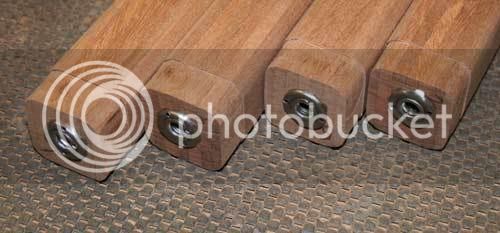
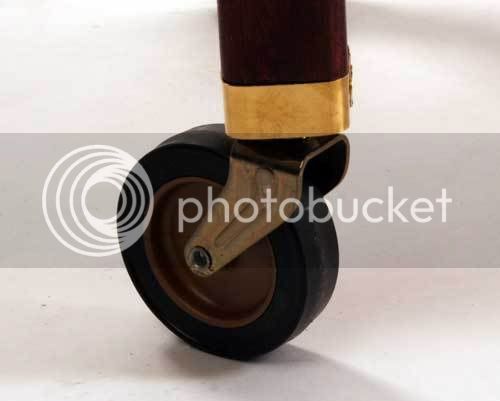
I had to drill 10mm holes in the bottom of the legs for the trolley wheel inserts:
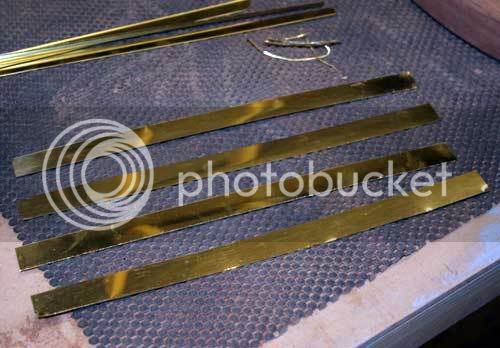
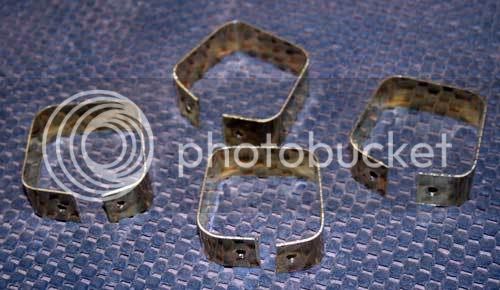
I was a little concerned that, because the legs were a lamination, there would be a lot of pressure in use if the wheels hit something, maybe, despite the fantastic Titebond glue I had used, the lamination might separate. So I decided to make some brass pieces to fasten around the bottom of the legs. You can see a small rebate for the brass on the legs on the above photo. The brass started life as a letter flap from my local hardware store. First I cut four strips about ¾” in width.
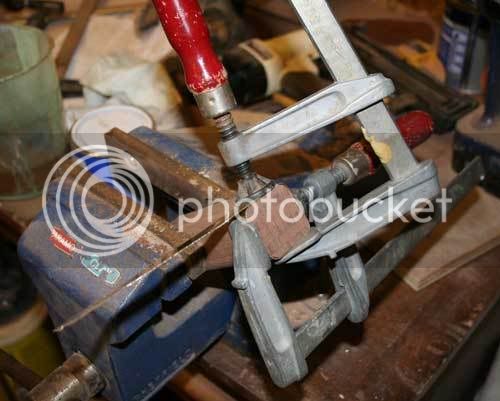
Then I bent them around a small off cut:
And finished up with these:
I know this is probably a little belt & braces but they do look good:
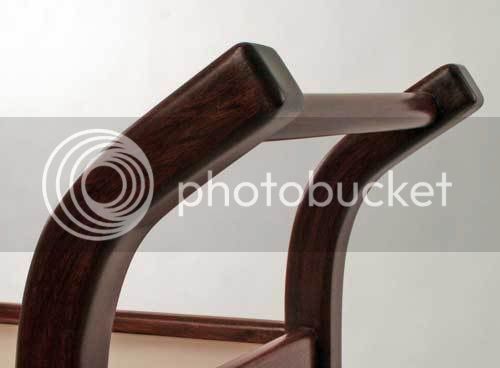
The handle detail:
The corner:
As for finishing, the first thing I had to deal with was the slight gaps in the joints of the leg laminations. So I made some home made paste by mixing very fine mahogany sawdust made with my ROS with some of that Titebond dark wood glue and pushed it in the gaps. It worked great.
I did as much sanding as possible before assembly and after assembly I stained it with a mix of brown and red mahogany stain from Rustins. I then applied some of their grain filler, which I think is a bit pink so I darkened it with some of the stain. After a final sanding I applied another coat of stain and then finished with four coats of quick drying polyurethane varnish, the first coat having been thinned 50/50 with water.
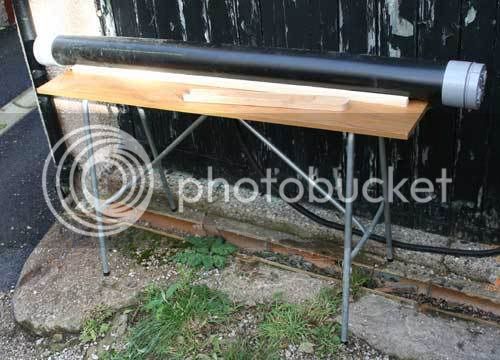
I then took it to have its portrait taken (see next post)
Hope this post was not too long winded
Regards
Brian