Steering Wheel Project

UKworkshop.co.uk

Help Support UKworkshop.co.uk:

This site may earn a commission from merchant affiliate links, including eBay, Amazon, and others.

SketchUp Guru

Established Member
Joined
12 Apr 2005
Messages
3,152
Reaction score
1
Location
Rochester, MN USA
I actually have a project to report on for a change.

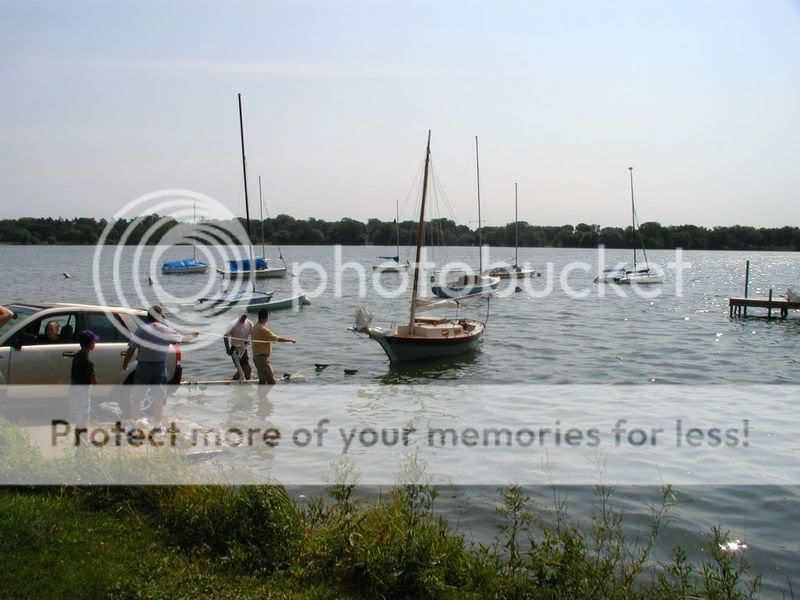
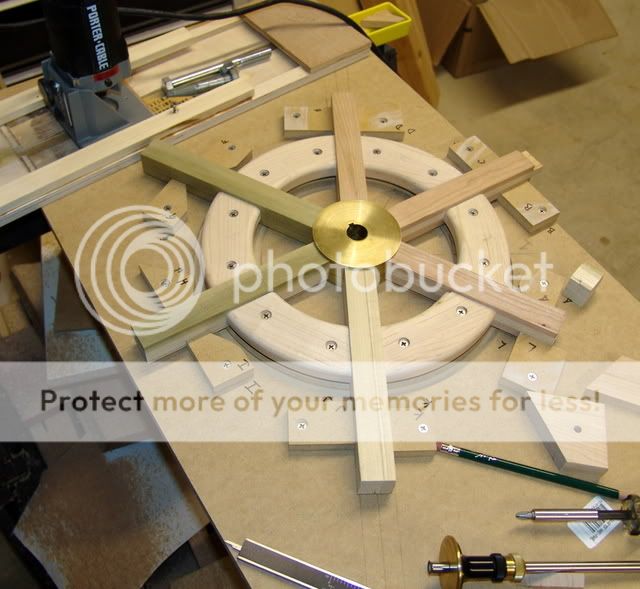
Last weekend I started on a new steering wheel for my sailboat. (Funny, that boat was "finished" four years ago but I'm still making stuff for it. :huh:) I made the spoke blanks which I sent off to a friend who kindly volunteered to turn them for me. They are laminated up from cherry and hard maple.

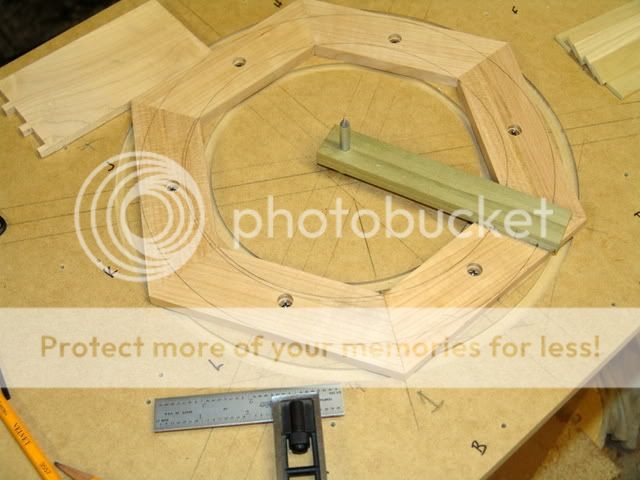
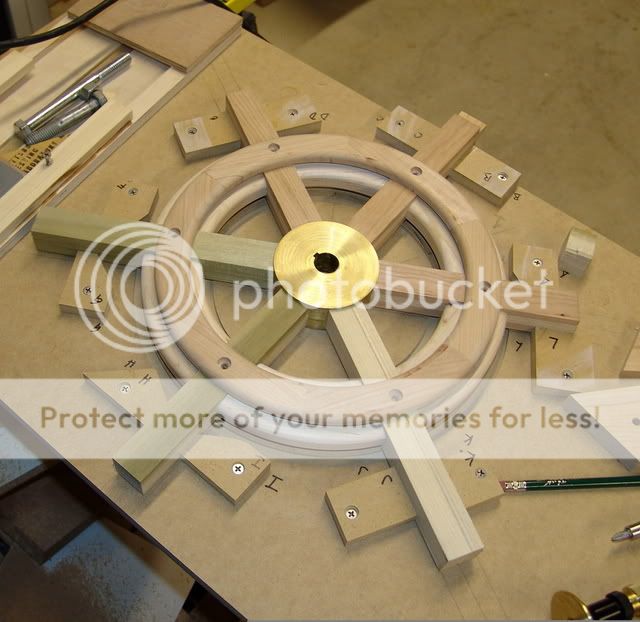
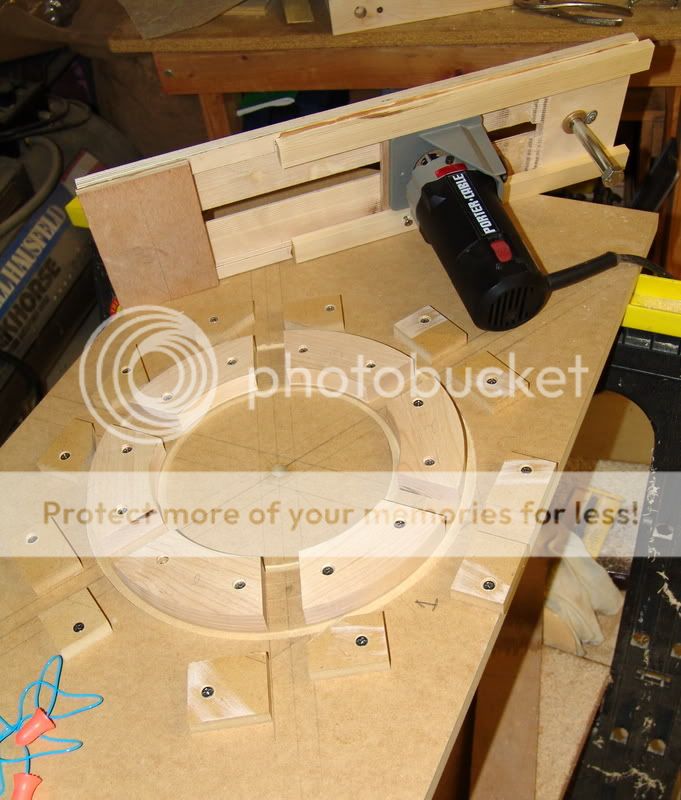
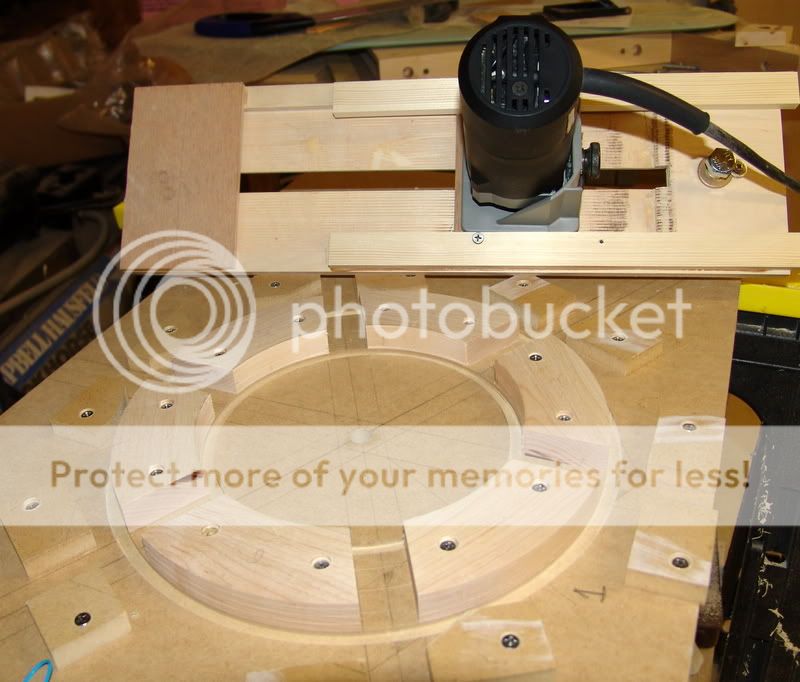
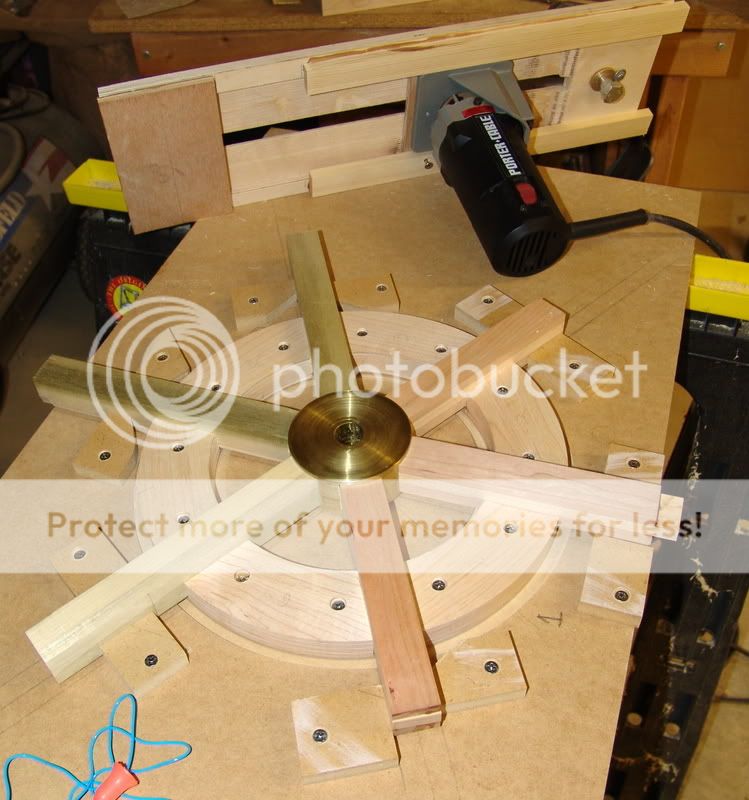
This weekend I made a trammel for my P-C trim router, milled the stock for the felloes, (the parts that form the rim of the wheel. They are called felloes on a wagon wheel, too.) and got the inner felloes cut to shape.

I had enough stock cut to the size of the spoke blanks to stand in for the ones my friend will be making so I could at least get this far.

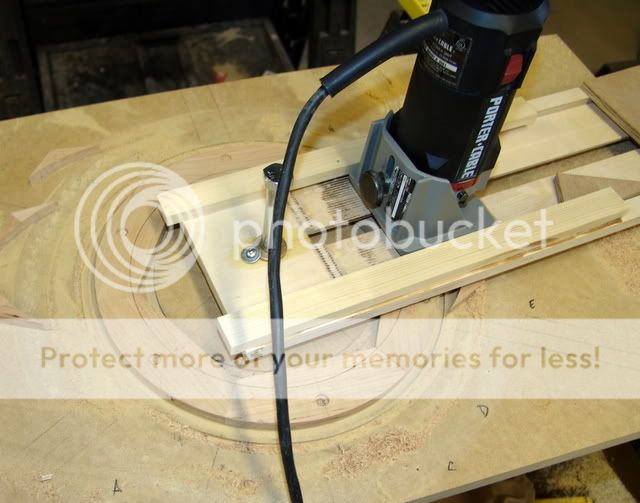
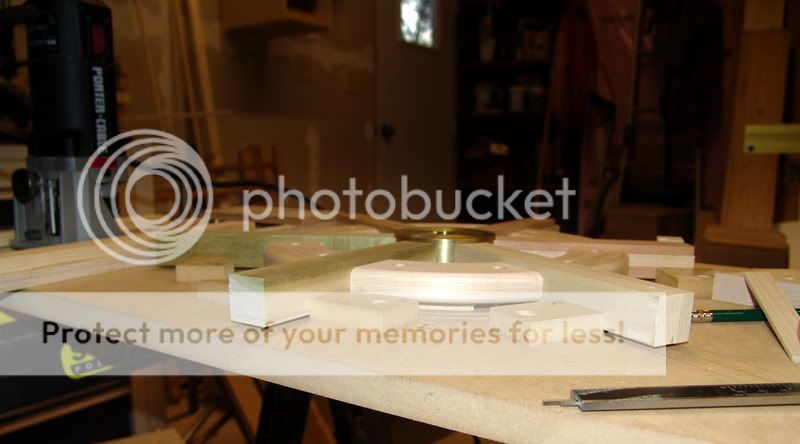
The trammel was a bit of a challenge to work out. There aren't any extra screw holes on the bottom of the stock router base and there's not really that much vertical travel so the base couldn't be too thick. Since I have plenty of scraps I worked out what you can see in the pictures. I started by replacing the plastic base with one made from a scrap of 3/8" lauan ply I had left over from the boat. I used a piece of 12mm baltic birch ply for the trammel itself. I cut a channel in it for the new router base so it is a snug, slip fit. You can see some bits of pine on top that form the rails to hold the router down. Locking the router in place is a simple matter of drilling a hole and driving a screw through the rail, the base plate and the trammel. Not sophisticated but it works.

The next step is to make the two outer felloes rings and then I need to get the real spokes in place so they can be milled to receive those out felloes.

Thanks for looking.

DSC03735.jpg

DSC03736.jpg

DSC03737.jpg
 
That's really nice work Dave. Look forward to seeing the progress.

Do you have pictures of the boat too?

Tony
 
Superb Dave.

It's always been a dream of mine to build a boat. I still hope to when the kids leave home and we can move somewhere with more outdoor space.

How long did it take you to get it to that stage?

Tony
 
Thanks Tony.

I built the boat over the course of almost three years but I really only worked on it part time over nine months. Boats really aren't that difficult to build once you get your head around the process and the terms.

You're in a great place for some cool boats. You should look up a fellow neamed Iain Oughtred on the Isle of Skye. I want to build one of his double enders but I can't decide which.
 
Love the Yacht Dave , looking forward to see how the wheel turns out .
 
That's one project I don't envy you Dave, lovely boat though.
The Isle of Skye???
To us over here that's a bit like you saying, "I'm just popping to Bogota to buy a new hammer" :)

Dom
 
Lovely boat Dave, hope the wheel turns out well - keep the piccies coming awork progresses :wink:
 
Hi again Dave,

Yes. I've looked at Ians designs before. In fact I stayed very near him on Skye a few years ago for a weeks holiday. Just didn't know it at that time.

As an aside, it was our holidays on Skye that made us move to Scotland 12 years ago. We now hope to move/retire further north, possily Orkney, another island we have fallen in love with, but thats a few years off yet.

Looking forward to seeing that wheel progress. You've inspired me to start doing some research for the future. :D

Tony
 
Thank you again, Gents. I will post more photos after I get some time to make progress on the wheel. I thought, in the meantime I would post a couple of other images related to the steering mecahnism on the boat.

First, a SketchUp drawing I did for soomeone who was interested in how I built it.

steeringModified-1.jpg


Most of the parts for this came from the local farm supply store. The wheel fits on the near end of the shaft which is actually threaded (left hand thread) and has a key way cut for the key that lock the wheel on the shaft.

steeringModified.jpg


This shows the rudder box attachment and the wheel.

And here's a picture of the mechanism through the tiny hatch in the stern deck. It's so small I can hardly work with both hands in there at the same time. The bungee cord is one of two that are used to hold the hatch cover in place.

dsc03128.jpg


The hatch cover is kind of funny. I didn't want anything too thick and I wanted no exposed hardware. I took a piece of 3/8" plywood cut to size and ran it through my planer (thicknesser to you lot) and took off the back veneer layer. This made the plywood a bit floppy with a desire to bend in the proper direction. I glued a couple of 3/4" x 3/4" pieces oriented fore and aft along the ends of the hatch to locate the cover over the hole correctly and to hold the screw eyes for the bungee cords. A coat of epoxy and then varnish on the outside while in situ and the cover holds its shape matching the camber of the deck.
 
And while I'm boring you with boat pictures, here are some I found from launch day that a friend took.

Just off the trailer for the first time. I'm the one in yellow wondering how long it will take before she settles to the bottom.

sub6.jpg


First time aboard her while she was afloat. The wind had come up and was blowing her away from the dock. You can sort of see the original steering wheel.

sub8-1.jpg


And with the commander aboard. You can just see the corner of that hatch I was talking about.

sub9-1.jpg
 
Dave I've looked at the SU picks and the photo of the steering gear and I'm puzzled. Do you have to turn the wheel to port to go to starboard and vice versa?
 
Yes, you've got it right. I tried it the other way and didn't like it. Since the wheel is behind you when you're sailing, setting it up so turning to port makes you go to port was backward. I found it more intuitive set up as is, It works basically like the tiller on the typical small boat. You push the top of the wheel away from the direction you want to go as you would with the tiller.

There's only about 300° of rotation stop to stop so It really does work much more like a tiller without having the tiny cockpit obstructed.
 
Finally, I have some new pictures and a progress report on the steering wheel.

First, a little boo boo. I neglected to consider the part of the outer felloes that would be cut away before I drilled the screw holes in the center of the blanks. Fortunately I had enough stock planed to thickness so I could make another six and also fortunately I didn't drill all twelve of the first batch.

DSC03739.jpg


The pieces were glued together with super glue. the first piece was screwed down against a registration block which was removed before routing. Then each subsequent piece was glued and screwed down. To prevent gluing the pieces to the jig, I rubbed the surface with a bar of paraffin.

Then I ran the router round the outside.

DSC03740.jpg


After making the rings round inside and out, all the felloes pieces were rounded over on the router table. Then I shimmed up the stand in spokes to the height of the face of the hub. The inner felloes were then shimmed to put them midway up the spokes.

DSC03749.jpg


DSC03750.jpg


And here is one of the rings laying in place on the spokes. I need to run the router round the spokes to create a recess for the outer felloes. Then it'll be time to sand all the parts and start gluing things together. Well, of course I'll need those spokes Ken turned for me.

DSC03751.jpg
 
JFC":1lg8x7xw said:
Love the Yacht Dave , looking forward to see how the wheel turns out .

Me too JFC. Also like the cabinet in your 'Avatar'. It would be one of yours I am sure.
Lovely work.

John :)
 
Back
Top