


slimshady
Established Member
After getting more time to tie up the loose ends here is the longest workshop build, currently 8 years.
Some explanations / reasons behind the decisions ....
I got interested in Oak-frame after seeing the early Grand Design programmes, thinking that it would be something I'd like to try. I decided to combine the need for a workshop with the desire to build. I read almost all the books on the subject and luckily visited some oak-frames in progress of build. Just had to ring the framers and ask to visit. I also helped with a frame build nearby, Earth trust Barn at Little Wittenham in 2006.
The base was dug by me over a long time. It is a ring of concrete 12-14 inch wide by 24 inch deep except for the front door area with is 18inch by 36 deep. Soil is clay and very sticky.
The 22x11ft rectangular frame is eight off 6x6 x8ft oak posts arranged as 2 rows of 4, as shown below.
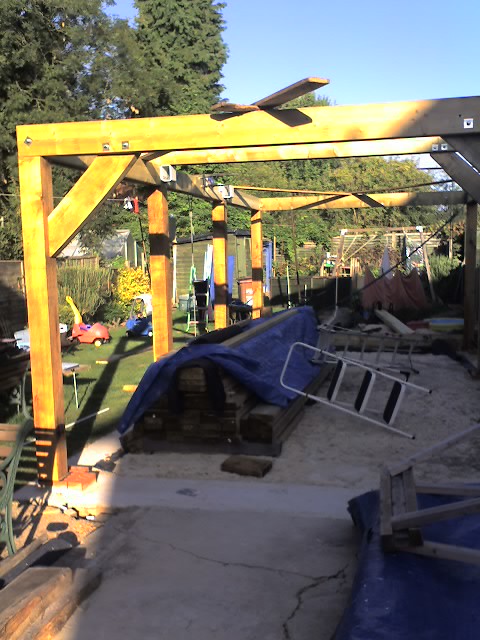
the Oak posts were sourced from Oakmaster frame company at Enstone airfield in 2006. The w-r-ceder cladding from Bala, Wales also in 2006. These piles were left to air dry in the driveway for a year whilst I practiced the m & t.
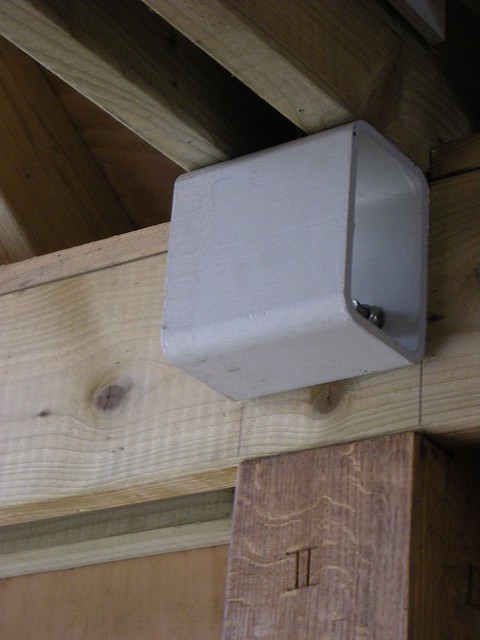
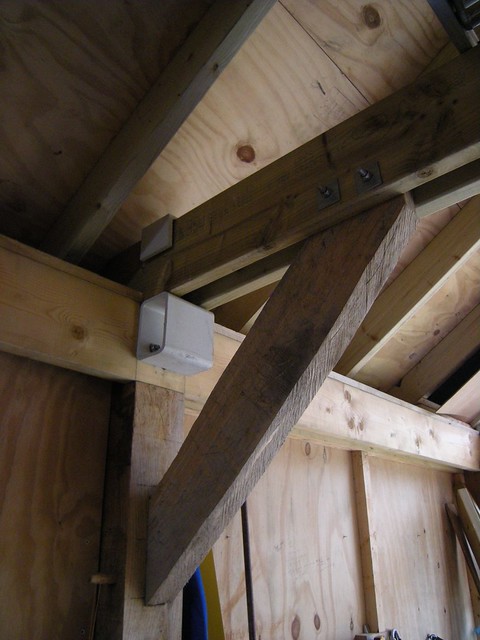
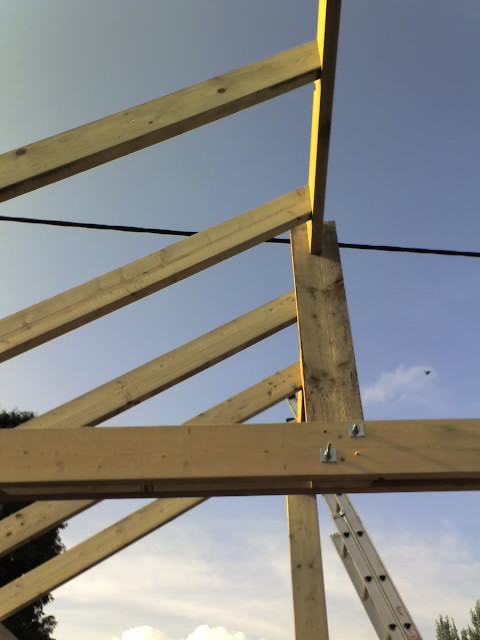
It became apparent that using oak beams (11 foot 8x5) would be too heavy to lift up. I therefore changed design to make use of 8x2 tantalised. I used two rows of 8x2 that sandwich the oak posts, below shows post with horiz 8x2 ring and 8x2 tie-beam equivalent. The section of steel box has two M12 studs that pull sandwich tight. Another steel section is pulling the tie-beams down to the steel box. Over engineered, of course.
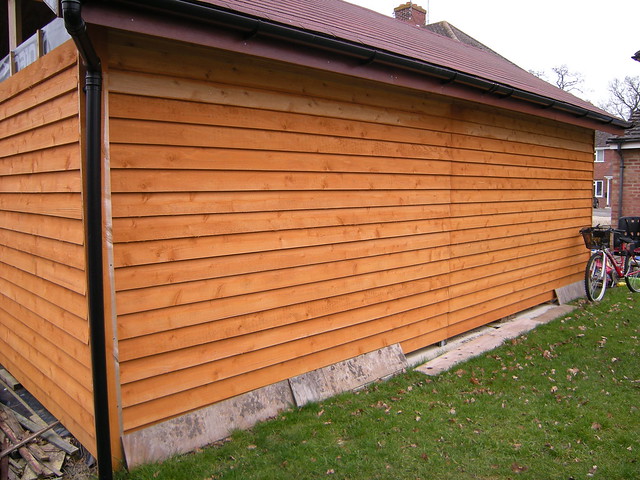
The frame walls are skinned with 1/2inch wbp ply screwed to the oak posts and the 8x2. A 6x2 is fixed low to the post. The gap is filled with insulation and the inner ply affixed. I have added extra support to prevent ply bending and give anchor points for cupboards etc. The outside ply was covered with membrane then 2x1 laths and then cladding held with st-steel screws.
The roof was more ply, this time two thicknesses of 1/2 inch. The rafters are 6x2, ridge is another 8x2
 All fixing are st/st including M12 studding.
I have purposely not fitted windows and instead filled the apex with multi-wall. This is for security, insurance cover and I didn't want the hassle of weather proofing them.
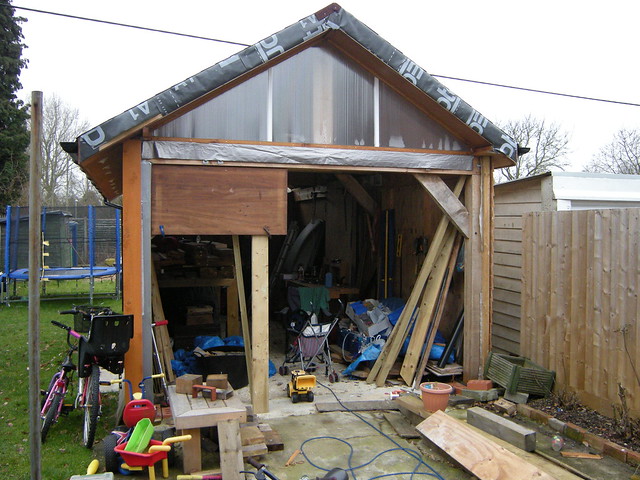
The doors are made of more 6x2 with 12 of the Iroko school table tops that I bought from Corby. Also got an Emir bench for £50
 Also bought extra vices.
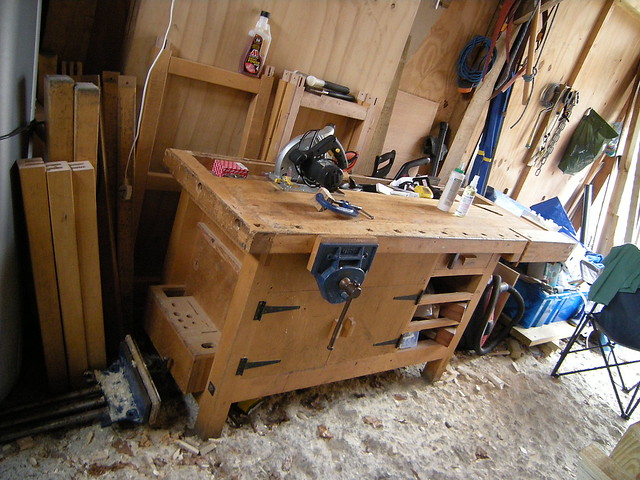
This last picture does show the only error that I made. The concrete slab went off too quick, so chiselled it flatter and have now installed a new floor of scaffold boards. Next job is to install proper electrics.
I have spent the build time purchasing good old cast iron. I'll post again when the electrics are in.
Any other pics or questions happy to help.
Some explanations / reasons behind the decisions ....
I got interested in Oak-frame after seeing the early Grand Design programmes, thinking that it would be something I'd like to try. I decided to combine the need for a workshop with the desire to build. I read almost all the books on the subject and luckily visited some oak-frames in progress of build. Just had to ring the framers and ask to visit. I also helped with a frame build nearby, Earth trust Barn at Little Wittenham in 2006.
The base was dug by me over a long time. It is a ring of concrete 12-14 inch wide by 24 inch deep except for the front door area with is 18inch by 36 deep. Soil is clay and very sticky.
The 22x11ft rectangular frame is eight off 6x6 x8ft oak posts arranged as 2 rows of 4, as shown below.
the Oak posts were sourced from Oakmaster frame company at Enstone airfield in 2006. The w-r-ceder cladding from Bala, Wales also in 2006. These piles were left to air dry in the driveway for a year whilst I practiced the m & t.
It became apparent that using oak beams (11 foot 8x5) would be too heavy to lift up. I therefore changed design to make use of 8x2 tantalised. I used two rows of 8x2 that sandwich the oak posts, below shows post with horiz 8x2 ring and 8x2 tie-beam equivalent. The section of steel box has two M12 studs that pull sandwich tight. Another steel section is pulling the tie-beams down to the steel box. Over engineered, of course.
The frame walls are skinned with 1/2inch wbp ply screwed to the oak posts and the 8x2. A 6x2 is fixed low to the post. The gap is filled with insulation and the inner ply affixed. I have added extra support to prevent ply bending and give anchor points for cupboards etc. The outside ply was covered with membrane then 2x1 laths and then cladding held with st-steel screws.
The roof was more ply, this time two thicknesses of 1/2 inch. The rafters are 6x2, ridge is another 8x2
I have purposely not fitted windows and instead filled the apex with multi-wall. This is for security, insurance cover and I didn't want the hassle of weather proofing them.
The doors are made of more 6x2 with 12 of the Iroko school table tops that I bought from Corby. Also got an Emir bench for £50
This last picture does show the only error that I made. The concrete slab went off too quick, so chiselled it flatter and have now installed a new floor of scaffold boards. Next job is to install proper electrics.
I have spent the build time purchasing good old cast iron. I'll post again when the electrics are in.
Any other pics or questions happy to help.