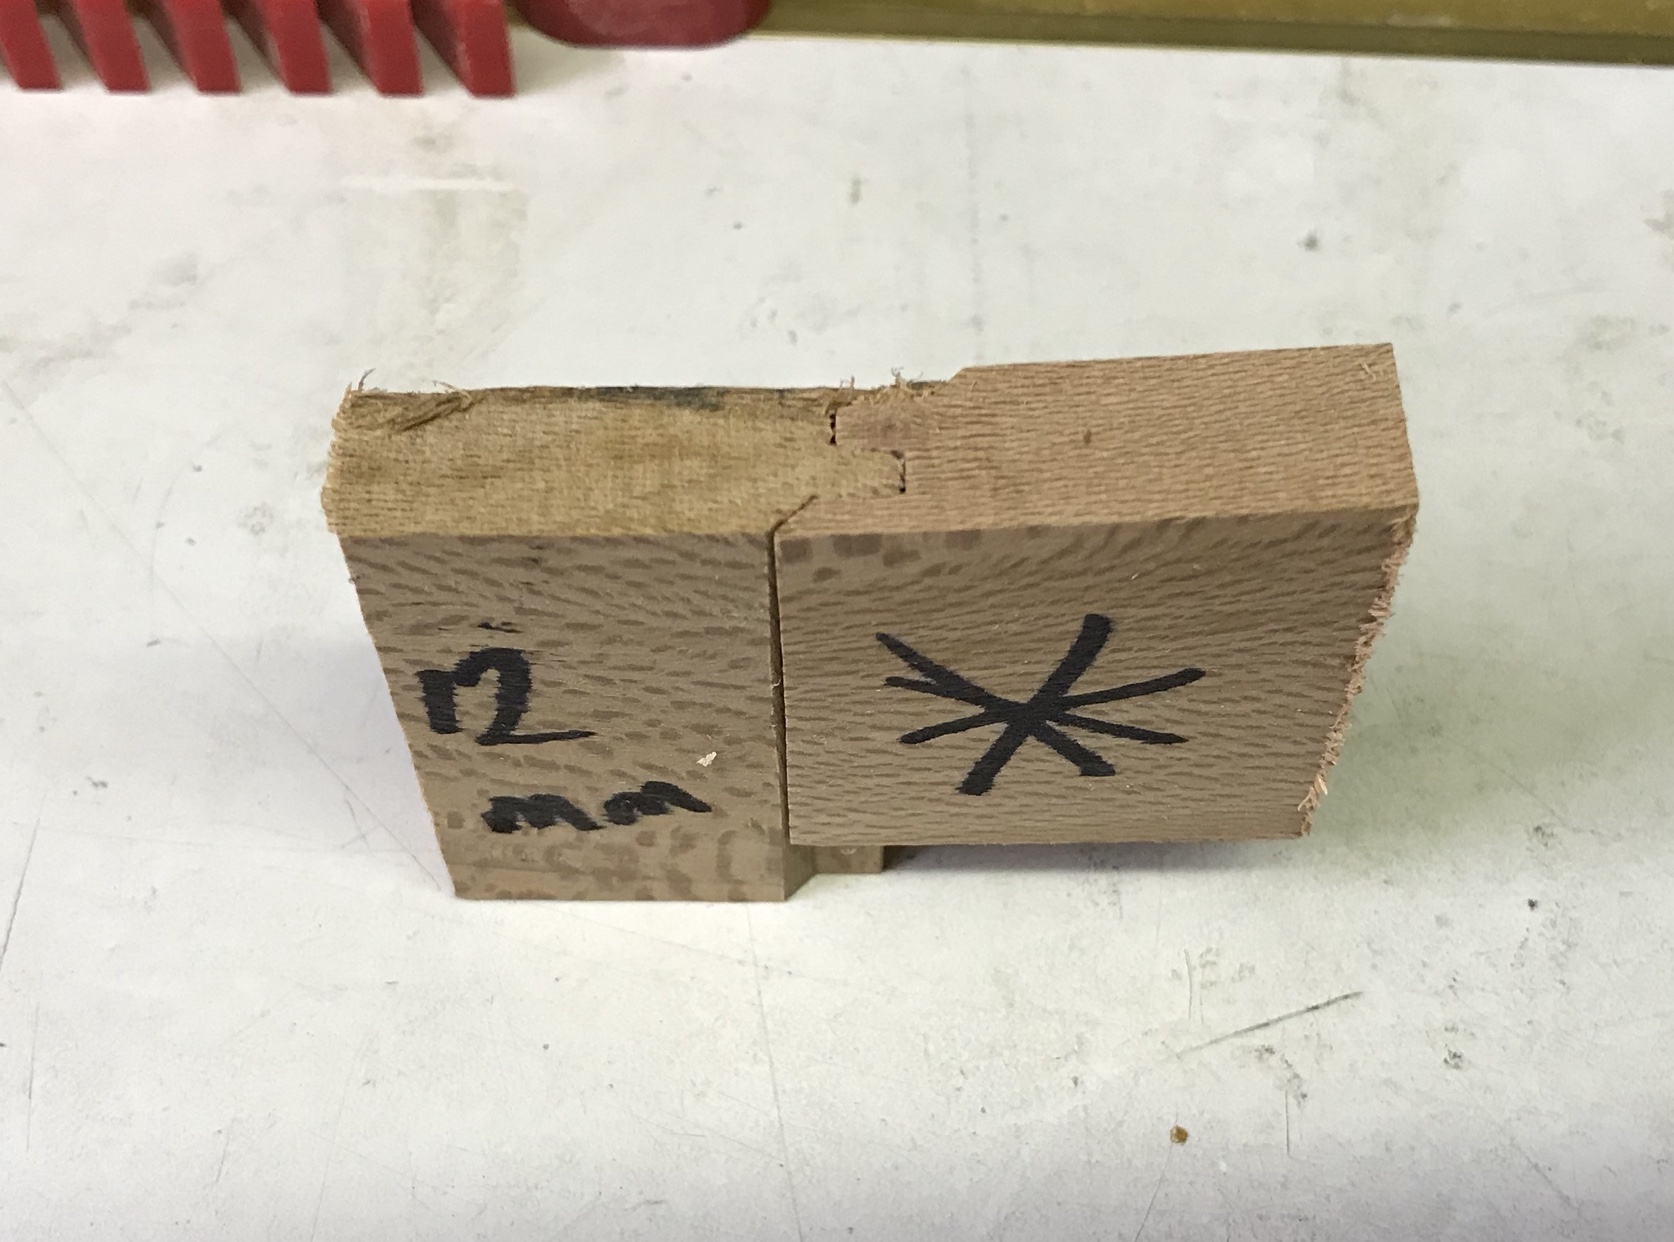
sliding dovetail on a wooden box

UKworkshop.co.uk

Help Support UKworkshop.co.uk:

This site may earn a commission from merchant affiliate links, including eBay, Amazon, and others.

marcros

Established Member
Joined
11 Feb 2011
Messages
11,302
Reaction score
746
Location
Leeds
I have bought the timber to make a box similar to https://www.finewoodworking.com/2015/07 ... ctors-case

I don't like the dovetails on it though, and I don't have the skills to cut them anyway. I guess that this would be ideal for the mitred dovetails, but that is not going to happen!

The timber will be approx 15mm tigery brown oak. It is currently sawn boards, and is at nominal 1", so if that changes, so be it. it is nice timber, and I would like to let it speak for itself.

I could use a rabbeted dovetail, but to me it looks a bit American, and a bit naff. it is the latter that is stopping me from a simple pinned rebate joint that I had briefly considered. https://i.pinimg.com/originals/4e/f1/8a ... de1244.jpg

could I use a small sliding dovetail joint (widest part say 8mm), and cut the overhanging board flush https://s3.amazonaws.com/finewoodworkin ... ils_md.jpg ? I have never seen this, which suggests that it is probably a non starter.

next alternatives would be a drawer lock router bit. the mitre lock bit looks too sensitive to board thickness to be viable for this.

any thoughts or suggestions?
 
If you want a simple joint to execute, and don't want the faff of dovetailing leading to possible visual detraction from the wood speaking for itself (as you describe it), I personally wouldn't bother with anything along the lines you've suggested. So, simple for a small box would be to mitre the corners, glue it together with masking tape, then use judiciously placed veneer keys to reinforce the mitres.

Incidentally, the attractive colouring of both brown oak and tiger oak are relatively fugitive. Slainte.
 
Drawer lock router bit should look good with the contrasting end grain showing. Or you could deliberately leave the end grain side short and add some dark / Blackwood edging?
 
marcros":2c0ct8ss said:
I have bought the timber to make a box similar to https://www.finewoodworking.com/2015/07 ... ctors-case

I don't like the dovetails on it though, and I don't have the skills to cut them anyway. I guess that this would be ideal for the mitred dovetails, but that is not going to happen!

That's a nice design, but given he used dovetails for the carcase it's puzzling why the drawers weren't also dovetailed?

I agree with Richard, if you're not up for dovetailing then some type of re-inforced mitre joint is the best option. This would also have the huge advantage of allowing the grain to wrap around the carcase in one unbroken flow, which with Tiger Oak would be the perfect way of allowing the "wood to speak for itself".

Couple of points, mitre joints are essentially end grain to end grain, so glue is at it's worst strength wise. If you're using PVA you can help matters by first sizing the joint with slightly dilute PVA (no more than 10% water), let it tack and then apply neat PVA. Alternatively pu glue is much better than PVA on end grain.

But whatever you use you'll need some reinforcement, if I can find some time later on I'll take you through the process I use for this.
 
Sheffield Tony":2wwxuyi3 said:
Like so ?

I guess that the through spline method of reinforcing a mitre, shown in the video, is probably the strongest method of all. But, IMO at least, you pay a big price for that strength, in that every time you open the box you see those ugly exposed splines staring up at you!

Stopped splines would fix that problem, as would laying a veneer over the exposed edges, but then you're adding a load of faff and, unless the box is destined for a great deal of handling stress and strain, I'm not sure it's necessary.

For most boxes a few keys added to the mitre is all you need along with well cut joints and sensible glue technique.

You can add internal keys. These are usually little "L" shaped pieces of ply wood set into the inside of the mitre. But again they're pretty ugly so you'd only use them if you plan on lining both the box and the lid.

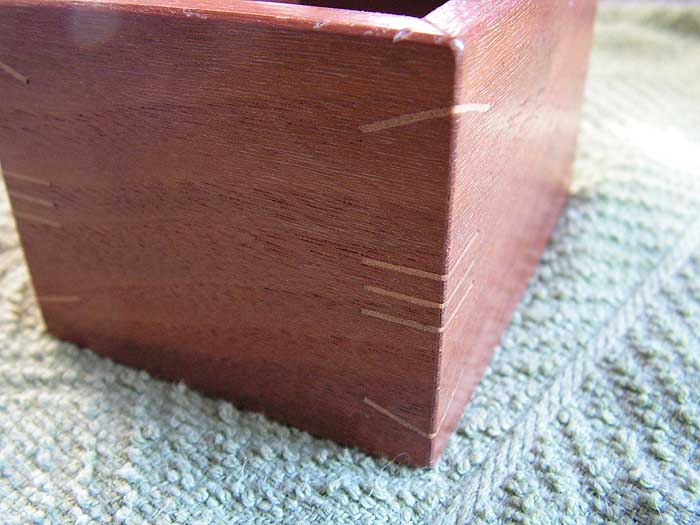
The other option is external keys in a contrasting wood like these,
Box-Mitres-15.jpg


The way I fit these is as follows. I start by cutting mitres for the four sides, then groove the sides to take the top and base,
Box-Mitres-01.jpg


Glue up the sides using the precautions I mentioned previously (ie, sizing or pu glue), glue in the veneered ply top and base, and use good quality stretchy masking tape to provide some cramping pressure,
Box-Mitres-03.jpg


Personally I cut the key kerfs on a spindle moulder with a grooving blade, but you can get similar grooving blades for router tables, run the whole job vertically over a table saw, or just use a hand saw. The main thing is make sure the saw teeth leave a clean flat bottom to the kerf, which requires a rip style tooth pattern rather than cross cut style teeth.
Box-Mitres-04.jpg

Box-Mitres-05.jpg


This should leave you with something like this,
Box-Mitres-08.jpg


One small detail, you can see from the above photo that a mysterious new groove has appeared on the outside of the box. This was done on a router table and goes almost all the way through, just leaving a 1mm thickness to saw through later in order to release the lid.

You then cut the keys, having thicknessed them to be a perfect fit in the kerfs,
Box-Mitres-09.jpg

Box-Mitres-10.jpg


You then plane down the keys and groove the lid to fit some inlay,
Box-Mitres-13.jpg


Saw off the lid,
Simple-Box-10.jpg


Clean up the sawn surfaces to get perfect mating fit between the lid and box, add the hinges, line and finish the box as you wish, and you're pretty much done.

This is just about the simplest method of box making I know. Obviously, as with any woodwork, there are loads of different ways of cocking it up. But in essence it's really not that difficult, and a few practise pieces should see you churning these out at a rate of knots!
 

Attachments

  • Box-Mitres-15.jpg
    Box-Mitres-15.jpg
    50.8 KB
  • Box-Mitres-01.jpg
    Box-Mitres-01.jpg
    56.4 KB
  • Box-Mitres-03.jpg
    Box-Mitres-03.jpg
    57.3 KB
  • Box-Mitres-04.jpg
    Box-Mitres-04.jpg
    92.1 KB
  • Box-Mitres-05.jpg
    Box-Mitres-05.jpg
    80.8 KB
  • Box-Mitres-08.jpg
    Box-Mitres-08.jpg
    55.9 KB
  • Box-Mitres-09.jpg
    Box-Mitres-09.jpg
    85 KB
  • Box-Mitres-10.jpg
    Box-Mitres-10.jpg
    51.4 KB
  • Box-Mitres-13.jpg
    Box-Mitres-13.jpg
    71.6 KB
  • Simple-Box-10.jpg
    Simple-Box-10.jpg
    62.9 KB
custard":94yqvqt8 said:
I start by cutting mitres for the four sides, then groove the sides to take the top and base
Really? I am surprised. Why not do the grooves first when the 4 sides are still in a single board?
 
custard":1g0x56g9 said:
The other option is external keys in a contrasting wood like these,
file.php
That's almost exactly the style I had in mind custard. The only difference being in my normal methodology is that I frequently don't use a spindle moulder to cut the slots for the spline, especially for small boxes. I put the box in the vise and use a handsaw to cut perpendicular across the mating surfaces of the mitre and break off bits of veneer to glue into the slots. Essentially the same technique but takes the spindle moulder out of the equation. And when the key slots are hand cut it's possible to sort of 'dovetail' the key slots (saw kerfs) as and when you feel like it, ha, ha.
[Edit] The image below should give the general idea. Slainte.

veneer-splines-keys-700px-web.jpg
 
Just4Fun":3k4mgk19 said:
custard":3k4mgk19 said:
I start by cutting mitres for the four sides, then groove the sides to take the top and base
Really? I am surprised. Why not do the grooves first when the 4 sides are still in a single board?

Doesn't make much odds either way. I mitre first as cutting a mitre across a groove risks spelching, and too long a workpiece length on a router table can become unwieldy and inaccurate.
 
Hi Mark,
You've seen how the professionals do it so I thought I'd add an amateur perspective.
For a box with mitred corners and grain flowing around, here is a WIP: -
IMG_1165.jpg

As Custard said, the problem with splines is that you can see them when you separate the box and lid. To get over this, I used a "Heath Robinson" jig and a hand held router with a fence : -
IMG_1166.jpg

By having 2 separate grooves, you can separate the lid & box and not see the splines. I use a 4mm cutter and standard biscuits (the top one obviously cut down).

If you're not bothered about splines running down the length of the mitre, I use: -
IMG_1167.jpg
(ignore the workpiece)
For cutting slots for keys, I use the standard router table jig: -
IMG_1169.jpg
This can be used upright with a straight cutting bit or on it's side with a grooving bit.
Or as Richard says, just cut them by hand: -
IMG_1170.jpg


In terms of separating the lid and box, there are lots of ways, handsaw, bandsaw, tablesaw etc. but I use a thin slotting cutter (1.5mm) from Wealden's (I think Peter Sefton uses one from Whiteside). I simply leave a small amount of wood in place to support the lid and run the box around the cutter.

I'd be interested in some WIP pictures please?
 

Attachments

  • IMG_1167.jpg
    IMG_1167.jpg
    219.5 KB
  • IMG_1165.jpg
    IMG_1165.jpg
    228.8 KB
  • IMG_1166.jpg
    IMG_1166.jpg
    237.5 KB
  • IMG_1169.jpg
    IMG_1169.jpg
    231.1 KB
  • IMG_1170.jpg
    IMG_1170.jpg
    219.4 KB
Thanks everybody. This one will be a bit simpler because there is no separation to be done. (I have generally done that with a bandsaw in the past, although have also used a table saw before).

I will do some WIP pics.
 
Some clever boxes!
Years ago as a toymaker I made hundreds of boxes about 4" cube for jackinaboxes.
Had to be simple and repeatable with limited kit (nothing like the stuff I've got now) and this meant tongue and groove sides to ends, tops and bottoms just glued on flush. Then cut off the tops.
Simple, but used contrasting hardwoods e.g. sides in sycamore, tops in iroko or oak, polished up and looked very nice.
The tongues and grooves were both cut over a small 6" table saw with a wobble blade, which entailed a lot of careful setting up as they had to be a firm fit to avoid having to clamp. Tops and bottoms 'clamped' by stacking them with a weight on top - plus little wedges between boxes to close gaps if needed. Grooved sides slightly over length so they could be brought back neatly with a plane and sanding.
So plenty of end grain showing, but looked very tidy.
Did 'luxury' versions with DTs but they weren't worth the effort in terms of selling.

Mitred rebate joint is an option - helps with glue-up as is self locating and strong (good glue surfaces) but still needs clamps
http://www.table-saw-guide.com/mitered-rabbet.html

PS a plain t&g joint is the practical alternative equivalent to the hopelessly impractical sliding DT first suggested
The tongue would be 'bare faced' i.e. just a rebate on the outside face
 
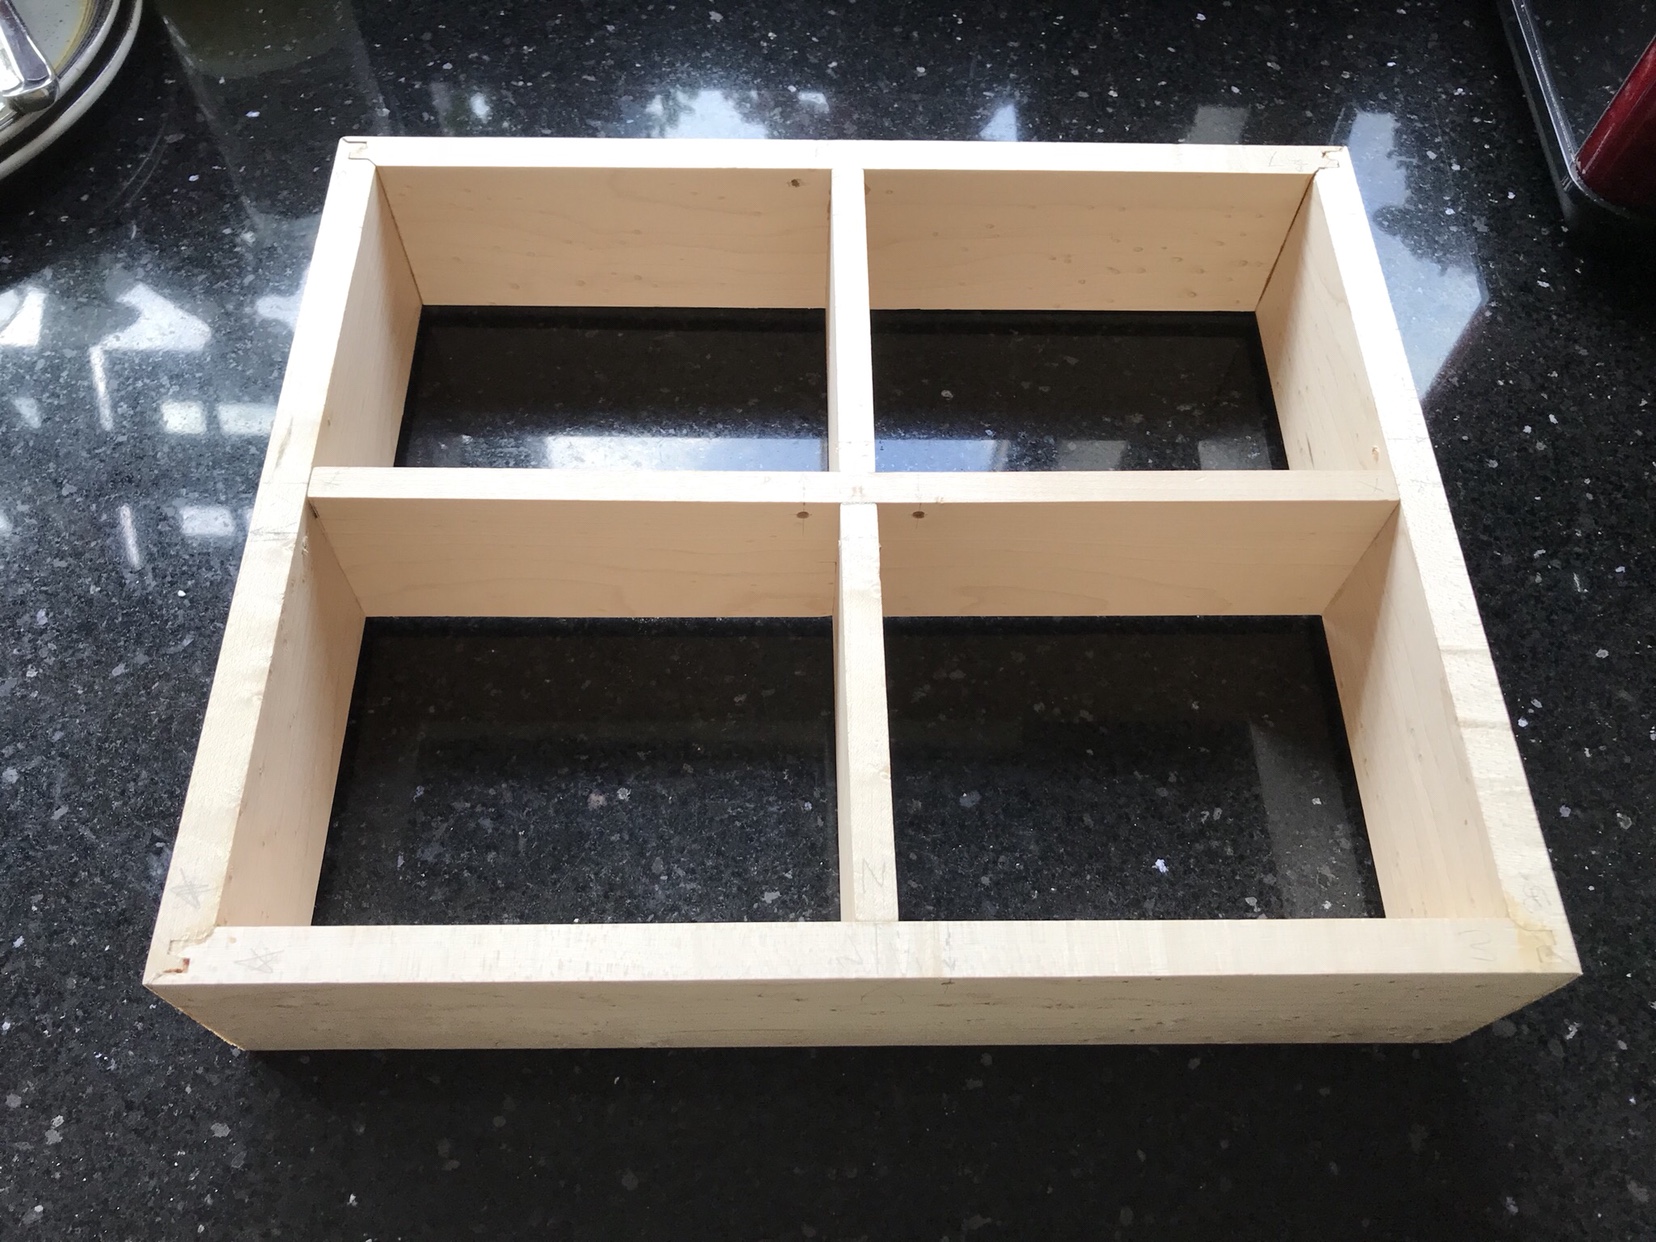
I’m making some boxes using a lock Mitre cutter using 12mm boards:
This is before tidying up:

9bd4a1a6e5d9c66d5e54661914a55d0d.jpg


Rod
 
I've never used a lock mitre cutter. Is it efficient or does it take a lot of setting up time?
It looks such a good idea but I can't help wondering if really is. What about that little end grain tongue - does it get snapped off etc?
I noticed on a youtube demo that he was only doing it on the long grain edges, which is one way of making a box, but most boxes need to join on the cross grain edges, like Harbo's above.
 
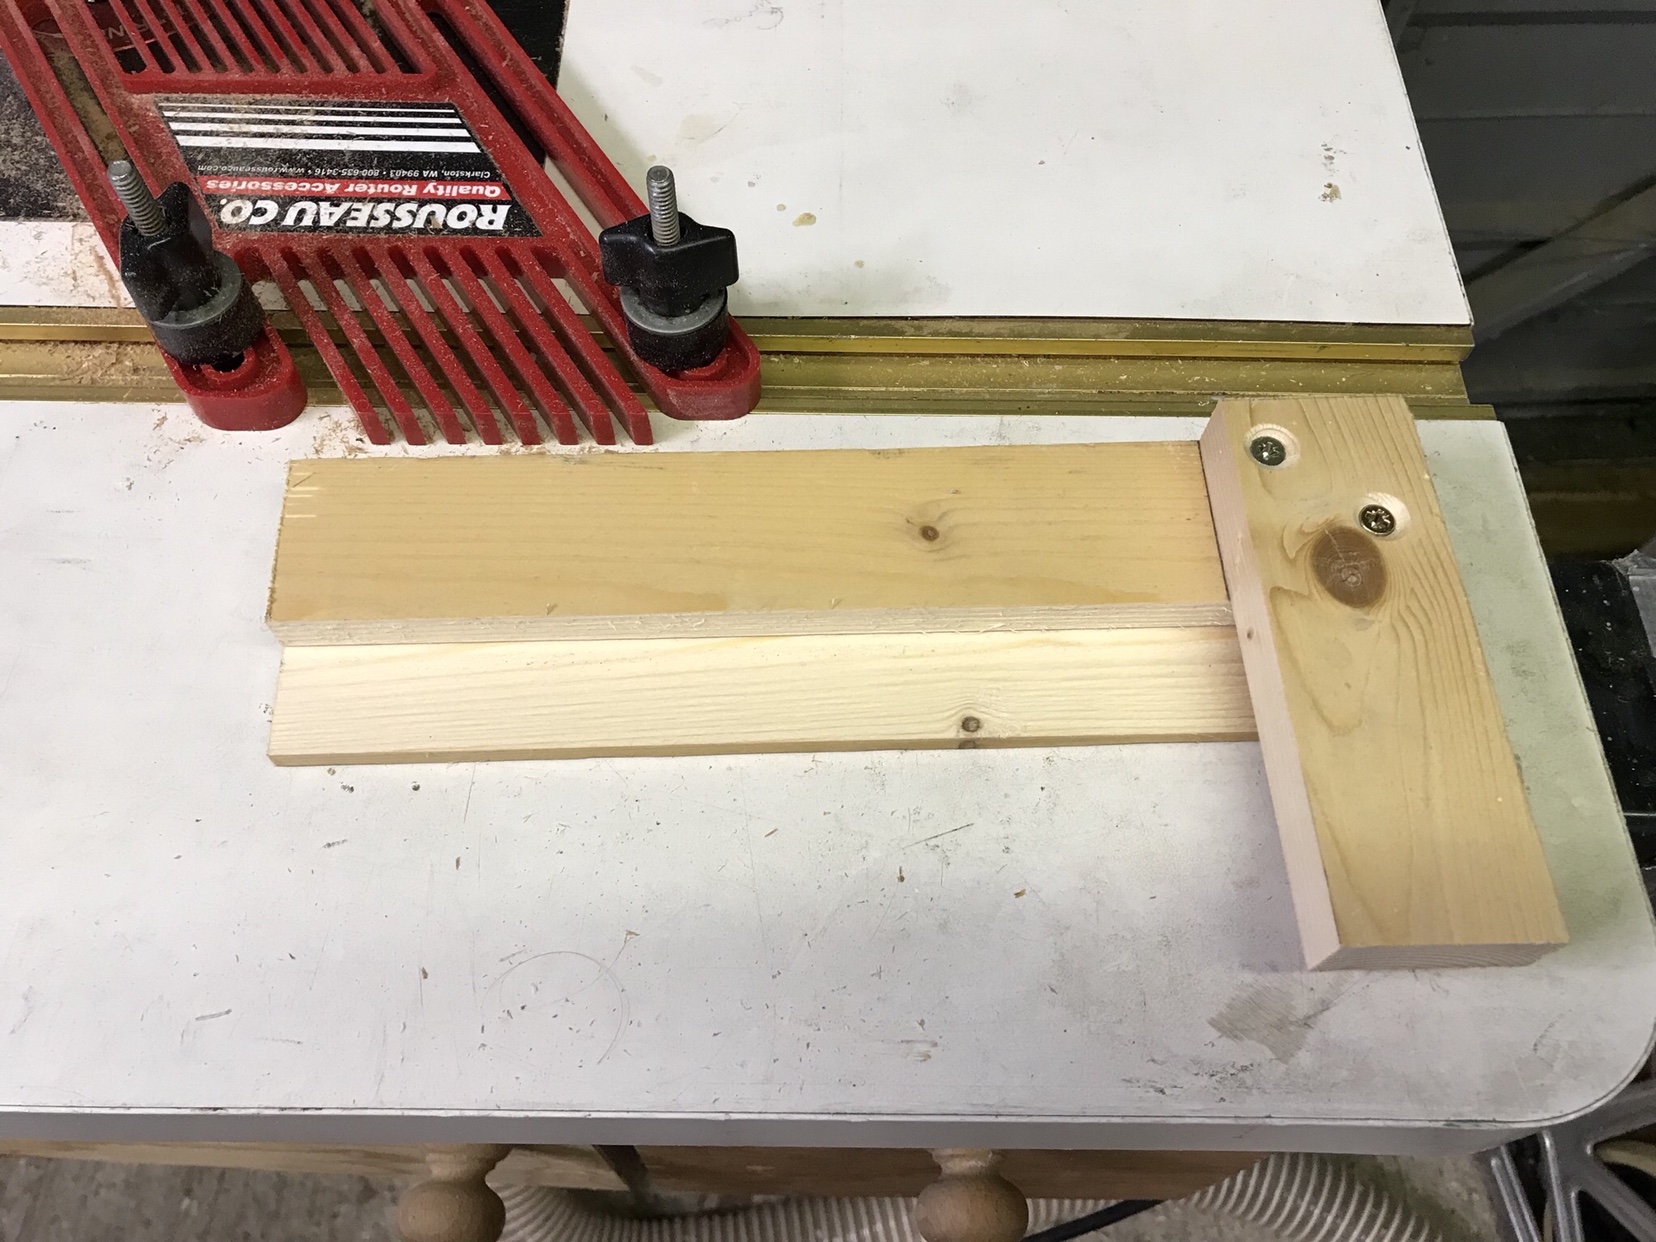
You have to cut one horizontally and the matching piece vertical. To prevent tear out I used sacrificial bits of wood though I probably should have made the boards oversize and cut down later.
For the vertical piece I made a quick jig to ride over the fence;

538265311caa007d5529fc80cee03b4a.jpg


86379e650e7092146eb2c0397656fcec.jpg


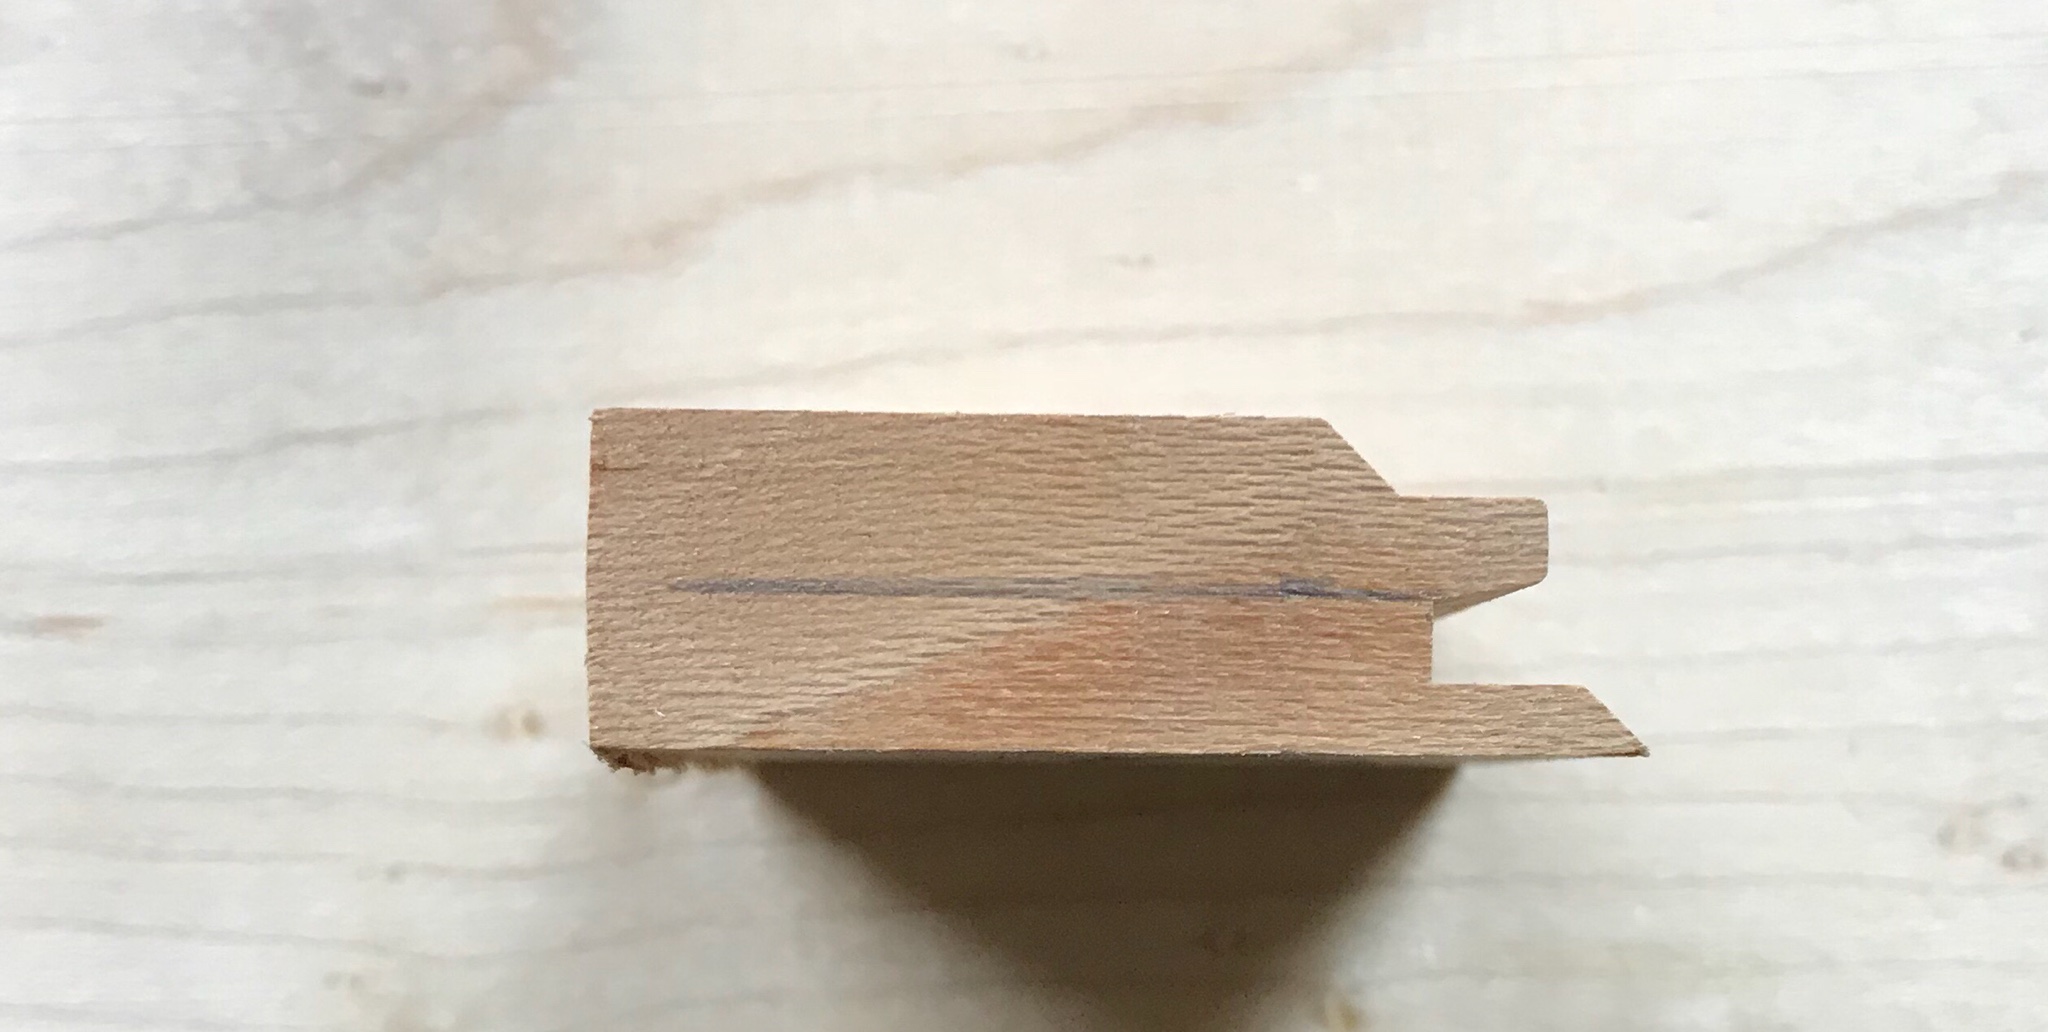
Lots of videos about setting up which is easy measuring the cutter. Once correct I made some templates for future use:

ce0a745725b9d3c051acf80b76bcdda9.jpg


1af3a1e72cc108769d8e9f84ee7a2453.jpg


9d69e12935eaa80d73ef6ca49b06c672.jpg


They lock square so hardly any need for Clamps

I used the smallest Wealden cutter and 12mm is as low as it will cut.
I think Axminster sell some smaller ones.

Rod
 
Back
Top