Minimal Tool Challenge

UKworkshop.co.uk

Help Support UKworkshop.co.uk:

This site may earn a commission from merchant affiliate links, including eBay, Amazon, and others.
Add a cutting gauge and gennou to my previous list. Include a workbench, but I think that is missing the point of a "minimal tool build".

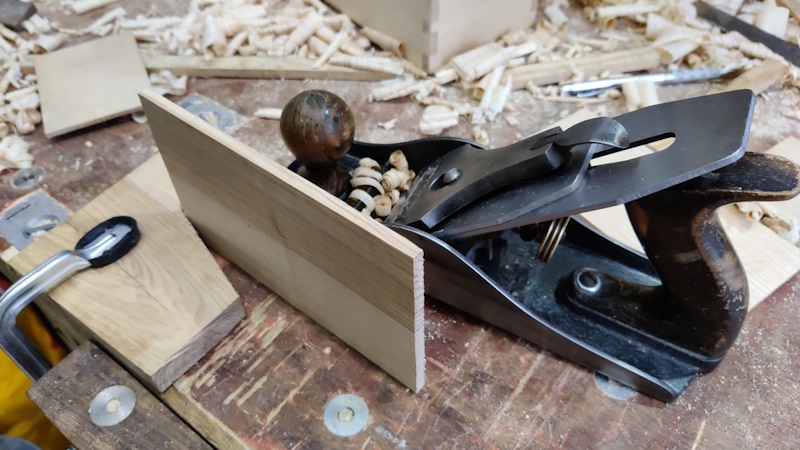
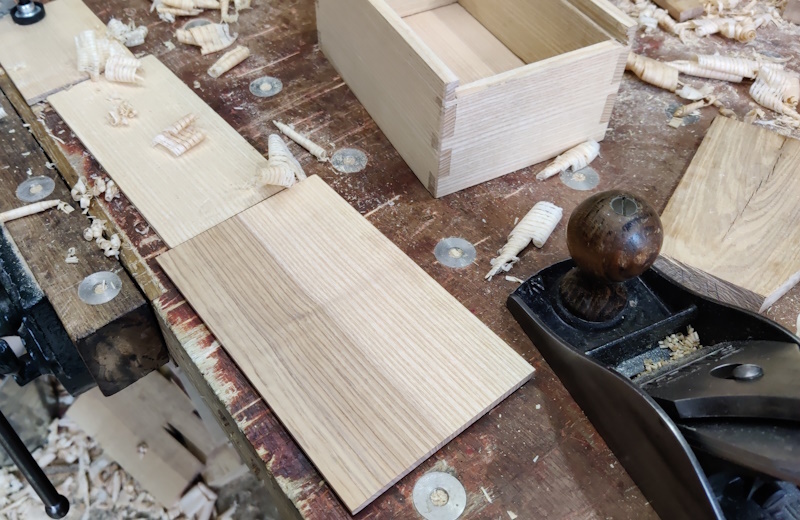
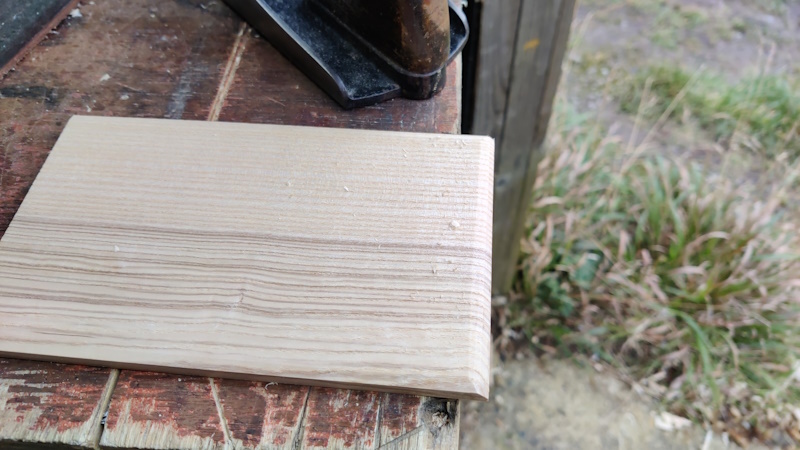
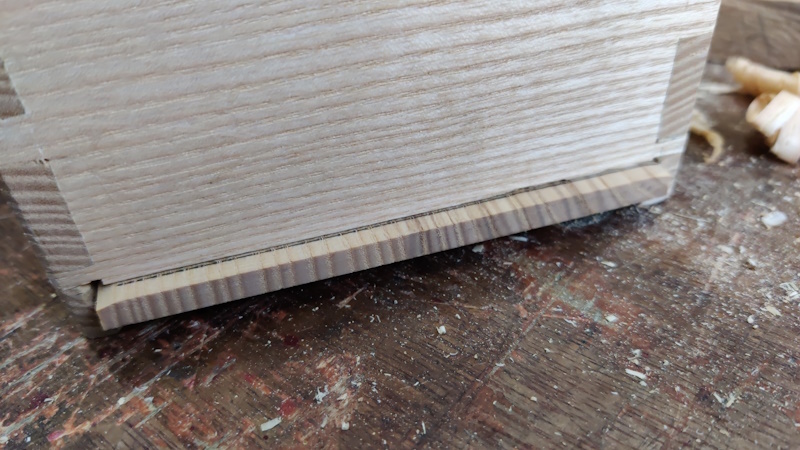
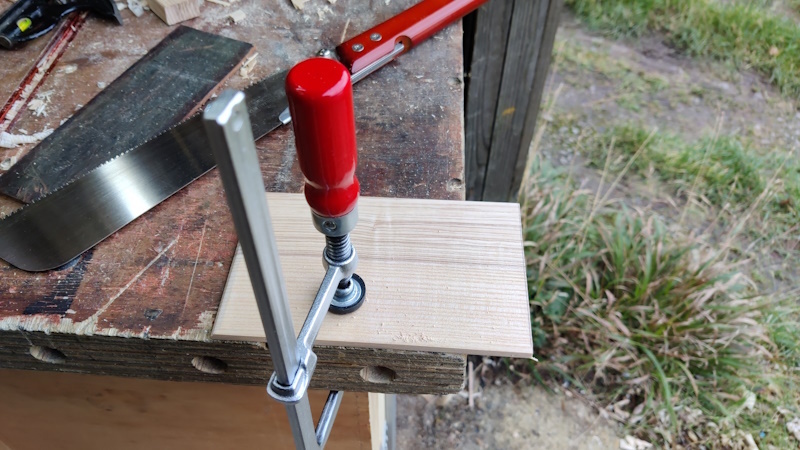
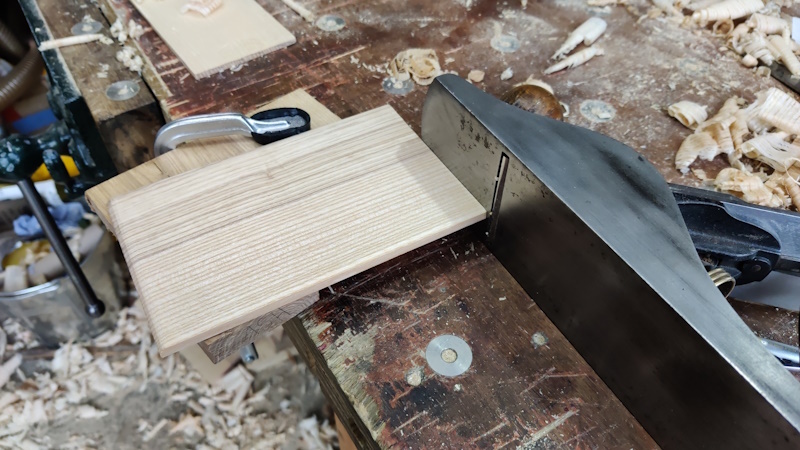
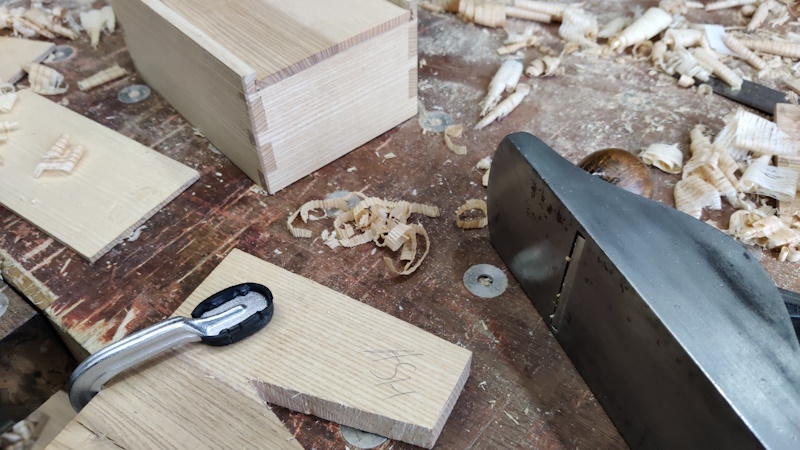
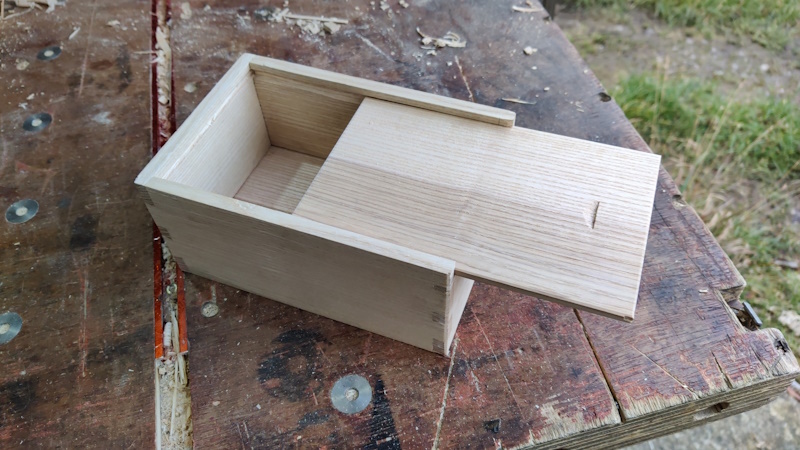
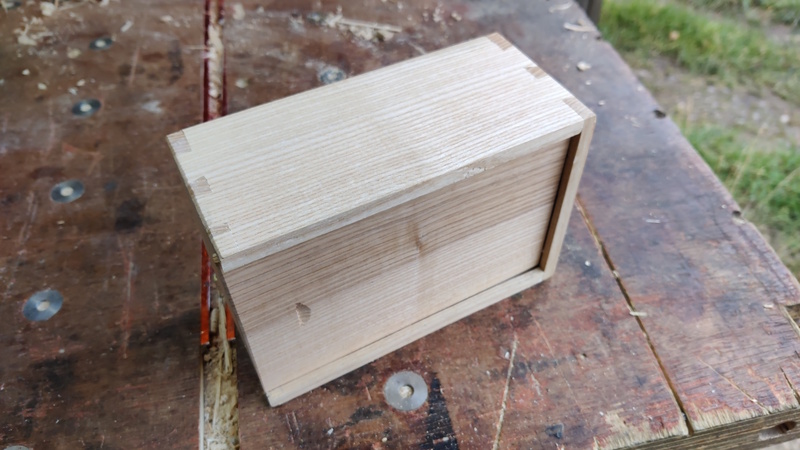
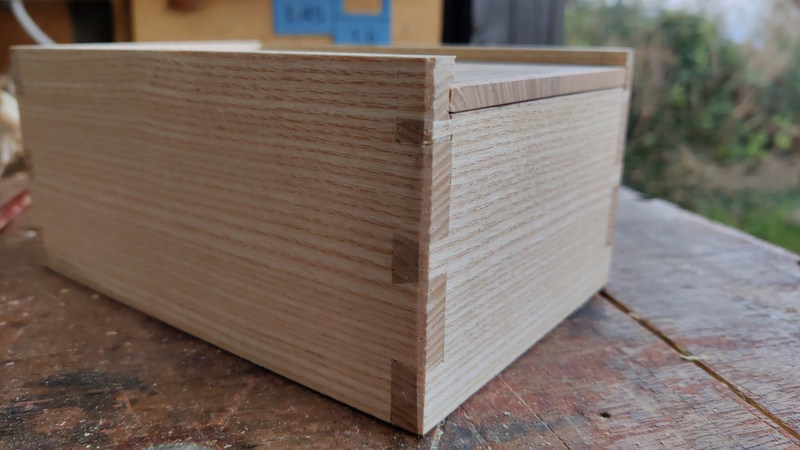
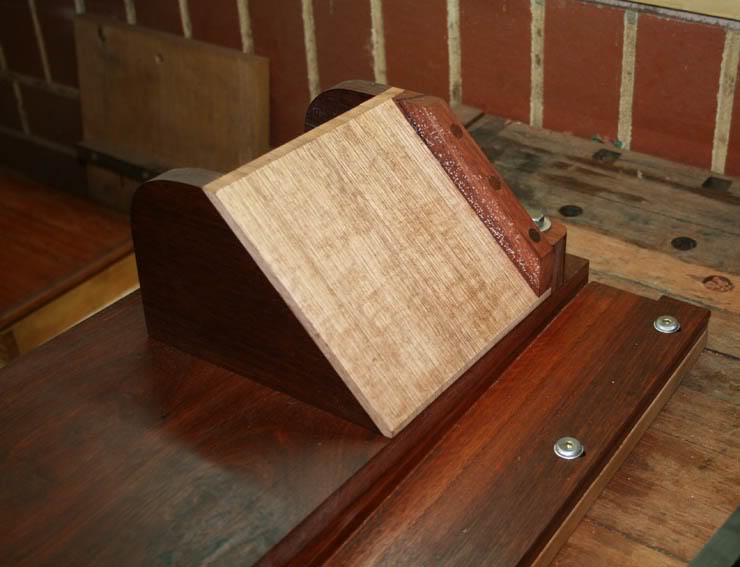
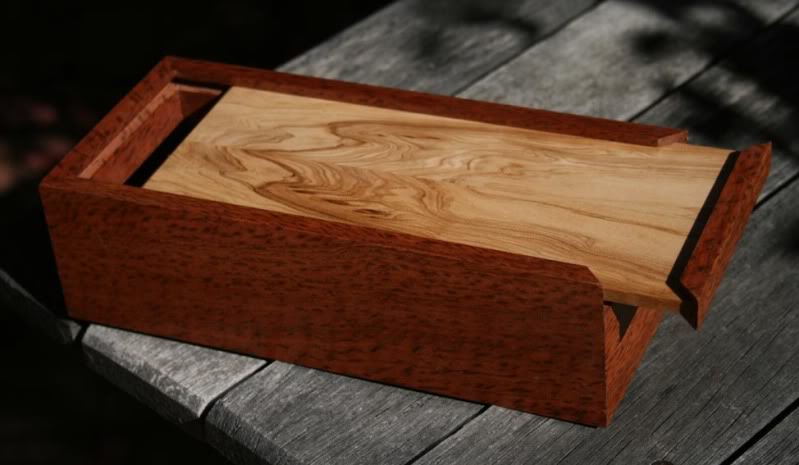
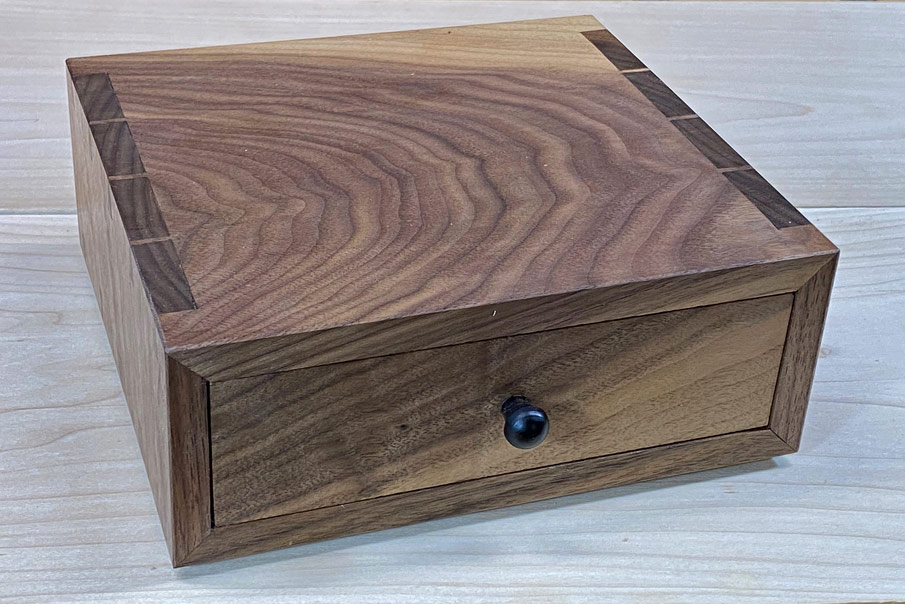
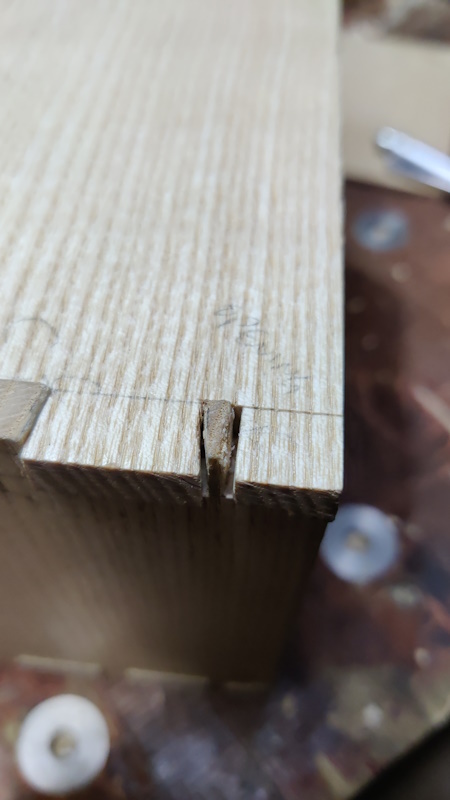
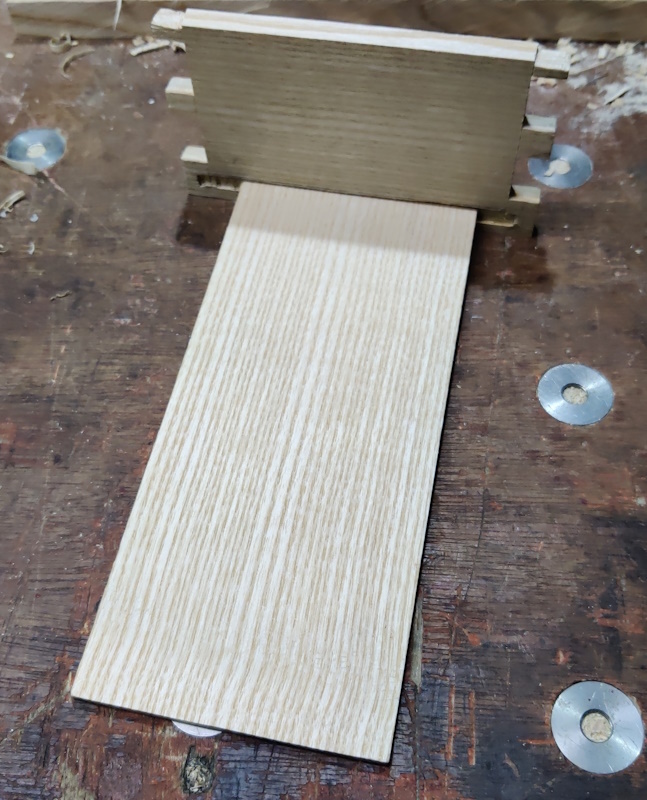
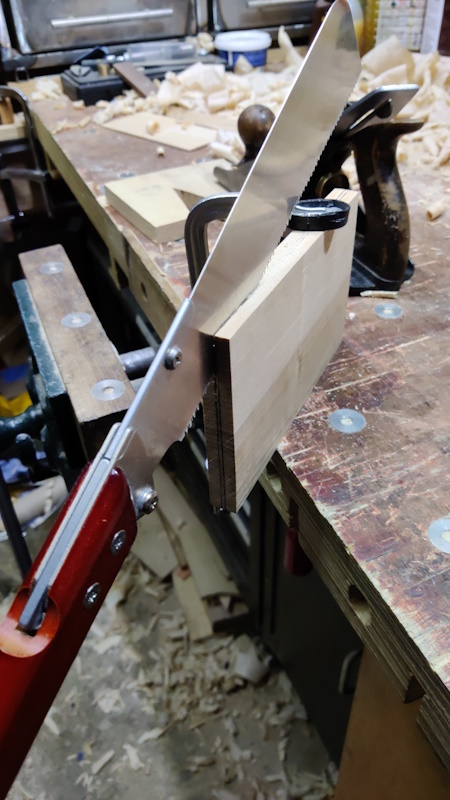
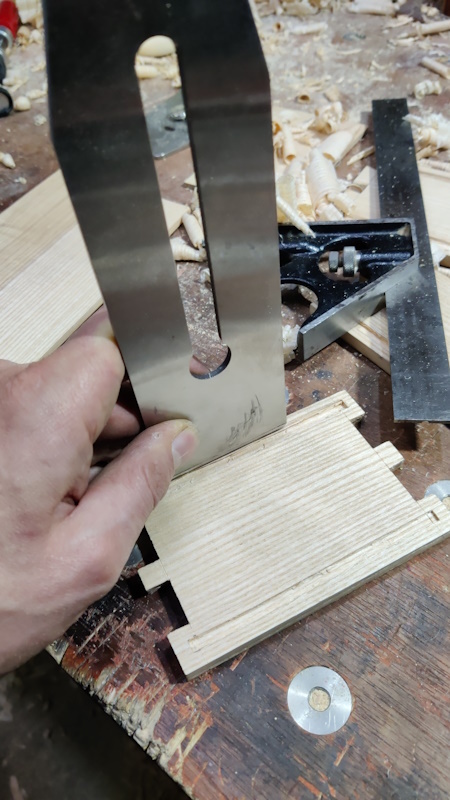
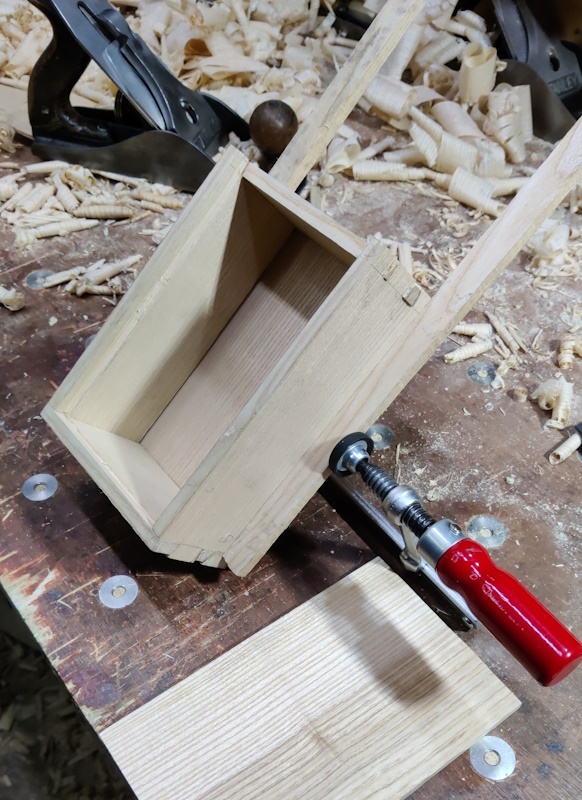
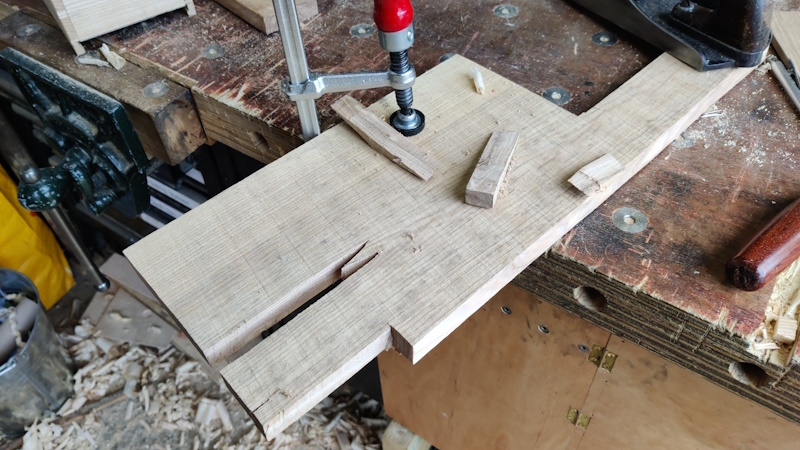
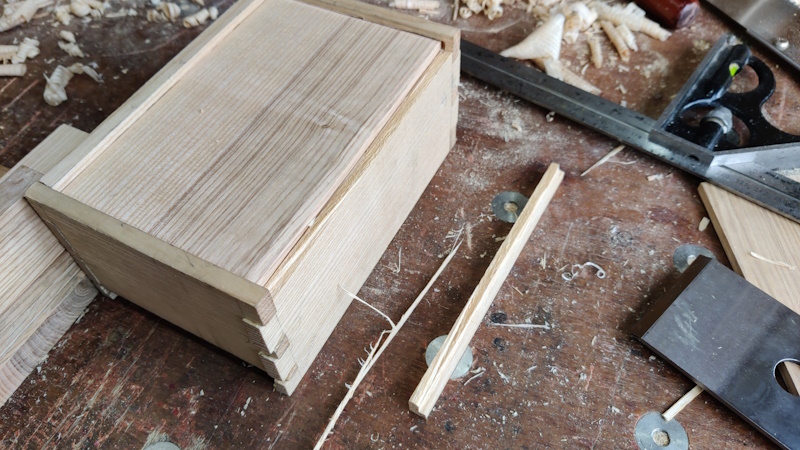
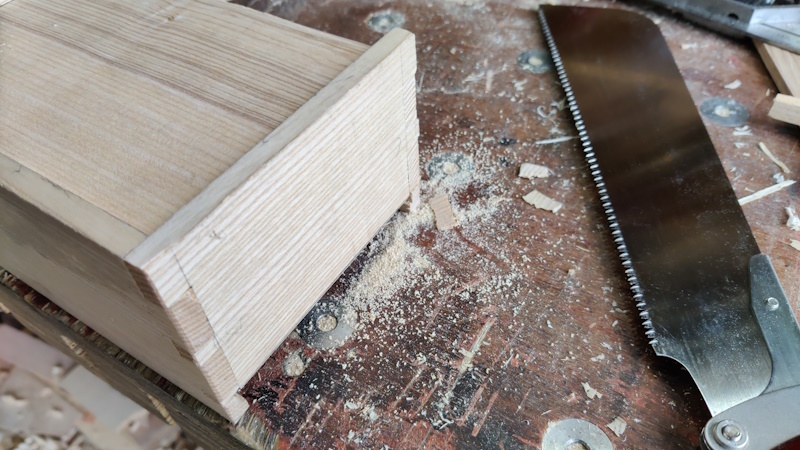
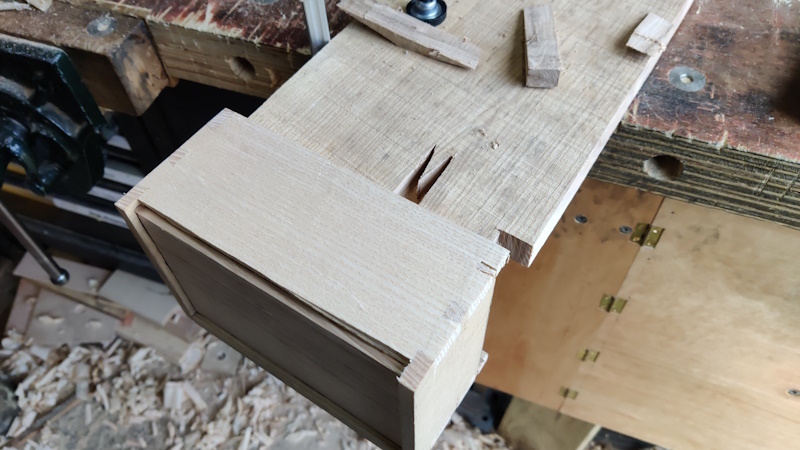
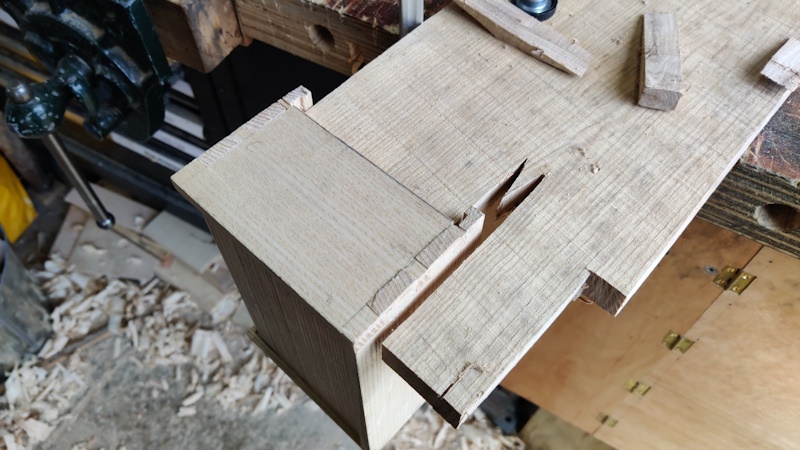
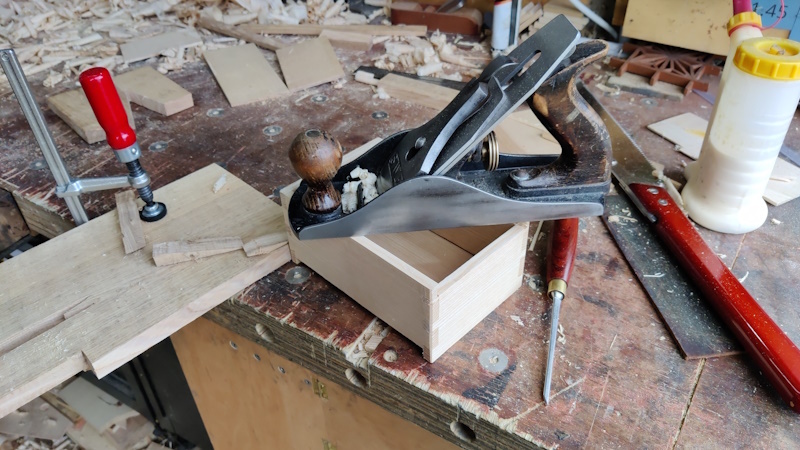
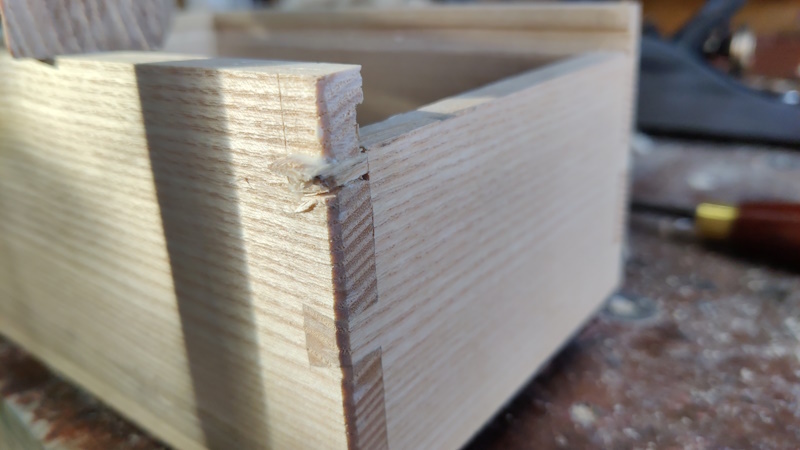
The box below has mitred corners and needed a shooting board (Donkeys Ear) and plough plane. Cut to rough size with a backsaw, shoot to final dimension, add the mitres with the DE, and plough the grooves.


As described in the first post, a workbench is assumed (and doesn't count), but only as a surface to clamp to / work on.

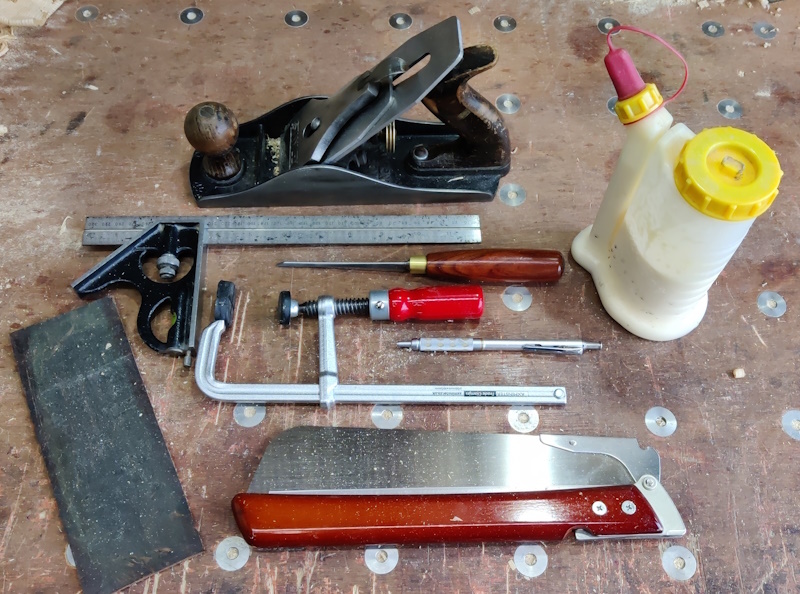
Another beautiful box Derek, but I still don't know the tool list, so I don't know whether it qualifies as a "minimal tool" build. Without much to go on, I'll guess what you used for this:
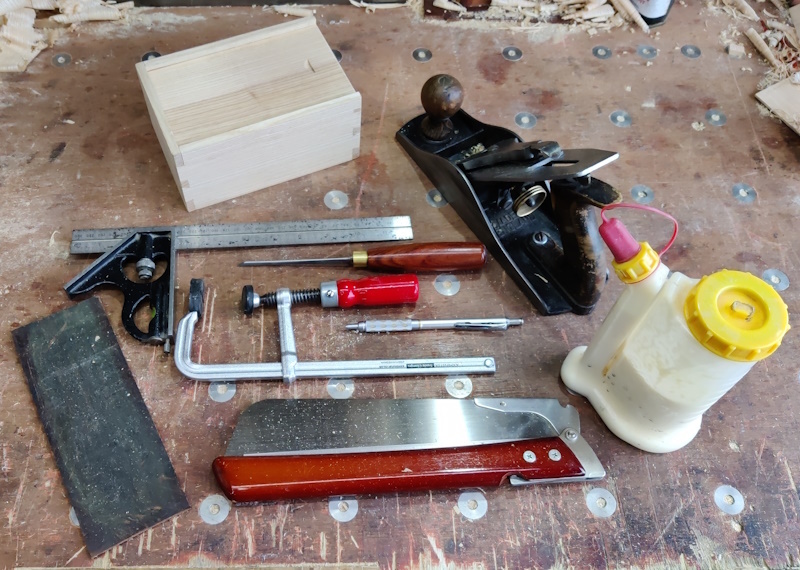
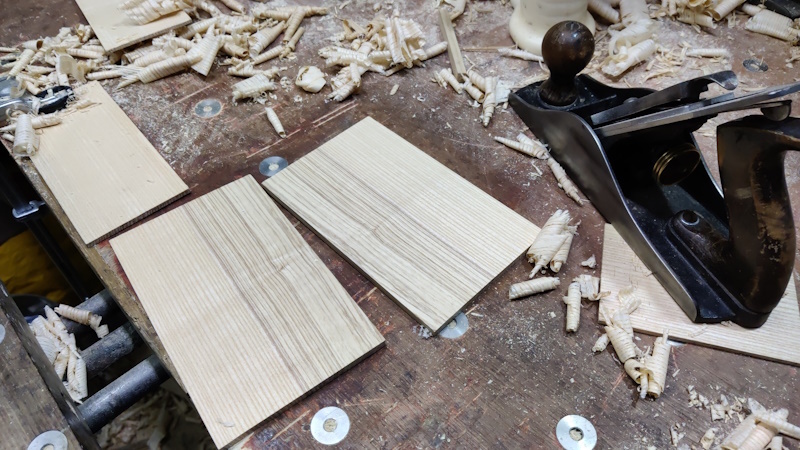
  • Bandsaw to resaw the rough-sawn timber down to thickness and to cut to width (power tool, so counts as 5).
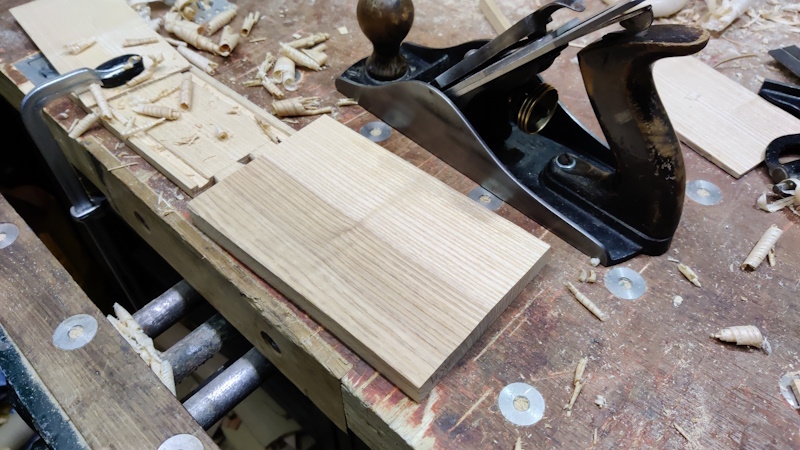
  • #4 Smoothing plane to sort out the bandsawn faces and to plane the edges square
  • Bench dog to support the work while planing the faces
  • Vice to hold the work while planing the edges
  • Ruler to measure the board lengths
  • Pencil or knife to mark the board lengths
  • Backsaw to cut the timber to length
  • Bench hook to support the timber while cutting to length
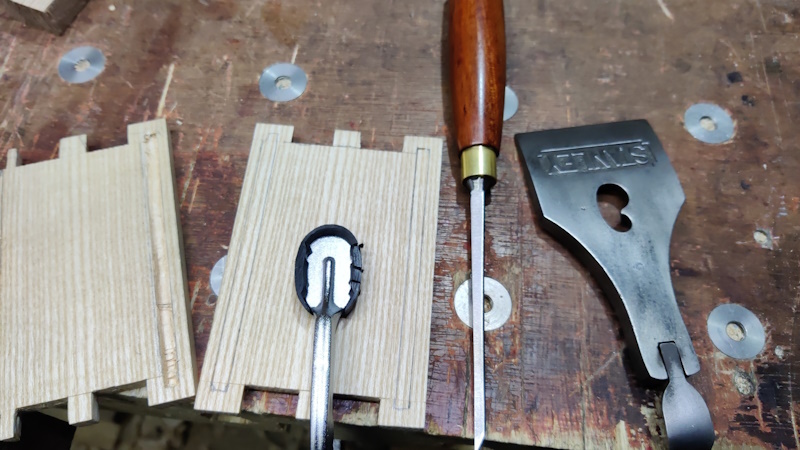
  • Donkey's Ear shooting board (used with the already-listed #4 smoothing plane) to shoot the mitres
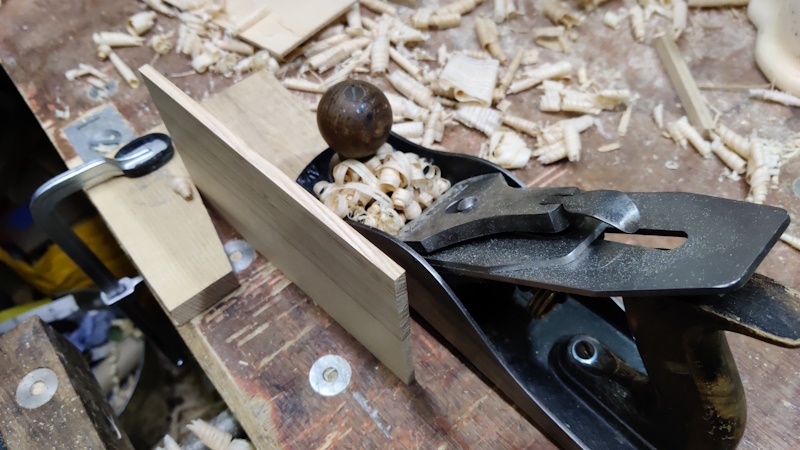
  • Plough plane to plough the grooves
  • Sticking board to support the work while ploughing the grooves
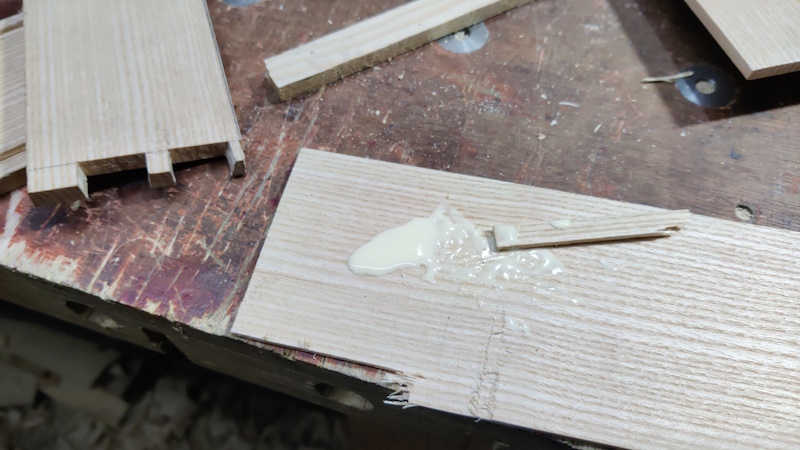
  • Glue
  • Brush to apply the glue
  • Wet rag to remove squeeze-out (which is hard to avoid on a mitred joint)
  • A single grit sharpening stone to give the smoothing plane a touch up before planing the surfaces (I'm assuming you used the #4 smoothing plane again to clean up after gluing rather than adding various sandpaper sheets into the mix)
  • Oil as a finish
  • Brush / sponge to apply the oil
  • Paper towels to clean up excess oil
  • Abrasive of some sort (scotchbrite, 0000 wire wool, worn-out sandpaper) to de-nib between coats of oil
So that's 23 tools. Did I miss anything?

The point I'm trying to make is that it's unlikely that you'll find a box you made in the past that will have a particularly good score. No-one in their right mind would go to the lengths that I've gone to in this build to minimise tool use, so the chances of there being something you did in the past that has an impressive tool count is quite slim.
 
Hi Dr Al

I think that we look at these matters from a different perspective. You want to explore how few tools needed for a build. I think that this is misleading since smaller versions of a build (e.g. a box vs a chest) do not necessarily lead to less tools or less work. The way I look at this is to find a way to build a piece more efficiently. That will not count tools, but how the tools were used.

For example, that last box (with the sliding lid) is made very simply, as were the Japanese tool boxes. The latter went from start to finish in 3 hours each.

Here are two simple, single drawer cases: The first set (just the case and drawer) took me a month to build ...


... because they the joinery was essentially a simple mitred case to maximise the waterfall effect (but the drawers were not time-efficient) ...

AWRNightstands3.jpg


By contrast, this small box-in-a-case took just as long as the dovetail design was less efficient ...

6.jpg


14.jpg


The point is that speed is not about reducing the number of tools needed. It is about efficient ways to use the tools, and this comes down to the efficiency of the design.

So the question is not how few tools you need, but how few build tasks are needed.

Regards from Perth

Derek
 
Last edited:
I think that we look at these matters from a different perspective. You want to explore how few tools needed for a build. I think that this is misleading since smaller versions of a build (e.g. a box vs a chest) do not necessarily lead to less tools or less work. The way I look at this is to find a way to build a piece more efficiently. That will not count tools, but how the tools were used.

The point is that speed is not about reducing the number of tools needed. It is about efficient ways to use the tools, and this comes down to the efficiency of the design.

So the question is not how few tools you need, but how few build tasks are needed.

That is a perfectly valid question, but it isn't the point of this challenge. I wrote the challenge rules with the explicit aim of minimising tools, not with the aim of minimising build tasks or maximising efficiency. There's no way I'd go about making this challenge box in the way I am if I was trying to maximise efficiency.

You can show boxes and drawer cases you made and they'd be brilliant in another challenge, but they don't do very well at this one. It's like I've set a challenge to run a marathon bare foot and you've said "I cycled a mile in 30 seconds". Impressive, but not relevant.
 
After struggling with the marking up method shown in the last post, I decided to try something different for the last two:

51_alternative_mark_up_method_800.jpg


That worked much better and gave me a crisper line to work to. Unfortunately, on one of the joints I then proceeded to saw very carefully on the wrong side of the line on both sides of one of the pins, so I've created some gaps that will need filling later. C'est la vie: I'm certainly not going to remake the part now!

With all the joints made, I could do a test fit and transfer the groove locations across onto the end pieces:

52_test_fit_no_base_800.jpg


This was the pin where I sawed on the wrong side of the line:

53_gappy_800.jpg


Chopping out the blind grooves was done in a similar way to the previous grooves. The only difference was I chopped down at the end to start the grooves off. This was getting quite hard on the last one; I suspect that's because, despite regular strops on the leather, the chisel is probably in need of a proper sharpen now after all those dovetails. To eke a little bit more life out of it, I used the lever cap from the plane as a hammer for the last few chops:

54_hammer_800.jpg


With all the grooves chiselled, I could get the piece I'd carefully planed to thickness to be the base of the box. Now if only I'd chosen a piece that was actually wide enough before I'd done all that planing. D'Oh!

55_whoops_800.jpg


A new piece was sawed from the plank and I planed both faces:

56_new_piece_800.jpg


I then tortured myself a bit more by resawing it in half with the cross-cut Kataba (why oh why didn't I choose a rip saw!)

57_torture_800.jpg


The resulting two pieces could then be planed down further.

58_plane_holding_up_well_800.jpg


Looking at the plane blade, it's clear that it needs sharpening, but stropping it on the leather seems to be letting it keep cutting okay, so I'm still managing without a sharpening stone thus far.

The edges were planed to size in the same way as before:

59_edge_planing_800.jpg


A chamfer was added on the bottom edges of the base. The pockets were also tweaked slightly in size by using the plane blade as a wide chisel:

60_adjusting_width_800.jpg


Finally, with everything looking okay, I chopped a bit off one of the offcuts to use as a glue spreader:

61_glue_spreader_800.jpg


Then glued the box together. With only one clamp in the arsenal, I had to be a bit creative with holding it together, but the joints are very tight, so it probably would have been fine without the clamp in all honesty.

62_glue_up_800.jpg


63_glue_up_2_800.jpg


Once the glue has had the night to cure, I'll plane the outside faces and fit the lid. I'll also do something about that gappy dovetail joint.
 
To help planing the sides without a vice available, I cut some notches in some of the leftover ash:

71_notches_in_offcut_800.jpg


Unfortunately, as soon as I did the first pass with the plane, the bottom of one of the sides snapped off:

72_snap_800.jpg


I guess the groove wasn't big enough. At least it was a fairly clean break, so I used the plane blade to enlarge what is now a rebate in the snapped off bit. That should give plenty of clearance for when I glue the snapped off bit back on.

To save working my long-suffering plane blade (which has had a lot of stropping but still hasn't been sharpened), I sawed the ends off the tails and pins where they were long enough to do so:

73_sawing_ends_800.jpg


I could then use the notched offcut to plane the sides...

74_planing_sides_800.jpg


... and the ends:

75_planing_ends_800.jpg


While the offcut was clamped to the bench, I also used it as a planing stop to plane the top surface:

76_planing_top_800.jpg


That done, I figured the best thing to get on with was gluing the broken off bit back on again:

77_glued_on_break_800.jpg


While that was clamped in place, I used the plane blade to pare off bits from an offcut:

78_paring_800.jpg


Two of those pared bits were smothered in glue and shoved into the holes where I sawed on the wrong side of the line. This photo was taken after inserting the first one.

79_glued_in_one_insert_800.jpg


They were hammered into place with an offcut of ash (actually the notched piece I used for edge planing earlier).

I don't think it's going to look beautiful, but hopefully it won't be as obvious as it was before.

I was going to get on with preparing the lid, but then I realised that my only clamp is busy holding the box to the bench for the glue-up, so I won't have a way of making a planing stop and hence it's going to have to wait until the glue has dried enough.
 
Once the glue had been left for enough time to dry, I planed the face on the side with the gap-fillers and the bit that had previously snapped off. Once that was done I got back to the lid. First of all, I trimmed it to width (having trimmed an offcut to width first to use as a reference):

80_trimming_lid_to_width_800.jpg


I then planed the lid down to the thickness of the groove, leaving it at a rather tight fit:

81_planing_lid_to_thickness_800.jpg


A chamfer was applied to the underside (now making it a more comfortable fit) on three sides:

82_chamfering_lid_underside_800.jpg


The lid was then slid into the box and the length marked:

83_marking_length_800.jpg


I chopped it to length in the usual way (for once, the cross-cut saw was actually doing what it's good at!)

84_chopping_to_length_800.jpg


To clean up the end, I used a makeshift shooting board:

85_makeshift_shooting_board_800.jpg


Amazingly, the plane was still managing to take some nice end-grain shavings despite all the abuse and lack of sharpening it has endured:

86_end_grain_shavings_800.jpg


The last job was to chisel out a notch for use as a finger pull:

87_chiselled_finger_pull_800.jpg


Finally, I can call it done:

88_done_1_800.jpg


I guess it could be argued that it's not finished without some, well, finish, but I've decided it's a perfectly serviceable and attractive box without any oil or whatever. That's partly to keep the tool count down, but mainly because I really can't be bothered to do any oiling!

89_done_2_800.jpg


This photo shows the filled in gaps and the re-glued snapped-off bit: neither are especially obvious in my opinion:

90_filled_in_gaps_800.jpg


The final tool list consisted of the following 8 tools:

92_tools_800.jpg


A Stanley 4½, a combination square, a 3 mm chisel, an F-clamp, a pencil, a (poorly chosen) cross-cut saw, some glue and a leather strop. No vice, no bench dogs, no sharpening stone, no cloths/rags and a distinct lack of any common sense shown by trying to do this challenge!

All that was left to do was a quick photo with the 8 tools I used to make the box:

91_box_and_tools_800.jpg


Given how difficult some of the operations were, I really don't think I'd do it again, but I also think it was worthwhile in some ways as I learnt a few things and came to appreciate a few things more.

For example, I really grew to appreciate how good a rip saw is at ripping & resawing! I was really impressed with how well the plane blade and the chisel continued to cut with regular stropping and no sharpening stone attention. They'll get some TLC now that the project is finished, but they coped admirably. With hindsight it would have been better to pick a slightly more robust F-clamp as that little one was quite hard to tighten sufficiently for some operations. I also learnt that a plane blade doesn't make a very good (for which read: safe) marking knife: I've picked up a lot of cuts and nicks from this project! Finally, I'm sure the next few times I pick up a plough plane or router plane I'll be very appreciative of how much easier they make things compared to just a chisel.
 
Quite a fun challenge!
It can be argued though, that the tool you made (is that a Doe's Foot?) also needs to count, even though you made it with the minimal toolkit and the board :D
 
Great challenge and well done for doing it. I can’t help thinking you took it a bit far though. For example you didn’t count sharpening but you didn’t use an out of the box plane. Should you have counted what you have used before, or indeed after, unless you never sharpen your tools again. Similarly I don’t think consumables should count, like glue and wax.
Anyway your challenge and your rules. Just not sure what it’s demonstrating.
 
Quite a fun challenge!
It can be argued though, that the tool you made (is that a Doe's Foot?) also needs to count, even though you made it with the minimal toolkit and the board :D

I didn't make or use a doe's foot. I did notch a board as an upright planing stop: I guess that's what you mean.

It was difficult to decide where to draw the line. I chose to class anything that was a single piece cut from the source timber as "free", but anything where two bits were joined together counted as a tool.

Great challenge and well done for doing it. I can’t help thinking you took it a bit far though. For example you didn’t count sharpening but you didn’t use an out of the box plane. Should you have counted what you have used before, or indeed after, unless you never sharpen your tools again. Similarly I don’t think consumables should count, like glue and wax.
Anyway your challenge and your rules. Just not sure what it’s demonstrating.

I probably agree that consumables shouldn't count & I certainly take your point re: sharpening.

At the end of the day, I had to pick a line somewhere and those were the rules I chose.

Part of the reason I wanted consumables to count was to avoid the minimal box that was 5 bits of timber nailed together. You could do that, but I'm counting the nails!
 
Once the glue had been left for enough time to dry, I planed the face on the side with the gap-fillers and the bit that had previously snapped off. Once that was done I got back to the lid. First of all, I trimmed it to width (having trimmed an offcut to width first to use as a reference):

80_trimming_lid_to_width_800.jpg


I then planed the lid down to the thickness of the groove, leaving it at a rather tight fit:

81_planing_lid_to_thickness_800.jpg


A chamfer was applied to the underside (now making it a more comfortable fit) on three sides:

82_chamfering_lid_underside_800.jpg


The lid was then slid into the box and the length marked:

83_marking_length_800.jpg


I chopped it to length in the usual way (for once, the cross-cut saw was actually doing what it's good at!)

84_chopping_to_length_800.jpg


To clean up the end, I used a makeshift shooting board:

85_makeshift_shooting_board_800.jpg


Amazingly, the plane was still managing to take some nice end-grain shavings despite all the abuse and lack of sharpening it has endured:

86_end_grain_shavings_800.jpg


The last job was to chisel out a notch for use as a finger pull:

87_chiselled_finger_pull_800.jpg


Finally, I can call it done:

88_done_1_800.jpg


I guess it could be argued that it's not finished without some, well, finish, but I've decided it's a perfectly serviceable and attractive box without any oil or whatever. That's partly to keep the tool count down, but mainly because I really can't be bothered to do any oiling!

89_done_2_800.jpg


This photo shows the filled in gaps and the re-glued snapped-off bit: neither are especially obvious in my opinion:

90_filled_in_gaps_800.jpg


The final tool list consisted of the following 8 tools:

92_tools_800.jpg


A Stanley 4½, a combination square, a 3 mm chisel, an F-clamp, a pencil, a (poorly chosen) cross-cut saw, some glue and a leather strop. No vice, no bench dogs, no sharpening stone, no cloths/rags and a distinct lack of any common sense shown by trying to do this challenge!

All that was left to do was a quick photo with the 8 tools I used to make the box:

91_box_and_tools_800.jpg


Given how difficult some of the operations were, I really don't think I'd do it again, but I also think it was worthwhile in some ways as I learnt a few things and came to appreciate a few things more.

For example, I really grew to appreciate how good a rip saw is at ripping & resawing! I was really impressed with how well the plane blade and the chisel continued to cut with regular stropping and no sharpening stone attention. They'll get some TLC now that the project is finished, but they coped admirably. With hindsight it would have been better to pick a slightly more robust F-clamp as that little one was quite hard to tighten sufficiently for some operations. I also learnt that a plane blade doesn't make a very good (for which read: safe) marking knife: I've picked up a lot of cuts and nicks from this project! Finally, I'm sure the next few times I pick up a plough plane or router plane I'll be very appreciative of how much easier they make things compared to just a chisel.

Very impressive work. An excellent technical challenge, though certainly not one I am going to try. Looks a lot like hard work!

Could make for a very interesting extension to it - what would be the minimum starting point to be able to create not just a single box, but a functional workshop. What would be your priorities? I would imagine it would be heavy on grinding / sharpening and tool steel itself.
 
a much bigger box

I went to Newfoundland Canada for a year or two late sixties, early 70s - housebuilding in the city was usual N American tech, but in the small outports there were still some full two story houses built the old way - basement foundation rocks and/or poured concrete, then from there to the roof, using bought-in windows but otherwise just sawmill product the whole of this large box was made using just handsaw, claw hammer, wickedly sharp adze, one chisel, tape measure and plumb line. The house was often constructed by the owner or a relative plus a mate, in one season, often while doing his regular job. In case you wonder the roof there was not usually shingles, but tar/bitumen 'tiles' stuck on to tongue and groove.
 
After spending all of last year working on the tool chest (and using pretty much every tool in my armoury), I thought I'd choose something a lot quicker for my next project. However, I'm keen to stretch myself a bit and, while thinking about options I came up with what struck me as an interesting idea:

Make a wooden box using as few tools as possible.

That sounded to me like a fun challenge, so I thought I'd write down a few rules that I'm going to adhere to and I thought I'd share them in case anyone else fancies having a go as well.

Challenge rules:
  1. The box must be made from ONE plank of rough-sawntimber.
    • Two planks are allowed if (and only if) they're different timber species (e.g. one for the box frame and another for the top & bottom).
What about one branch of green wood? Bought myself a machete earlier this year but still haven't used it in anger for a practical task.
 
Very interesting project and a great result.

... tool you made (is that a Doe's Foot?) also needs to count...:D
Nope, tools you make don't count!

To quote the late and much missed Terry Pratchett

... the only tools a dwarf needed were his axe and some means of making fire. That'd eventually get him a forge, and with that he could make simple tools, and with those he could make complex tools, and with complex tools a dwarf could more or less make anything.
 
Very impressive work. An excellent technical challenge, though certainly not one I am going to try. Looks a lot like hard work!

Thanks. It definitely was hard work, especially since I was stupid enough to choose a cross-cut saw instead of a rip one. To be honest, with a rip saw instead of a cross-cut saw & with the addition of a vice, a sharpening stone and something better for groove making (plough plane or router plane), it would have been quite straightforward.

Could make for a very interesting extension to it - what would be the minimum starting point to be able to create not just a single box, but a functional workshop. What would be your priorities? I would imagine it would be heavy on grinding / sharpening and tool steel itself.

That's an interesting question. I'd definitely think some grinding / sharpening tools would be high on the list. If making blades, then a blowtorch or forge would make a lot of sense as the steel could be worked soft & heat treated afterwards.

Add a saw or two & some saw horses and I guess you could make most other things with enough time & inclination.
 
Back
Top