Sharpening a hand plane

UKworkshop.co.uk

Help Support UKworkshop.co.uk:

This site may earn a commission from merchant affiliate links, including eBay, Amazon, and others.
Fumbles - the oilstone (it's an oilstone, you need to use standard 3 in 1 oil on it, not water) has two sides. One side is a coarse side. The other side is a fine side. You use the coarse side for grinding an edge on a blunt chisel/plane iron. You then use the fine side for getting the edge that you've ground sharp. So you need to switch over to the fine side, put a lot of oil on (first time you use it, it'll soak up more oil than it might normally) and give that a try.

It's fairly rare to actually use the coarse side. You can hone the edge back to sharpness a lot of times on the fine side before needing to grind it back to a fixed angle and get going again. I use my tools a couple of times a week and sharpen them once a session maybe, so I find that I go months before touching the coarse oilstone.

Another general piece of advice, most of the 'tool shaped objects' that you can buy in DIY Megastores are over priced and useless. Ditto for cheap tools over the internet. You either want to buy old tools from ebay or car boots (and be prepared for the odd fettling session) or spend serious £££ on buying decent tools from the small number of good tool manufacturers that exist (eg Veritas/Lie Nielsen etc).

Also, it Paul Seller's says it, it's right. You can't go wrong following what he says (despite what some on here might say). I do all my sharpening freehand, it's dead easy, so that's a good way to go. If you want a good oilstone, these are good:

http://www.classichandtools.com/acatalo ... tones.html

I have a fine and a coarse. You don't need a medium, don't worry that it's not there. Also a leather strop is worth getting.

Everyone else (especially the usual suspects) please don't get into discussions about honing angles and different methods. Lets just stick to get the poor chap going with a simple oilstone shall we? While yes, really cheap ones may be c**p, it'll get the iron sharp enough for a beginner to get going, which ultimately is the aim here isn't it?
 
morfa":1jwpsx0v said:
......
Everyone else (especially the usual suspects) please don't get into discussions about honing angles and different methods. Lets just stick to get the poor chap going with a simple oilstone shall we? While yes, really cheap ones may be c**p, it'll get the iron sharp enough for a beginner to get going, which ultimately is the aim here isn't it?
Agree. Keep it simple. Cheapo stone will do for starters and making it work is a good training exercise for a beginner.
 
The Stanley stone should be fine - there are some properly useless ones out there.

Flip it over, fill it up, put the guide aside, watch a Paul Sellers video and see how you go.

Stropping the blade on a bit of leather afterwards will help too.
 
Agree. Keep it simple. Cheapo stone will do for starters and making it work is a good training exercise for a beginner.

Well, now I can post links, here's a video of what i'm doing:

http://s116.photobucket.com/user/mmmbop ... e.mp4.html

I'm having a go at doing it freehand, and trying to do it the Paul Sellers way (ie. lifting the blade as you push it forwards). In the video I pass it over the block 60 times.

The oil that i'm using came with the stone, so it's recommended. I'm also using what I think is the fine side. The last time I picked it up I thought the darker side was the hard side, but now i'm not so sure. It's hard to tell just by dragging your finger across it.

At the end of the video I try to show how sharp (or dull) the blade is. I press it against some sandpaper, and you can see that it doesn't really cut it. I found this method of testing the sharpness of a blade here.

Am I doing it correctly?
 
Fumbles,

If you fancy a trip up to my workshop just outside Diss in South Norfolk I will happily give you a couple of hours of my time and go through some different sharpening techniques so that you can decide for yourself what will work best for you!

If you want to take me up on the offer PM me your phone number and I will give you a call to arrange a mutually convenient time.

Don't worry there wont be any charge but donuts go very nicely with coffee :wink: :wink:

Rog
 
fumbles22":15m689gg said:
Am I doing it correctly?

No.
It looks like you're tickling it and no sharpening the end.
2 hands, medium to firm pressure.
Start at the back of the stone with the blade at 30 (or whatever angle you choose)
Run the full length of the stone whilst slowly tilting back.
You only want to tilt a small amount (1pm to 2pm on a clock) and ideally this tilt should start 1/2 way along.

This is how I do it (or as well as I can explain)
Others will do it differently.
 
As JustBen says above.
It looks a bit steep. You want to start pushing forwards with the blade at 30º max and dip it gradually as you go forwards. Perhaps get a visual reference for the angle such as a 60/30 school protractor, or just draw 30º on a card or something.
Use the full length of the stone in one steady movement. Flood the stone with lots of oil - stand it in a plastic box or something until you make yourself a proper box with a lid.
Getting there!
 
It's nice to know what i'm doing wrong.

I'm going to try sharpening it again, but this time i'm going to:

1). Flood the stone in baby oil in a tupperware
2). Make a plastic triangle with an angle of 30 degrees out of a milk bottle
3). Grip it firmly with both hands, push down on it
4). Use the full length of the stone
5). Only tip it back slightly about half way down the stone

I also think i'll do it slowly so I get a "feel" of it.

I also think i'll leave out the "tipping it to one side" part for now too.

I'll post an update later on this afternoon. I might do a video again.

If you fancy a trip up to my workshop just outside Diss in South Norfolk I will happily give you a couple of hours of my time and go through some different sharpening techniques so that you can decide for yourself what will work best for you!

That's really nice of you Dodge, but I haven't got enough money to go anywhere at the moment. I've been hoarding £179 in my bank account but, since inflation is 8-9% including energy and food, and my bank account was only going to offer 1% interest if I put it in an ISA, so it made sense to spend it.

I still have a bit left (£80 or so), but i've got to go to summer school in July so i'll probably need it for then.
 
One other thing that I've not seen anyone explain on this thread, is that you need to get a 'burr' on the edge. You can't see this very well, it just looks like a small ridge on either side of the edge. Once you've built the burr up over the whole edge, you just need to swap the iron over and one or two swipes will clean it off and you'll be nice and sharp. The easiest way is to feel across the edge with your thumb after about 10 strokes, you'll probably have a burr going at that point.

Hopefully someone else can explain this part if it better than me. Any takers?
 
I came on here with a question about the "burr" you're talking about. First, i'll post what i've been doing:

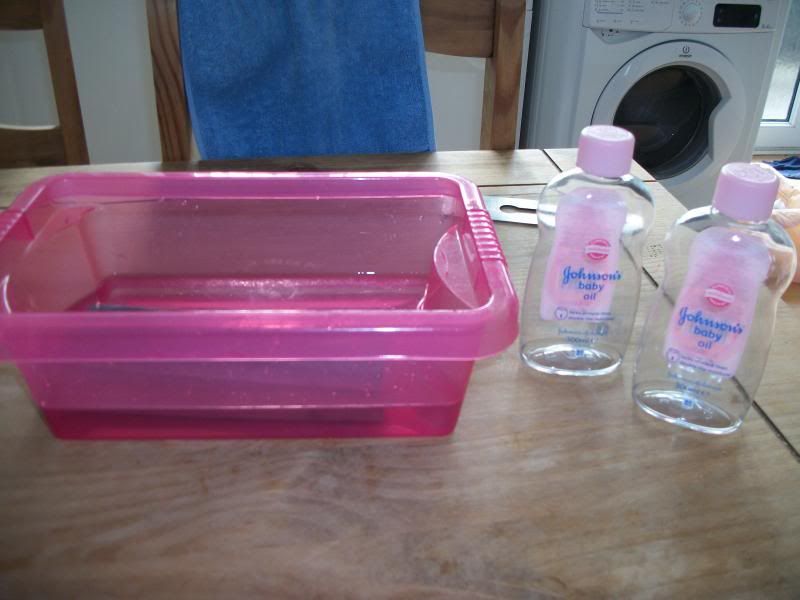
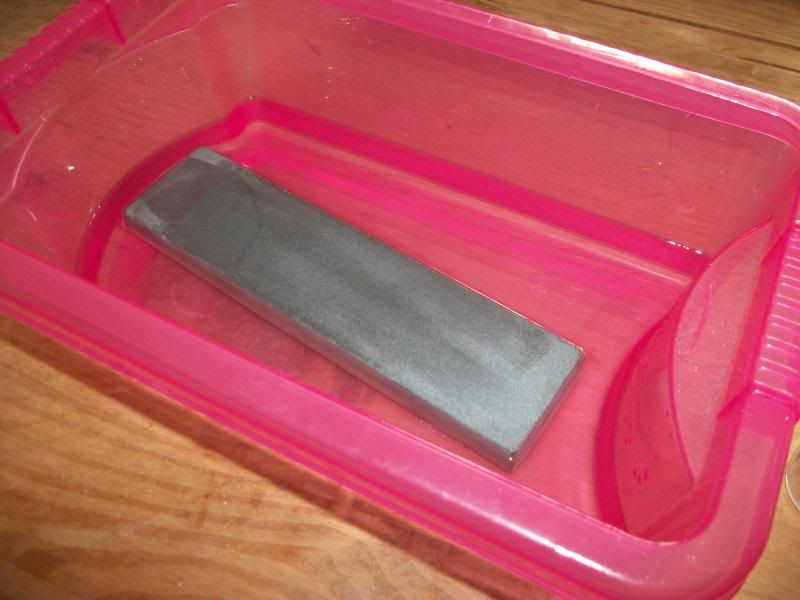
I started buying two bottles of Johnsons baby oil, and leaving the stone in it for 5 hours.


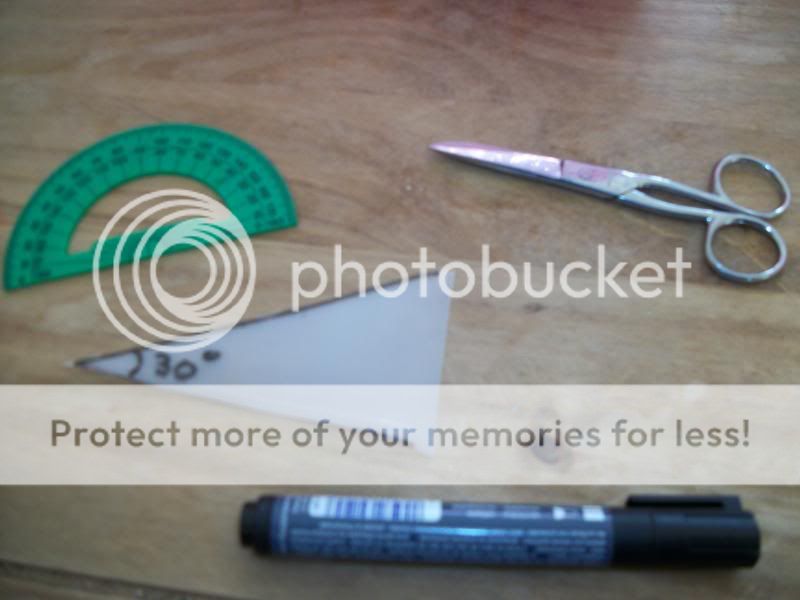
I also made a 30 degree angle out of a milk bottle:


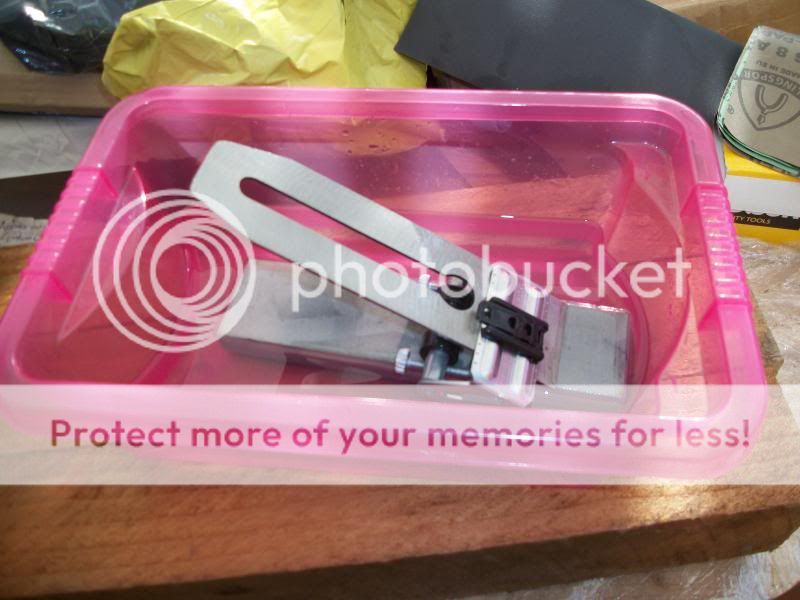
Unfortunately, the sides of the container stopped me using it properly. When I would pull my hand back, it would hit the sides of the container making it impossible to maintain an accurate 30 degree angle. I had to go back to using the honing guide:


Here's a video of me attempting to sharpen in the blade. My Mum was the camerawoman!

http://s116.photobucket.com/user/mmmbop ... e.mp4.html

At the start i'm trying to show you that the blade is set to 30 degrees.

It's still not that sharp. At the end of the video I try to show that it still isn't cutting the paper, but it's not that clear. One of the problems is that the oil soaks into the paper, making it look like a clean cut when nothing has been cut at all. The first time this happened I thought "Ah YES!", but I was disappointed afterwards when I tried to cut some of the hair on my arm with it. On the plus side, although it isn't cutting my hair directly I can help it along by clamping the hair in place with my finger. When I move the blade through it, some of the hair is pulled out at the roots but some of it is cut. This is progress!

When I feel along the side facing upwards in the video, I can feel a "burr" there. I turned it over and gave it 10 clean strokes. I can still feel a bit of a burr still there. Should I keep going? Is this a sign that i've tried sharpening it for too long?
 
The stone will be loaded with oil now so it can come out of the container ;) Store it in a plastic tub or bag when not using it, a good first project would be to make an oilstone box!

Don't get too obsessed with sharpening, plane irons are for planing wood not shaving your arms!

A copy of "the essential woodworker" by Robert Wearing is a great book for when you start out, it will instruct you on the most important basics.
 
The dark side of the stone is the coarse grit. You need to start on this and continue until you obtain a burr or wire edge on the back of the blade. Only the do you hone on the light stone, repeating until the burr /wire is reduced.

The single most important step in sharpening is the hone to the back of the blade. You cannot get a sharp edge without doing so. The burr/wire lets you know that you have honed across the bevel to the back. This wire must be removed at the end. Your video shows you failing to do any of this.

Now the result is still unlikely to be sharp as the smooth side of the oilstone is only about 1000 grit. The cheapest way to a sharp edge at this point is either 2000 grit wet and dry sandpaper or green compound on leather or hard wood.

Regards from Perth

Derek
 
Exactly.

If you produced a burr...which you say you did....then what you have on the edge is a hook....the metal edge is hooked over.

If you break this off...then you will have a sharp edge.

When you say you "turned it over and did ten strokes on the other side" ....I assume (hope) you mean you laid the other side down FLAT on the stone and flattened it to remove the burr?

If you are putting a bevel on the other side then this is where you are going wrong and you have to remove this back bevel (start again).

What you are trying to achieve here is two flat surfaces of metal meeting together at a perfect point. To do this you try to get the flat side (called the "FACE") as flat as possible all the way up to the edge and the bevel side needs to be created to the edge so it forms that burr either on the stone coarse side or on a wheel.

I find it easier to flatten the face perfectly first and then turn over and grind the bevel until a burr is formed which you can check with your fingernail. You should be able to feel it.

You can remove this burr on the palm of your hand but at this stage and given you are still learning, I would suggest you just remove it by flattening the face again.

Once you have done this you can hone a secondary bevel at a slightly higher angle to really sharpen the iron.

Jim
 
See Jim and Derek did explain it better than me. As others have said, there's enough oil on it now, I'm sure, you can take it out of the tub.

Normally for me, I'd do about 10-15 strokes on the fine side, at 30 deg or so. Check for a burr and if it's there (it normally is) then I'd put it flat on the oilstone and do one stroke, really putting pressure on the iron. Then lift and check the burr, if it's gone, then you're good to go. If it's not another stroke and check. Repeat till it's done.

Personally I've never felt the need to bother with a secondary bevel, so just ignore that for now (it's a extra complexity that's not needed yet).

I'd like to second the recommendation of getting the Essential Woodworker by Robert Wearing. It can be bought here - http://www.classichandtools.com/acatalo ... Press.html
 
Dodge":3ejo2qmd said:
Fumbles,

If you fancy a trip up to my workshop just outside Diss in South Norfolk I will happily give you a couple of hours of my time and go through some different sharpening techniques so that you can decide for yourself what will work best for you!

If you want to take me up on the offer PM me your phone number and I will give you a call to arrange a mutually convenient time.

Don't worry there won't be any charge but donuts go very nicely with coffee :wink: :wink:

Rog

You probably don't realise what an opportunity this offer is if you are interested in getting into woodworking as a hobby, Just have a look at past post of Dodge's.

Are you a student? Find out how much a student return rail ticket is. I would be willing to subsidise your fare and will start with an offer of £5.00. I bet there are others who would donate a pound each to get you there. You may even have enough left over to buy Roger doughnuts.

I do this on the understanding you give us all a write up of your visit.

Anyone else interested in helping this guy out? After all Roger has volunteered his time.

Mick
 
MickCheese":2wowil4r said:
Anyone else interested in helping this guy out? After all Roger has volunteered his time.

Mick

I'm just down the road in Stanford le Hope (and 5 mins from the station) if that's any help?

(I might not be the best teacher though!)
 
When you say you "turned it over and did ten strokes on the other side" ....I assume (hope) you mean you laid the other side down FLAT on the stone and flattened it to remove the burr?

I did turn it over and I rubbed it flat. There was still a burr there after the first 10 strokes so I rubbed it a few more times until I couldn't feel it. The end result still isn't that sharp. I loaded it back into the plane and managed to get a weak shaving when I did it on one of the corners of a piece of wood. It got stuck everywhere else!

Now the result is still unlikely to be sharp as the smooth side of the oilstone is only about 1000 grit. The cheapest way to a sharp edge at this point is either 2000 grit wet and dry sandpaper or green compound on leather or hard wood.

I think this is definitely my problem. I watched this and couldn't believe how sharp Ray Mears got his knife! There's a 6000 grit waterstone on ebay for £29.50 so I might have to bite the bullet and buy that....next month. I'm down to my final £70 so there is room in the budget for it, but i'd be completely broke at summer school.

You probably don't realise what an opportunity this offer is if you are interested in getting into woodworking as a hobby, Just have a look at past post of Dodge's.

Are you a student? Find out how much a student return rail ticket is. I would be willing to subsidise your fare and will start with an offer of £5.00. I bet there are others who would donate a pound each to get you there. You may even have enough left over to buy Roger doughnuts.

I do this on the understanding you give us all a write up of your visit.

Anyone else interested in helping this guy out? After all Roger has volunteered his time.

Mick

A train website put Benfleet to Diss at £90, which is a pretty penny. I have to say, this is the best forum i've been a part of. I've been a member of (and continue to be an active one on some of them) Computer forum, bike forum, maths forum, maths board forum, physics forum, Guild Wars 2 forum, Yu-gi-oh! forum (when I was 14, don't laugh), linux mint forum, Stack Overflow forum and C++ forum, and I have never met people offering their time and even offering money to help someone out. It's nice to know that there are still nice people out there, since I meet so many unkind people every day.

I'd also like to say that i'm technically a student, but probably not the type you're imagining. I'm doing maths on The OU and i'm due to graduate this October. I've got two modules on the go at the moment; SMT359 Electromagnetism and MSXR209 Mathematical methods and modelling. Like most OU students, i'm older than the norm, 24 years old in fact. I spend most of my mornings and afternoons doing work for these, and I used to spend the evenings watching TV and playing video games until I realised that they're all exactly the same. What little woodworking i've done so far has actually been interesting, so I want to dive right in and see what happens.

Watch this space! I'll probably sleep on it tonight, and end up buying a 6000 grit Japanese water stone tomorrow.
 
fumbles22":3gsrk13t said:
Watch this space! I'll probably sleep on it tonight, and end up buying a 6000 grit Japanese water stone tomorrow.

A sheet of 2000 grit SiC is 50p - save your money.

BugBear
 
I think we are losing focus on what the problem is here.

Before we get into yet another sharpening debate...about which is best..this or that method...I think you are doing something basically wrong with your use of the plane. Your comment about it "getting stuck" tends me to think this is more of a problem than just sharpening.

Starting from the beginning take these steps and let's see how we go.

1) Get that burr back again using the coarse side of the stone you have.

2) Flip the iron over onto the same coarse side and remove that burr but putting the face side down and making sure it's perfectly flat to the stone and then rub it backwards a few time to dislodge the burr. Keep checking until it's gone.

3) Put the iron back in the plane and back it off so that there is nothing protruding. Try using the lateral lever to get it lined perfectly straight in the mouth.

4) Get a small piece of wood and rub it across the mouth from toe to heel whilst SLOWLY adjusting the depth wheel to push the edge into the mouth.

5) When you feel the edge catching on the piece of scrap wood STOP.

6) Now try to plane with it along one side of a piece of softwood. If it catches, try the other direction and see if that's better.

Let us know how this works.

Jim
 
Back
Top