Plane Cabinet - WIP!!!

UKworkshop.co.uk

Help Support UKworkshop.co.uk:

This site may earn a commission from merchant affiliate links, including eBay, Amazon, and others.

eoinsgaff

Established Member
Joined
5 Nov 2009
Messages
336
Reaction score
11
Location
Co. Kerry, Ireland
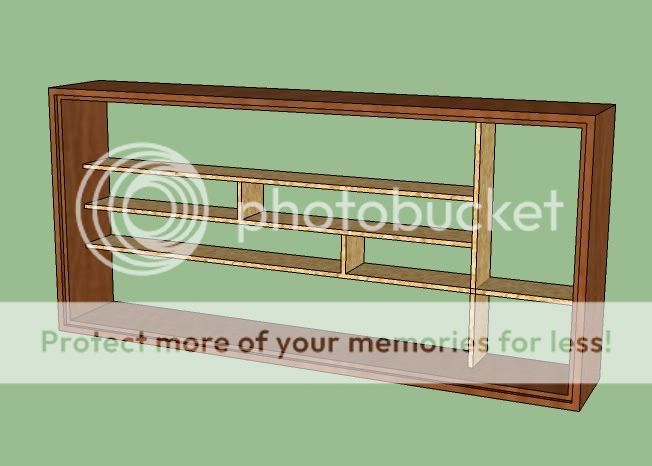
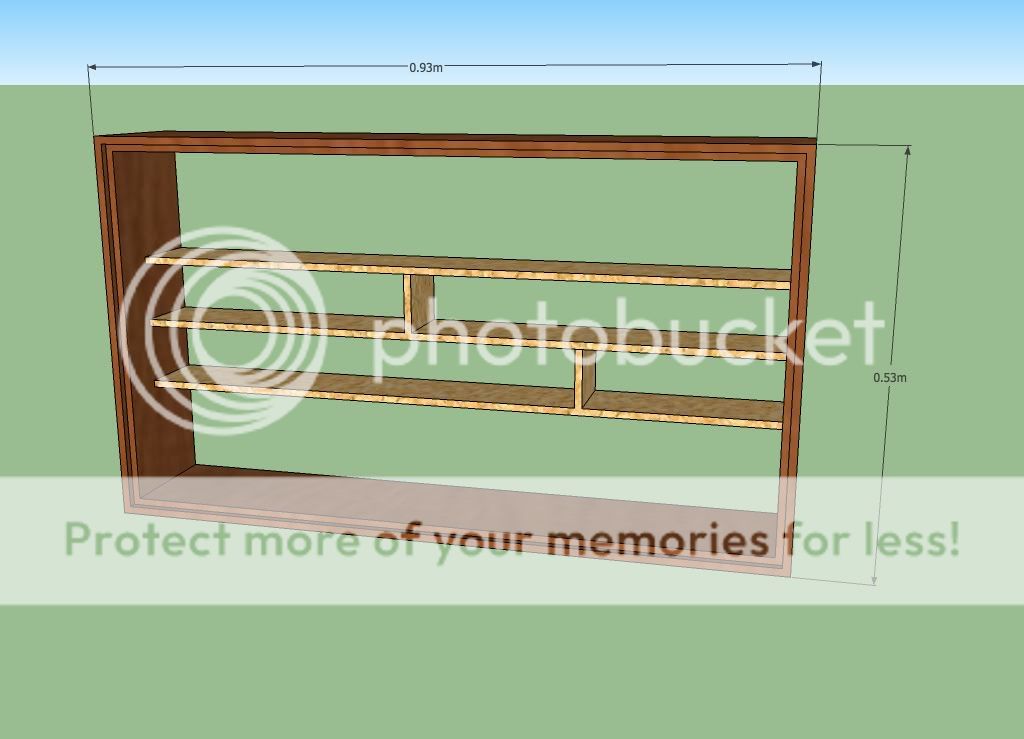
I'm planning a cabinet to store my planes over the coming months and I have a number of questions. I'll start with one first.

The primary purpose of this cabinet is to prevent rust. The planes are stored indoors but the house is very damp. I use various rust inhibitors but after a couple of hours use its easy to forget to reapply the wax or what ever.

I've heard of VCI rust inhibitors being used. Has anyone an idea if a VCI is available to spray onto a decorative felt or is there a similar approach I could consider.

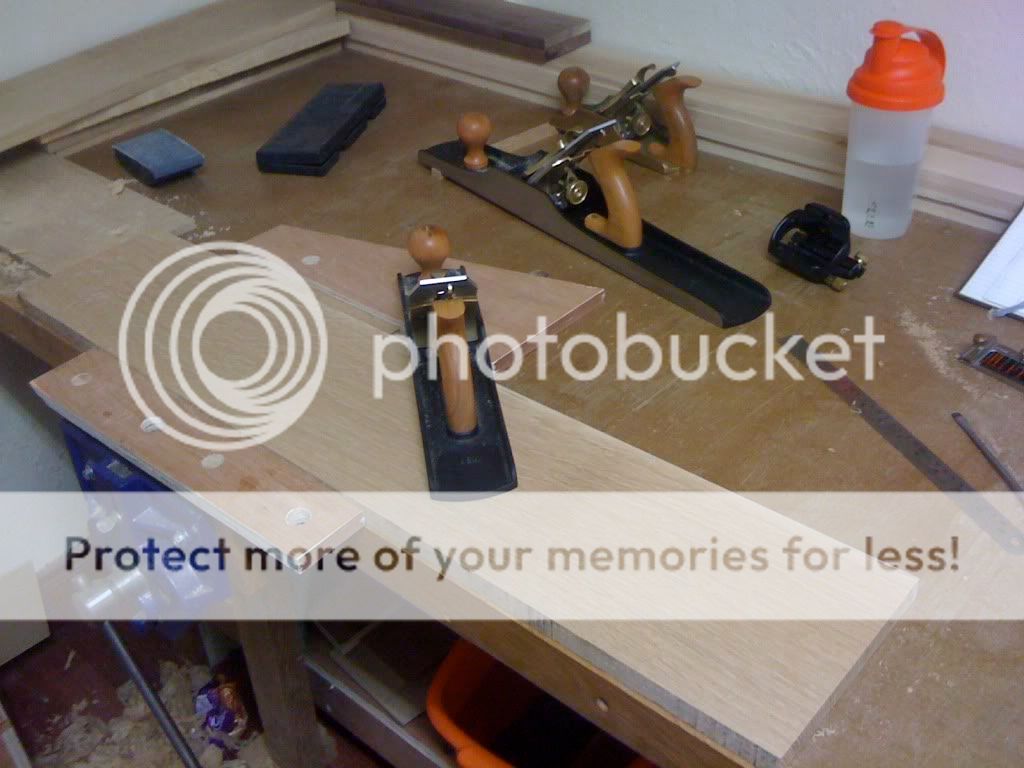
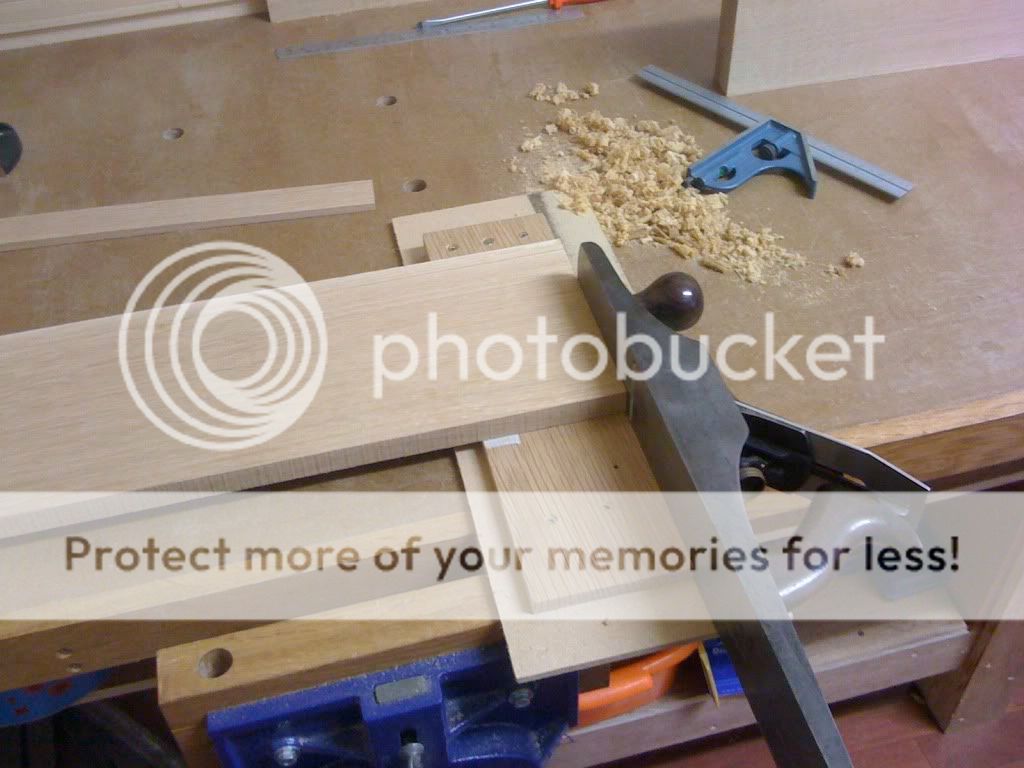
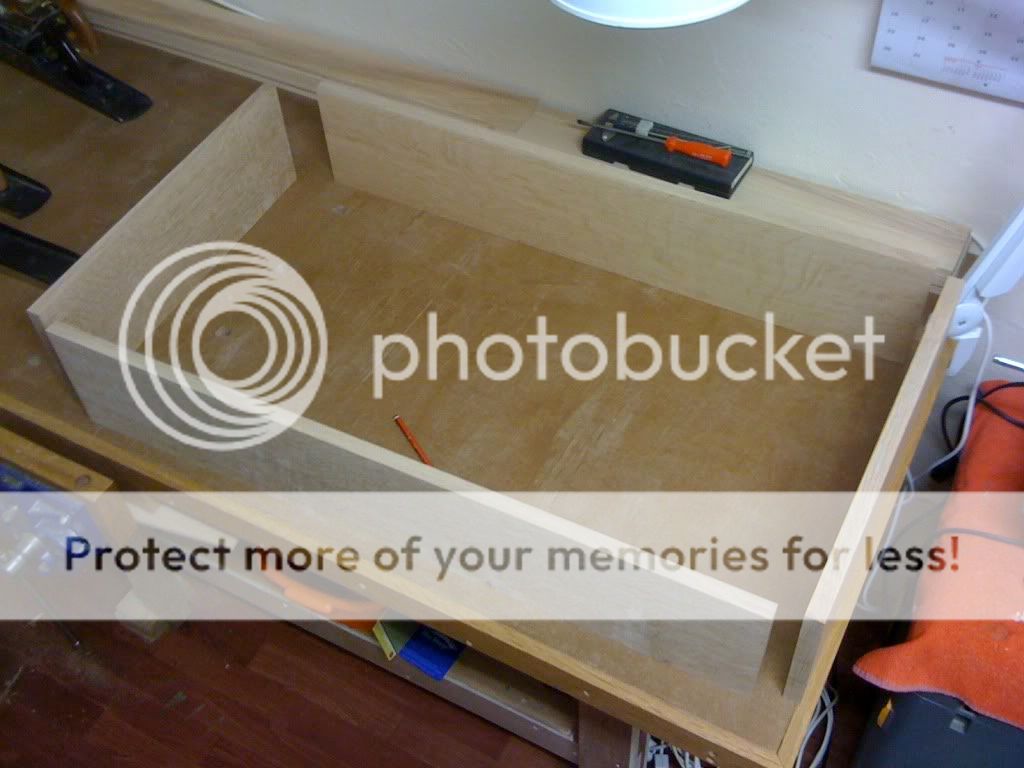
One must appreciate the difficulty of the conditions where I have my tools. I have a temporary plywood box, sealed pretty tight, plenty of silica gel packs in place and still the tools rust if they are not lathered with wax. Very frustrating...
 
I have this problem in my garage. i just leave a low watt light bulb running. I think it is 7watt. Never had any problems since.
Plus it gives a nice glow when you open the box.
 
I believe Bob9fingers uses a very successful electrical method to keep the dreaded rusticles at bay...might be worth a PM to see how it's done? - Rob
 
Hi

I have used dedicated low power wardrobe heaters in the tropics with success (probably a slightly safer but more costly variant on the low power light bulb). You can get them on e-bay. Another option is a low power greenhouse heater as a general space heater (again on e-bay)

I use boxes of absorbent crystals in wardrobes here in Thailand to protect clothing and leather shoes. They are very effective in removing moisture and last about six months in a very high humidity environment. I was surprised to see a very similar product at a discount stall at a local auction near Ipswich. Each box cost a pound and will absorb around a pint of water. I have put a couple in each of two large tool boxes where I keep my planes, chisels and other easily damaged items. Given the restricted space, they should last a reasonable time.

Worth a try if you can find them.

Regards
Richard
 
Thanks for the replies so far.

To be honest I'm not keen on any form of electrical approach. The tools are left unattended for weeks at a time so the fear of a fire and the resultant heart failure means I'd prefer a different approach.

For those reasons I like idea of the absorbent crystals. I must check this out further. Is there a particular trading name I should look out for?

I'm still interested on opinions on the VCI option. I wish to give a felt backing to the cabinet anyway so it would be great if this could be used for rust protection as well. I'm sure I recently came across a new drawer liner product of this nature but I'm damned if I can remember where.

Regards

Eoin
 
I'd watch out on the felt, Eoin. As I understand it, not all felt is created equal and some of it contains nasties that actively cause rust - I believe you need to make sure it's wool felt as other fibres are the ones that need the nasties to make them felt together. Secondly, if any moisture is around the felt will tend to absorb it and hold it against your planes so they rust nice and evenly.

Those little tins of rust inhibitor that give off anti-rust vibes (or whatever it is they do) work pretty well. Having said which, personally I had some reaction with the brass on some of my tools that were too close to it, so I wouldn't use them again. But maybe I was just unlucky.
 
A slightly different approach is to use a sacrificial block. If you connect your planes by a conductive material (i.e. metal wire) to a large lump of a slightly more reactive metal (such as zinc if I recall correctly), then this block will preferentially corrode. Then you just need to replace this block when it's more or less corroded away.

That at least is the theory, and works well on oil rigs and the like.
 
ALF, of course. That makes the world of sense. How could I miss that? I'll have to consider another liner, or try for the pure wool one.

Samharber, I must look a little more into that. Not sure if its what I'm looking for but maybe it could be adapted with a little thought.

Richard, thanks for that. It'll be my first port of call as it appears to be the simplest and will work for a while at least.

I'm still pondering the VCI option. Must do some further research...

Thank you everyone

Eoin
 
Eoin,

You should be able to get those moisure absorbant crystals from a caravan/camping supplies shop. We have bought them in the past for keeping damp at bay when storing the caravan for the winter.

Hope this helps.

Mark
 
Why don't you line the cabinet with cork, thats what I did with my cabinet, it also protects the tools.

For rust prevention I use silica gels bags and those little pot things that come form Axminster, no rust to date.
 
como":jujv88dc said:
Eoin,

You should be able to get those moisure absorbant crystals from a caravan/camping supplies shop. We have bought them in the past for keeping damp at bay when storing the caravan for the winter.

Hope this helps.

Mark

There's a Go Outdoors near us - bought a bag with several KG in it for not much. I have it in the "other" car when it's not being driven to keep the interior free of moisture & therefore whatever that brings with it.

HIH

Dibs
 
This idea got me thinking.

Project file:
http://ninet.org/woodwork/sketchup/PlaneCabinet.skp


Notes:
Oak for the outer frame.
Dark wood inset on front door.
Can't decide what to use for the back, you could use oak but if you attach to the wall do you want to damage decent wood. So perhaps MDF then on the inside line with felt.

The plane slots are aprox and for the shorter plane either lower the roof of each or insert mini shelves for spare parts.

The plank on the inside of the front door should have holes cut to hang chisels.

The rest of the inside could be customised as needed.

PlaneCabinet.png
 
Thanks guys for the help to date. I think with the absorbent crystals, a VCI capsule and impregnated liner should do the trick! For now anyhow. However, I have another problem I like some advice on. Firstly, the following is roughly what I had in mind.
PlaneCabinet.jpg

There will be a back to this of course. My issue is that I'd like to add a full glass front, preferably opening upwards. For the rust problem its important to keep the cabinet airtight so I was considering a rubber seal in the rebate around the front as well as the glass sitting in here.

My problem is hinging the glass upward. I've seen some Blaum mechanisms which allow for a soft, upward opening but these would be too unsightly inside the glass door. Also, regular glass hinges would prevent a neat seating of the glass into the rebate so something like the regular kitchen door hinges would be useful.

Have I made this problem clear? If not, let me know. If I have, then is there any ideas out there.

Regards

Eoin
 
So, no ideas then??? :D

In the meantime I've started on the outer frame (with a changed layout) and I'll put up a few WIP photos over the next few days. However I've still not resolved my problem with the proposed glass door so any ideas would be appreciated.
 
OK, my first WIP and my first full project, if I manage to complete it of course.

I got a nearby shop to plane and thickness QS white oak for me.
IMG_0244.jpg

This gave me a problem as the stock turned out to be pretty poor in places so I had to revise my design to account for less wood. After much deliberation over a few days I finally decided upon the sections of oak I could use and reduced the cabinet accordingly.
PlaneCabinetRev1.jpg

I cut the sections I needed...
IMG_0246.jpg

...and began handplaning to the finished surface.
IMG_0249.jpg

While I was aiming for a fine finish, it quickly became clear that I would not be able to plane out all the defects caused by the p/t taking out lumps of gnarly grain. As the cabinet is to used to store my planes, its probably ok to go for an unfinished look, or maybe just an oil finish. It remains to be seen.
Finally I had to arrange the sections as I intended to build them.
IMG_0251.jpg

One of the long, horizontal pieces was quite poor and I couldn't decide wether to use it on the top or the bottom. Which would be more visible? I then realized that since the cabinet was to have a glass front the underside of the top piece would be most visible. It was definitely worth taking my time with that one.
Dovetails next to joint the four pieces in the last pick. I'm going to do a mock up of the dovetails so as to get as decent balance between the tails and the pins. I've done some neat dovetails in the past (and many terrible ones) that have been let down by a poor pin to tail ratio. I'm not sure how to approach this so I'll do a bit of guess work on the mock up.

I still need advice on the glass door to this cabinet as asked previously. Help would be really appreciated.

Thanks for looking

Eoin
 
OK, time to start the dovetails.
IMG_0254.jpg

When laid out like that, I'm always reminded of a set of antiquated surgeons wartime tools.

I marked out the doves tails as per the mockup I had made. Still not a perfect proportion but better than I had before. I'd welcome comments on this point. I ganged up the two boards to cut tails, not only to speed up the operation, but to use the longer line on top of the tails to make it easier to keep my saw cuts square.
IMG_0255.jpg

When I had the tails cut I got a little anxious. The pins are quite small and likely to be quite tricky.
IMG_0256.jpg

Thats it for now. I'm looking forward to finishing these dovetails. This hard oak is not going to give me much room maneuver so I'm a little apprehensive.
Thanks for looking in,
Eoin
 
eoinsgaff":2shs8jnz said:
When laid out like that, I'm always reminded of a set of antiquated surgeons wartime tools.
Heh, I know what you mean. It's the piercing saw looking a bit like a bone saw, I think... And I deduce you are a student of Cosman. Looks good so far, and the oak will certainly be a test; real world stuff instead of all these darn demonstrations with readily compressible timbers. *gets off soap box owing to danger of ranting* :wink:
 
Nobody's come up with any magic hinges to hold a frameless glass door up when hinged along the top.

If I were you, I'd make a slim wooden frame for the glass. It would give you all the usual options for hingeing. You could even have the frame sit within the sides and hinge it by inserting a pair of horizontal pins at the top corners, which could be quite unobtrusive.

Some nice beading round the frame, and it could look good - a bit like a museum display case. (Not wanting to suggest these planes won't be used - I can see that you want the glass to keep them visible!)
 

Latest posts

Back
Top