Derek Cohen (Perth Oz)
Established Member
After all the criticism levelled at Rob Cosman's dovetails (a guy I think is terrific, by the way), perhaps we should see some examples from the forum members!! :shock:
To help, or start, some along the way, here are a few strategies for producing tight dovetails that I have found useful. The idea here is to add your own and build up as many useful tips as possible.
Take the time to ensure that the boards you are joining are dimensioned square and even in thickness. Anything that is out-of-square will make it very difficult to end up with flush joints.
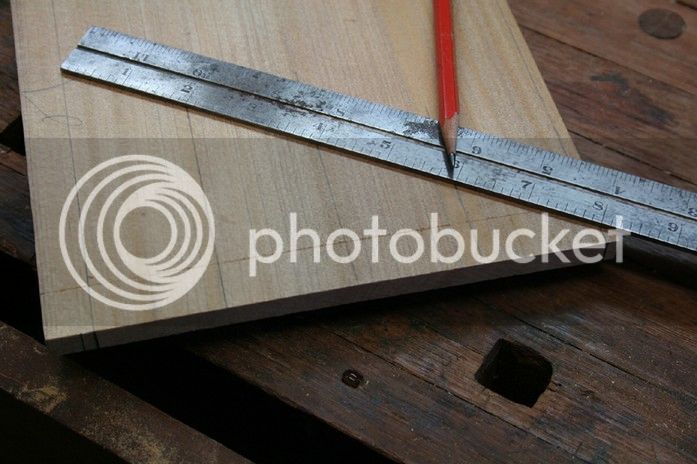
Marking out with a scale. This makes it easier to adjust the spacing. I find this less finicky than using protractors.
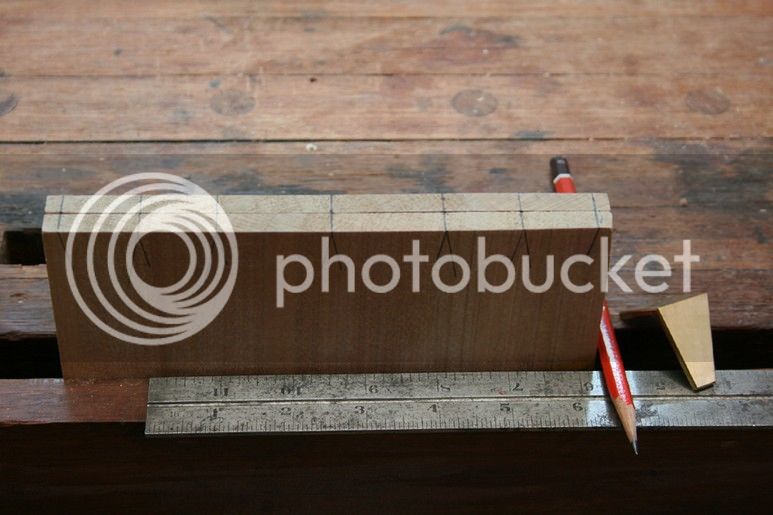
Sawing square is the key to tight fitting dovetails. Ganging up boards makes this easier to do.
I saw the tails first. The accuracy in sawing these angles is not critical - it is matching these saw cuts to the pins that is critical. Using a dovetail angle marker helps in this regard - not vital, but it does make it easier to replicate angles.
Dovetail markers also allow one to experiment with different angle ratios. I think that the angle does not make a lot of difference to drawer strength. On the other hand, a wider or narrower dovetail can enhance the aesthetic look. I tend to go for a higher ration (1.5) on thin boards and a lower ratio (1.7 or 1.8) on wide boards.
Starting a saw cut with the saw raised effectively lowers the rake of the teeth and makes for easier starting. Aim to follow two lines similtaneously (e.g. the angled and the horizontal lines).
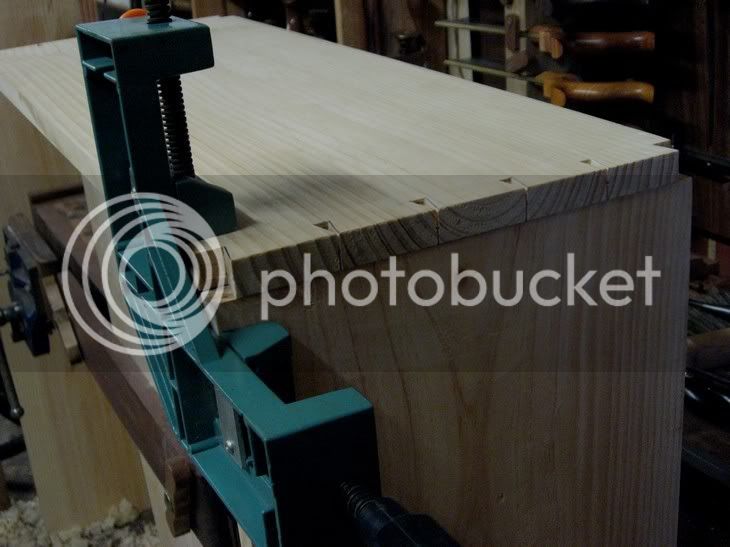
Aim to make your saw cuts as close to the knife line as possible. The tighter your sawing, the less need for paring, and the less chance of errors creeping in. To achieve such close tolerances, use a chisel to chamfer a fence for your saw.
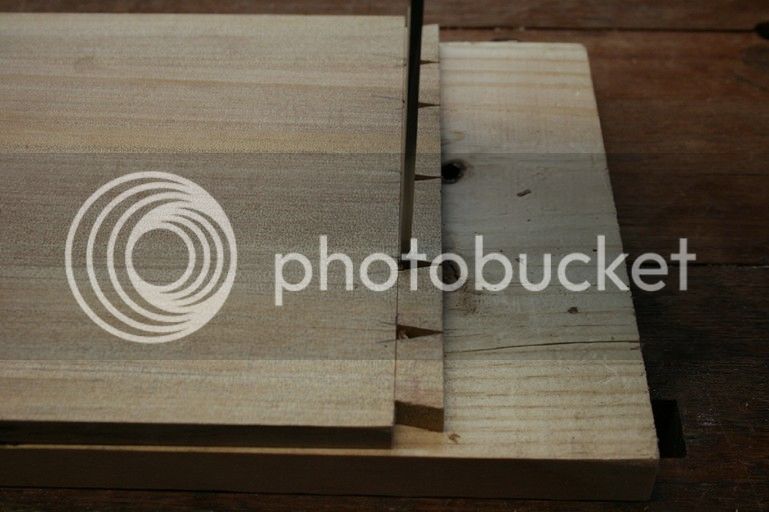
Before removing any waste, take the time to mark out which areas are to be removed. If you look carefully at the through dovetail end of the drawer below, you will see a cut into the tail! I caught myself just in time. Dang spatial difficulties!
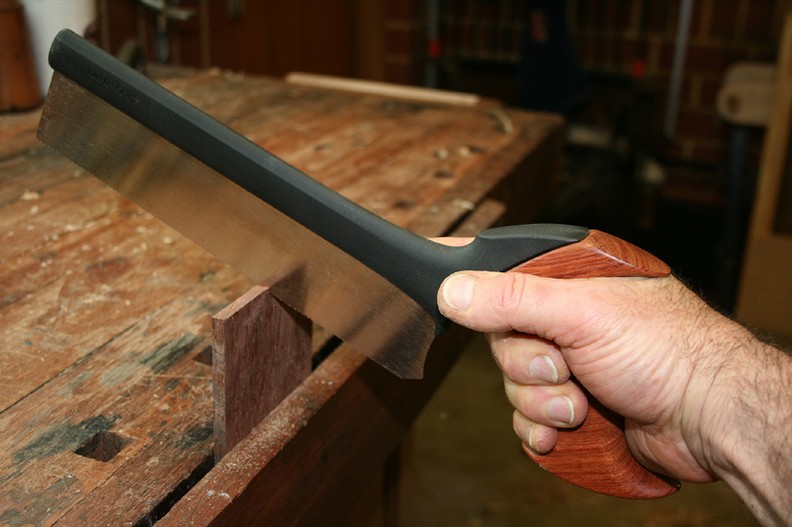
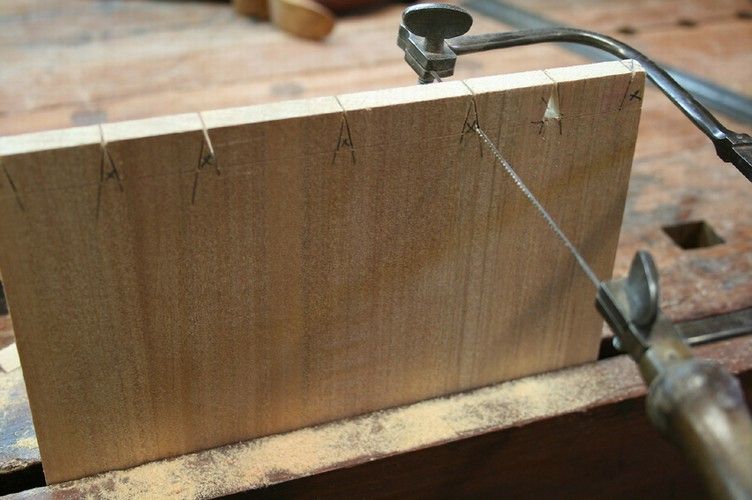
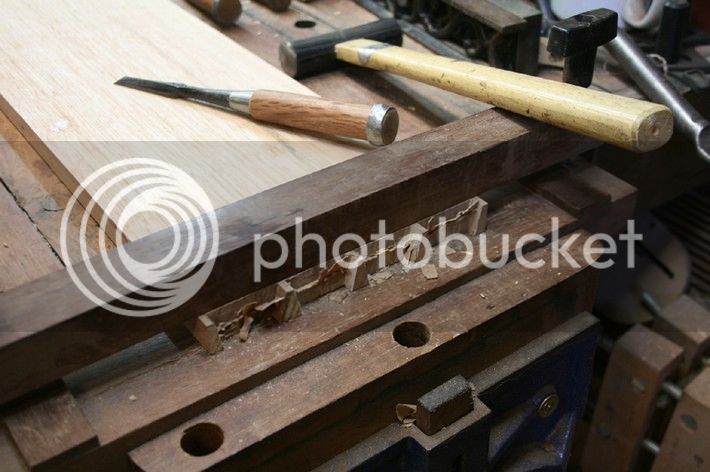
I prefer to remove waste with a fretsaw/jeweller's saw than chop it out. A recommendation made to me was to add a twist to the blade so that you do not experience the limitation I show here of how deep into a board a standard fretsaw can cut.
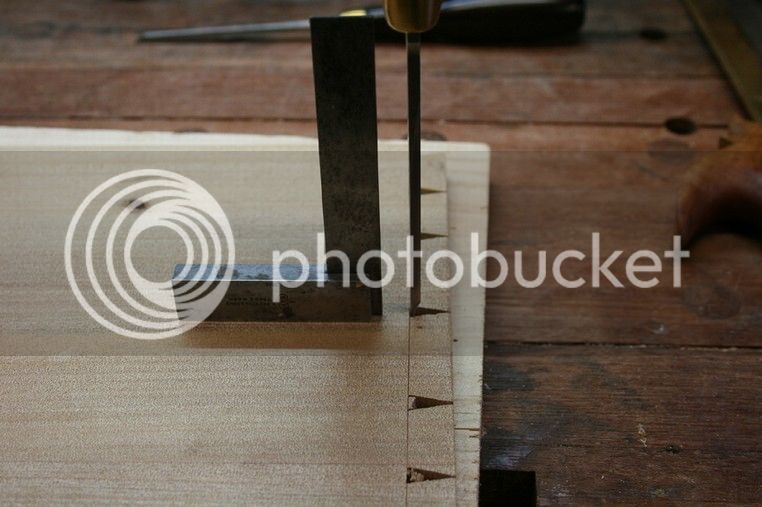
When paring the waste, place the board side-on. This will more easily allow you to see whether you are not holding the chisel over the vertical line . Aim for a slight undercut for a tight fit at the baseline.
If you find it difficult to judge vertical, then place a square alongside the chisel.
If you need to chop out waste in hardwood, a guide fence can aid in maintaining even baselines. Note that this is not a vital tool – practice makes one unnecessary. However these are excellent jigs.
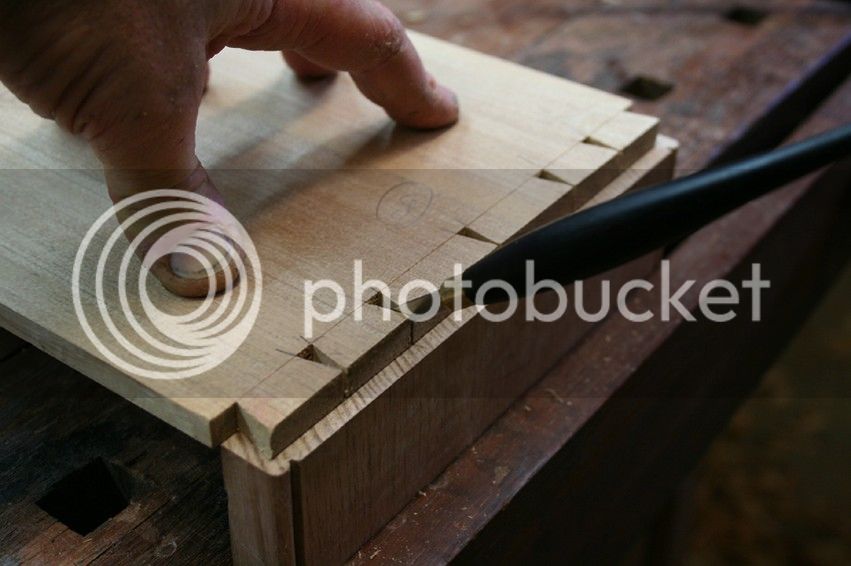
When transferring tails to pins, many use a handplane to rest the tail board. I find that this can easily cause the board to move, which will affect the accuracy of the marking. Accurate marking is all-important for accurate sawing.
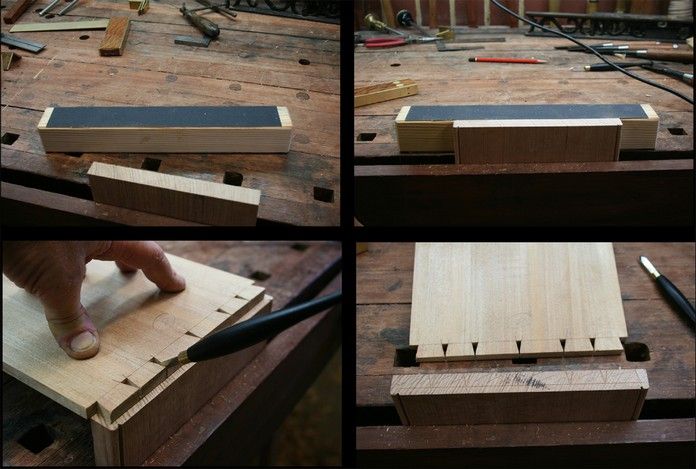
I made a “Rest Block” out of pine scrap onto which I glued 240 grit sandpaper (on two opposite sides – one as a non-slip for the board, and the other as a non-slip for the bench).
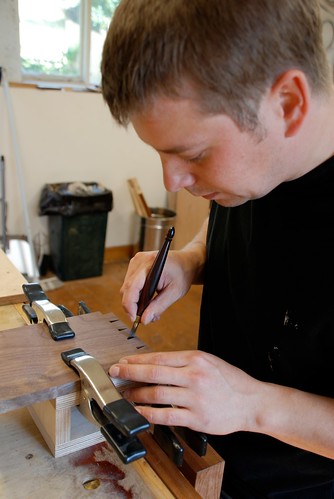
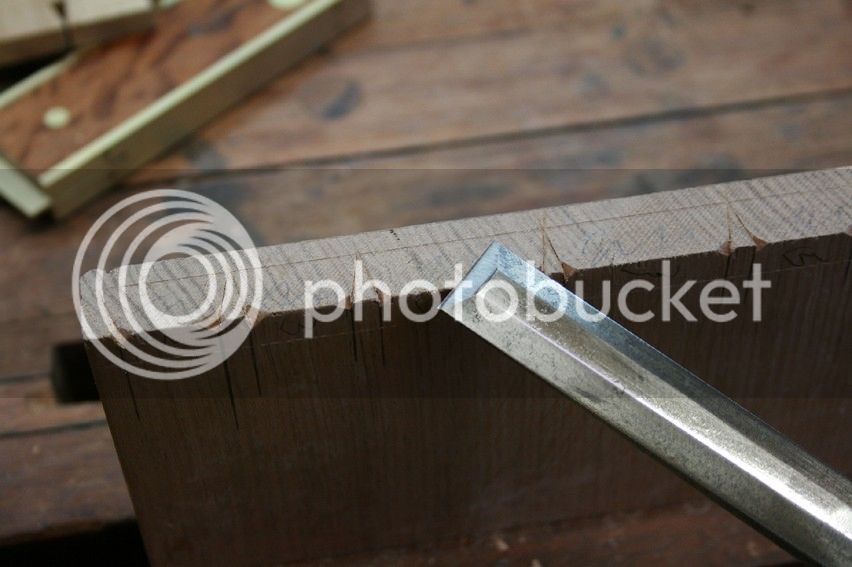
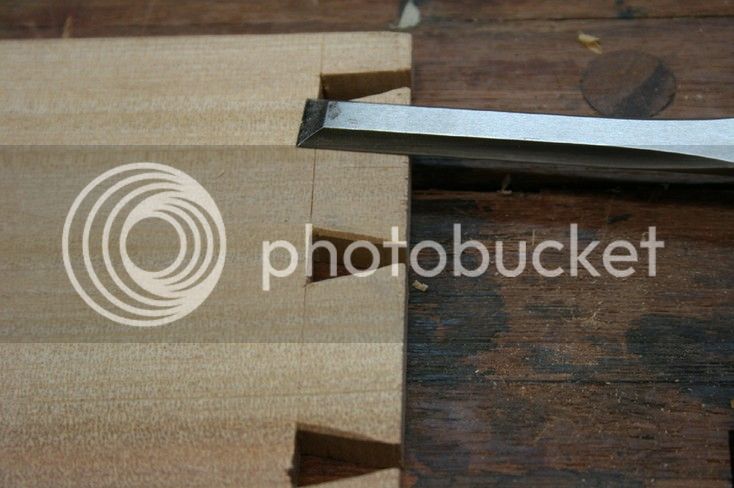
Always transfer marks with a knife. For tight tails you will need a thin bladed knife.
Prior to joining the boards pare a chamfer on the backs of the tails before wacking them into the pins. This takes two seconds to do and makes the join a smoother process.
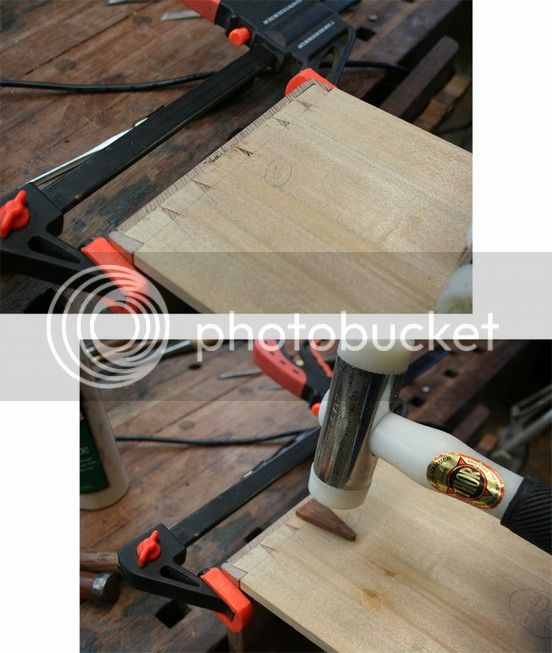
When joining boards, especially when they are hardwood, add a clamp to the pin board to prevent the ends splitting. I close up gaps with a wedge-shaped block.
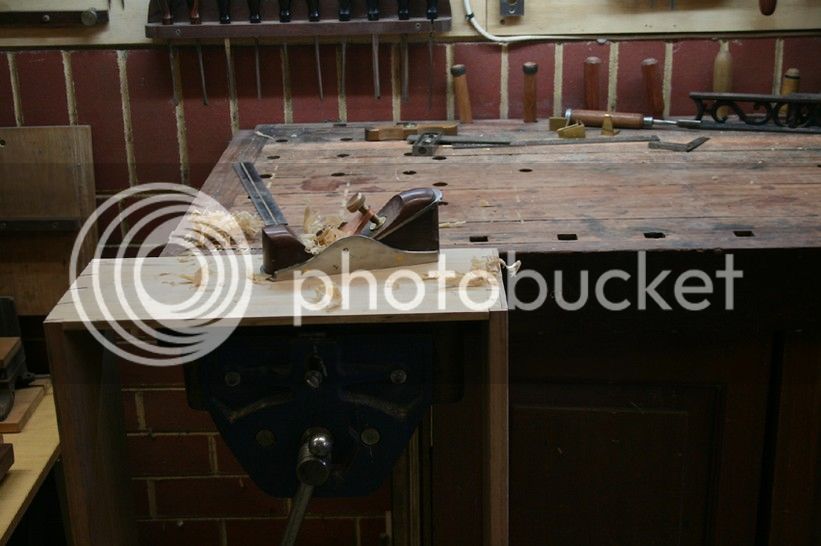
Plan the grain direction so that you are able to plane away from the edge of the face board.
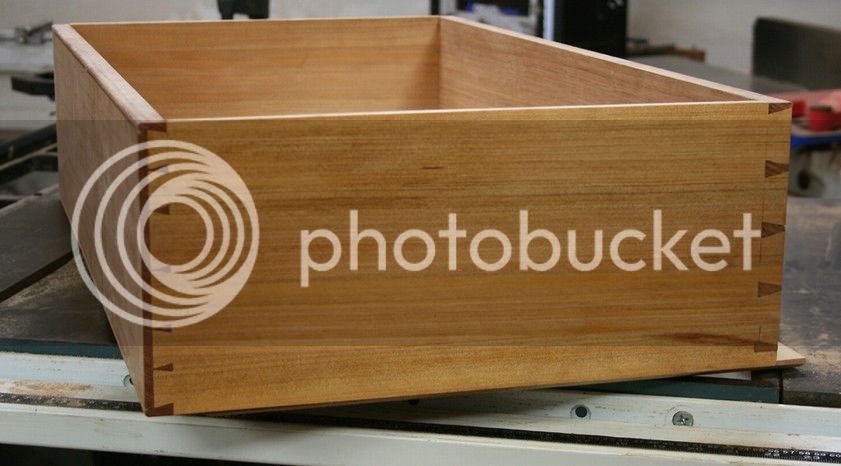
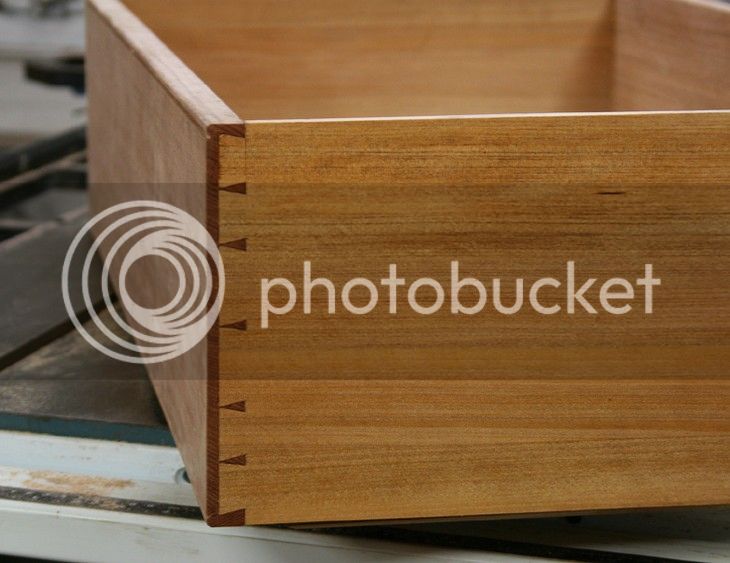
Here is a recent drawer I built. These dovetails all went saw cut to saw cut …
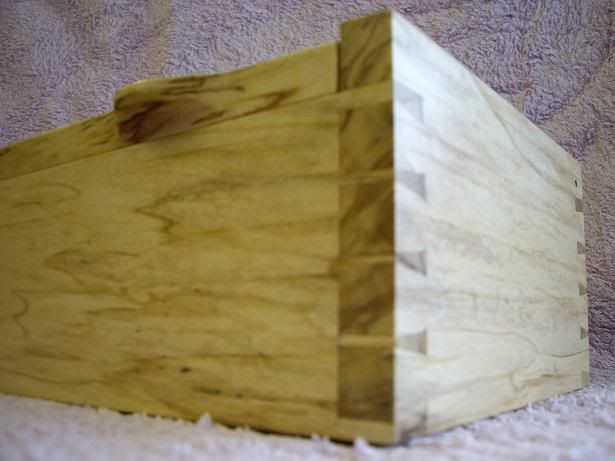
A close-up of the through dovetails …
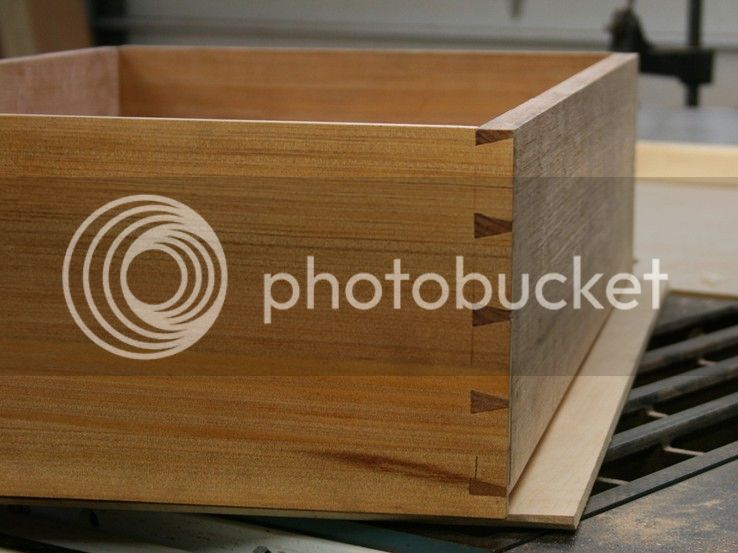
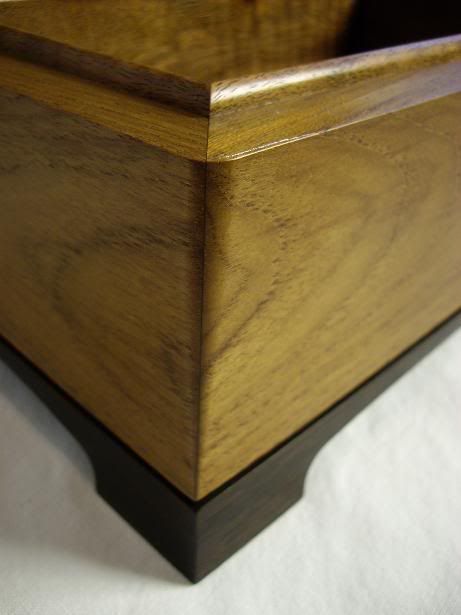
And a close-up of the half blind dovetails …
Happy dovetailing!
Regards from Perth
Derek
To help, or start, some along the way, here are a few strategies for producing tight dovetails that I have found useful. The idea here is to add your own and build up as many useful tips as possible.
Take the time to ensure that the boards you are joining are dimensioned square and even in thickness. Anything that is out-of-square will make it very difficult to end up with flush joints.
Marking out with a scale. This makes it easier to adjust the spacing. I find this less finicky than using protractors.
Sawing square is the key to tight fitting dovetails. Ganging up boards makes this easier to do.
I saw the tails first. The accuracy in sawing these angles is not critical - it is matching these saw cuts to the pins that is critical. Using a dovetail angle marker helps in this regard - not vital, but it does make it easier to replicate angles.
Dovetail markers also allow one to experiment with different angle ratios. I think that the angle does not make a lot of difference to drawer strength. On the other hand, a wider or narrower dovetail can enhance the aesthetic look. I tend to go for a higher ration (1.5) on thin boards and a lower ratio (1.7 or 1.8) on wide boards.
Starting a saw cut with the saw raised effectively lowers the rake of the teeth and makes for easier starting. Aim to follow two lines similtaneously (e.g. the angled and the horizontal lines).
Aim to make your saw cuts as close to the knife line as possible. The tighter your sawing, the less need for paring, and the less chance of errors creeping in. To achieve such close tolerances, use a chisel to chamfer a fence for your saw.
Before removing any waste, take the time to mark out which areas are to be removed. If you look carefully at the through dovetail end of the drawer below, you will see a cut into the tail! I caught myself just in time. Dang spatial difficulties!
I prefer to remove waste with a fretsaw/jeweller's saw than chop it out. A recommendation made to me was to add a twist to the blade so that you do not experience the limitation I show here of how deep into a board a standard fretsaw can cut.
When paring the waste, place the board side-on. This will more easily allow you to see whether you are not holding the chisel over the vertical line . Aim for a slight undercut for a tight fit at the baseline.
If you find it difficult to judge vertical, then place a square alongside the chisel.
If you need to chop out waste in hardwood, a guide fence can aid in maintaining even baselines. Note that this is not a vital tool – practice makes one unnecessary. However these are excellent jigs.
When transferring tails to pins, many use a handplane to rest the tail board. I find that this can easily cause the board to move, which will affect the accuracy of the marking. Accurate marking is all-important for accurate sawing.
I made a “Rest Block” out of pine scrap onto which I glued 240 grit sandpaper (on two opposite sides – one as a non-slip for the board, and the other as a non-slip for the bench).
Always transfer marks with a knife. For tight tails you will need a thin bladed knife.
Prior to joining the boards pare a chamfer on the backs of the tails before wacking them into the pins. This takes two seconds to do and makes the join a smoother process.
When joining boards, especially when they are hardwood, add a clamp to the pin board to prevent the ends splitting. I close up gaps with a wedge-shaped block.
Plan the grain direction so that you are able to plane away from the edge of the face board.
Here is a recent drawer I built. These dovetails all went saw cut to saw cut …
A close-up of the through dovetails …
And a close-up of the half blind dovetails …
Happy dovetailing!
Regards from Perth
Derek