June Box Challenge ( Rules and Requirements )

UKworkshop.co.uk

Help Support UKworkshop.co.uk:

This site may earn a commission from merchant affiliate links, including eBay, Amazon, and others.
Status
Not open for further replies.
Hi,
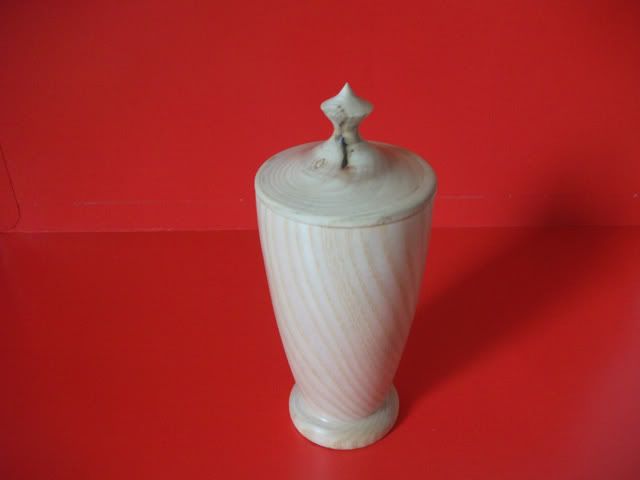
Here is my box, made from She-oak 115mm high and 90mm at widest point. Finished with melamine lacquer and Renaissance wax.
Here is the method I used:
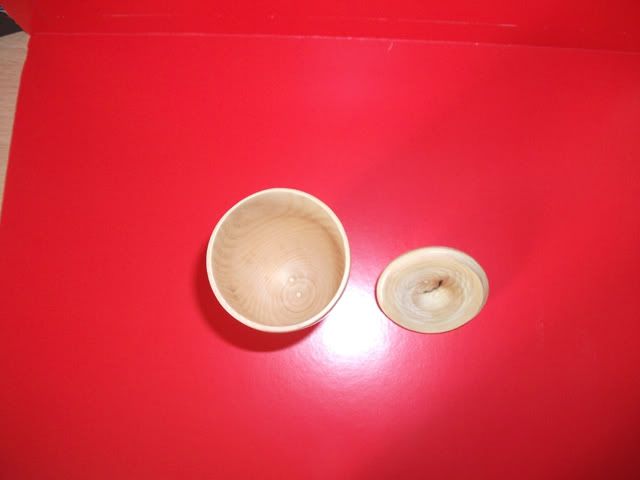
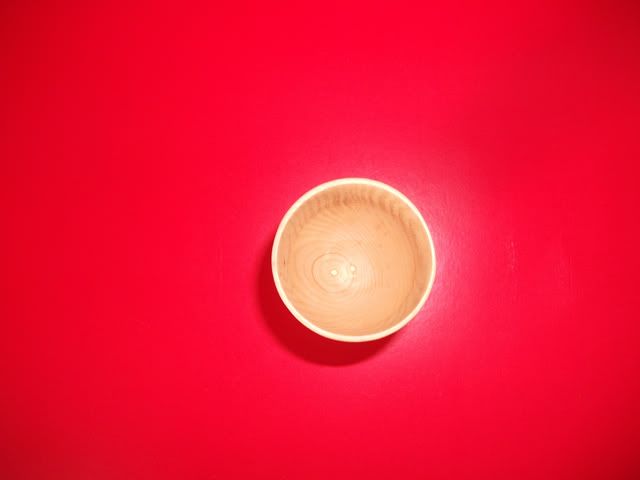
After truing up and parting into two sections, the lower section was hollowed, shaped and finished.
Next, the lid was chucked, hollowed and finished inside and part completed outside, before jam fitting onto the lower
section to allow access for completing the remainder of the outside.
Finally, the lower section was reverse mounted to allow the spigot to be removed and the base completed.

Ian
 

Attachments

  • inside.jpg
    inside.jpg
    225.6 KB · Views: 750
  • lid.jpg
    lid.jpg
    192.8 KB · Views: 749
  • profile.jpg
    profile.jpg
    213.1 KB · Views: 749
Here's mine which started out with the intention of just being spherical but it seemed a shame to waste all that extra wood so it ended up with a pedestal base.

Started as a roughed cylinder with a spigot either end, done between centres. Then the main shape developed before deciding where the separation would be, a thin line then made with a small parting gouge but only about 3 mm deep, then the two halves parted on the bandsaw.

The base was then chucked and the face levelled, then hollowed using my faithfull Rolly hollower (makes such a short job of it) before finishing the inside with a curved scraper than shear scraped, sanded, sealed, tacked-off then carnuba was applied and polished with a cloth.

The outside shaping was then finished and shear-scraped etc. with the same treatment as the inside but no finish applied yet. Spigot kept on.

The top was done in the same way but the last thing was to almost part it from the spigot leaving a very small bit left which was finally parted off on the bandsaw.

The base was rechucked and the lid put on (it's a nice tight fit :mrgreen: ) but masking tape applied around the join for security, then the top of the lid finished with a spindle gouge and sanded, sealed etc. Tailstock then brought up with a nylon bush in the live centre and the whole thing sanded again as a single unit to give an (almost) seamless join in the middle.

Lid removed, base parted off, again leaving a nub for the bandsaw, then the bottom sanded using a power sanding arbor in Jacob's chuck in the headstock.

Finally it was all finished using the Chestnut Buffing system which applies carnuba wax as the last stage.

yewbox_02.JPG


yewbox_04.JPG


yewbox_11.JPG
 

Attachments

  • yewbox_02.JPG
    yewbox_02.JPG
    17.1 KB · Views: 749
  • yewbox_04.JPG
    yewbox_04.JPG
    24.1 KB · Views: 749
  • yewbox_11.JPG
    yewbox_11.JPG
    18.1 KB · Views: 749
Hi guys,

Here is my entry to this month’s challenge, very simple turning out of a bit of wet ash and dried in the microwave once dried top re-cut lid re-cut and final shape finished.

DSCF1395.jpg


DSCF1396.jpg


DSCF1400.jpg


spasm
 
Here's mine; spalted beech box with black walnut lid. 190mm Diameter, 100mm tall.
The box is all one peice, undercut with a Sorby Hollowmaster bought at Harrogate last year. I had to use coats of sanding sealer to harden the surface to get a decent finish.

The lid is a nice tight fit, it held tight while finishing off the finial.

Finished off with several coats of beeswax inside and out. And I even removed the chucking recess! [that's a first]

There's some cracking entries this month, and I've already spotted a couple of winners, but I'm as pleased with this as with anything I've turned, so I'm happy :D
P1070488k.jpg

P1070514k.jpg

P1070516k.jpg
 

Attachments

  • P1070488k.jpg
    P1070488k.jpg
    102 KB · Views: 726
  • P1070514k.jpg
    P1070514k.jpg
    91.1 KB · Views: 726
  • P1070516k.jpg
    P1070516k.jpg
    94.1 KB · Views: 726
I made this box from a piece of yew which I've had for a few years. Both the top and bottom parts of the box have been reversed and had the bottoms finished as can be seen in the photo's. I'm really pleased with the fit of the lid as the grain can be matched up perfectly and can hardly notice the join. This was also my first attempt at a finial. The inside of the box was hollowed out with an undercut under the shoulders. It has been finished with my usual sanding to 600 grit, and a coating of paste wax.
 

Attachments

  • PICT0601.JPG
    PICT0601.JPG
    176.1 KB · Views: 717
  • PICT0600.JPG
    PICT0600.JPG
    178.2 KB · Views: 717
  • PICT0599.JPG
    PICT0599.JPG
    175.8 KB · Views: 717
Status
Not open for further replies.
Back
Top