How Not to Make a Japanese Tool Box!

UKworkshop.co.uk

Help Support UKworkshop.co.uk:

This site may earn a commission from merchant affiliate links, including eBay, Amazon, and others.
Very little to report still, as garden tidying and rain has generally stopped play this week. All I’ve done so far is plane the edges of the bits which will make the sides of the tray;


Here you may notice my planing arrangement on my “high-tech workbench”; a few nails to stop movement and hoping that it is upright. Then I checked to see if the tray will fit in above the plane and leave 15mm clearance for the lid;


As I’ve done so little, I thought I’d show you my nuts!;


The apprentice says he could do with a couple, what with that little operation he had and all! That’s 2 ½ kilos of wild hazelnuts (Cobnuts to those of you from Kent), picked up over three days going for a walk with the apprentice. Should save me a couple of quid come Christmas.
 
I have to say I love my nuts. I usually keep them in the bag between me and the chair arm (stops the dog getting at them). If we have guests, my wife makes me put them in a bowl. :mrgreen:
 
Grayorm":q8vb12ko said:
I have to say I love my nuts. I usually keep them in the bag between me and the chair arm (stops the dog getting at them). If we have guests, my wife makes me put them in a bowl. :mrgreen:

:lol: :lol: :lol: :lol: :lol: :lol: :lol: =D> =D>
 
Another slow day today. The Weather forecast said it would be fine, so I spent a long time hiding under hazel-bushes (looking for my nuts) from a veritable monsoon. Eventually I managed to make it home and spent a bit of time on the toolbox. First off I nailed a couple of bits of batton on the bottom for “feet”;


That should keep it away from the crud and wet on the “workshop” floor. Then I had a look at the last bit of board, that’s going to be the bottom of the chisel tray;


Hmmm, I believe that’s called “cupping”, just remember that if you’re thinking of buying pine shelving from B&Q! This means I’ll have to nail it to the bottom of the side and ends of the tray. This poses a problem, as the tray bits are just about the right size to fit under the lid and I had intended the base to be nailed “inside” them. So for no particular reason (apart from not wanting to cut or plane the side/end bits any more) I thought I’d plane a rebate for the base to fit into. So I nailed a bit of batten along the edge of the “side bits”;


and had a go with the handy No 311;


However I did notice that the rebate was not particularly square across the bottom and wondered if it was due to the blade(iron) not coming out of the slot square;


I re-sharpened the iron twice, but it was still on the p**s (Positional Instability Sloping Situation) and I think it’s because the bed for the iron is actually machined with the Positional Instability problem. I also noticed that I was not holding the plane particularly square either, so who knows, so I gave up and came in.
 
That has been the best WIP thread that I have ever followed. I have looked forward to updates and thank you for the time spent in posting it.
 
Hmmm, Hrrmmmph. I can truly say it’s been one of those days of ups and downs, I think the downs won though.

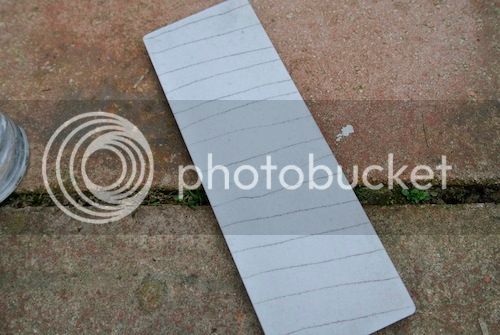
I was going to finish the rebates for the sides of the chisel tray. Remembering there was a “Positional” issue with the shoulder plane iron, I thought I’d see if I could re-sharpen it and be third time lucky. First of all I checked if my water-stones were flat. Nope, so I used the high-tech flattening system. One; draw pencil lines across the stone;


…two; prepare flattening station, here I’m pouring water on the concrete flag-stone in the “workshop”;


….three; rub it up and down and round and round, till you remove the pencil marks;


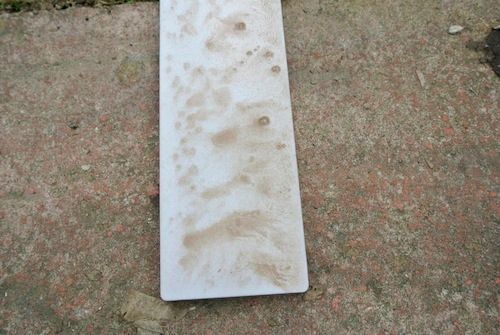
…check with a straight edge in all directions, if flat, sharpen plane iron;


General improvement and it’s now slightly cock-eyed to the other side. Anyway, it worked, however it takes a long time and many cups of tea to make this many rebates;


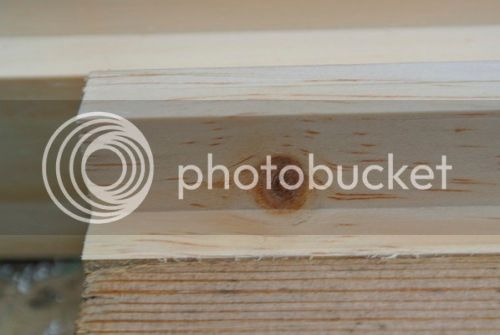
..it was actually sharp enough to go through a knot with no real problems;


Nextly I noticed the lid to the tool-box had wedged itself shut, The wood’ s been moving a fair bit and I think it’s sucked up a fair bit of humidity (rain?) from the air. Having gently removed the lid with a block of wood and a framing hammer, I bevelled the edges which seemed to resolve the problem;


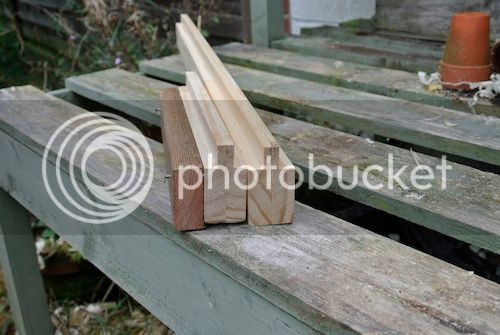
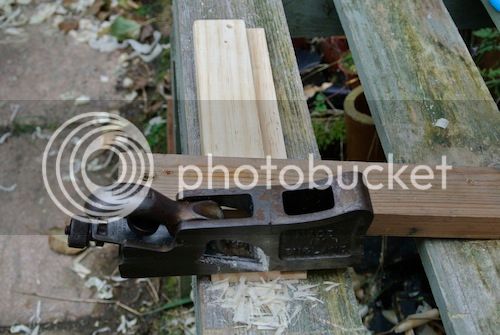
You might see that not only has the wood got fatter, it also cupped despite the batten across it. Following this, I ripped and trimmed some board to make the base of the tray,cut the sides to length, glued and pinned them on and checked the ends for fit. These needed side “rebates” so out with Mr 311 again;


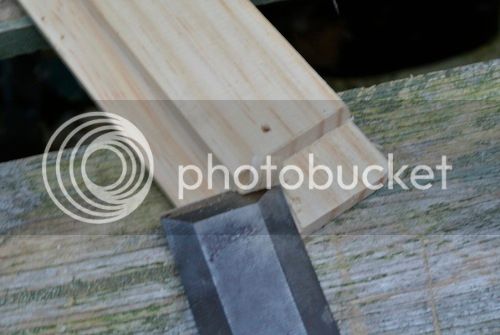
shhhmm, shhhmm, shhhm, Pare with a chisel;


bash bang ‘ouch’ and;


Woopsie, that’s a pin which went 90 degrees round a corner and out again;


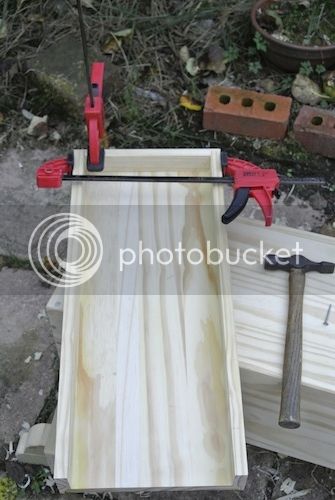
…and there we go, nearly there. I was feeling tired, the light was about to fade so I thought I’d pack away, then;


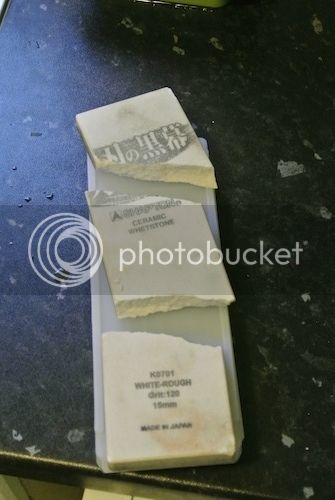
…that’s what happens when you try to stick your water-stones away, on top of the fridge-freezer, without turning the light on in the larder. B****r, B******s, ****!!!. That’s a brand new stone, ordered from Japan, that I only got three weeks ago. T**s, B*****y and B******s. I think I’m going to have to use that for sharpening the nail scissors from now on, S**t.

TTFN.
 
Try gluing it then flatten it. You'll have to research for a glue, maybe araldite? I remember working on a job where I installed a bath with a marble rim around the top. When the marble arrived (from Spain) packaged between 2 sheets of 1" ply it was broken in 2 places, I employed a monumental mason to repair it. He glued it and after an hour it was as strong as the marble and looked like a vein in the marble. Don't know what he used.

This was for an Arab guy who at the time was a director at Man United. The job was in Cheshire, about 20 years ago. He was very low profile and unbelievably wealthy. Believe it or not he got into trouble with an American casino and was taken to court in the UK. This forced his resignation from Old Trafford.

Needless to say the glue up of the marble had to be good, and last. I live quite close to the house where I did the work, since he moved it's been gutted, and no doubt the bath has gone too.
KIT05 resized.jpg
 

Attachments

  • KIT05 resized.jpg
    KIT05 resized.jpg
    68.2 KB · Views: 1,327
Grayorm":3j6o0m6o said:
Try gluing it then flatten it. You'll have to research for a glue, maybe araldite? I remember working on a job where I installed a bath with a marble rim around the top. When the marble arrived (from Spain) packaged between 2 sheets of 1" ply it was broken in 2 places, I employed a monumental mason to repair it. He glued it and after an hour it was as strong as the marble and looked like a vein in the marble. Don't know what he used.

Thanks Grayorm :D

I was thinking along these lines myself, possibly "aralditing" it together and to a tile to keep flat (maybe you can recommend a good brand!). Nice looking job, when you said kitchen fitter I hadn't quite realised.....

I always wondered what a monumental mason looks like, I have visions of a 7 foot 30 stone chap in a leather apron, with one trouser leg rolled up and funny handshakes.
 
Yes that was him, you are spot on :lol: Any tile will do as you are going to flatten the surface you will use to sharpen on. You'll need a glue thin enough so as not to create too big a gap where the joint is. As I said do some digging on google. I'd put a piece of paper between the stone and the tile so you don't glue the stone to the tile as well. I wouldn't stick it to the tile as well......although maybe.

Thanks, I do bathrooms and kitchens, this was by far the most exotic I've done. The bath was in the bedroom suite!!
 
Hi Ross

I have a 6000 grit waterstone glued back together with superglue, it works fine.

If it fits together well give it a go, you have nothing to lose, make sure its dry before you glue it.

Pete
 
Very little to report so far. Motivation levels are at a low ebb, not helped by having 35quids worth of stone commit Hari-Kiri. The edges of the cracks have crumbled too much for a glue-back-together exercise so it’s now relegated to the kitchen knife and axe department.

The other end cap for the tray was suffering from a little too enthusiastic paring so was suffering from a Positional Instability Slope Situation :roll: ;


so I inserted a bit of angled wood shim;


…threw some glue at it and bashed some pins in (hammer) ;


Even though all the side and end bits were supposed to be uniform in width etc, there’s a fair amount of not-quite-the –right-size-when-put-together-ness but nothing that a pass or two with a plane or flame-thrower won’t solve. I shall return if motivation picks up, really shouldn’t take too long to finish this, should it :| ?
 
if you're stone's new edge's are too rough to glue up, grind them on your workshop floor until the edge's meet - stone won't be as long as it was but it'll be longer than it is now :)

on the subject of motivation, I think you're approaching this wrong - you should be a writer (thinking Terry Pratchettesq) with woodwork as your subject

your style reminds me of him in his earlier, funnier days and where Rincewind had the luggage as a companion, you have the apprentice !

exactly how many legs does the apprentice have by the way ?
 
Thanks Den

Grinding the stone seems like a good idea, must give it a try.

I have to admit, I've probably read more Pratchett than was good for me, so he probably is an influence :lol:

Thanks for the encouragement, you've now got me thinking of writing a book called "Zen and the art of how not to make Japanese stuff with Japanese Tools", which alludes to making things from wood and generally covers as many Double, Triple and Quadruple Entendres as I can come up with :twisted:. (Currently the motivational issues are due to "employment issues" not the toolbox, which is serving to keep me sane(ish))

The apprentice seems to have more than two legs, but is useless at carrying anything :roll: .
 
Once again not a lot of progress. The Hampshire Monsoon started at lunch time, but at least Hurricanes Hardly Ever Happen Round here (or so they say). However, I did finish the main body of the tray;


that’s the detail of the b********d corner (Den, hopefully you’ll notice that the glue was wiped off at some stage!). I put a couple of strips of quadrant in, wot I found hiding in the outhouse, this’ll support the tray;


…and luckily the tray fits in;


….I’m sure I don’t need to show you the spacer I had to fit in to stop the tray falling through due to miscockulation on the width of it! We’ll take it as read that that was “planned”.

…one hand braided handle later;


……. and I think we’re on the final straight. Must admit, it’s getting a bit heavy now, not sure if I’ll be able to pick it up with tools in it, but we can’t have everything can we?
 
Back
Top