bodgermatic
Established Member
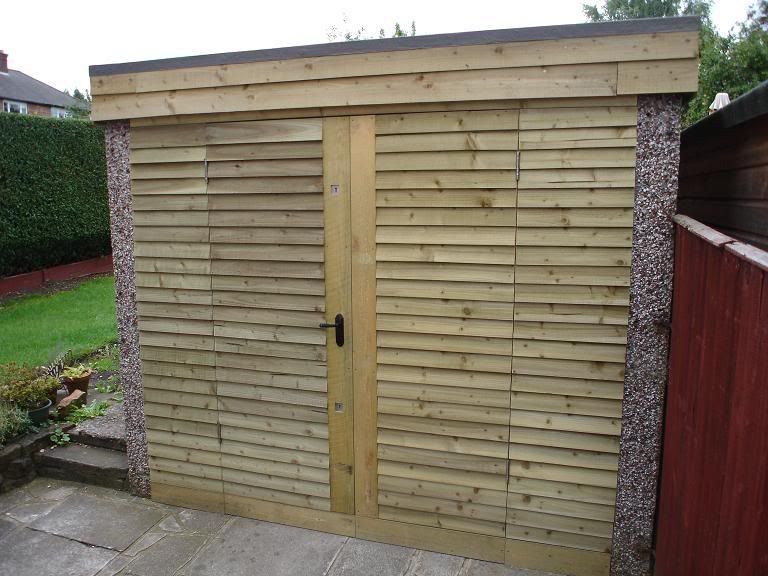
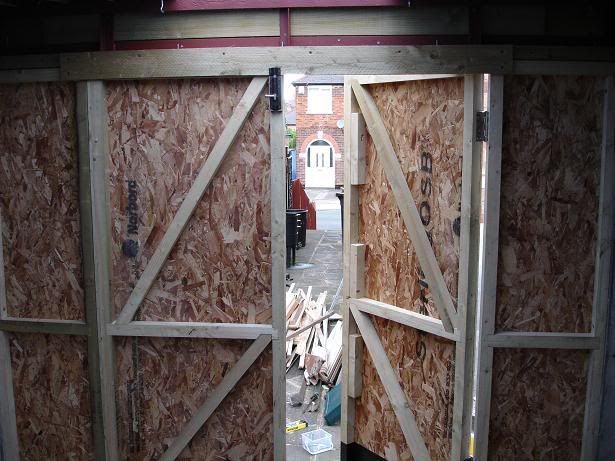
I've started the process of converting the garage into a workshop, It's a 50's concrete prefab job. You join me a little way in to the project as I haven't been taking photos up to now :roll: . Last autumn I replaced the corrugated concrete asbestos sheets with corrugated bitumen sheets, and replaced the fascia as well. Over the past month of weekends and evenings I've built a pair of legged and braced doors in 45mmx45mm and framing to reduce the size of the opening. The weekend before last I removed the up and over door and fixed the framing to the floor and walls with anchor bolts, and temporarily hung the doors while I waited for some projection hinges. The fffffflippin' big hinges have been fitted now, as have mortise locks top and bottom and a latch centre. The bottom foot of the whole construction has been liberally daubed in bitumen paint - which is perhaps a bit belt and braces  Anyway, I know a photo whould help out about now, so here we go. One looking in:
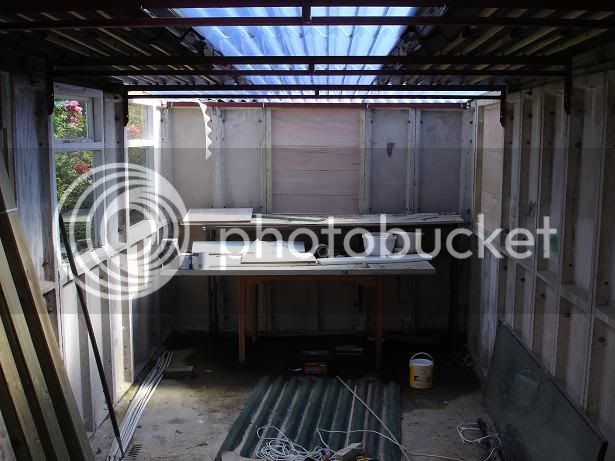
One looking out:
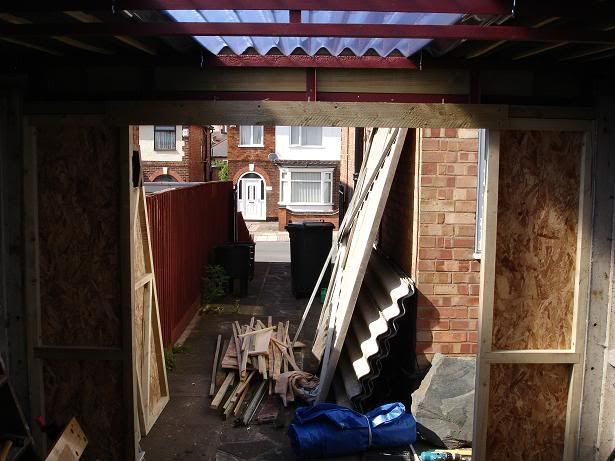
And one looking at :
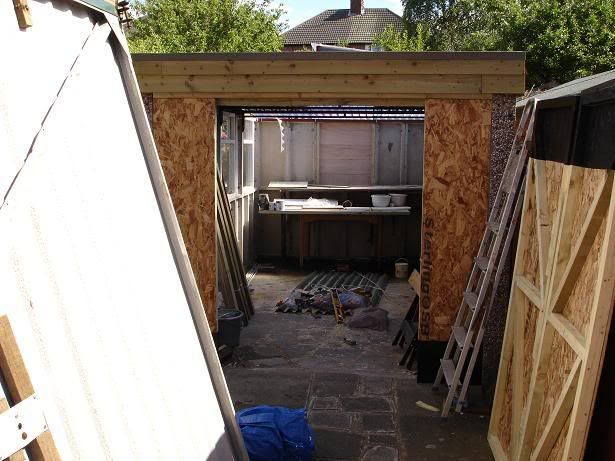
That's the old steel up and over door to the left, and the new doors on the right leaned up with a final coat of bitumen drying.
My joinery looks better from farther away :? :
Today's work was mostly tidying up, adding a tower bolt to the right hand door and a final coat of bitumen. During the tidy up I found the sadly abused internal door which matches the rest of the doors in the house:
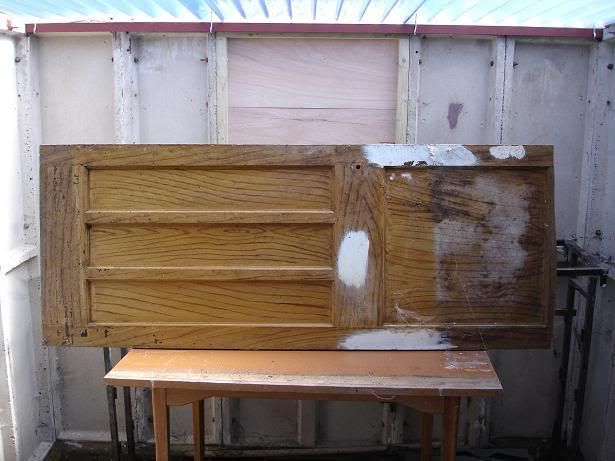
It's been grain-effect painted at some point, but all of the internal doors have a facing of hardboard applied to them and many coats of gloss! They're really quite nice 1930's doors in keeping with the house, so at some point they'll go for dipping and stripping. When we moved in we found a lot of old issues of "Practical Housholder" from the 50's to the late 60's. I've spent a while browsing through them (as you do :roll: ), and the hardboard was one of many fabulous ideas suggested in the magazines. Along with adverts for melamine and wolf power tools :lol:
I also found something for the c*ll*ctors out there:
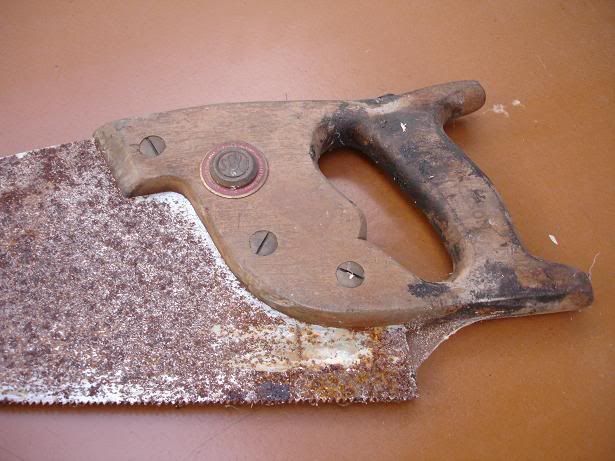
It's a Spear and Jackson saw, close up of the button:
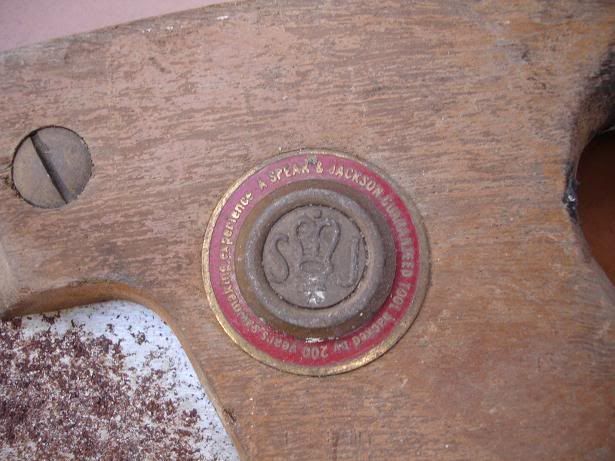
Restoration project maybe?
Jobs left to do are facing the whole lot with feather-edge, a mortise for the top lock and latch, a tower bolt for the bottom, handles etc.. etc.. Then on to the rest of the workshop!
A major problem with the workshop-to-be is that the ground level to two sides of it is higher than the floor. After heavy rain, it gets a wee bit damp - wellies advised. So I also need to get someone in to build me a retaining wall on both of those sides to keep the waters at bay!
Still, all in a good cause, I think SBOH (significantly better other half) will be pleased when the tools get a home _outside_ of the house.
Anyway, I know a photo whould help out about now, so here we go. One looking in:
One looking out:
And one looking at
:
That's the old steel up and over door to the left, and the new doors on the right leaned up with a final coat of bitumen drying.
My joinery looks better from farther away :? :
Today's work was mostly tidying up, adding a tower bolt to the right hand door and a final coat of bitumen. During the tidy up I found the sadly abused internal door which matches the rest of the doors in the house:
It's been grain-effect painted at some point, but all of the internal doors have a facing of hardboard applied to them and many coats of gloss! They're really quite nice 1930's doors in keeping with the house, so at some point they'll go for dipping and stripping. When we moved in we found a lot of old issues of "Practical Housholder" from the 50's to the late 60's. I've spent a while browsing through them (as you do :roll: ), and the hardboard was one of many fabulous ideas suggested in the magazines. Along with adverts for melamine and wolf power tools :lol:
I also found something for the c*ll*ctors out there:
It's a Spear and Jackson saw, close up of the button:
Restoration project maybe?
Jobs left to do are facing the whole lot with feather-edge, a mortise for the top lock and latch, a tower bolt for the bottom, handles etc.. etc.. Then on to the rest of the workshop!
A major problem with the workshop-to-be is that the ground level to two sides of it is higher than the floor. After heavy rain, it gets a wee bit damp - wellies advised. So I also need to get someone in to build me a retaining wall on both of those sides to keep the waters at bay!
Still, all in a good cause, I think SBOH (significantly better other half) will be pleased when the tools get a home _outside_ of the house.