You are using an out of date browser. It may not display this or other websites correctly.
You should upgrade or use an alternative browser.
You should upgrade or use an alternative browser.
Fixing an Inca 205 Bandsaw
- Thread starter DTR
- Start date


Help Support UKworkshop.co.uk:
This site may earn a commission from merchant affiliate
links, including eBay, Amazon, and others.
The bandsaw bodgery is now complete, but updates have been lacking due to Flickr being a bit naff.......
Drilling out a bore for the rise & fall to run in:

Boring the hole out to be a sliding fit on the rise & fall (some 3/4" stock I already had):
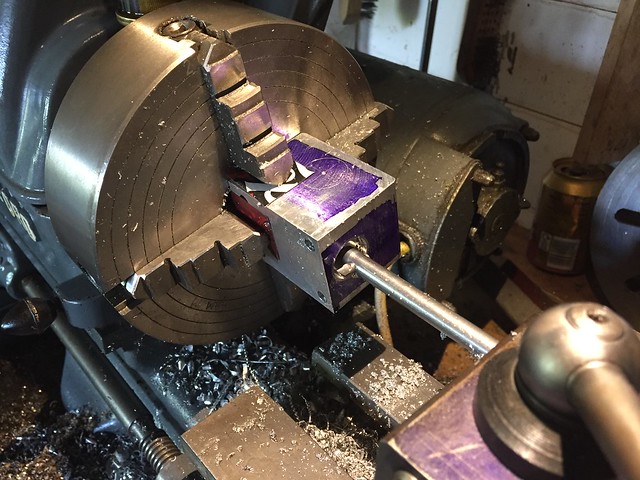
I had to make a bespoke boring bar for this job, naturally :roll:. Another 3/4" hole was bore crosswise for the clamping mechanism.

Yes, my lathe does have a face on it. Meet Timmy the Toolpost.
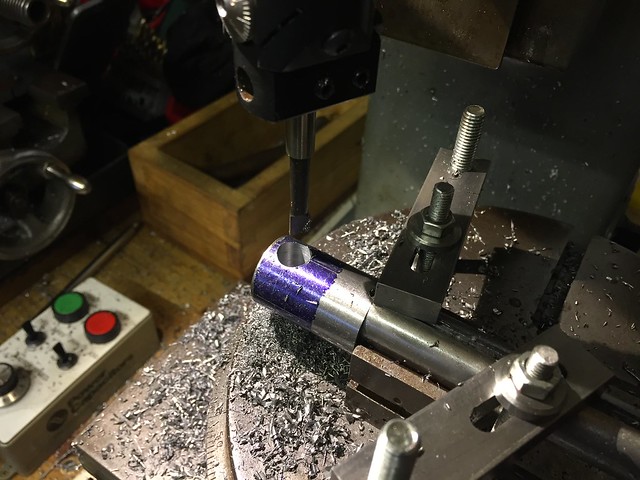
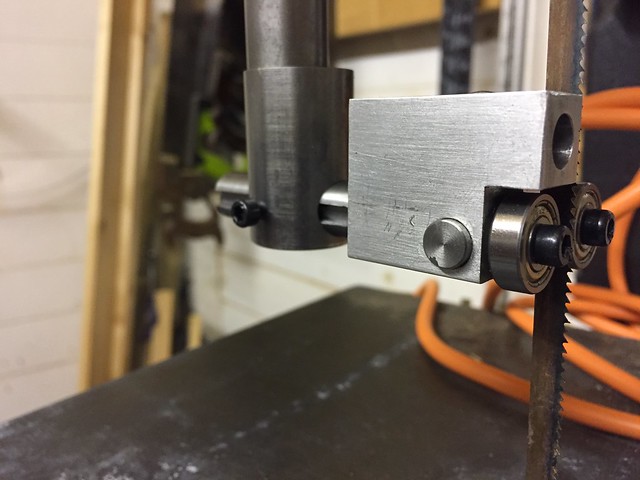
For the rise & fall shaft I attached some 1" stock to the end of a 3/4" bar. This was to add some meat to the end where the guides attach, and also to make the whole thing a bit longer. Then I milled a keyway in it:
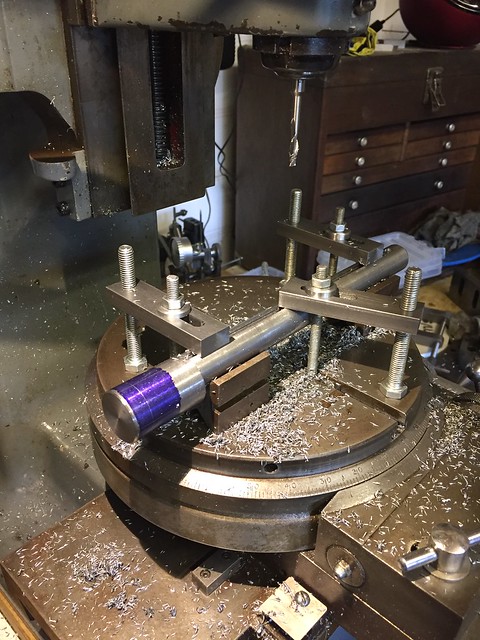
.... and bored a hole where the guides attach:
....more to follow....
Drilling out a bore for the rise & fall to run in:
Boring the hole out to be a sliding fit on the rise & fall (some 3/4" stock I already had):
I had to make a bespoke boring bar for this job, naturally :roll:. Another 3/4" hole was bore crosswise for the clamping mechanism.
Yes, my lathe does have a face on it. Meet Timmy the Toolpost.
For the rise & fall shaft I attached some 1" stock to the end of a 3/4" bar. This was to add some meat to the end where the guides attach, and also to make the whole thing a bit longer. Then I milled a keyway in it:
.... and bored a hole where the guides attach:
....more to follow....
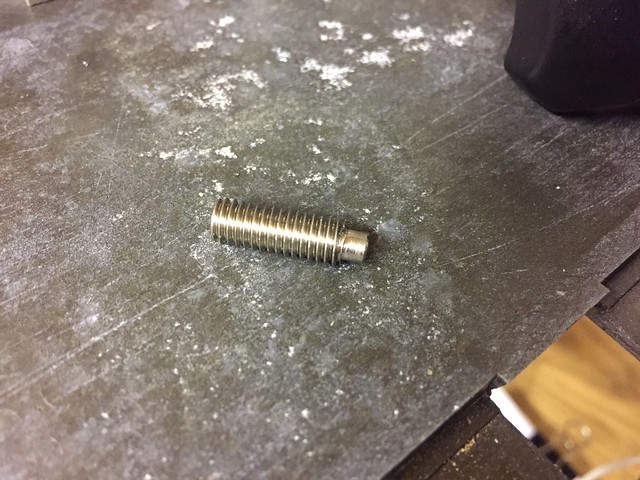
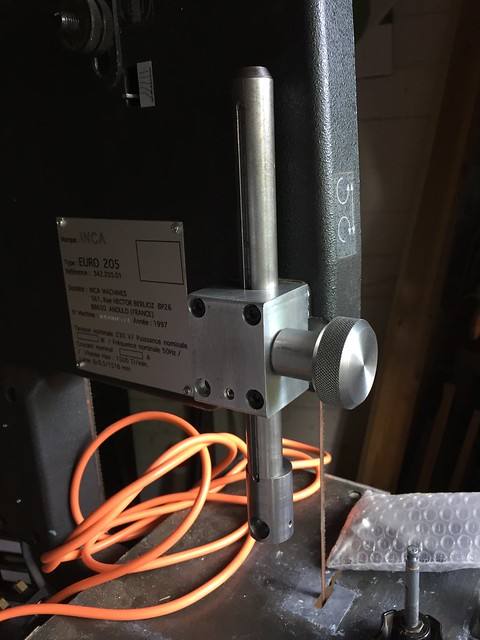
A grub screw with the end turned down to make a key:
One of the two rise & fall clamping pads:

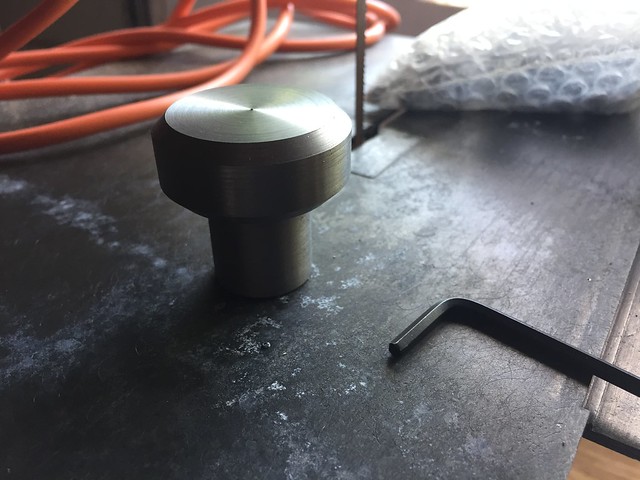
Sawing up some stock on the Kennedy Hexacut to make the clamping knob:
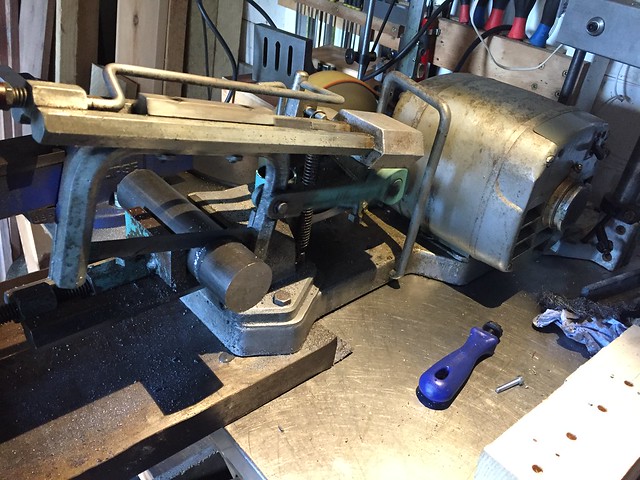
Clamping knob roughed out:

And a trial assembly:
Note the missing screw in the block; I marked out for four holes but there's only three on the back of the Inca #-o
.... final post coming up.....
One of the two rise & fall clamping pads:
Sawing up some stock on the Kennedy Hexacut to make the clamping knob:
Clamping knob roughed out:
And a trial assembly:
Note the missing screw in the block; I marked out for four holes but there's only three on the back of the Inca #-o
.... final post coming up.....
Final assembly, and delivery to the primary stakeholder (Doris). Rest assured that the sawdust is merely stunt sawdust that was purchased from a reputable supplier for aesthetic effect. It is in no way an indication that the bandsaw actually works.

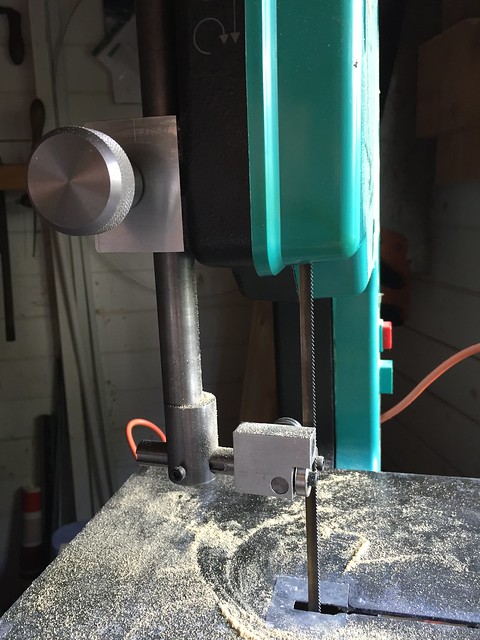
Yes it could do with a guard over the front of the blade. I'm still thinking about that :-k
And yes the blade is a rusty coil of poo. A new one will be ordered from Tuffsaws...
Yes it could do with a guard over the front of the blade. I'm still thinking about that :-k
And yes the blade is a rusty coil of poo. A new one will be ordered from Tuffsaws...
Very nice work, Dave. Even better than the original Inca engineering on the rise and fall/guide mechanism (spoken as an Inca addict).
Keith
Keith
AES
Established Member
Dave, that really IS an excellent piece of engineering for the rise & fall, once again, as per your usual high standards, very well done Sir.
=D>
Never mind the "economics", but I do have one Q concerning the rest of the machine (as I don't know that Inca machine at all).
Have you now "up-modded" the machine (new word?) to the extent that a different weakness elsewhere in the machine as it was first made is now revealed?
AES
=D>
Never mind the "economics", but I do have one Q concerning the rest of the machine (as I don't know that Inca machine at all).
Have you now "up-modded" the machine (new word?) to the extent that a different weakness elsewhere in the machine as it was first made is now revealed?
AES
John Brown
Freeloading Social media influenza
That rise and fall does look a lot better than the original. As an Inca owner(although the slightly bigger version), I reckon the rise and fall is definitely a weak point. Mine binds like crazy.
powertools
Established Member
All i can say is that i think that your guides are better than the original on my machine.
I can confirm I'm very pleased with the results of the restoration. Even with the rusty old kinked blade it came with, it still cuts like a knife through butter.
Was well worth the wait.
Was well worth the wait.
Thank you everyone for the kind words ")
I cannot compare it to an original Inca as I've never used one. I can say though that the guides are far better than the stock guides on our "big" bandsaw, a Draper BS350. The upper guides on the BS350 need a spanner and at least one allen key to adjust. The access to those nuts / screws is poor and the guides themselves move all over the place when tightening them up. I deliberately used one size of screw on the Inca guides so that they can be adjusted with just one hex key. I am definitely thinking about making new guides for the BS350 now.
The table on the Inca still needs some attention as it is considerably warped across the blade slot. I think that's more due to its exposure to the elements than a build defect. I think I will have to attach some reinforcing bars underneath to pull it back flat. Also the green plastic front cover needs some work. It attaches to the body via a knurled screw at the top and bottom, which leaves the right-hand side unsecured. This is where the electric interlock for the NVR switch is located, and it doesn't take much movement of the cover to drop out the NVR. The cover could definitely use a third screw or catch to secure it properly. I've seen other Incas online which do have a third fixing.
While I'm having a whinge, why do tool manufacturers have to use odd-sized bolts? For example, M6 screws with 9mm heads instead of the standard 10mm? Or screws with non-standard sized metric heads but Imperial threads?!
Sorry, rant over
AES":232f8iyv said:Dave, that really IS an excellent piece of engineering for the rise & fall, once again, as per your usual high standards, very well done Sir.
=D>
Never mind the "economics", but I do have one Q concerning the rest of the machine (as I don't know that Inca machine at all).
Have you now "up-modded" the machine (new word?) to the extent that a different weakness elsewhere in the machine as it was first made is now revealed?
AES
I cannot compare it to an original Inca as I've never used one. I can say though that the guides are far better than the stock guides on our "big" bandsaw, a Draper BS350. The upper guides on the BS350 need a spanner and at least one allen key to adjust. The access to those nuts / screws is poor and the guides themselves move all over the place when tightening them up. I deliberately used one size of screw on the Inca guides so that they can be adjusted with just one hex key. I am definitely thinking about making new guides for the BS350 now.
The table on the Inca still needs some attention as it is considerably warped across the blade slot. I think that's more due to its exposure to the elements than a build defect. I think I will have to attach some reinforcing bars underneath to pull it back flat. Also the green plastic front cover needs some work. It attaches to the body via a knurled screw at the top and bottom, which leaves the right-hand side unsecured. This is where the electric interlock for the NVR switch is located, and it doesn't take much movement of the cover to drop out the NVR. The cover could definitely use a third screw or catch to secure it properly. I've seen other Incas online which do have a third fixing.
While I'm having a whinge, why do tool manufacturers have to use odd-sized bolts? For example, M6 screws with 9mm heads instead of the standard 10mm? Or screws with non-standard sized metric heads but Imperial threads?!
Sorry, rant over
Bump. As part of Operation Musical Chairs, the Inca has come back into my possession.
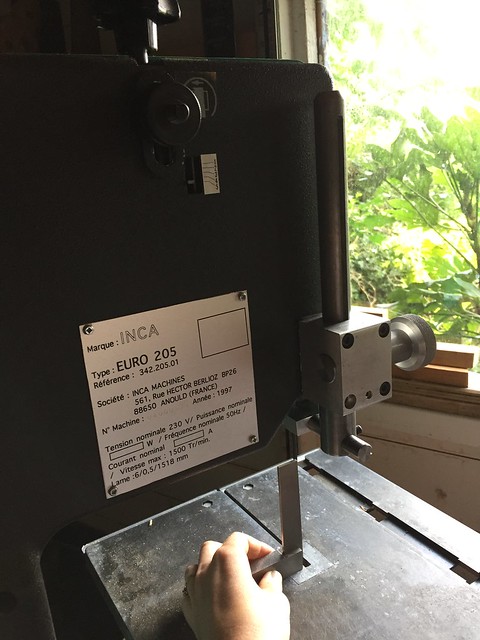
One of the unresolved issues with this Inca is the secureness (is that a word?) of the front cover. It is secured by two thumbscrews (one of which I had to replace), both on the left-hand side of the cover. That leaves the right-hand side free move. It only takes a little movement or vibration for the safety interlock to disengage and kill the NVR. Very annoying. I notice that later Incas seem to have an extra catch next to the switch.
Around the switch buttons there is a cast cover. I'm not really sure what it's for, but it made a very convenient mounting for an M8 nut and bolt:

Note the blue ink in the end of the bolt; it left this witness mark on the inside of the cover:

The lid was then drilled out with a clearance hole. :

I guess I'll have to call it a "Ro 205" from now on. This allows the cover to be safely secured right next to the NVR interlock:

There's still some work to do. The table has a bit of a warp in it. I'm going to look for some ally angle to screw onto the bottom to pull it back flat. Then I need to conjure up a new fence from somewhere...
One of the unresolved issues with this Inca is the secureness (is that a word?) of the front cover. It is secured by two thumbscrews (one of which I had to replace), both on the left-hand side of the cover. That leaves the right-hand side free move. It only takes a little movement or vibration for the safety interlock to disengage and kill the NVR. Very annoying. I notice that later Incas seem to have an extra catch next to the switch.
Around the switch buttons there is a cast cover. I'm not really sure what it's for, but it made a very convenient mounting for an M8 nut and bolt:
Note the blue ink in the end of the bolt; it left this witness mark on the inside of the cover:
The lid was then drilled out with a clearance hole. :
I guess I'll have to call it a "Ro 205" from now on. This allows the cover to be safely secured right next to the NVR interlock:
There's still some work to do. The table has a bit of a warp in it. I'm going to look for some ally angle to screw onto the bottom to pull it back flat. Then I need to conjure up a new fence from somewhere...
Attachments
SammyQ
Established Member
Ah!! Dave, are YOU the one castigated in the vacuums thread for 'cutting holes in your bandsaw, when a new bearing would have done'??
Made no sense at the time :-"
Sam
Made no sense at the time :-"
Sam
powertools
Established Member

Do you have the original rail for the fence? It is a length of unequal angle iron that bolts to the front of the table and I would think it also helps to keep the table flat.
Straingly enough I have done some work on my Inca today a few weeks ago I managed to break the table insert and today I made a new one.
Attachments
So much so I gave it back lolDoris":xkk9qu09 said:I can confirm I'm very pleased with the results of the restoration. Even with the rusty old kinked blade it came with, it still cuts like a knife through butter.
Was well worth the wait.
SammyQ":tlpn1rkp said:Ah!! Dave, are YOU the one castigated in the vacuums thread for 'cutting holes in your bandsaw, when a new bearing would have done'??
Made no sense at the time :-"
Sam
I'll have to plead ignorance on that one. I haven't posted anything much lately, let alone about making holes for vacuums???
powertools":tlpn1rkp said:
Do you have the original rail for the fence? It is a length of unequal angle iron that bolts to the front of the table and I would think it also helps to keep the table flat.
Straingly enough I have done some work on my Inca today a few weeks ago I managed to break the table insert and today I made a new one.
Nope, no rail. There is a channel cast into the bottom of the table though which I was thinking of utilising. Interesting that yours has a round insert, ours is square
John Brown
Freeloading Social media influenza
AFAIK, the 260 is a round insert(mine certainly is). I think the 205 is a slightly smaller saw.
Argus
Established Member
I’ve just come across this this little saga………. Puts me in mind of an Inca saw like this that I had more than 25 years ago.
It didn’t occur to me at the time that it was a ‘left-hand’ cut, (apparently the only one made???) but I used it for a year or so until it became clear that it was too small, physically, for what I did........ I think that it was a set of six Oak doors that convinced me.
Anyway, after a free-ad in one of the woodworking comics, I sold it to a bloke who specifically wanted a ‘southpaw’ machine because, he said, he was making a glider.
With the cash in hand and a very good bit of bonus, I bought a Startrite 352, which I still use.
Still, a good read and nice to see the old machines are still about.
.
John Brown
Freeloading Social media influenza
Making a glider? You've totally lost me there...Argus":2t1x6hcq said:I’ve just come across this this little saga………. Puts me in mind of an Inca saw like this that I had more than 25 years ago.
It didn’t occur to me at the time that it was a ‘left-hand’ cut, (apparently the only one made???) but I used it for a year or so until it became clear that it was too small, physically, for what I did........ I think that it was a set of six Oak doors that convinced me.
Anyway, after a free-ad in one of the woodworking comics, I sold it to a bloke who specifically wanted a ‘southpaw’ machine because, he said, he was making a glider.
With the cash in hand and a very good bit of bonus, I bought a Startrite 352, which I still use.
Still, a good read and nice to see the old machines are still about.
.
Similar threads
- Replies
- 14
- Views
- 1K
- Replies
- 6
- Views
- 2K