


RossJarvis
Established Member
Hello again folks, it's a while since I horrified you with my antics so here's some more;
Rather than working in the back garden, I thought I’d find some other, far from ideal circumstances, to do some butchering in. Some friends of mine live in a rambling manor house and attached buildings, in need of constant maintenance and money, which don’t exist. They are converting part of an 1850 stables into some accommodation on a very low budget. They thought it may be possible to re-use a door and frame instead of buying in a UPVC wotsit, so I said I’d have a go at helping.
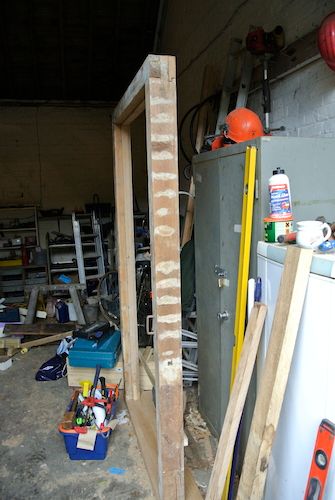
The frame seemed to be a reasonable fit to a hole cut through the wall for a new main entrance so I took control (ha ha ha) of the wood side of things. The frame itself had no sill and was anchored through a concrete floor with a couple of iron doo-dahs, the door was a semi-framed –ledged-and-braced arrangement and much wood-worm had been munching, sometime over the past 170 years. The frame;
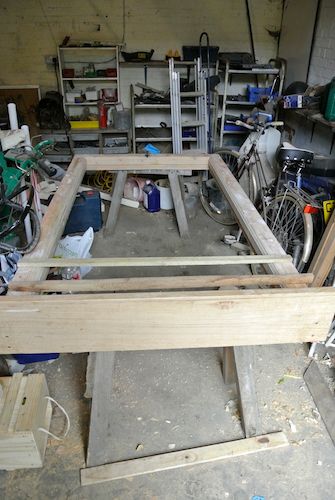
(this is actually a few days after I started on it) and the door;
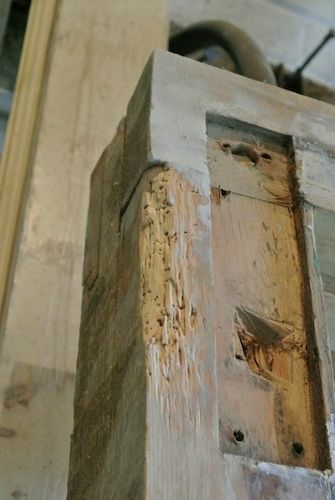
The frame and door had been removed from an exterior placement, which was under cover, the “head” had had the “horns” cut off exposing the sides of the tenons, the foot of one of the side “jams?” had ben cut off due to rot and worm and was spliced in with new wood, leaving some large gaps and there were rebates for the “anchors?”.
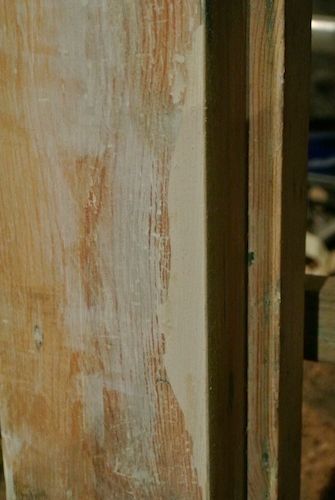
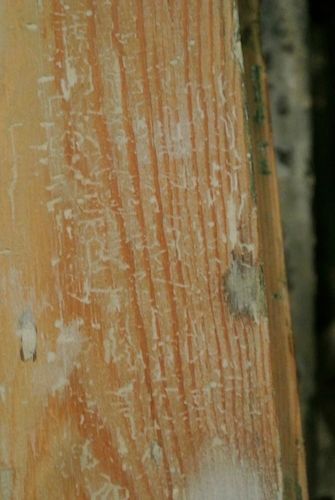
The first thing I did was strip the paint with a hot air gun. Much of the frame and door had never been painted, but a few layers of paint had been slapped on at various stages over the past 170 years, some of which went on over un-prepared damage. Then I scraped and sanded the surface to bare wood as much as I could and then I started to fill with two part filler;
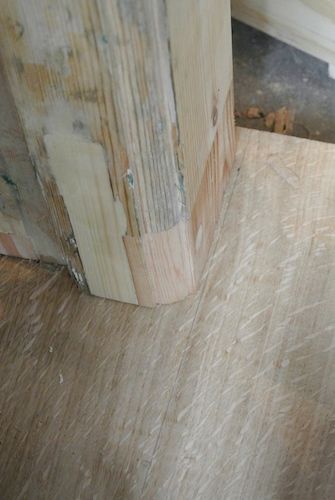
I cut some rot out of the bottom of the other leg and then plugged the gaps and used my shoulder plane to re-instate the mouldings;
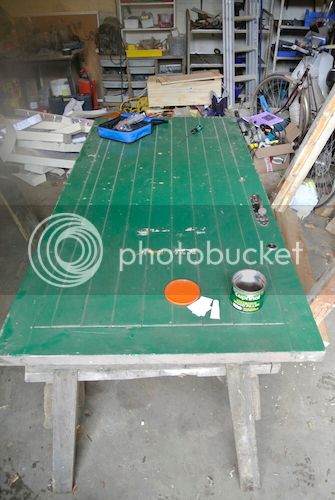
This is another shot, long after the deed was done.
I must admit that I’m not following “best practice” but trying to do a reasonable job on a close to zero budget, so try not to point out too many failures unless your willing to pay some money into the project or can recommend zero budget remedies.
I’m also assuming that the worm has now “flown” as I can’t see evidence of recent activity, but can’t be sure here. If I’m lucky I can find some treatment and may slap that on.
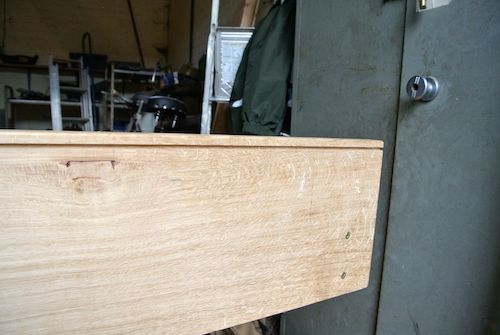
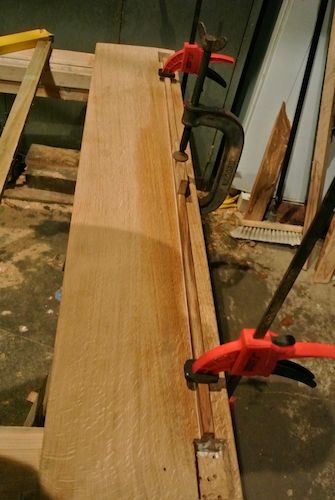
The next thing was to think about the sill. My idea was to fabricate a hardwood sill and fit it to the bottom of the “uprights-legs-jambs-wotsits”, I found some good, very old pine, which might have done and had some bits of oak which could have been laminated together, but the chappie in charge poo-poohed these ideas. Then we managed to get a bit of seasoned oak, 1 ½ x 9” for free so I was able to shape this to size;
I routed a drip in the bottom;
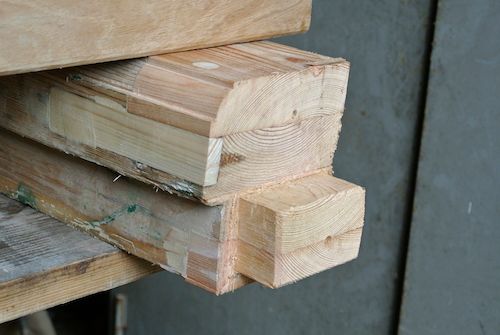
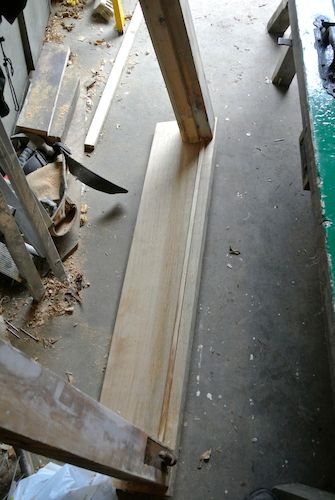
…and planed a drop of ½ inch over 7 by hand, which took about an hour and a half and filled a bin bag with shavings; I then cut the bottoms of the legs into tenons, you might notice the amount of new wood put into the job here;
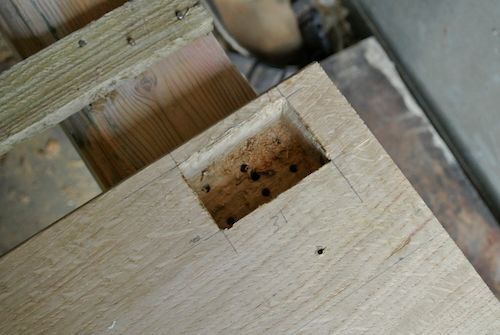
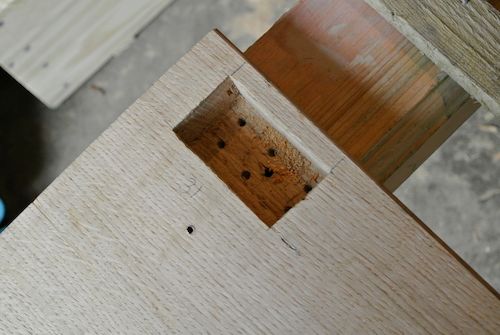
…and chopped some mortices into the sill;
…using a spade bit and chisel. Nextly I cut a lump of oak out of a bigger lump of oak using the rip side of my Ryoba saw. As per usual, the cut went off line and was well on the p**s vertically speaking, so I had another hour of planing and another bin-bag full of shavings to create a weather bar. (this was possibly exended due to a combination of thinking time, resting time and ***-break time). I then routed a strip into the sill and glueged the bar in;
This was then planed to a uniform height, arrises were relieved and I stuck the whole lot together with some screws to help;
I had a go at cleaning the hinges up and managed to demolish a Dremel flap-thingummy-jig in short order, but up until then the ironwork was coming up very nicely. The general idea is to keep all the original iron-work and leave the door in as original a state as possible. Henny-way, by this morning I’d done as much as I could with the frame so started on the door, pre-doing;
and after I’d started;
…the paint is relatively recent so comes off generally easily with the hot-air-gun, however it wasn’t put onto well prepared wood, so is deeply stuck in, in places. Ho hum. My current plan is to remove a fair bit of the bottom, as the frame is now shorter than original and put in a single piece bottom rail, tongue and grooved with a formed weather bar as part of this. If anyone has some better suggestions, please make them before 11:00 Saturday 9th. Suggestions such as “do it properly you moron” may be ignored!
Rather than working in the back garden, I thought I’d find some other, far from ideal circumstances, to do some butchering in. Some friends of mine live in a rambling manor house and attached buildings, in need of constant maintenance and money, which don’t exist. They are converting part of an 1850 stables into some accommodation on a very low budget. They thought it may be possible to re-use a door and frame instead of buying in a UPVC wotsit, so I said I’d have a go at helping.
The frame seemed to be a reasonable fit to a hole cut through the wall for a new main entrance so I took control (ha ha ha) of the wood side of things. The frame itself had no sill and was anchored through a concrete floor with a couple of iron doo-dahs, the door was a semi-framed –ledged-and-braced arrangement and much wood-worm had been munching, sometime over the past 170 years. The frame;


(this is actually a few days after I started on it) and the door;

The frame and door had been removed from an exterior placement, which was under cover, the “head” had had the “horns” cut off exposing the sides of the tenons, the foot of one of the side “jams?” had ben cut off due to rot and worm and was spliced in with new wood, leaving some large gaps and there were rebates for the “anchors?”.
The first thing I did was strip the paint with a hot air gun. Much of the frame and door had never been painted, but a few layers of paint had been slapped on at various stages over the past 170 years, some of which went on over un-prepared damage. Then I scraped and sanded the surface to bare wood as much as I could and then I started to fill with two part filler;


I cut some rot out of the bottom of the other leg and then plugged the gaps and used my shoulder plane to re-instate the mouldings;

This is another shot, long after the deed was done.
I must admit that I’m not following “best practice” but trying to do a reasonable job on a close to zero budget, so try not to point out too many failures unless your willing to pay some money into the project or can recommend zero budget remedies.
I’m also assuming that the worm has now “flown” as I can’t see evidence of recent activity, but can’t be sure here. If I’m lucky I can find some treatment and may slap that on.
The next thing was to think about the sill. My idea was to fabricate a hardwood sill and fit it to the bottom of the “uprights-legs-jambs-wotsits”, I found some good, very old pine, which might have done and had some bits of oak which could have been laminated together, but the chappie in charge poo-poohed these ideas. Then we managed to get a bit of seasoned oak, 1 ½ x 9” for free so I was able to shape this to size;
I routed a drip in the bottom;

…and planed a drop of ½ inch over 7 by hand, which took about an hour and a half and filled a bin bag with shavings; I then cut the bottoms of the legs into tenons, you might notice the amount of new wood put into the job here;

…and chopped some mortices into the sill;


…using a spade bit and chisel. Nextly I cut a lump of oak out of a bigger lump of oak using the rip side of my Ryoba saw. As per usual, the cut went off line and was well on the p**s vertically speaking, so I had another hour of planing and another bin-bag full of shavings to create a weather bar. (this was possibly exended due to a combination of thinking time, resting time and ***-break time). I then routed a strip into the sill and glueged the bar in;

This was then planed to a uniform height, arrises were relieved and I stuck the whole lot together with some screws to help;

I had a go at cleaning the hinges up and managed to demolish a Dremel flap-thingummy-jig in short order, but up until then the ironwork was coming up very nicely. The general idea is to keep all the original iron-work and leave the door in as original a state as possible. Henny-way, by this morning I’d done as much as I could with the frame so started on the door, pre-doing;
and after I’d started;

…the paint is relatively recent so comes off generally easily with the hot-air-gun, however it wasn’t put onto well prepared wood, so is deeply stuck in, in places. Ho hum. My current plan is to remove a fair bit of the bottom, as the frame is now shorter than original and put in a single piece bottom rail, tongue and grooved with a formed weather bar as part of this. If anyone has some better suggestions, please make them before 11:00 Saturday 9th. Suggestions such as “do it properly you moron” may be ignored!


