Just think how good your next bench will be!
You are using an out of date browser. It may not display this or other websites correctly.
You should upgrade or use an alternative browser.
You should upgrade or use an alternative browser.
YAWN - Yet Another Workbench Newbie
- Thread starter MarkDennehy
- Start date


Help Support UKworkshop.co.uk:
This site may earn a commission from merchant affiliate
links, including eBay, Amazon, and others.
MarkDennehy
Established Member
And how easy - I saw 4"x8" slabs of red deal the last time I went hardwood shopping. If I'd seen them before I'd started this, the benchtop would have taken about six minutes to make instead of letting me plane 220 feet of 2x4...
Yup ... it happens to us all ...
MarkDennehy
Established Member
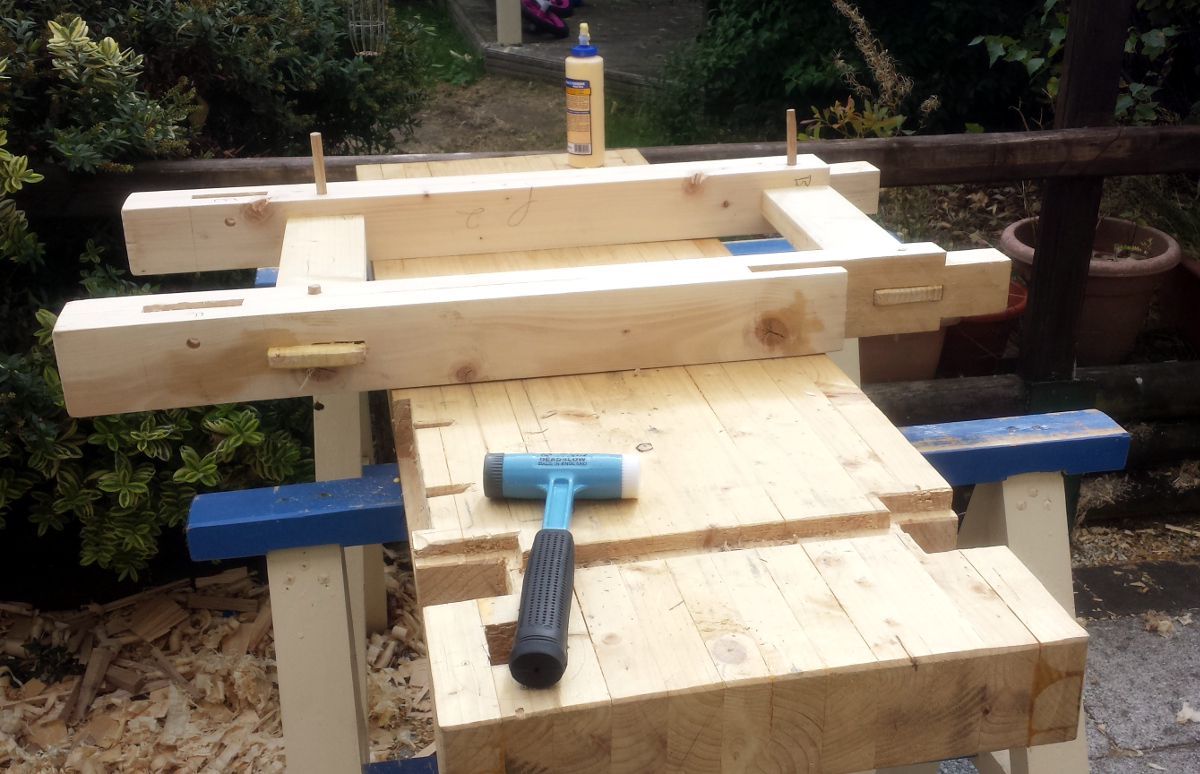
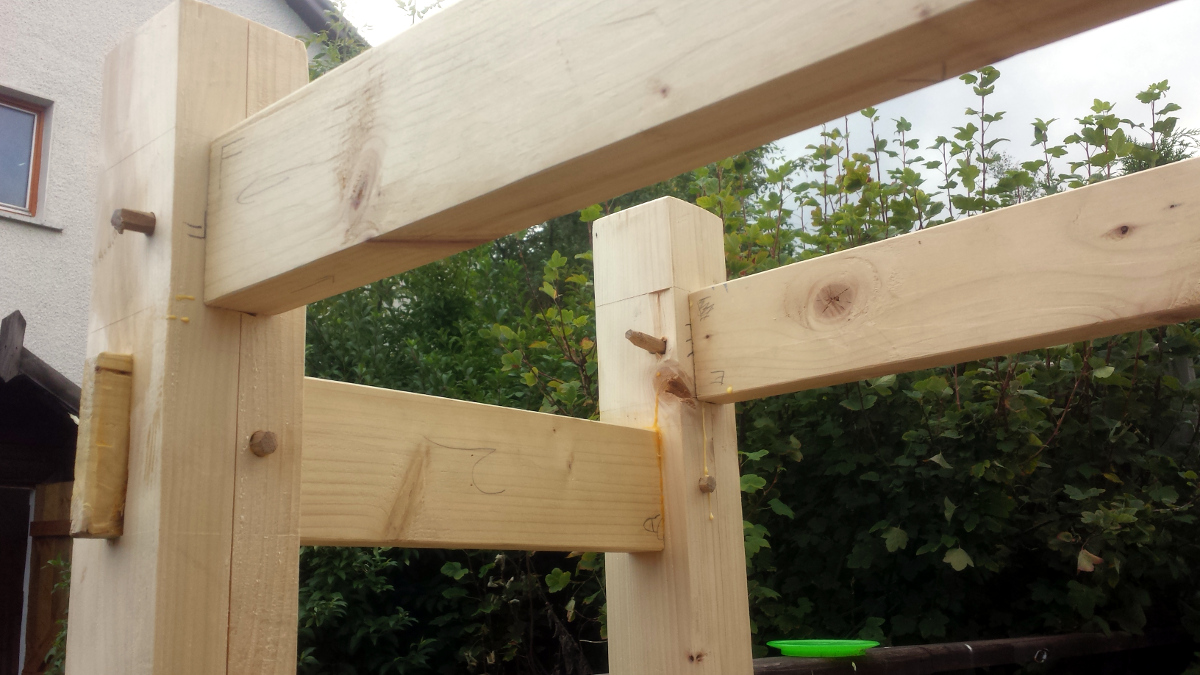
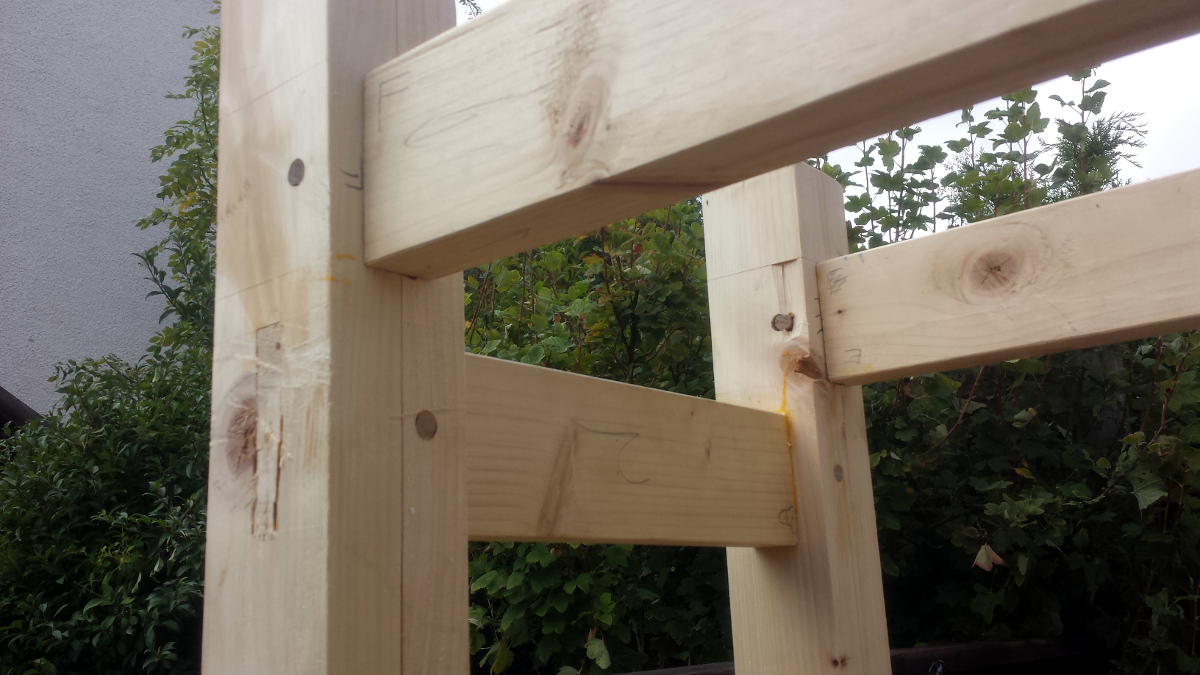
Rain yesterday, rain tonight, but for a few hours, no rain. So, time to cut the last mortices (got the tenons for the long stretchers cut during the week).
This time, chopped the first five mm or so using a chisel the paul sellers way, and did that on both sides, then used the auger to remove the waste and cleaned up by chisel.
It's not going to win awards, but it's at least cleaner than when I started this and it'll do for now.
Rear stretcher fits...

...and so does the front stretcher. Grand.
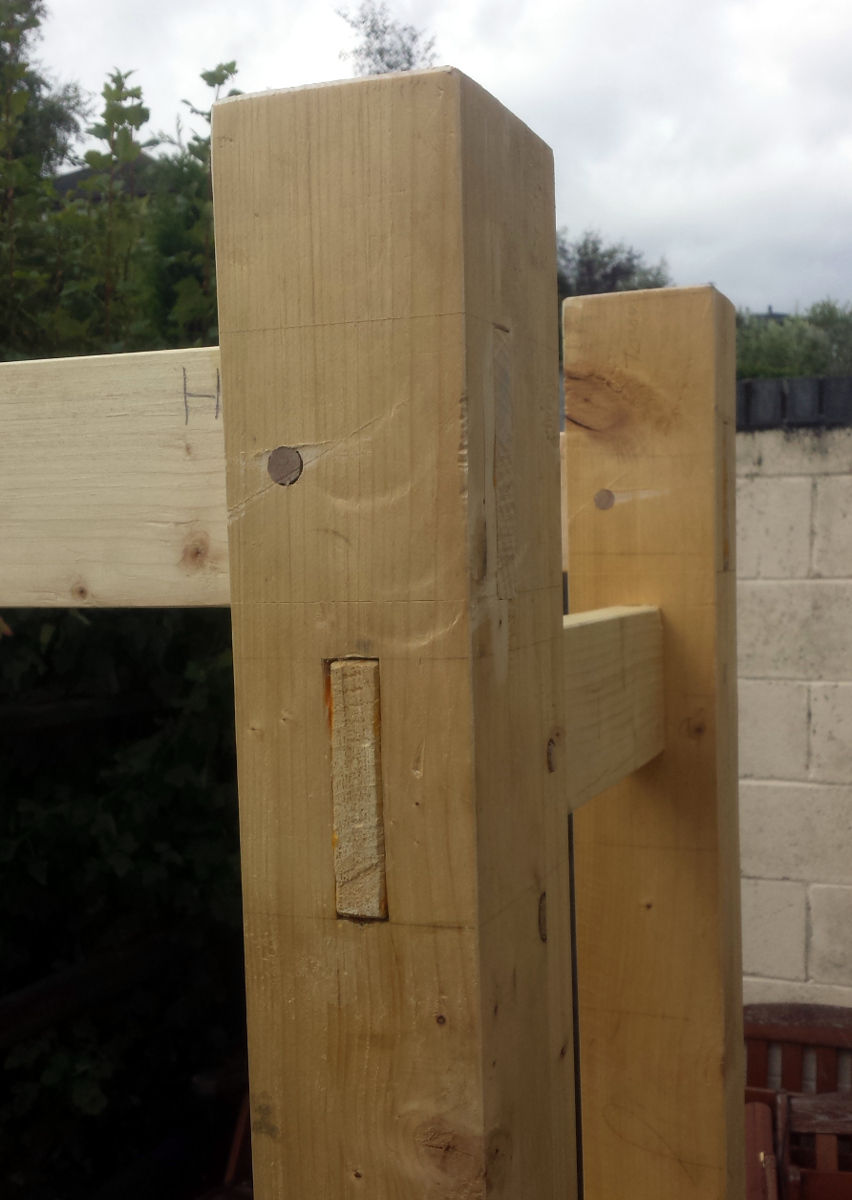
Next step was to drill the drawboring holes for the M&T joints on the stretchers. All will be using ½" pegs except for the thinnest part of the front right leg (which is only barely 2" thick at that spot, so I'll use a ¼" peg for that one). And I just managed to get the holes drilled with the auger for all twelve joints before this hit...

All back under the tarp now, and we're due a few dry evenings this week. I need to make up some drawbore pegs, and then I think it's time to start on assembly...
This time, chopped the first five mm or so using a chisel the paul sellers way, and did that on both sides, then used the auger to remove the waste and cleaned up by chisel.
It's not going to win awards, but it's at least cleaner than when I started this and it'll do for now.
Rear stretcher fits...
...and so does the front stretcher. Grand.
Next step was to drill the drawboring holes for the M&T joints on the stretchers. All will be using ½" pegs except for the thinnest part of the front right leg (which is only barely 2" thick at that spot, so I'll use a ¼" peg for that one). And I just managed to get the holes drilled with the auger for all twelve joints before this hit...
All back under the tarp now, and we're due a few dry evenings this week. I need to make up some drawbore pegs, and then I think it's time to start on assembly...
MarkDennehy
Established Member
Well, as drawbore pegs go, those are nice bananas.
Sigh.
MarkDennehy
Established Member
Right. Sunny morning, most of the last few days torrential rain dried up by the time breakfast was done, so out with the bench parts from the shed and onto the sawhorses and away we go. First thing to do is the finish making drawbore pegs, and then on we go with finally putting this thing together.
Hm. Help required here...
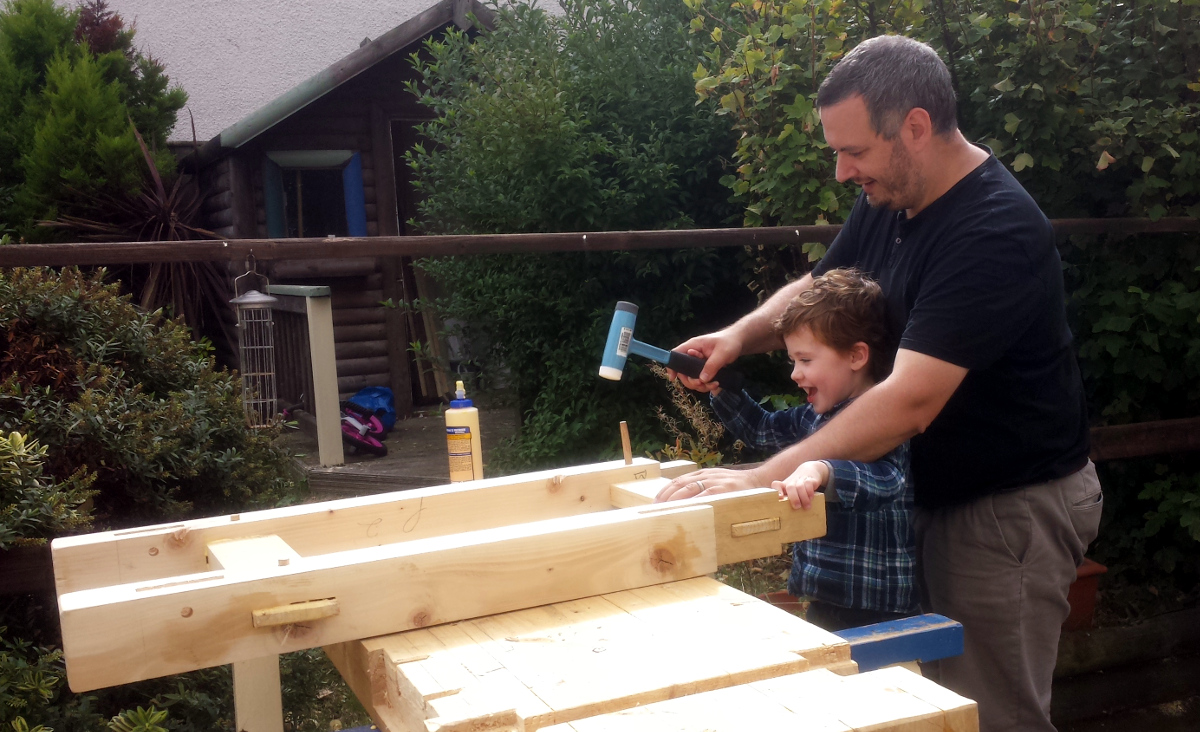
Mental note, hide the hammers from now on for the sake of the cat.
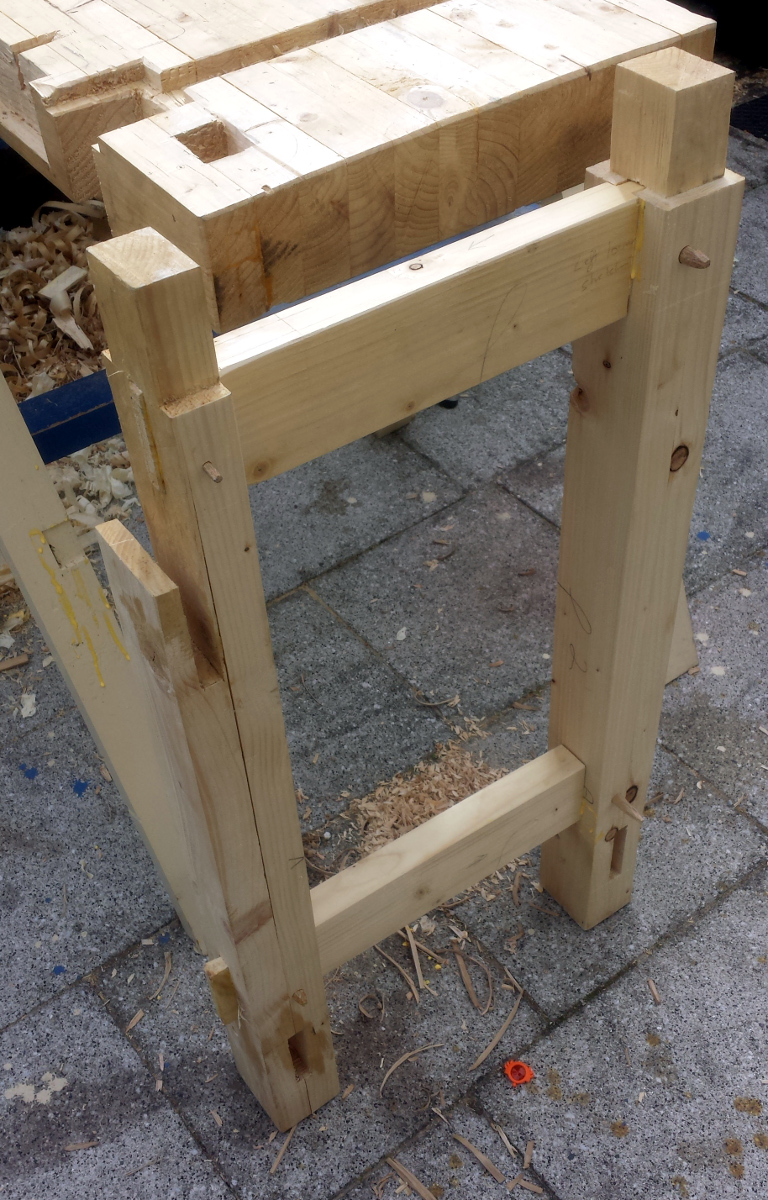
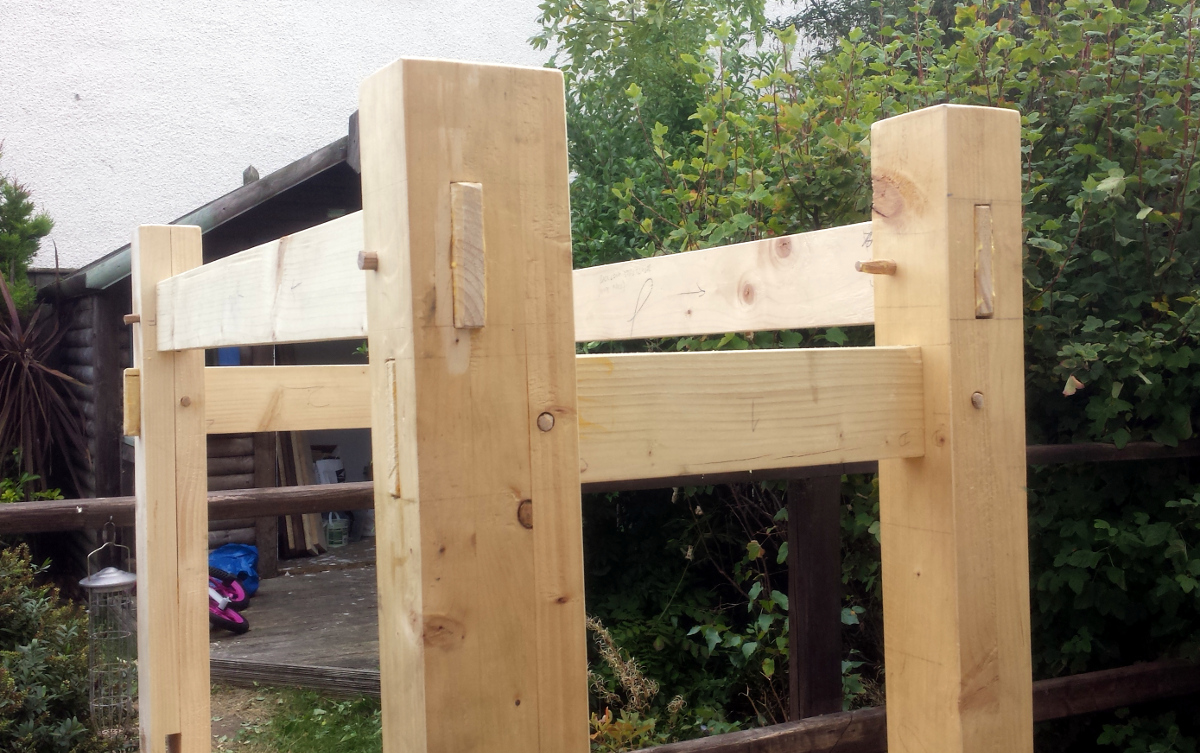
Okay, nothing split out, that'll do. Finished up both leg frames and clamped them up (not needed with drawbores, but hell, if you have them, why not use them?).
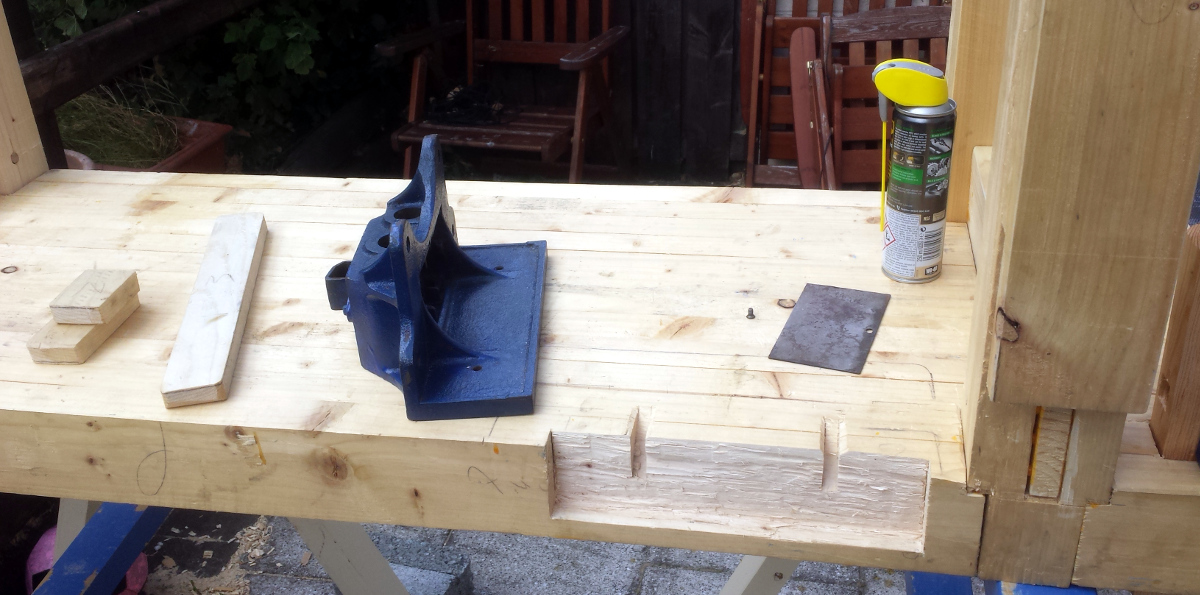
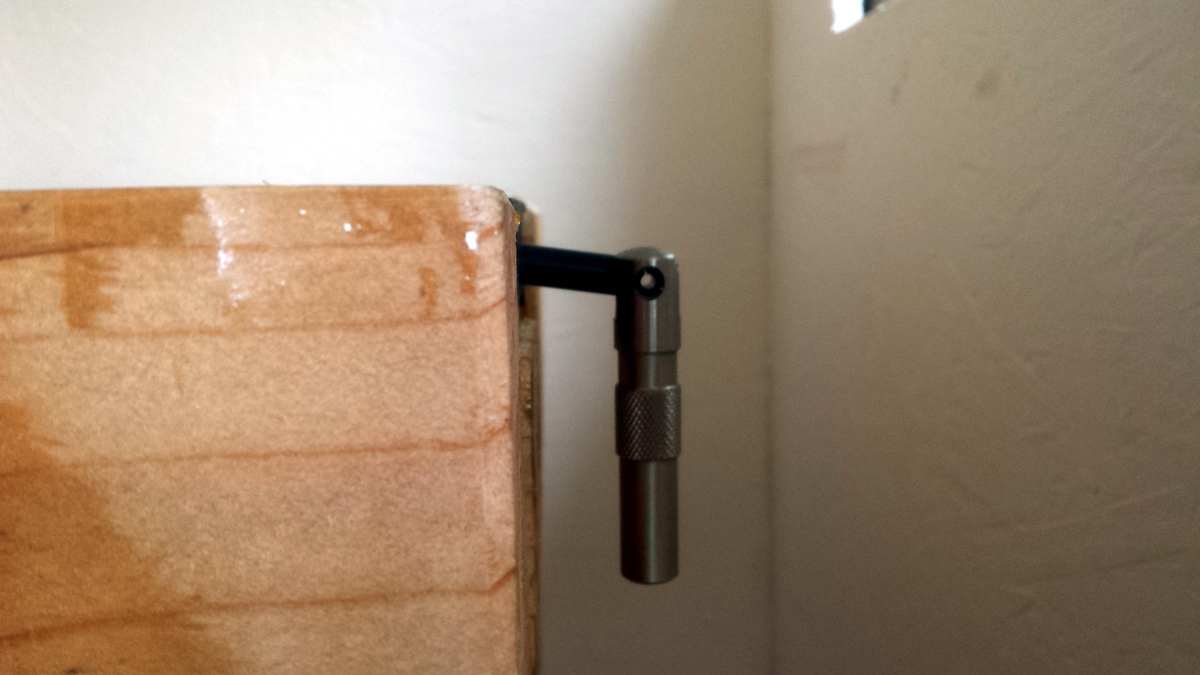
Now, while I leave those for an hour or two to cure slightly, time to drill the hole in the front apron for the vice bars.
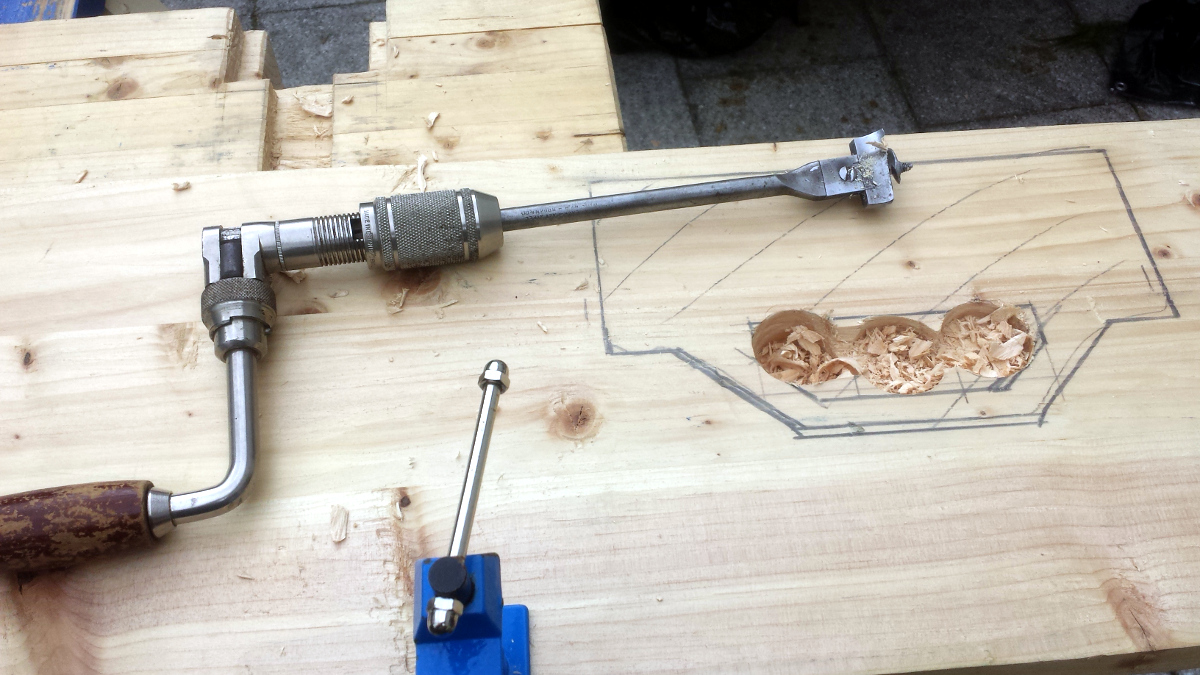
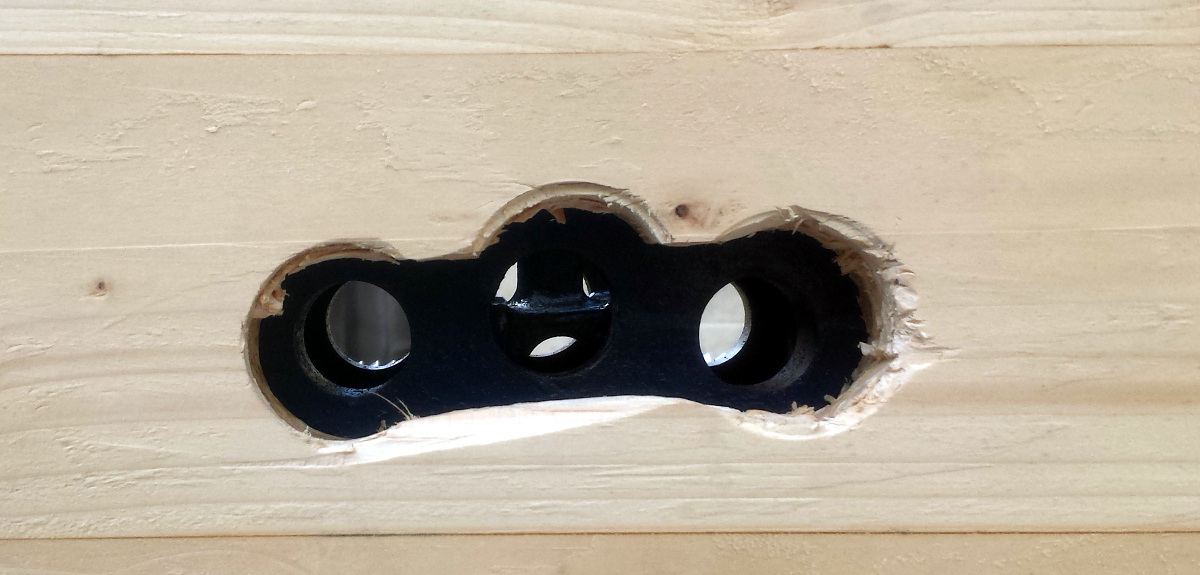
Damn but that thing takes it out of you. But it's quick, and a few moments cleaning up the inevitable breakthroughs with a chisel gives a nice, neat, minimalist hole.
Experienced record vice fitters have by now no doubt spotted the deliberate mistake.
/sigh
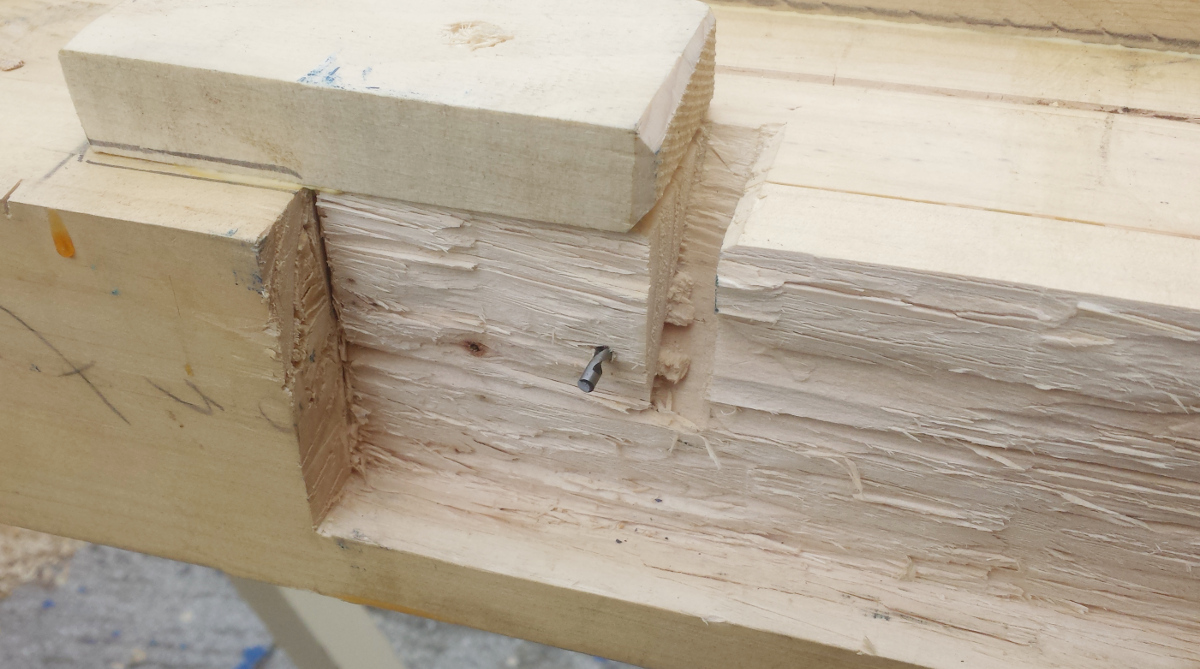
Out with the auger and chew away the required chunk for the quick release bar and then tidy up with the chisel...
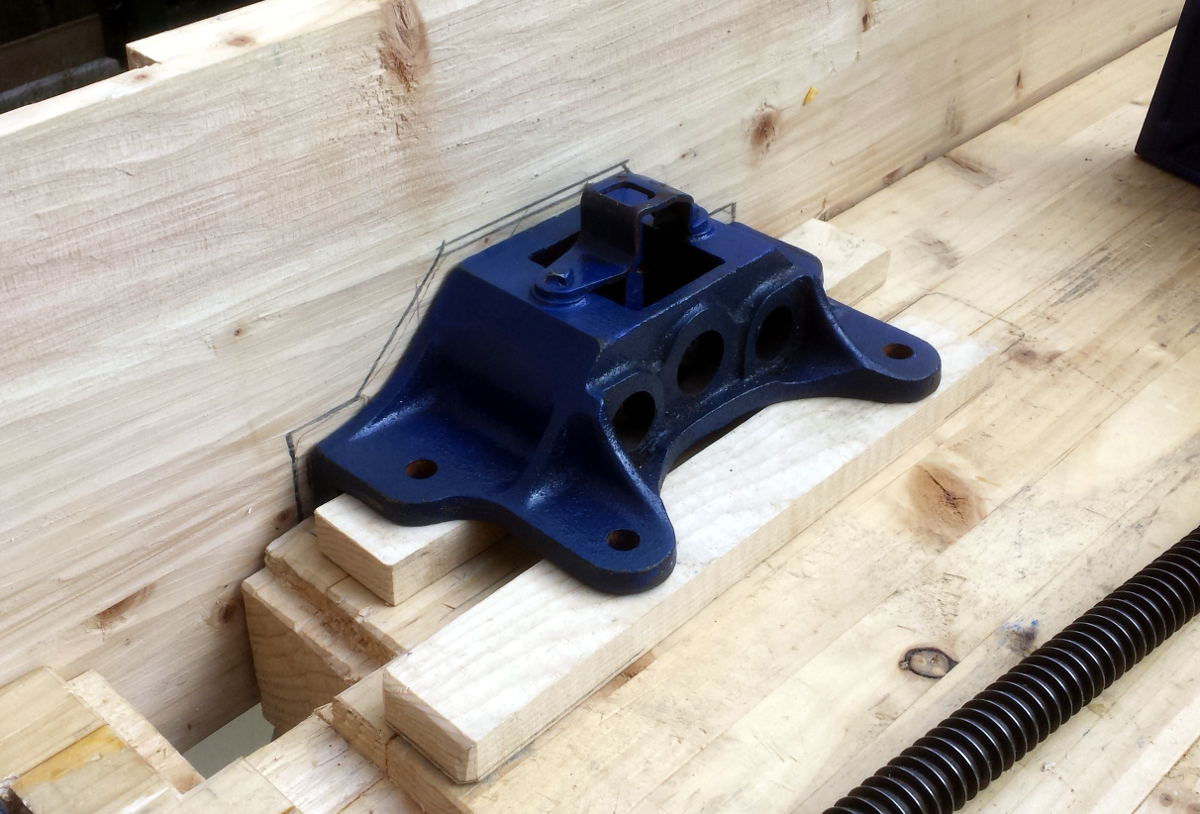
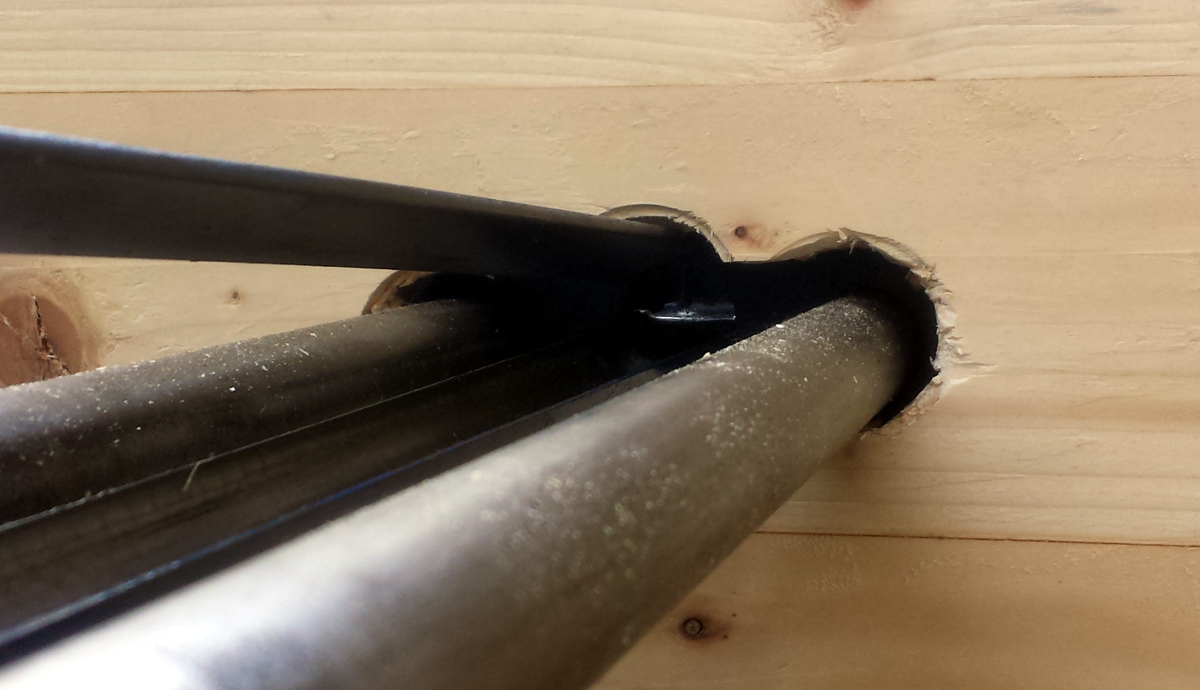
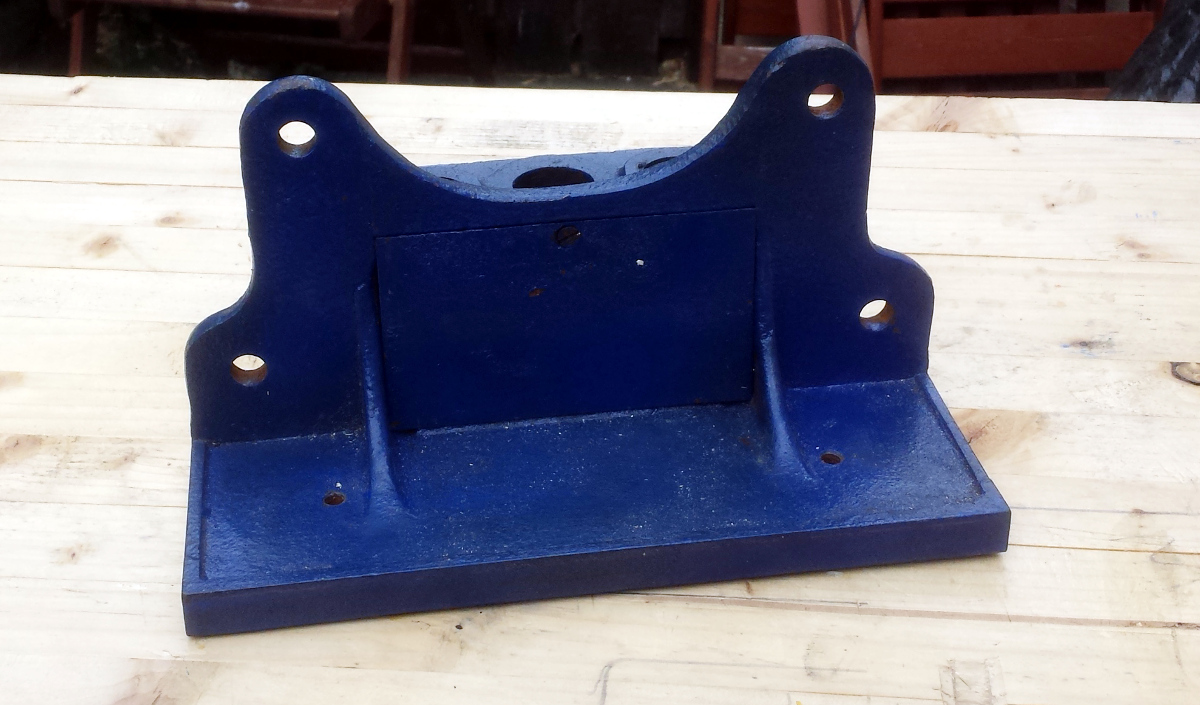
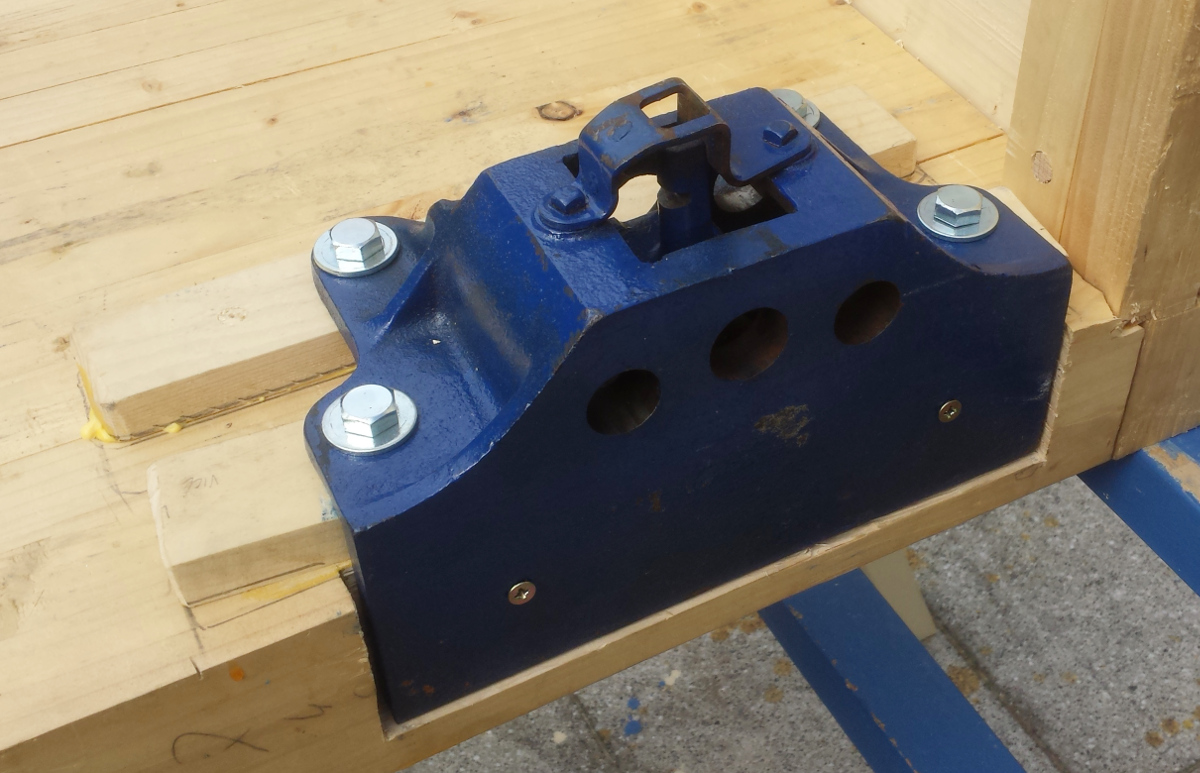
Man, that Record 53A is a big honkin' beast of a thing. In fact... er...
Er, phew? Half-inch of clearance at the back when that casting at the back of the rods is reattached. Totally planned that.
Little more trimming of the mortice on the benchfront was needed in fact, so it's not a half-inch anymore, but somewhere around 3/8ths or so. Good times.
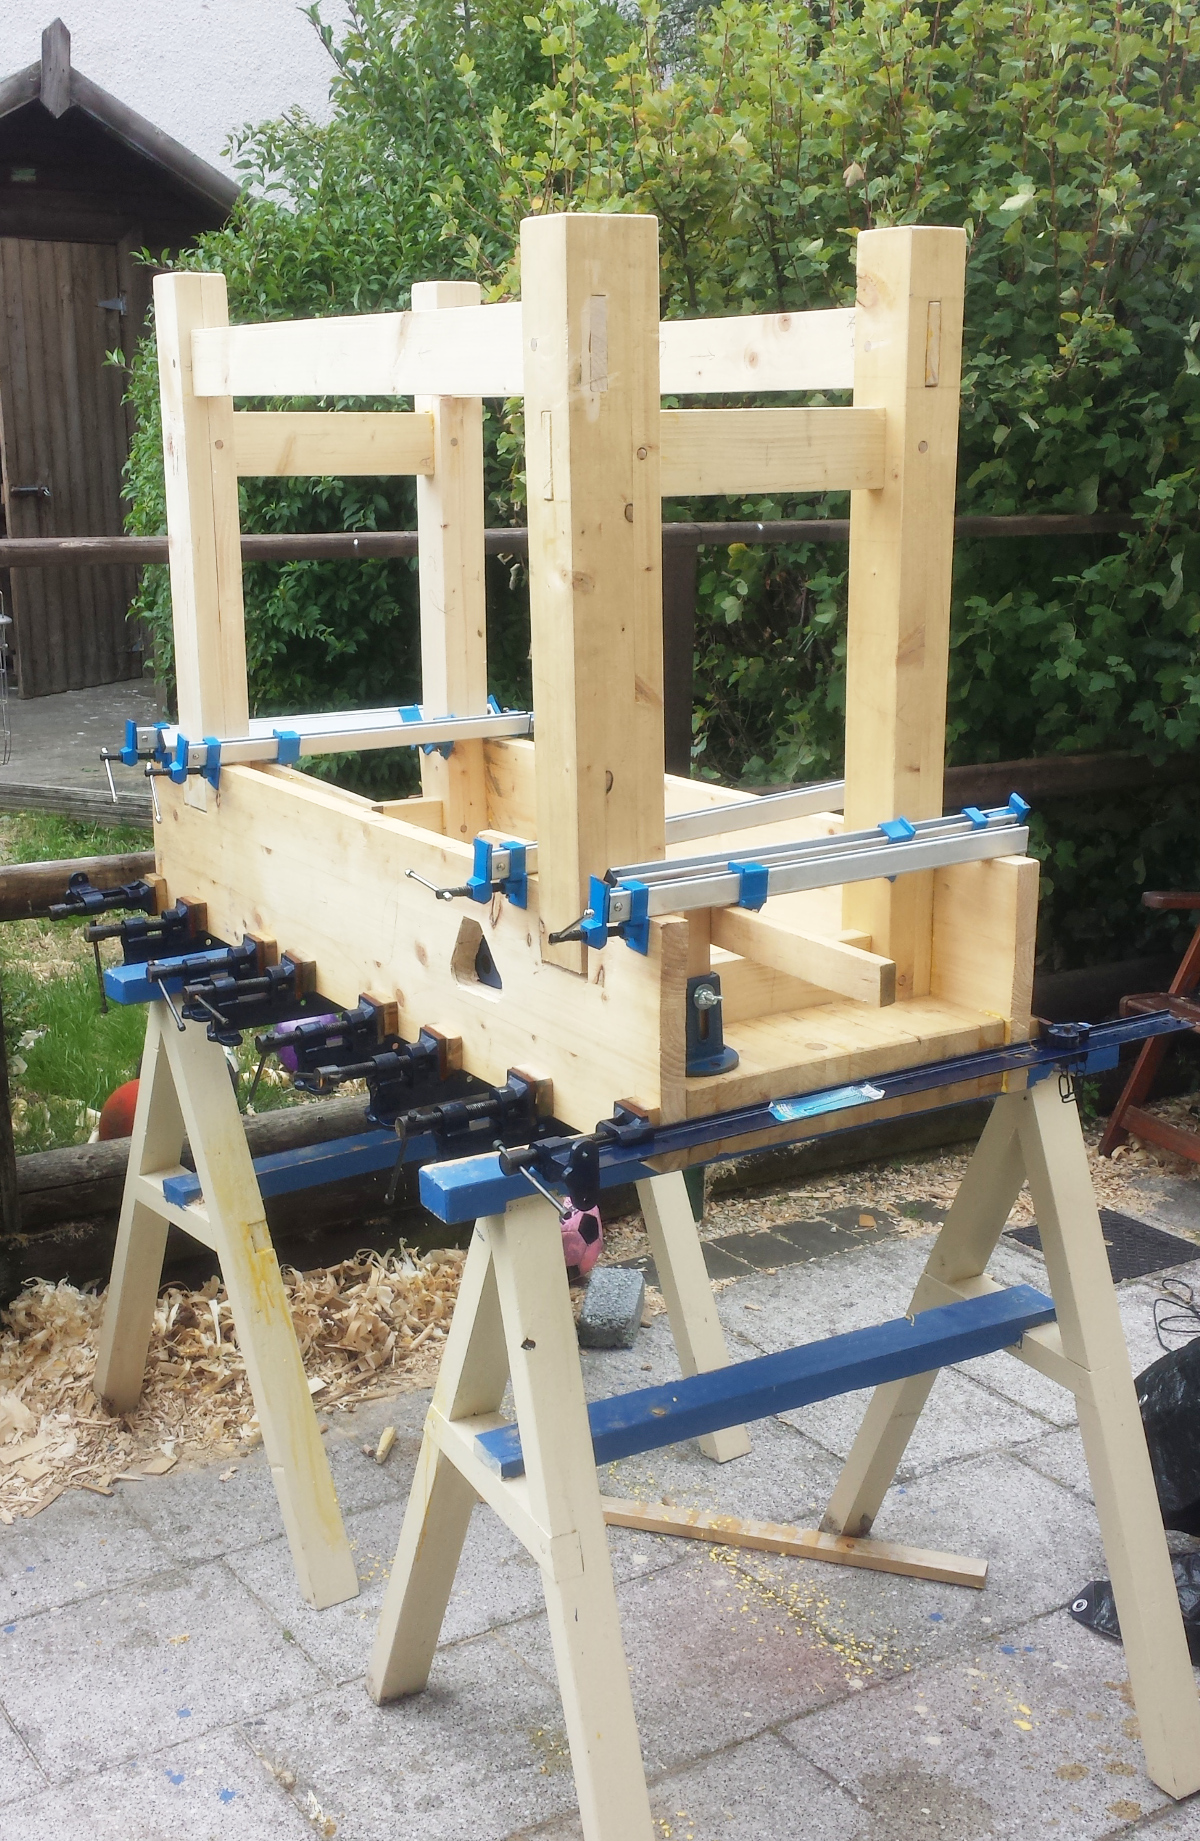
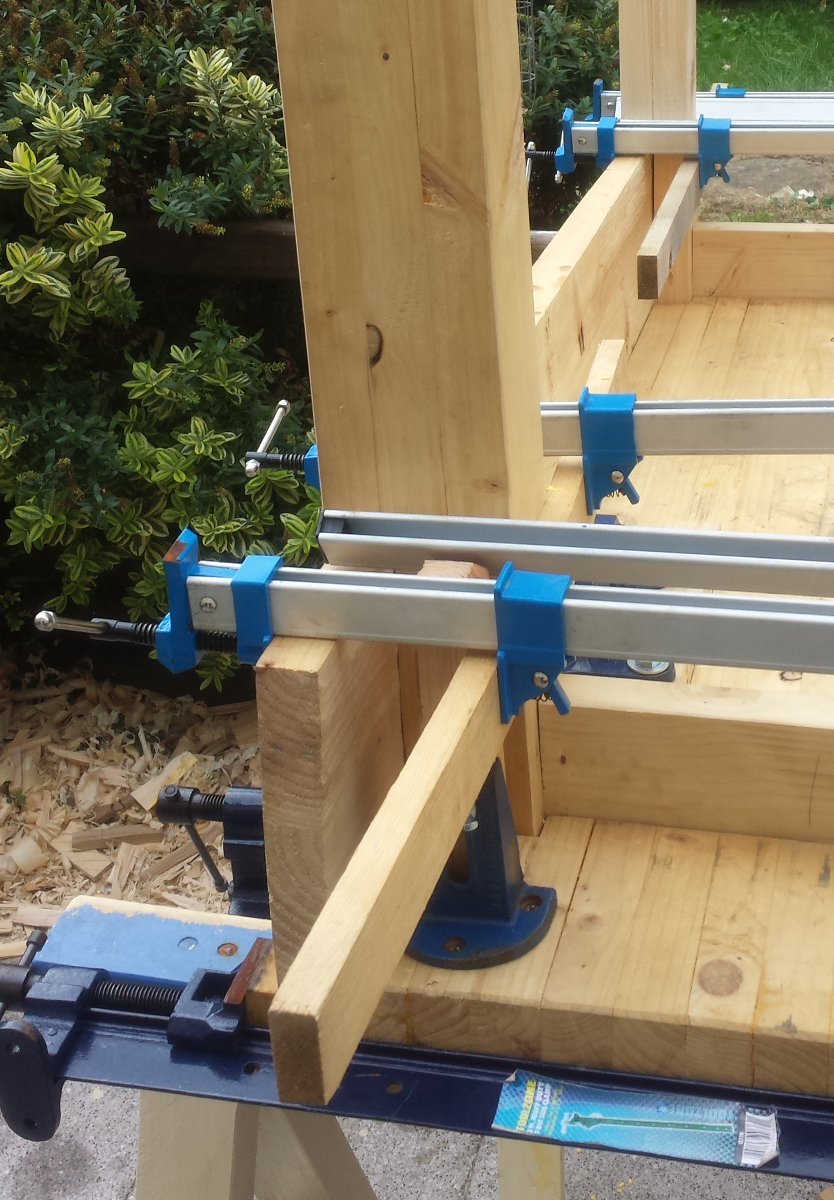
Broke here for a ham sandwich and about three litres of water. 'Twas a bit warm out there. At this point, figured the leg frames were ready to go into the benchtop and to get the long stretchers, so I took them out of the clamps, test fitted them in the benchtop mortices, trimmed one of the mortices a bit (but I knew that was coming - and there'll be a bit of a gap to fill with an offcut, but it shouldn't compromise the bench), and then glued up the long stretchers and drawbored them at one end. Glued up the benchtop mortices as well, and realised at this point that the fully assembled undercarriage of the bench is pineapple-y heavy, so I drowned the mortices in glue because I couldn't properly paint the tenons with glue, and then slid them all home. Once that was done I drawbored the other side of the long stretcher and everything seemed solid.
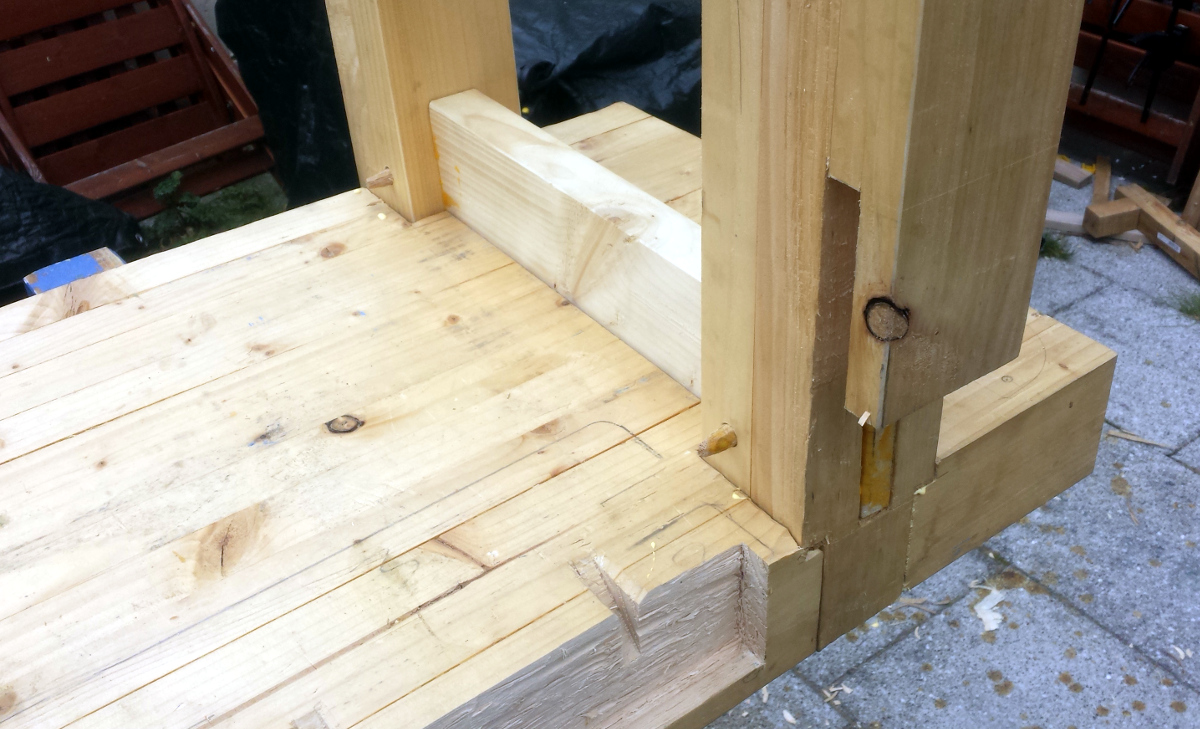
Messy as a pineapple in a blender with a hamster though. I cleaned up most of the squeezeout with shavings, and then stood the bench on the ground to be sure the glue didn't cure with the joints not settled right. I needed some weight to settle the bench onto its joints though, and didn't have any large bags of cement or sand to hand so I made do:
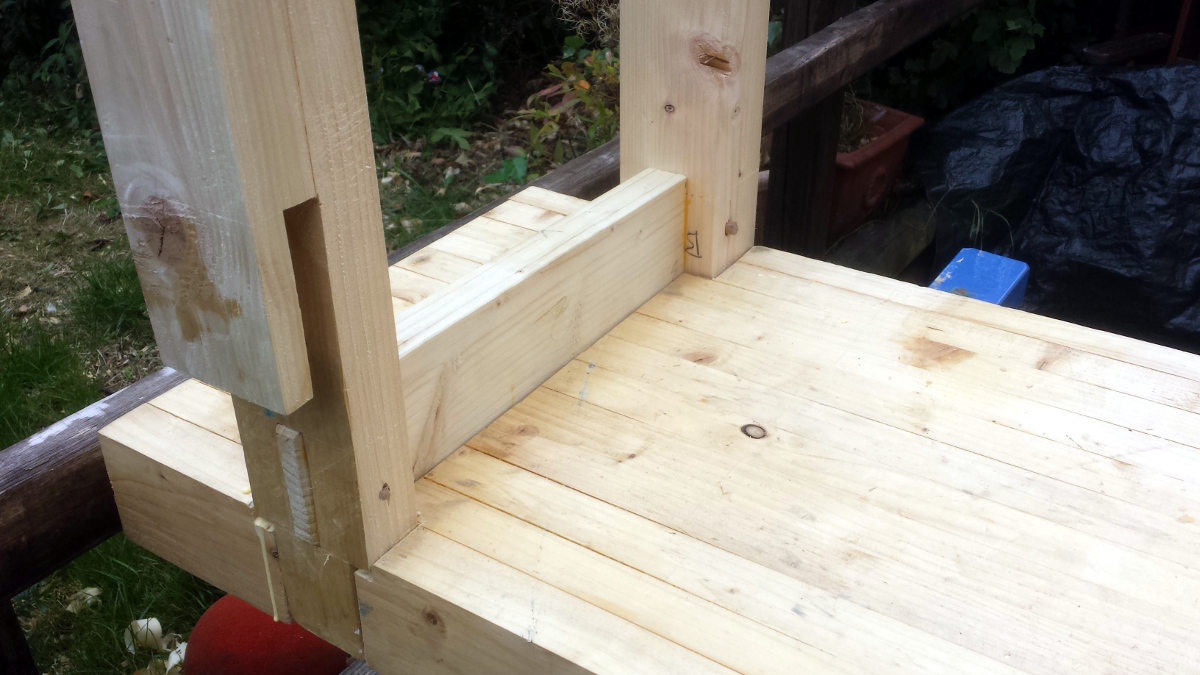
Test fitted the front apron to be sure the dados line up right now the glue-up's done:
The tenon on the top short stretcher is pushing on the back of the apron so that needs a trim, but it looks okay (it'll be glued on while the table is upside down so it won't be hanging down like that - there'll be an expansion gap in the joint it's currently sitting on, so the top will be level. Ish.
And with that, the aprons went back in the shed, the tools in the box and the bench got put under a tarp till tomorrow (assuming the weather's okay tomorrow, that is).
What's left to do:
I think that might actually be one day's work for a competent woodworker, so say 2-3 for me. Almost there!
Hm. Help required here...
Mental note, hide the hammers from now on for the sake of the cat.
Okay, nothing split out, that'll do. Finished up both leg frames and clamped them up (not needed with drawbores, but hell, if you have them, why not use them?).
Now, while I leave those for an hour or two to cure slightly, time to drill the hole in the front apron for the vice bars.
Damn but that thing takes it out of you. But it's quick, and a few moments cleaning up the inevitable breakthroughs with a chisel gives a nice, neat, minimalist hole.
Experienced record vice fitters have by now no doubt spotted the deliberate mistake.
/sigh
Out with the auger and chew away the required chunk for the quick release bar and then tidy up with the chisel...
Man, that Record 53A is a big honkin' beast of a thing. In fact... er...
Er, phew? Half-inch of clearance at the back when that casting at the back of the rods is reattached. Totally planned that.
Little more trimming of the mortice on the benchfront was needed in fact, so it's not a half-inch anymore, but somewhere around 3/8ths or so. Good times.
Broke here for a ham sandwich and about three litres of water. 'Twas a bit warm out there. At this point, figured the leg frames were ready to go into the benchtop and to get the long stretchers, so I took them out of the clamps, test fitted them in the benchtop mortices, trimmed one of the mortices a bit (but I knew that was coming - and there'll be a bit of a gap to fill with an offcut, but it shouldn't compromise the bench), and then glued up the long stretchers and drawbored them at one end. Glued up the benchtop mortices as well, and realised at this point that the fully assembled undercarriage of the bench is pineapple-y heavy, so I drowned the mortices in glue because I couldn't properly paint the tenons with glue, and then slid them all home. Once that was done I drawbored the other side of the long stretcher and everything seemed solid.
Messy as a pineapple in a blender with a hamster though. I cleaned up most of the squeezeout with shavings, and then stood the bench on the ground to be sure the glue didn't cure with the joints not settled right. I needed some weight to settle the bench onto its joints though, and didn't have any large bags of cement or sand to hand so I made do:
Test fitted the front apron to be sure the dados line up right now the glue-up's done:
The tenon on the top short stretcher is pushing on the back of the apron so that needs a trim, but it looks okay (it'll be glued on while the table is upside down so it won't be hanging down like that - there'll be an expansion gap in the joint it's currently sitting on, so the top will be level. Ish.
And with that, the aprons went back in the shed, the tools in the box and the bench got put under a tarp till tomorrow (assuming the weather's okay tomorrow, that is).
What's left to do:
- Flip bench upside down on the sawhorses again
- Trim pegs flush (and tenon ends where appropriate)
- Mount vice rear face
- Mount planing stop
- Glue on front and back aprons
- Let glue cure
- Assemble vice (including front jaw, which I'll just make from an offcut of 2x4 for now, I can make a hardwood face later on)
- Flip bench off sawhorses for the last time
- Chop out mortice to fit end vice (I got that veritas inset vice - damn but they make nice shiny stuff)
- Flatten benchtop (why did the hair on the back of neck just stand on end and why did the room suddenly seem cold?)
- Fit end vice (remembering to put some small shims under it as per Richard McGuire's notes)
- Drill holes for bench dogs and holdfasts in benchtop and legs
- Chamfer dog/holdfast holes (though I'd have to do this with the router, which I don't like)
- Drown it in 3-5 coats of BLO
- Strut
I think that might actually be one day's work for a competent woodworker, so say 2-3 for me. Almost there!
MarkDennehy
Established Member
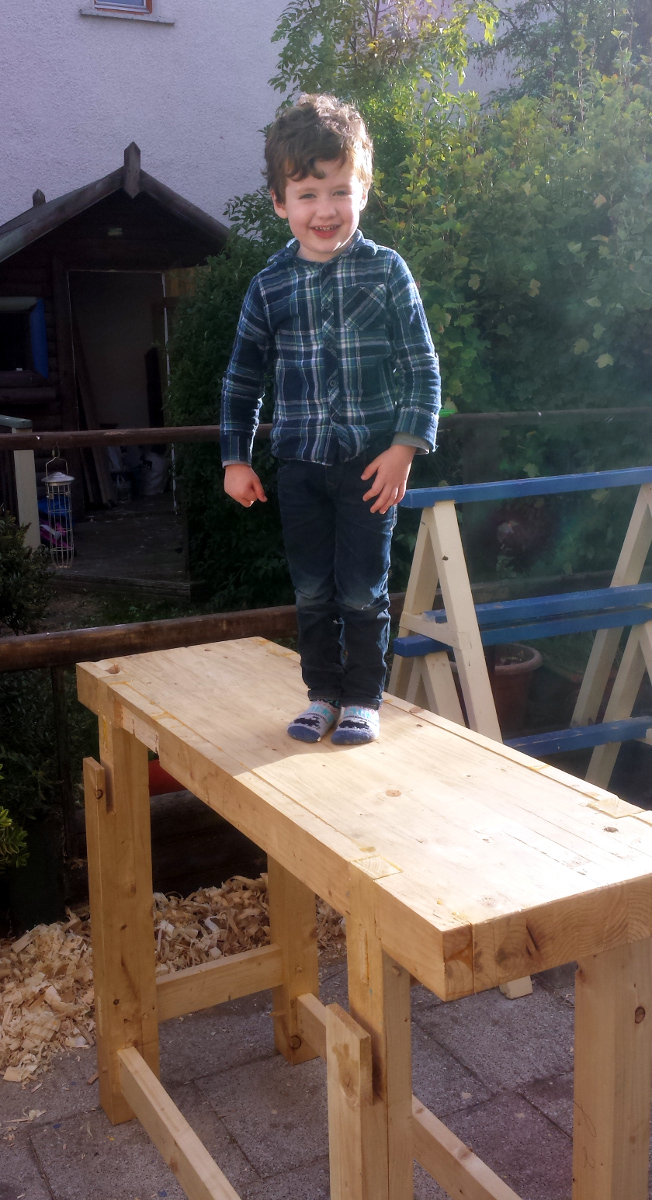
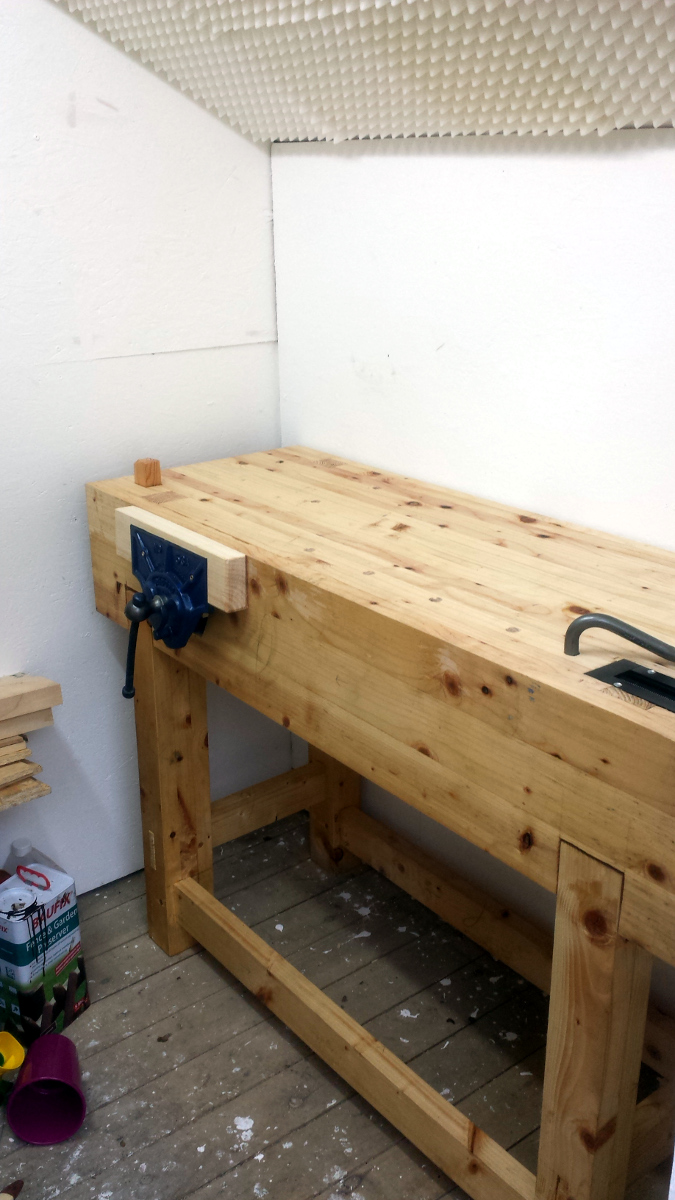
BTW, it's a hair under 40" tall when standing on the ground, and so far, that feels just perfect...
Wrist angle is natural when hands are on the bench and my back is straight, and I know from the kitchen that I can work on things at that height comfortably for ages. Planing might be more tiring depending on the thickness of the stock though. I still have three or four inches I can cut off the legs if necessary though.
Wrist angle is natural when hands are on the bench and my back is straight, and I know from the kitchen that I can work on things at that height comfortably for ages. Planing might be more tiring depending on the thickness of the stock though. I still have three or four inches I can cut off the legs if necessary though.
MattRoberts
Established Member
Coming along well. I've just got myself a record 52 1/2, so I know what you mean about the weight of these things!
Looking forward to seeing it sanded and oiled - although you don't have 'Sand for approximately three days solid' in your bullet list
Looking forward to seeing it sanded and oiled - although you don't have 'Sand for approximately three days solid' in your bullet list
MarkDennehy
Established Member
...sanding?

MarkDennehy
Established Member
Not quite a sunny day, but at least bright and reasonably dry. So got started after breakfast and flipped the bench back up onto the sawhorses. Holy pineapple but that thing's getting heavy. Took the flush-cut saw to the pegs and a few of the more excessive tenon ends.
I do like the look of drawbored tenons. I'm not as fond of the surface after my flush-cut saw proved its manufacturers didn't quite understand the concept of a flush-cut saw...
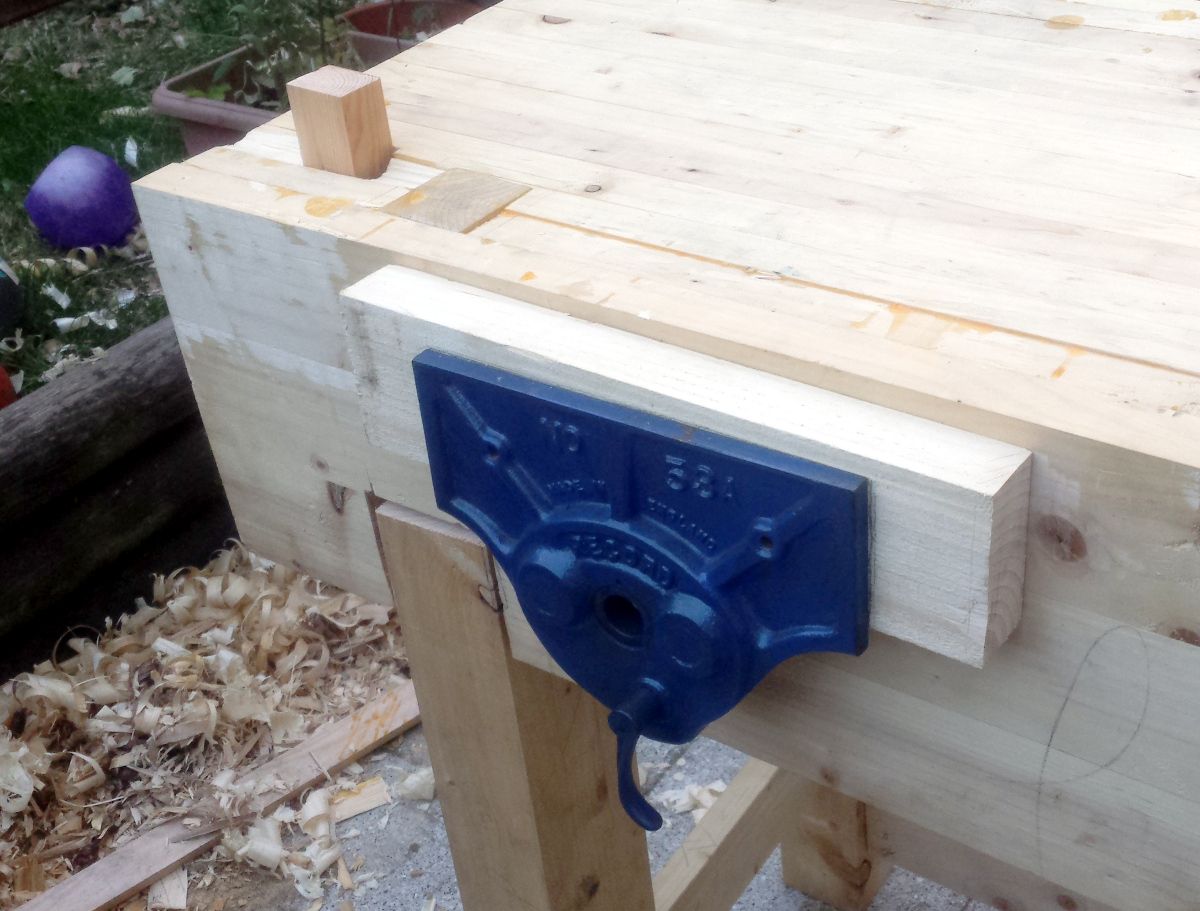
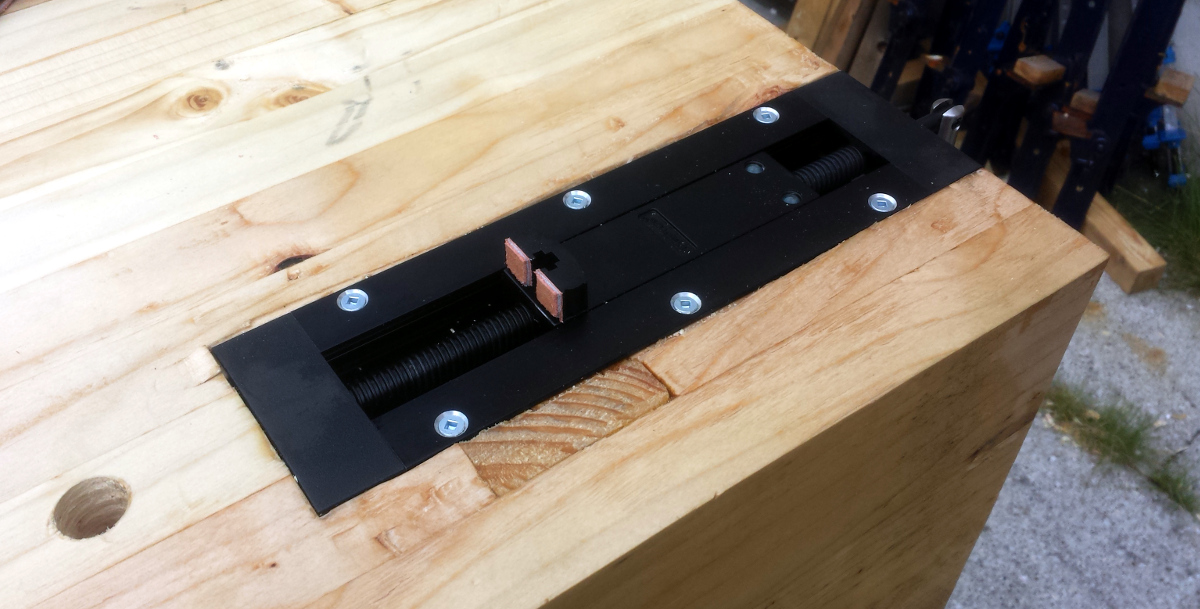
Time to mount the vice now.
One last coating of PTFE lube to the quick-release nut and then sealed the vice back up again.
A light coat of glue on the underside of the packing scraps, then sit the vice in place. Time to drill the pilot holes for the screws through the face of the vice (because they're there and there'll be two inches of wood between them and the work so why not?). My eggbeater is in need of a bit of a cleanup - I didn't get round to the vinegar bath and restoration on this one yet, I've been working on the workbench instead. Still, it should be fin...
Well, pineapple. Take everything off, pull out the failure of a drill bit with pliers, put everything back, and then it's time to sully the bench with power tools. Specifically a cordless driver. Well, sod it, it's been all wood and glue and joinery and hand tools to now, but even Sellers uses drill drivers, and the lag bolts to come are even nastier...
And if we're sullying the bench, let's keep on sullying for one more thing, the fitting of the planing stop...
And that's the last time I need to use a power tool to make the bench I think...
...thought not perhaps the last time I want to
Still, this is why they invented ratchet mechanisms. And when driving the lag bolts, that'll be even easier because of my ratchet socket driver.
Well, pineapple. My ratchet socket driver doesn't have a socket head large enough for the lag bolts. We're back to hand spanners. /sigh
Well, it's not the prettiest because the packing shims rotated, but sod it, it's done and it'll hold. Next, test fit the aprons.
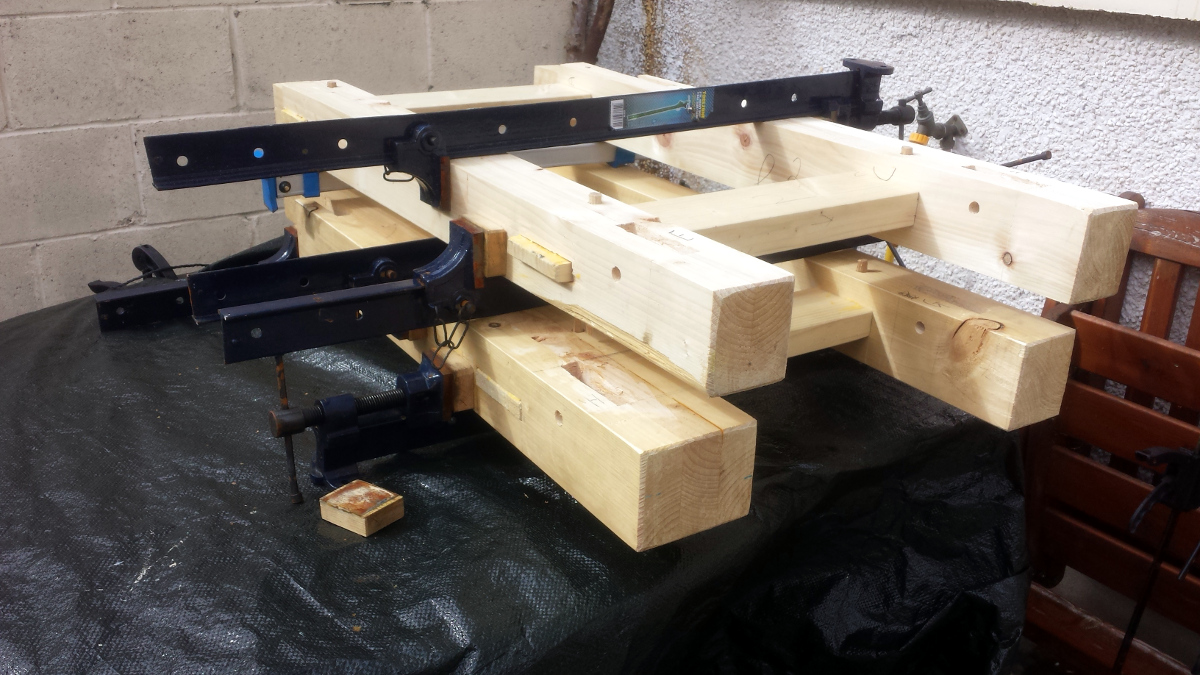
After that, curse a little, trim the dados on both sides a little in different spots, re-fit and figure sod it, it's close enough, it'll do. And then glue-up the aprons and much cursing and struggling with clamps. Until my common sense overtook ego and asked Herself Indoors for a hand holding the far end of the heavy-duty clamps in place while I got them tight enough to hang on. And then checking that the aprons were not below the level of the benchtop and tightening each clamp in turn till it wouldn't clamp more, and then adding more of the lightweight aluminium clamps on what will be the bottoms of the aprons to avoid them splaying out excessively from odd clamping.
And now it's all covered in a tarp curing away in the back yard. I've got an offcut of 2x4 set aside for the vice face, but I figure I can best get that planed up and fitted when the bench is on its feet again. I'm not sure when exactly I can move the bench to the shed in the steps though; I'm betting it'll be easier to plane it flat outdoors, but I'm wondering if I'd want to apply the BLO/turps finish outdoors as well?
What's left to do:
I do like the look of drawbored tenons. I'm not as fond of the surface after my flush-cut saw proved its manufacturers didn't quite understand the concept of a flush-cut saw...
Time to mount the vice now.
One last coating of PTFE lube to the quick-release nut and then sealed the vice back up again.
A light coat of glue on the underside of the packing scraps, then sit the vice in place. Time to drill the pilot holes for the screws through the face of the vice (because they're there and there'll be two inches of wood between them and the work so why not?). My eggbeater is in need of a bit of a cleanup - I didn't get round to the vinegar bath and restoration on this one yet, I've been working on the workbench instead. Still, it should be fin...
Well, pineapple. Take everything off, pull out the failure of a drill bit with pliers, put everything back, and then it's time to sully the bench with power tools. Specifically a cordless driver. Well, sod it, it's been all wood and glue and joinery and hand tools to now, but even Sellers uses drill drivers, and the lag bolts to come are even nastier...
And if we're sullying the bench, let's keep on sullying for one more thing, the fitting of the planing stop...
And that's the last time I need to use a power tool to make the bench I think...
...thought not perhaps the last time I want to
Still, this is why they invented ratchet mechanisms. And when driving the lag bolts, that'll be even easier because of my ratchet socket driver.
Well, pineapple. My ratchet socket driver doesn't have a socket head large enough for the lag bolts. We're back to hand spanners. /sigh
Well, it's not the prettiest because the packing shims rotated, but sod it, it's done and it'll hold. Next, test fit the aprons.
After that, curse a little, trim the dados on both sides a little in different spots, re-fit and figure sod it, it's close enough, it'll do. And then glue-up the aprons and much cursing and struggling with clamps. Until my common sense overtook ego and asked Herself Indoors for a hand holding the far end of the heavy-duty clamps in place while I got them tight enough to hang on. And then checking that the aprons were not below the level of the benchtop and tightening each clamp in turn till it wouldn't clamp more, and then adding more of the lightweight aluminium clamps on what will be the bottoms of the aprons to avoid them splaying out excessively from odd clamping.
And now it's all covered in a tarp curing away in the back yard. I've got an offcut of 2x4 set aside for the vice face, but I figure I can best get that planed up and fitted when the bench is on its feet again. I'm not sure when exactly I can move the bench to the shed in the steps though; I'm betting it'll be easier to plane it flat outdoors, but I'm wondering if I'd want to apply the BLO/turps finish outdoors as well?
What's left to do:
- Flip bench off sawhorses for the last time
- Flatten benchtop
- Chop out mortice to fit end vice
- Move bench to shed (?)
- Make front face of vice from 2x4 offcut and suede.
- Assemble face vice.
- Fit end vice (remembering to put some small shims under it as per Richard McGuire's notes)
- Drill holes for bench dogs and holdfasts in benchtop and legs
- Chamfer dog/holdfast holes (though I'd have to do this with the router, which I don't like)
- Drown it in 3-5 coats of 50% BLO 50% Turps (the Richard McGuire bench finish)
- Strut
Keep cracking on Mark. You're doing a great job fella.
I'd get it in the shed asap if it was me. Humidity and all that. Maybe sit it on some bin bags for the finishing. I'm guessing you want it as dry as you can before that.
Can I ask why you're chamfering the dogholes? Could you use a file and leave the router alone if you don't like using it. I just bought a couple of new ones and they have been a bit of a revelation tbh if you've not used them before. No advice being given! Just one beginner to another.
MarkDennehy
Established Member
Chamfering them just to take off the sharp edge right at the benchtop Bm, just so it doesn't break so easy. Same as running a plane along the arises or chamfering the edges of the feet, nothing too dramatic either, just a mm or two. Didn't think of the file, I have a half-round here that might do the job and a test hole to test it on. May need to tweak my augering technique as well, I'm seeing small chunks of wood relaxing back into the hole from the sides at the moment, it's a bit ragged looking (and makes using a holdfast a bit of a faff).
Soon as we get a dry day, I'll have it off the horses, flatten the top and cut the end vice mortice, and then I think I'll move it to the shed and do the rest there.
Soon as we get a dry day, I'll have it off the horses, flatten the top and cut the end vice mortice, and then I think I'll move it to the shed and do the rest there.
MarkDennehy
Established Member
Rather high winds over the last day or so, so I pulled off the tarp and clamps today.

No leaks in the tarp, glue seems to be gluing. Cool.

There seems to be a small void in one side, but it looks localised. I think it might be fine.
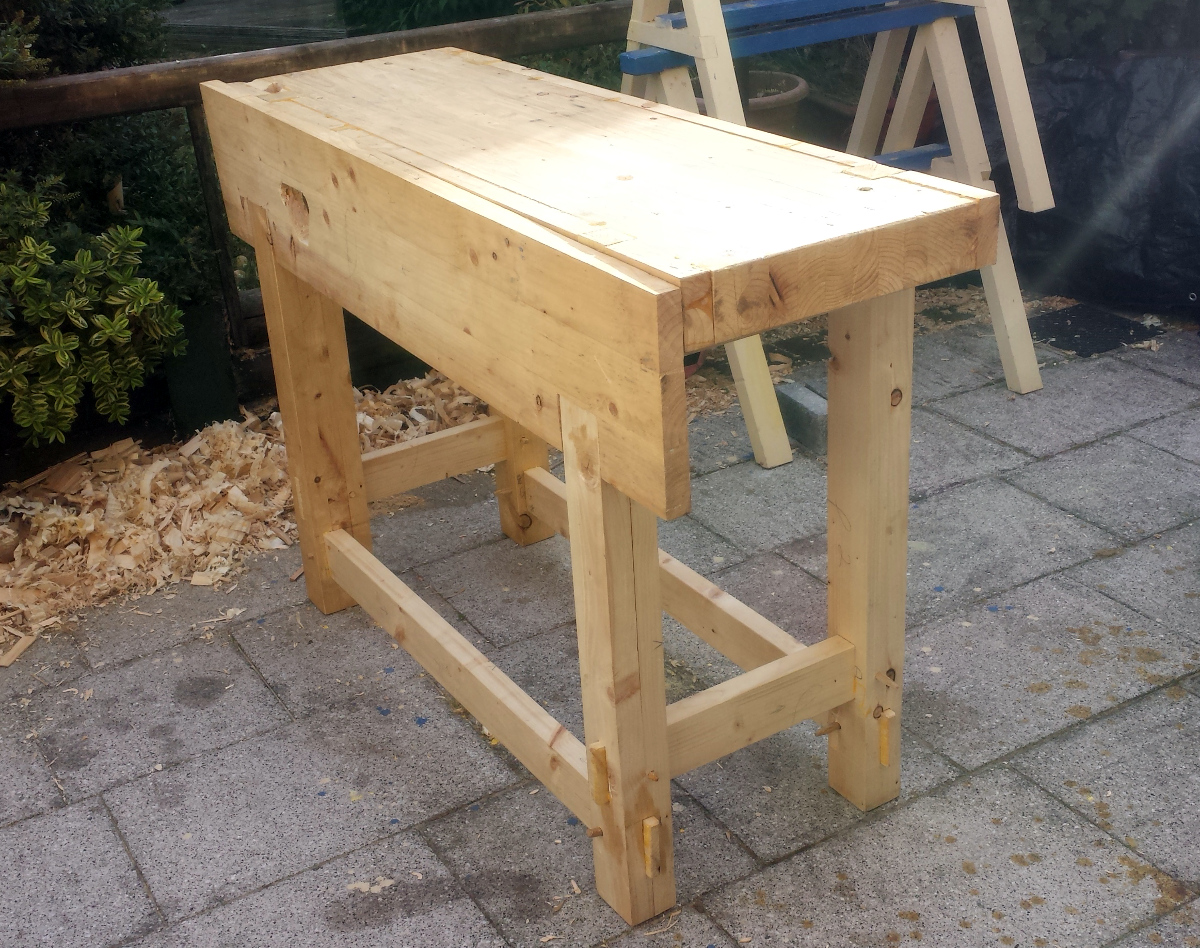
So I rolled it off the sawhorses for what I think will be the last time.

And it's pretty solid and stable, which is nice, but I can get it to tip and rock if I really put some welly into it trying to rock it back and forth. I may need to revisit that brace idea at some point. But not today. I hope.
I slotted in the front face of the vice just for fits and giggles.
It's a bit beefy
In fact, at full extension, I think I could almost get the bench itself into the vice...
And then I took the front face out and put it back under wraps, put the bench up on spacers, and wrapped it in a tarp again to wait for whenever I get a dry evening or day to take sid to it to get going on flattening the top.
I might want to fix that divot that broke out near the planing stop if I can first though.
No leaks in the tarp, glue seems to be gluing. Cool.
There seems to be a small void in one side, but it looks localised. I think it might be fine.
So I rolled it off the sawhorses for what I think will be the last time.
And it's pretty solid and stable, which is nice, but I can get it to tip and rock if I really put some welly into it trying to rock it back and forth. I may need to revisit that brace idea at some point. But not today. I hope.
I slotted in the front face of the vice just for fits and giggles.
It's a bit beefy
In fact, at full extension, I think I could almost get the bench itself into the vice...
And then I took the front face out and put it back under wraps, put the bench up on spacers, and wrapped it in a tarp again to wait for whenever I get a dry evening or day to take sid to it to get going on flattening the top.
I might want to fix that divot that broke out near the planing stop if I can first though.
memzey
Established Member
Great progress Mark! Puzzled me a bit with your edited image of wonky laminations though - looked like something I might have lashed together!
MarkDennehy
Established Member
Ah, sorry, it's the four corners of the glue-up aprons. Bit of a void on one side at the corners, but the others seem solid.
MarkDennehy
Established Member
Nice dry day today, and only had to work for an hour, so it's benchtime again!
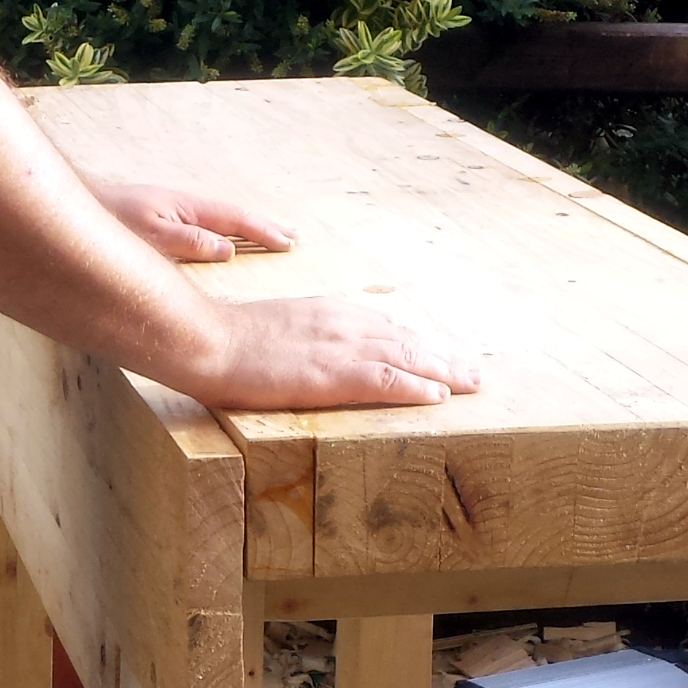
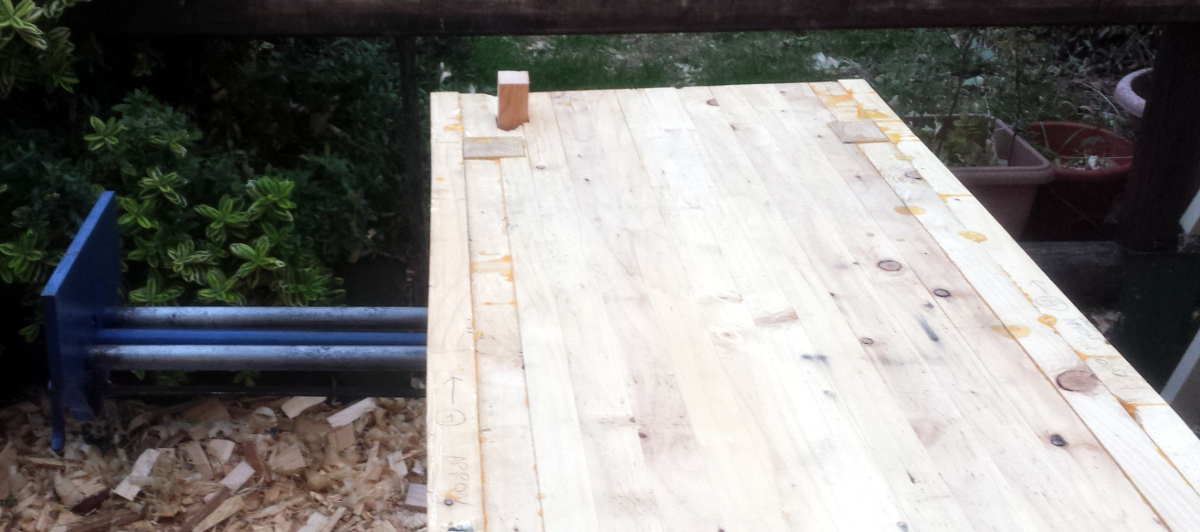
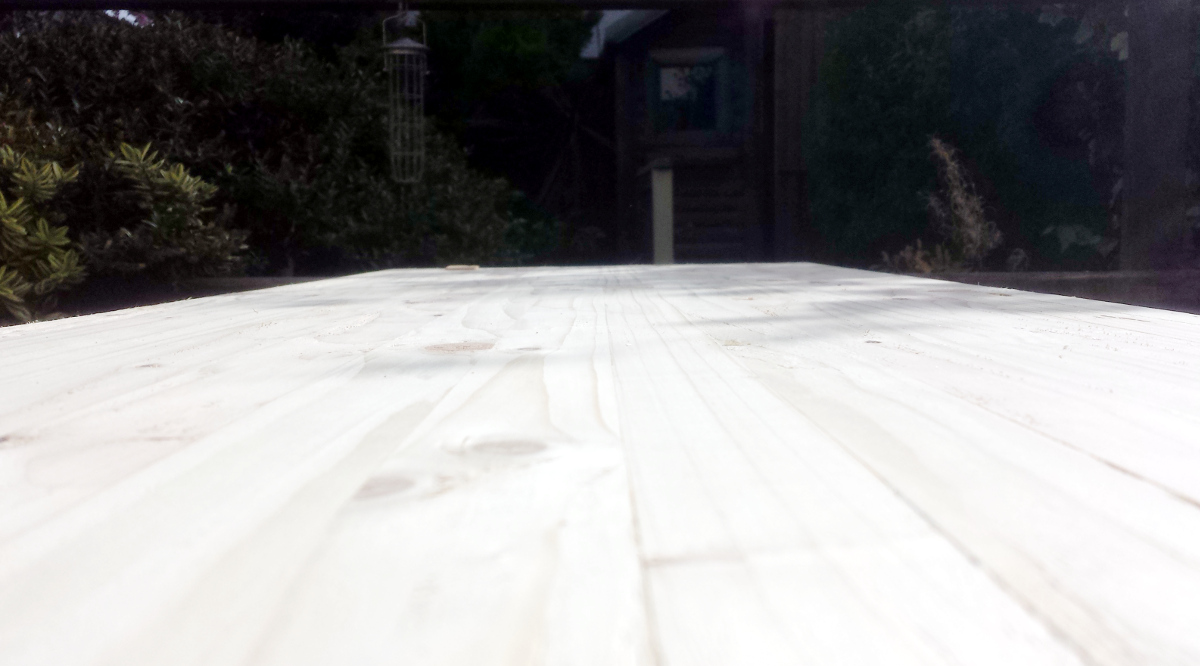
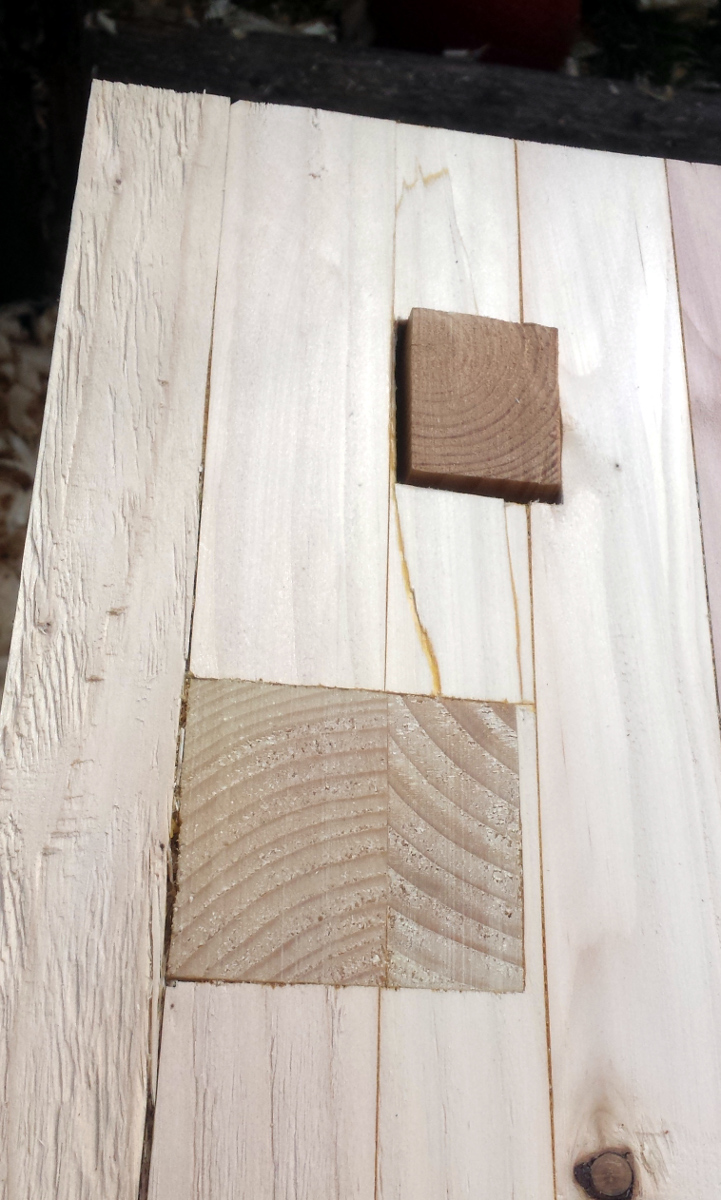
You might have noticed that the benchtop's lamination didn't go as smoothly as it could have and the surface was a tad irregular as a result:
And indeed, you'd be right. I was not expecting a fun time flattening that out. And I was not wrong.
Started off by sharpening up the scrub plane's iron, and then let sid at it, planing across the table and gouging divots out of it like I didn't like it. It was rough going - I had to stop twice to screw sid's front handle back on and once more to reattach the frog - but I eventually go to where I could put sid back in his box and switch over to the #5½ to smooth out the worst of the divots, and then up to the #7 to do the actual flattening.
It only took about twenty passes in the end before I could start planing along the grain...
But eventually, I got to the stage where I was too tired to keep trying to get out the imperfections I was having trouble seeing.
Flat, not really in twist, level according to the spirit level, not rocking, can't get a flat planed board to spin or rock - I'll take that.
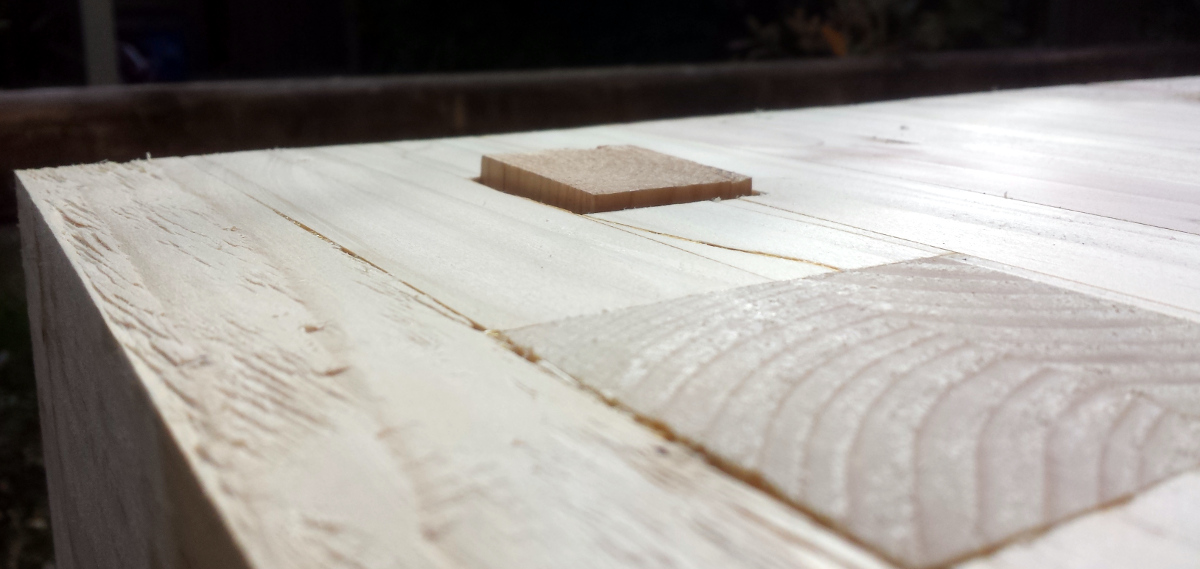
Which is not to say it's perfect. There were gaps in the two back mortices and despite chamfering the edges with a chisel, the tenons took a lot of abuse.
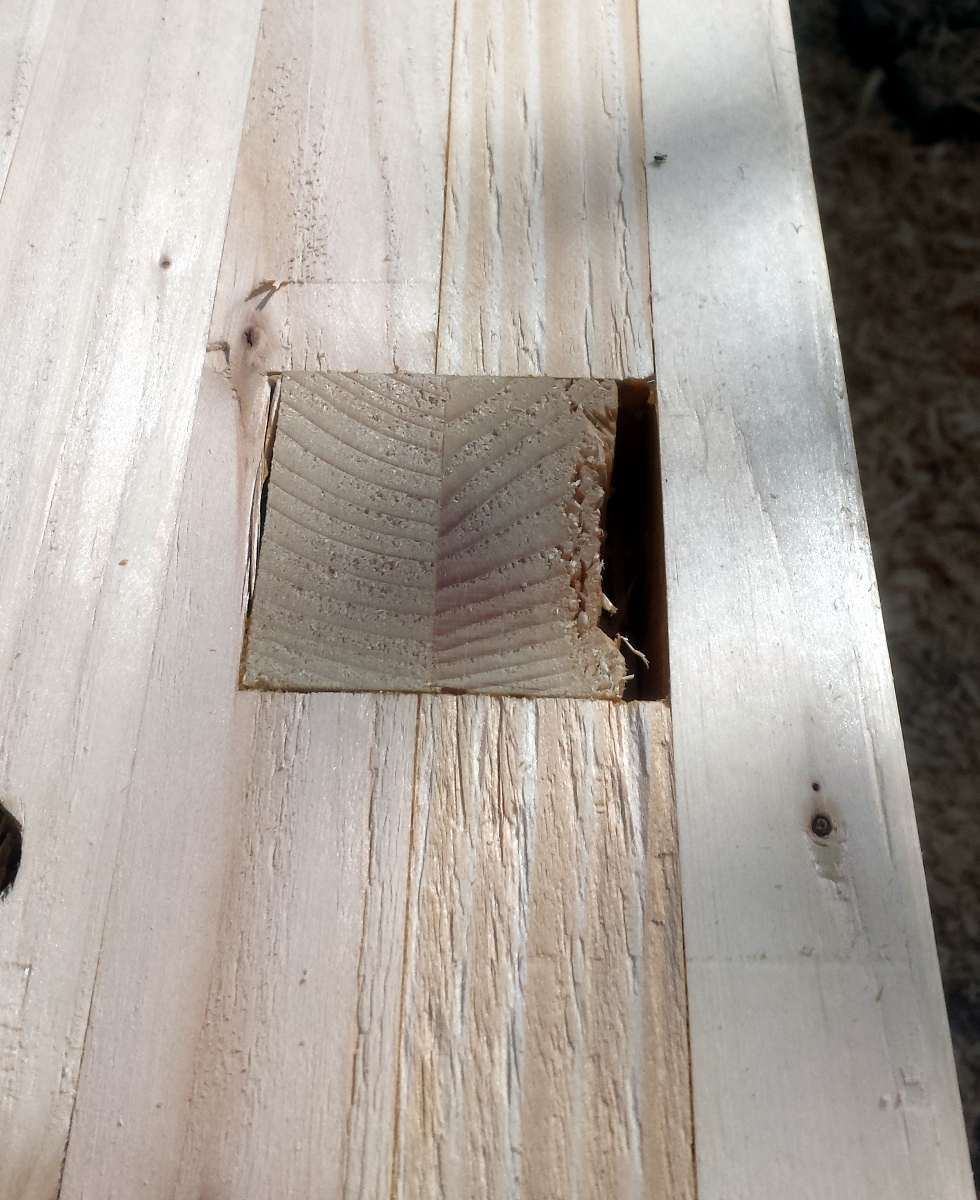
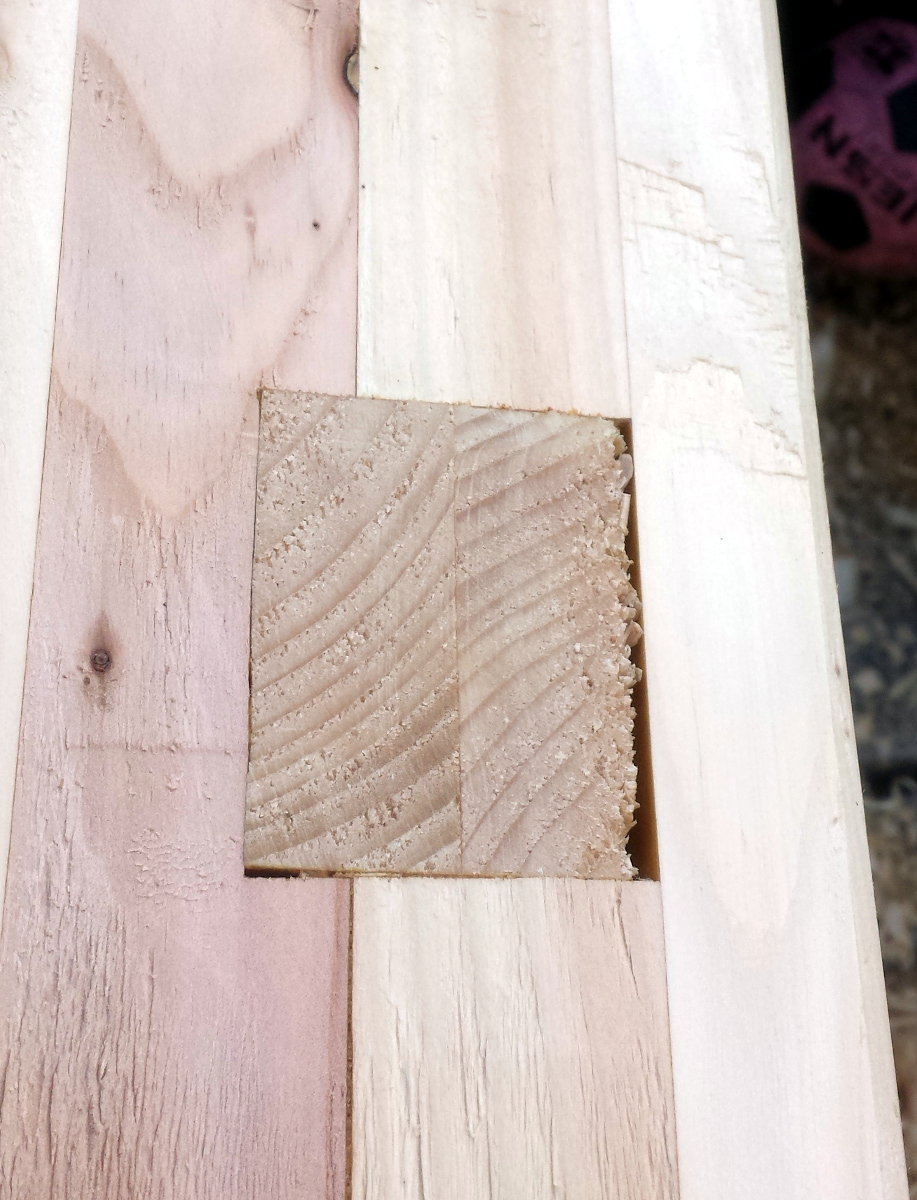
I have some 2-part epoxy to fill the gaps, I'll do that later. There are a few other voids I have to fill as well, from where knots broke out during face planing for lamination and also for a gap between the front apron and the main benchtop right over the vice - I didn't put glue on there for fear of getting glue into the workings of the vice (lets face it, clean is not the word to describe what happens when I get near wood glue).
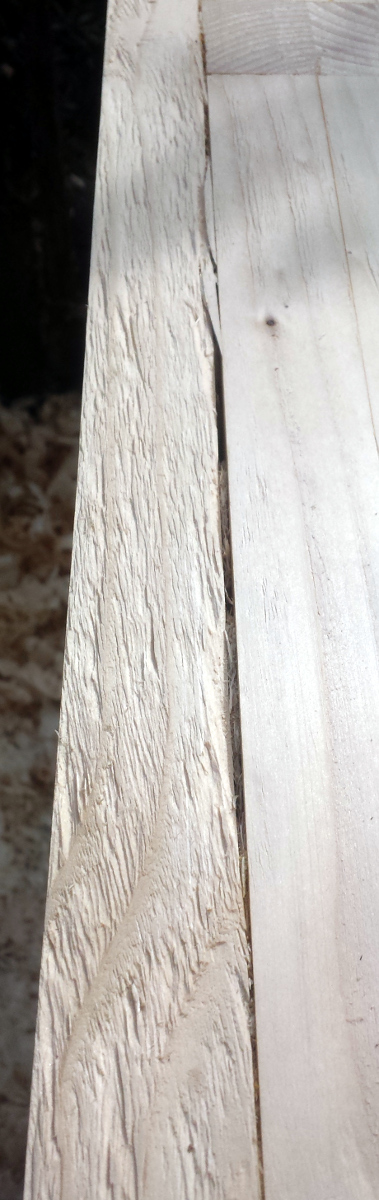
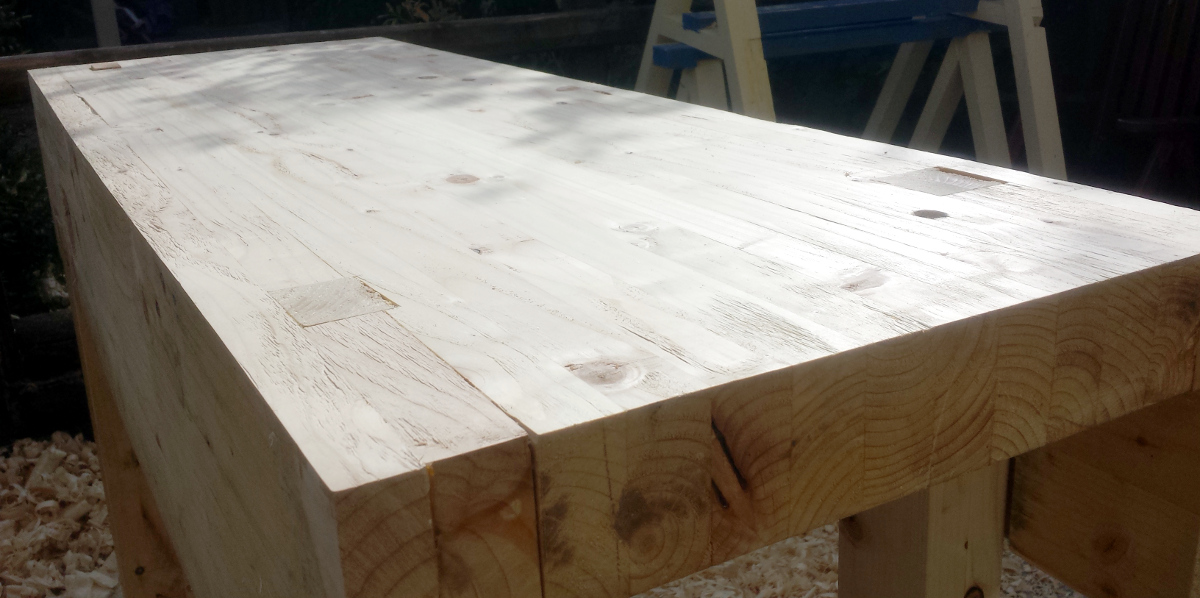
I'm consoling myself with the front tenons, which came out reasonably well (and the repair to that massive divot that came out when chopping the planing stop mortice went reasonably well too):
Mind you, to show how much I had to hack off that benchtop, this is the planing stop in it's lowest position, where it was flush with the benchtop before I started all this:
That's a lot to hog off by hand...
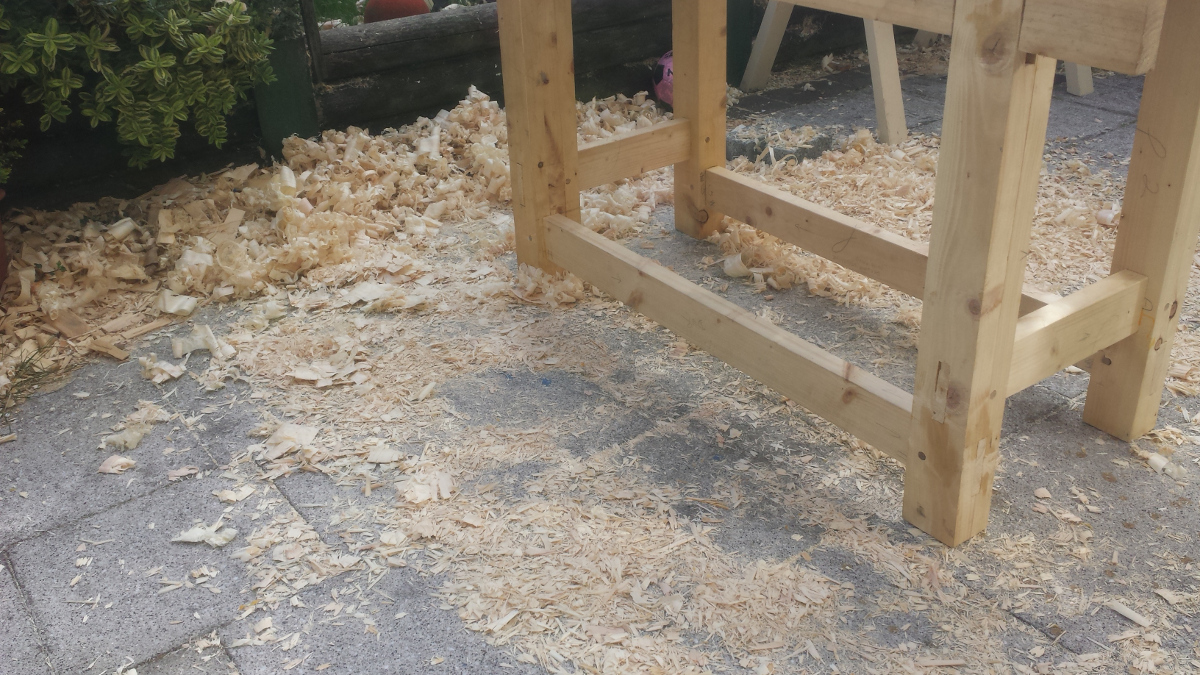
...and there it is all over the floor. (Herself is not a fan of this btw, there will be a bit of a cleanup job tomorrow. When my arms are working again).
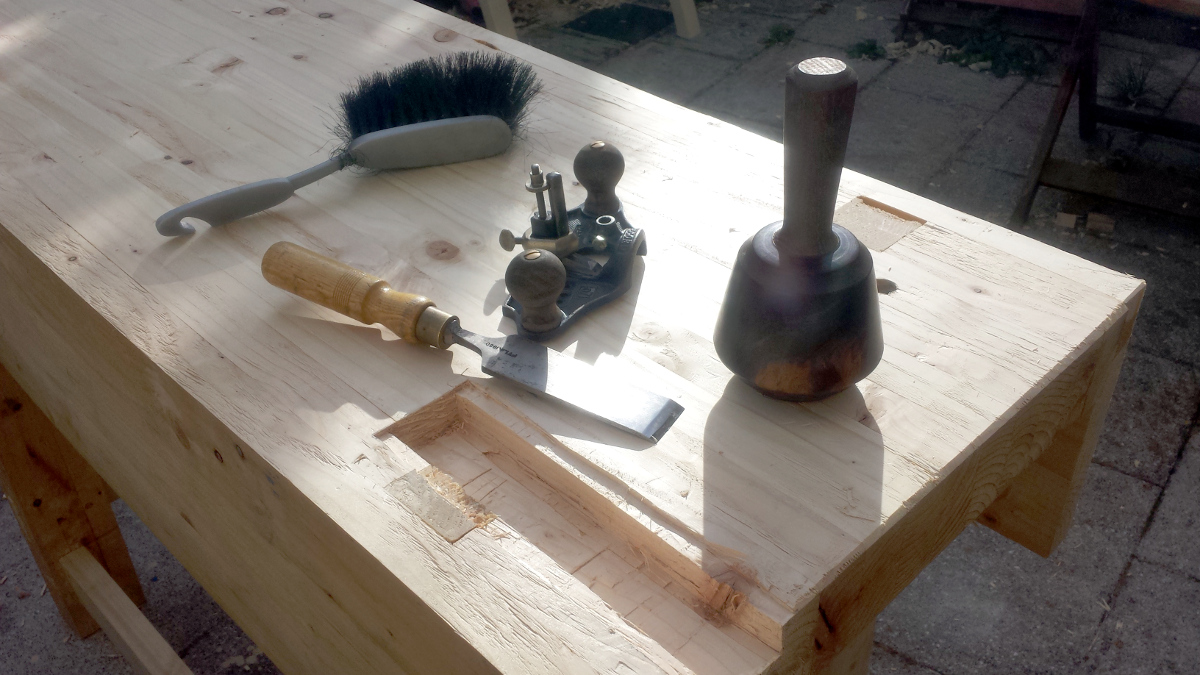
The last job I wanted to get done outside was to fit the inset vice. That involves cutting a mortice into the benchtop an inch deep and just over two inches wide, then another extending that mortice a half-inch on either side but only an eighth of an inch deep. Everyone else uses their router to do this because they're sensible. I cut the mortice using Paul Seller's morticing method and it didn't go too badly this time (still about as neat as the plot to Primer mind you).
Doesn't matter, the vice covers it up...
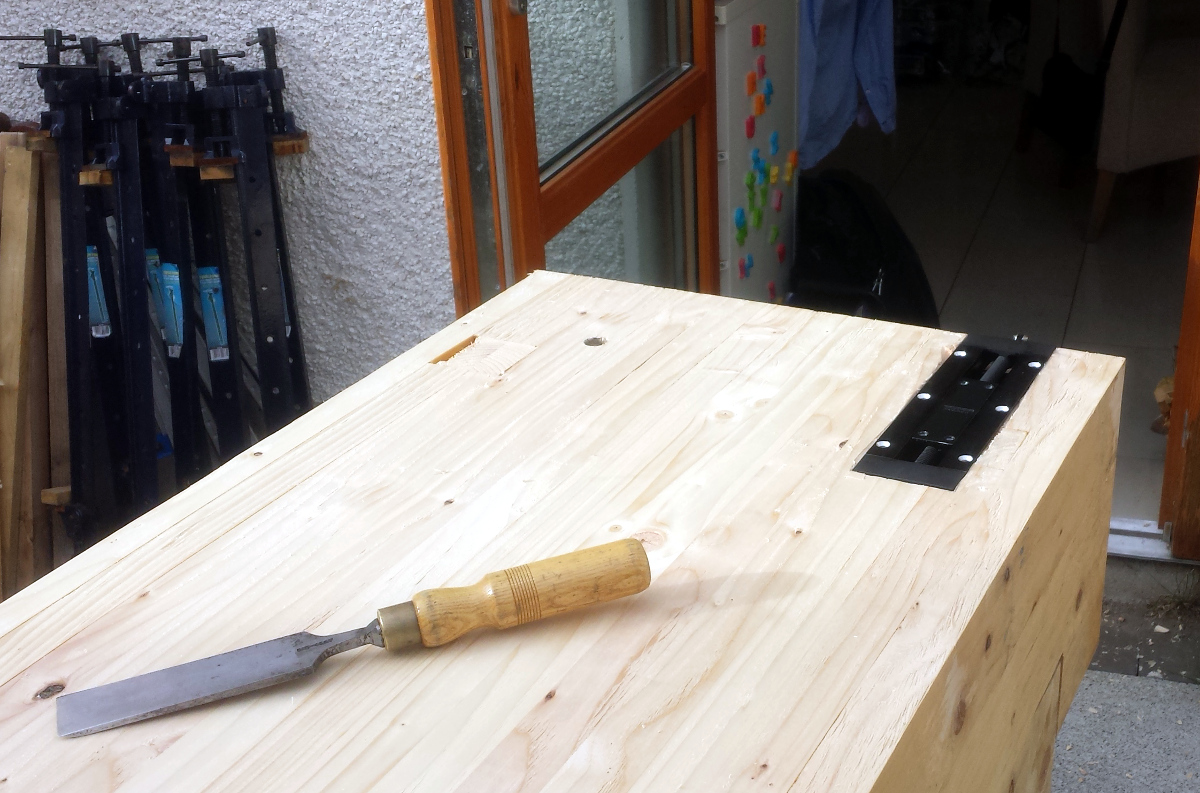
And there's a through-hole at the end of the mortice away from the bench for wood shavings to be pushed out through by the vice, that got cut using the bit and brace and was the easiest bit.
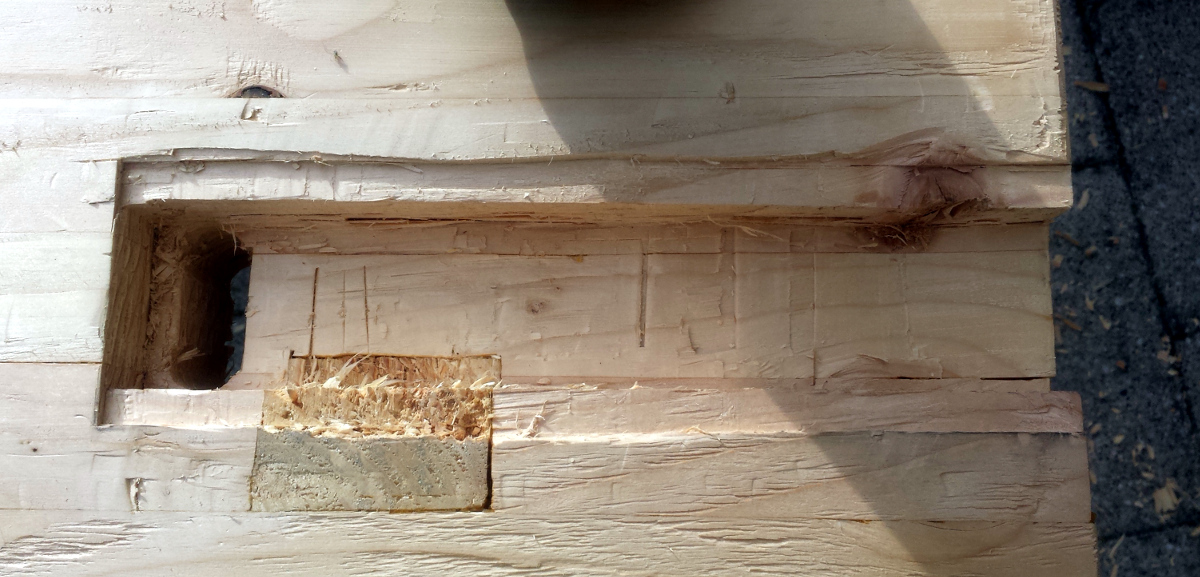
Next time, power tools.
But that's it. That's the last job that had to be done outside. I can move the bench into the shed pretty much anytime I want to now. So of course the next thing to do is to start the finish
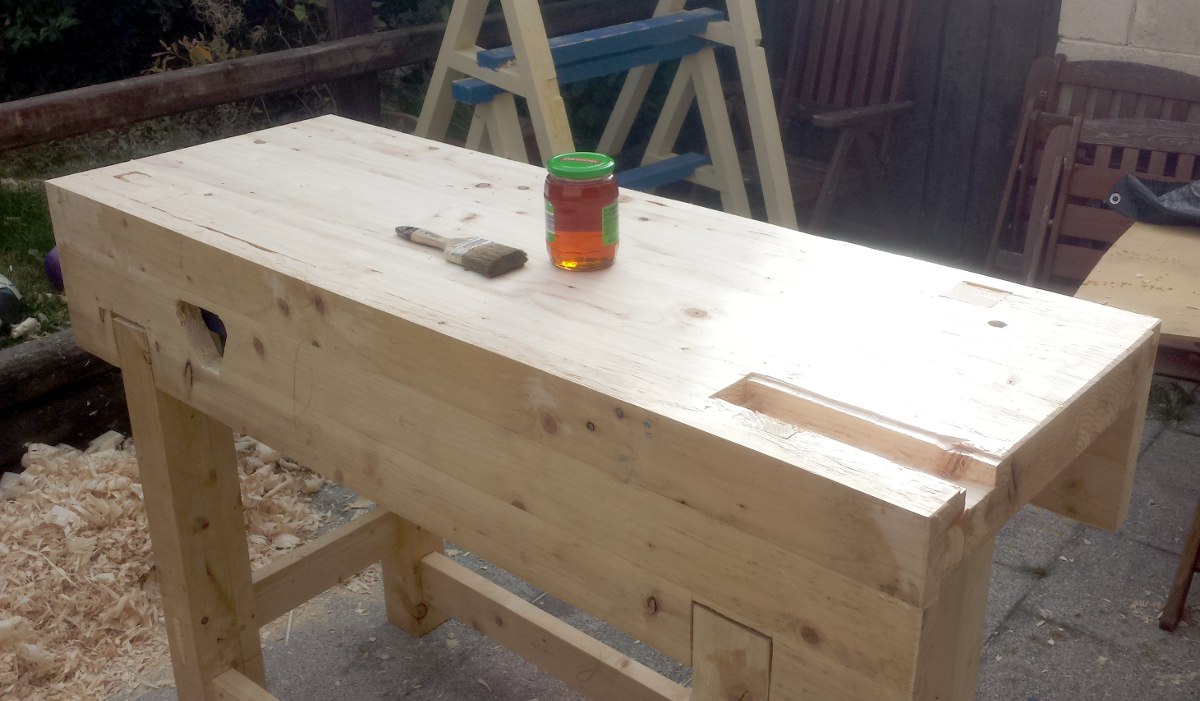
50% BLO, 50% turps. Painted on in great messy sweeps.
If I could embed music here, you'd now be hearing O Fortuna playing with the volume turned up to eleven.
What's left to do:
I think this thing might be finished tomorrow. I mean, I'll keep painting it in BLO, but that could keep going for a week, the actual bench part of it would be done...

You might have noticed that the benchtop's lamination didn't go as smoothly as it could have and the surface was a tad irregular as a result:
And indeed, you'd be right. I was not expecting a fun time flattening that out. And I was not wrong.
Started off by sharpening up the scrub plane's iron, and then let sid at it, planing across the table and gouging divots out of it like I didn't like it. It was rough going - I had to stop twice to screw sid's front handle back on and once more to reattach the frog - but I eventually go to where I could put sid back in his box and switch over to the #5½ to smooth out the worst of the divots, and then up to the #7 to do the actual flattening.
It only took about twenty passes in the end before I could start planing along the grain...
But eventually, I got to the stage where I was too tired to keep trying to get out the imperfections I was having trouble seeing.
Flat, not really in twist, level according to the spirit level, not rocking, can't get a flat planed board to spin or rock - I'll take that.
Which is not to say it's perfect. There were gaps in the two back mortices and despite chamfering the edges with a chisel, the tenons took a lot of abuse.
I have some 2-part epoxy to fill the gaps, I'll do that later. There are a few other voids I have to fill as well, from where knots broke out during face planing for lamination and also for a gap between the front apron and the main benchtop right over the vice - I didn't put glue on there for fear of getting glue into the workings of the vice (lets face it, clean is not the word to describe what happens when I get near wood glue).
I'm consoling myself with the front tenons, which came out reasonably well (and the repair to that massive divot that came out when chopping the planing stop mortice went reasonably well too):
Mind you, to show how much I had to hack off that benchtop, this is the planing stop in it's lowest position, where it was flush with the benchtop before I started all this:
That's a lot to hog off by hand...
...and there it is all over the floor. (Herself is not a fan of this btw, there will be a bit of a cleanup job tomorrow. When my arms are working again).
The last job I wanted to get done outside was to fit the inset vice. That involves cutting a mortice into the benchtop an inch deep and just over two inches wide, then another extending that mortice a half-inch on either side but only an eighth of an inch deep. Everyone else uses their router to do this because they're sensible. I cut the mortice using Paul Seller's morticing method and it didn't go too badly this time (still about as neat as the plot to Primer mind you).
Doesn't matter, the vice covers it up...
And there's a through-hole at the end of the mortice away from the bench for wood shavings to be pushed out through by the vice, that got cut using the bit and brace and was the easiest bit.
Next time, power tools.
But that's it. That's the last job that had to be done outside. I can move the bench into the shed pretty much anytime I want to now. So of course the next thing to do is to start the finish
50% BLO, 50% turps. Painted on in great messy sweeps.
If I could embed music here, you'd now be hearing O Fortuna playing with the volume turned up to eleven.
What's left to do:
- Move bench to shed (at some point, probably tomorrow night)
- Make front face of vice from 2x4 offcut and suede.
- Assemble face vice.
- Drill holes for bench dogs and holdfasts in benchtop and legs
- Chamfer dog/holdfast holes (though I'd have to do this with the router, which I don't like)
- Drown it in MOAR coats of 50% BLO 50% Turps (the Richard McGuire bench finish)
- Strut
I think this thing might be finished tomorrow. I mean, I'll keep painting it in BLO, but that could keep going for a week, the actual bench part of it would be done...
memzey
Established Member
I've enjoyed reading this thread so much I'm actually going to be sad when you finish the build! Great going though Mark and I much admire your fearless attitude in tackling this project. I've been working more on the shed to house my eventual bench than the bench itself but when I do build one I hope it comes out as well as yours.
MarkDennehy
Established Member
Forecast says dry till the afternoon, the TDL is short and Herself and Junior are off for a skite in the big schmoke, so time for the last push...
Got the inset vice and sullied the bench once more with power tools using a drill/driver to screw the vice into the bench. Then got the offcut bit of 2x4 that I'll use for the jaw of the face vice (for now at least, I might replace it with hardwood later) and used the holdfasts and inset vice to chamfer the edges and clean it up a bit (holy carp, but woodworking on a proper bench is just night and day from fighting with a black&decker workmate).
Put the jaw in the vice, leveled it up roughly with the benchtop and marked off where the vice face met it, then chopped out a half-inch mortice in it to let the vice slot into it. Then got out the suede I've been saving for this since... wow, way too long. And if you're putting suede on one thing, might as well do everything so I got the other holdfast and the end vice dog as well.
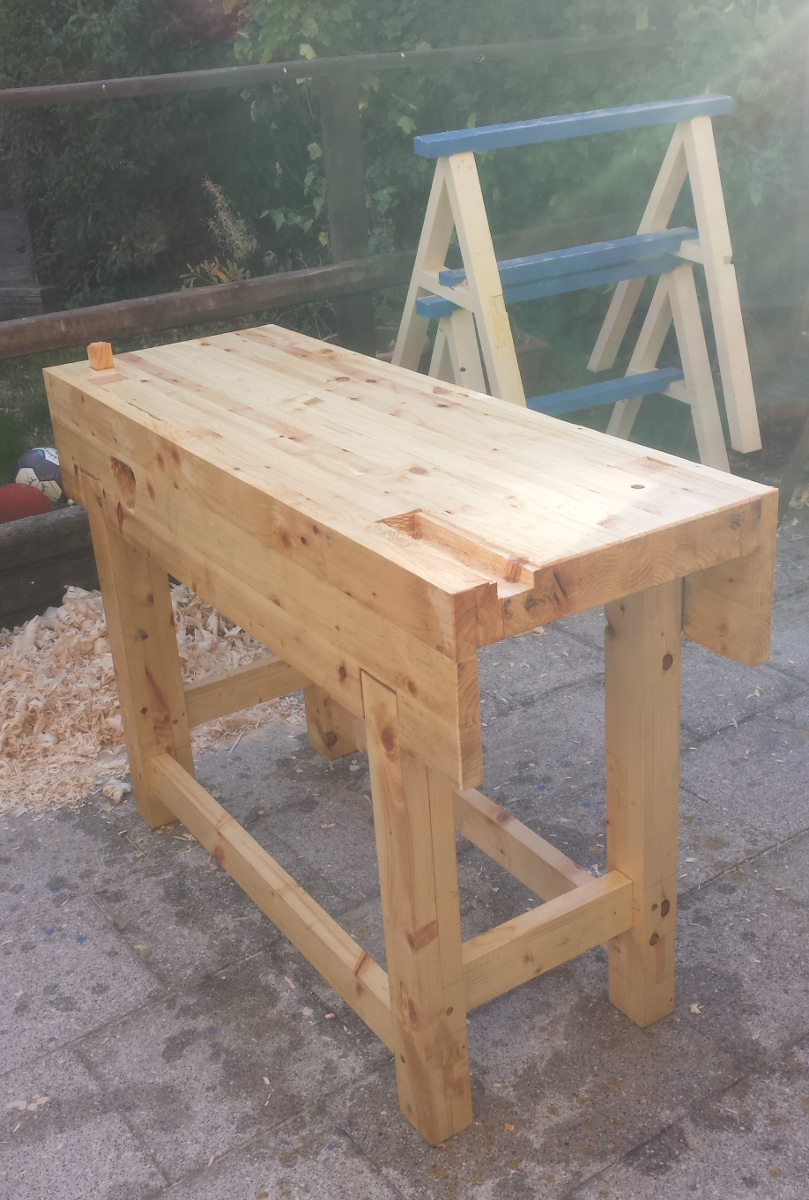
...and just like that, it's done.
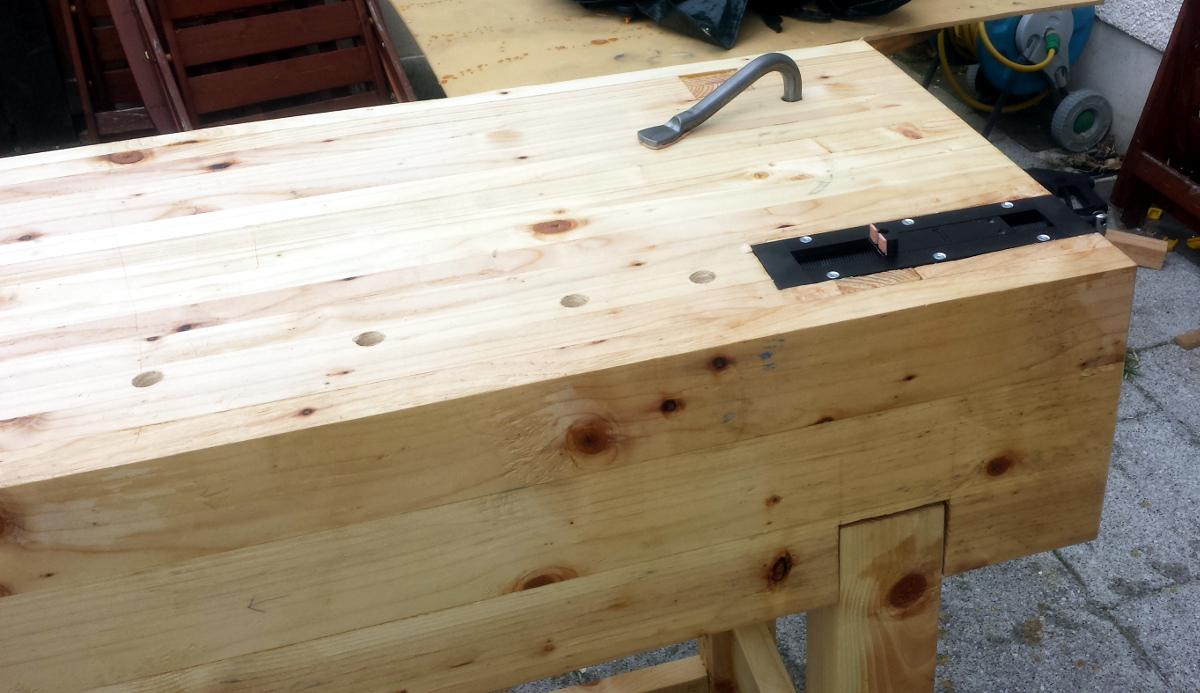
Even the little fiddly bit in the veritas end vice.
I'm showing that in all it's prettiness for a reason, bear with me...
Also, that's a monster of a face vice. And I love the sawdust shield for the screw. Gotta hand it to the lads who built this thing, they knew their stuff.
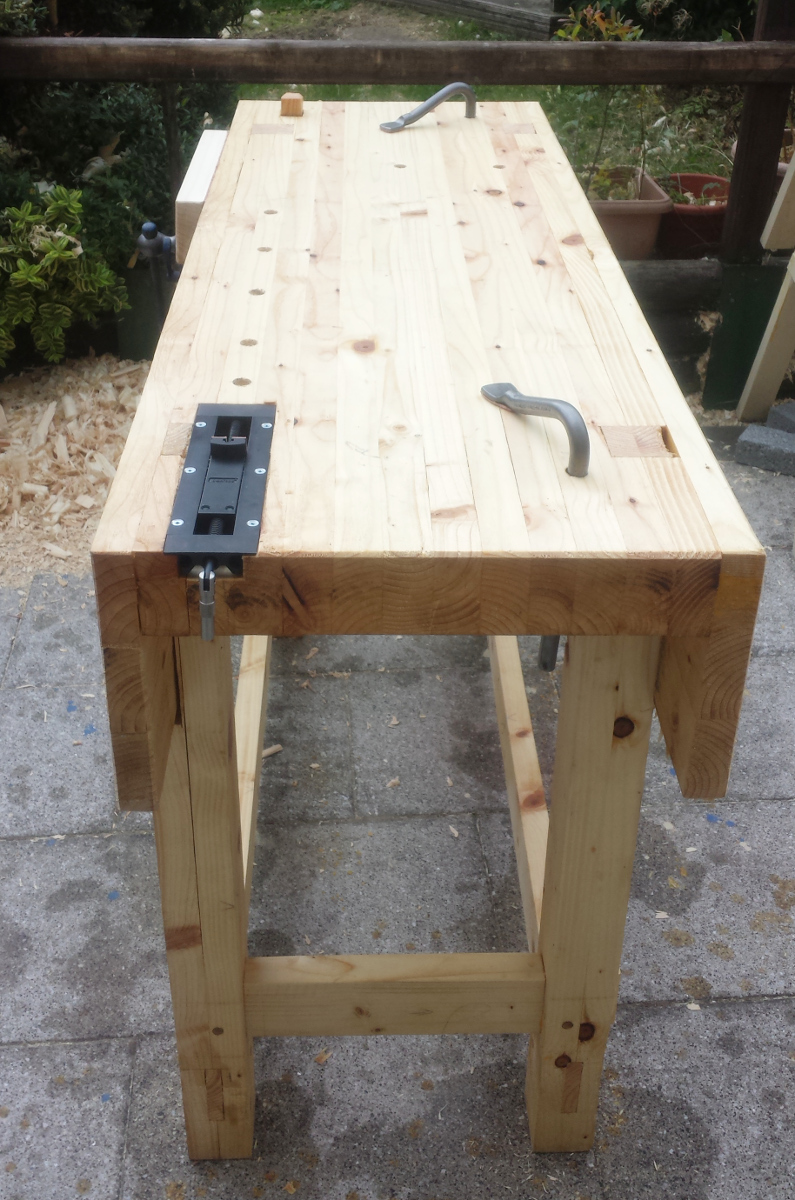
The overall bench dimensions wound up being 60" long by 21½" wide by 39¾" tall, and the benchtop is 3⅛" thick, which is 2½" narrower than I'd originally thought it'd be (I'm blaming the so-not-2x4s I wound up getting from the builder's merchants), but it's spot on otherwise. Damn sight simpler than the original plans - and if I was doing it over, it'd be simpler still. In fact I wouldn't even bother with the laminations, I'd just buy 4" thick red deal and go with that. Oh well, it won't be the last bench I build.
Mainly though, that's luck - once I'd gotten it to this point I tried to move it to the shed on my own. Got underneath the bench, put my shoulders to it and lifted, being sure to keep the heavy face vice in front of me... which is when I learned that the vice isn't that heavy compared to the wood and most of the weight was behind me... and over it went, absolutely no stopping it. I had just enough time to remember to keep my arms and legs inside the frame to avoid awkward snapping noises and with a rather depressing bang, it was over and I was sitting on my rather surprised buttocks in the middle of a still-intact bench. My next-door neighbour poked his head over the fence to ask if I was still alive, and offered to help move it to the shed to avoid further girly screaming, which kind help I accepted (thanks again Ken!) and we got it into place without further fun and games.
The veritas end vice took the full impact - something like 250lb of wood and metal given a four-foot run-up to the ground - and it still works. I mean, perfectly. No extra slop or play, no funny noises, no cracks in the screw, nothing. The sole evidence is that the last inch of the screw shaft is now bent by about 10-15° and the aluminium handle is a bit scuffed up.
Honestly, my shorts had more damage than the vice. I'm very impressed. With the vice, not the shorts.
And there it is, the culmination of a few months of spare hours here and there and about six full saturdays in total. €175 worth of wood (which gave the sawhorses and the bench), €40 worth of suede leather (only half of which was used), €20 for the record 169 planing stop holder, just over €100 for the record 53A vice, €50's worth of titebond II (because I hadn't learnt yet that every single woodworking thing you buy in Dublin has about a 100% markup), €90 for the veritas inset end vice, €40 for the holdfasts and wow was it a mistake to tot all that stuff up I am so not going near the total I spent on tools before getting free of the tool-collecting bug I'm just going to focus on how this bench cost me around €500 and a Little John goes for around €1500 (plus the requisite arm and leg for shipping). That's my story and I'm sticking to it
Thanks everyone for reading and commenting on the thread, it was handy to keep me honest with getting off the couch on lazy saturdays and getting on with things.
Now... time to actually get to using the bench...
Got the inset vice and sullied the bench once more with power tools using a drill/driver to screw the vice into the bench. Then got the offcut bit of 2x4 that I'll use for the jaw of the face vice (for now at least, I might replace it with hardwood later) and used the holdfasts and inset vice to chamfer the edges and clean it up a bit (holy carp, but woodworking on a proper bench is just night and day from fighting with a black&decker workmate).
Put the jaw in the vice, leveled it up roughly with the benchtop and marked off where the vice face met it, then chopped out a half-inch mortice in it to let the vice slot into it. Then got out the suede I've been saving for this since... wow, way too long. And if you're putting suede on one thing, might as well do everything so I got the other holdfast and the end vice dog as well.
...and just like that, it's done.
Even the little fiddly bit in the veritas end vice.
I'm showing that in all it's prettiness for a reason, bear with me...
Also, that's a monster of a face vice. And I love the sawdust shield for the screw. Gotta hand it to the lads who built this thing, they knew their stuff.
The overall bench dimensions wound up being 60" long by 21½" wide by 39¾" tall, and the benchtop is 3⅛" thick, which is 2½" narrower than I'd originally thought it'd be (I'm blaming the so-not-2x4s I wound up getting from the builder's merchants), but it's spot on otherwise. Damn sight simpler than the original plans - and if I was doing it over, it'd be simpler still. In fact I wouldn't even bother with the laminations, I'd just buy 4" thick red deal and go with that. Oh well, it won't be the last bench I build.
Mainly though, that's luck - once I'd gotten it to this point I tried to move it to the shed on my own. Got underneath the bench, put my shoulders to it and lifted, being sure to keep the heavy face vice in front of me... which is when I learned that the vice isn't that heavy compared to the wood and most of the weight was behind me... and over it went, absolutely no stopping it. I had just enough time to remember to keep my arms and legs inside the frame to avoid awkward snapping noises and with a rather depressing bang, it was over and I was sitting on my rather surprised buttocks in the middle of a still-intact bench. My next-door neighbour poked his head over the fence to ask if I was still alive, and offered to help move it to the shed to avoid further girly screaming, which kind help I accepted (thanks again Ken!) and we got it into place without further fun and games.
The veritas end vice took the full impact - something like 250lb of wood and metal given a four-foot run-up to the ground - and it still works. I mean, perfectly. No extra slop or play, no funny noises, no cracks in the screw, nothing. The sole evidence is that the last inch of the screw shaft is now bent by about 10-15° and the aluminium handle is a bit scuffed up.
Honestly, my shorts had more damage than the vice. I'm very impressed. With the vice, not the shorts.
And there it is, the culmination of a few months of spare hours here and there and about six full saturdays in total. €175 worth of wood (which gave the sawhorses and the bench), €40 worth of suede leather (only half of which was used), €20 for the record 169 planing stop holder, just over €100 for the record 53A vice, €50's worth of titebond II (because I hadn't learnt yet that every single woodworking thing you buy in Dublin has about a 100% markup), €90 for the veritas inset end vice, €40 for the holdfasts and wow was it a mistake to tot all that stuff up
I am so not going near the total I spent on tools before getting free of the tool-collecting bug I'm just going to focus on how this bench cost me around €500 and a Little John goes for around €1500 (plus the requisite arm and leg for shipping). That's my story and I'm sticking to it Thanks everyone for reading and commenting on the thread, it was handy to keep me honest with getting off the couch on lazy saturdays and getting on with things.
Now... time to actually get to using the bench...
One of the best threads I've ever read on UKW Mark. Thanks for all the laughs along the way. And you have a good bench to show for all that effort. It's been a genuine pleasure keeping up with your updates and the Irish weather. I'm a little sad you've finished it tbh.
slainte.
next stop Guild of Bench Makers.
Best regards Mark,
Chris
slainte.
next stop Guild of Bench Makers.
Best regards Mark,
Chris
Similar threads
- Replies
- 9
- Views
- 1K
- Replies
- 12
- Views
- 819
- Replies
- 5
- Views
- 404