YAWN - Yet Another Workbench Newbie

UKworkshop.co.uk

Help Support UKworkshop.co.uk:

This site may earn a commission from merchant affiliate links, including eBay, Amazon, and others.
I'd recommend watching the Stumpy Nubs workbench video (and part two) as well, if only just for kicks (though the way he puts it together is a good lesson in "good enough" I think). Graham Haydon's bench videos were also fantastic for the "here's how you get on with it" lesson, but they're not available any more. And if you don't mind shelling out a few quid, Richard McGuire's English Workbench videos are absolutely excellent and I don't regret spending a penny of the price on them. There are a few other videos on youtube that were interesting and might give you a few ideas too: the one on the morovian workbench, Crimson Guitar's Roubo workbench build, and there was a very short unnarrated roubo build here and here which stuck in my mind for some reason (probably the sheer contrast between the boards at the start being so filthy that a yard brush was required to clean off the dust, and the incredibly plane polish on the final benchtop). There are a ton of others (just search for "build workbench" on youtube and you could be watching for days), but those were the ones I kept going back to and taking notes in my notebook about.
 
MarkDennehy":1cg1hoey said:
I'd recommend watching the Stumpy Nubs workbench video (and part two) as well, if only just for kicks (though the way he puts it together is a good lesson in "good enough" I think).

Thanks for the links. Stumpy has convinced me that I need and end vice and storage underneath. Plus lots of holes I don't know if I need...

I've no doubt I'll build another workbench in future once I've figured out exactly what I need it to do. I fell in love with the fancy benches when I first started looking, however I don't have the skill, and fear I'd keep it as an ornament and dust it every day, rather than use it!

I'll possibly start my own progress thread once I get going. Going to let the wood acclimatise for a bit first. Plus, gives me time to scour eBay for even more tools...
 
A few observations. The tip about greaseproof is sound, but pieces of polythene bag work as well. If you have a mixture of cramps you can use a heavy one to pull something tight then a lightweight one to hold it, moving the heavy one on. I f you use wildly different dimensioned timber for the top, if you are fortunate enough to have a flat surface to work on keep the best (and most likely flattest) sides down - if you're lucky you'll end up with the downward side reasonably flat and the other all over the place. This can then have a router passed over it to flatten it only where it needs to be fixed down, the rest doesn't matter. Also - a scrub plane is used not only to clean timber up, but also to help flatten it, as such a No.4 is a little on the short side if anyone's planning one.
 
phil.p":3lgzouf5 said:
I f you use wildly different dimensioned timber for the top, if you are fortunate enough to have a flat surface to work on keep the best (and most likely flattest) sides down - if you're lucky you'll end up with the downward side reasonably flat and the other all over the place.
Wish you'd said that a few days back :D
But I got a half-hour today (saturdays are mainly the family and prep-for-next-week day here) to attack the benchtop with my little #4 scrub plane, and I was rather surprised by how fast the thing hogs off material. It's damn near flat already over most of the surface, I should have both sides done tomorrow at this rate. Which means I have just jinxed the entire thing and tomorrow it'll rain all day except for the small tornado at lunchtime.

Also - a scrub plane is used not only to clean timber up, but also to help flatten it, as such a No.4 is a little on the short side if anyone's planning one.
I built mine from a #4 mainly because (a) Paul Sellers told me to sir*; (b) stumpy nubs told me to sir; and (c) that POS amtrak was cheap :D
However, I do have another plan - I have a record #5½ that I got as part of the first job lot of stuff I bought on fleabay (hey, it's the toolbox of someone who worked in shipbuilding, thought I, that's not likely to be filled with useless gadgets and uncared-for tools; and oddly I wasn't entirely wrong that time). The record #4 and record #4½ that were also in the lot both had best crucible cast steel blades, but the #5½ had a stanley blade and a record cap iron that didn't mate properly (and even after ages with a grinder is still pretty awful). I bought a replacement record cap and blade off fleabay a fortnight ago (and best crucible cast steel too, so yay) so the plan is to turn the stanley blade into a scrub plane blade by grinding a camber on it. The idea being that the #4 scrub just hogs off great wodges of material and the #5½ hogs slightly less and flattens (and can have a normal plane blade fitted also to act as a normal jack plane). I'd say that I was being all clever about it, but I stole the idea from about sixty-three other places...

* Eh, I haven't been doing this for fifty years and I'm old enough to know to shut up and listen at least some of the time :D
 
I was thinking about the design of the workbench again last night and had a thought. Well, stole an idea more accurately. I read the apartment woodworker's blog quite a bit and in his last post he was talking about stealing an idea from Christopher Schwarz who in turn noticed it in a Stent design workbench that someone had sent him photos of. Long rambling story shortened to polite length, the idea is to have the leg beside the vice be bigger than all the other legs in the bench as it's closest to the most load the workbench sees. You can see it here, all the other legs are single-tenon jobs, but on the leg with the vice (in this case a leg vice), it's a much larger leg with a larger tenon and a sliding dovetail:

frank_benchtop.jpg


The more I thought about that, the better an idea it sounded. And at the stage I'm at right now, it would be very easy to do. Cut one of the spare 63" 2x4 lengths I have down to the 43" of the leg blanks, plane the glue face up and laminate it to the vice leg. Less than an hour's work, even at my level of faffing about. Nothing has been cut to length yet, and the legs aren't even squared off. And the vice I'm using is a record 53A, which is a little bit heavy.

Anyone think of a reason why it'd be a dumb idea?
 
I won't argue with the esteemed Paul Sellers but it is illogical to use the shortest plane you can lay your hands on to to get rid of high spots - without using a straight edge every minute you're not going to know where they are, let alone get rid of them. I think the other guy was just looking for a use for a bottom end plane, not suggesting it was the best option. Do as you wish - it's only an opinion. :D
 
As an aside - don't get to hung up about the weight and bulk of benches. Most traditional designs come from a time when huge sections of timber were sawn and jointed manually, and for modern day purposes they really don't need to be that heavy. As long as they don't fly around when you cut up a 6" x 3" or bounce when you whack a 1/2" mortice chisel into something they're probably heavy enough. The point of diminishing returns is easily reached.
 
phil.p":382vqcsv said:
As an aside - don't get to hung up about the weight and bulk of benches. Most traditional designs come from a time when huge sections of timber were sawn and jointed manually, and for modern day purposes they really don't need to be that heavy. As long as they don't fly around when you cut up a 6" x 3" or bounce when you whack a 1/2" mortice chisel into something they're probably heavy enough. The point of diminishing returns is easily reached.
See, this is the sort of thing that isn't getting mentioned in all those "how to build a workbench" videos.
I mean, granted, several months working on a workmate will make the idea of a concrete workbench seem like a good idea, but none of the material out there has ever made the point that the whole "four tons of hard maple roubo" design might be swinging the pendulum too far in the other direction, at least not directly.
 
A full weekend day without rain. Wow. I mean. I'd heard legends but... just wow.
So I immediately took full advantage of the day by sleeping late. Crud.
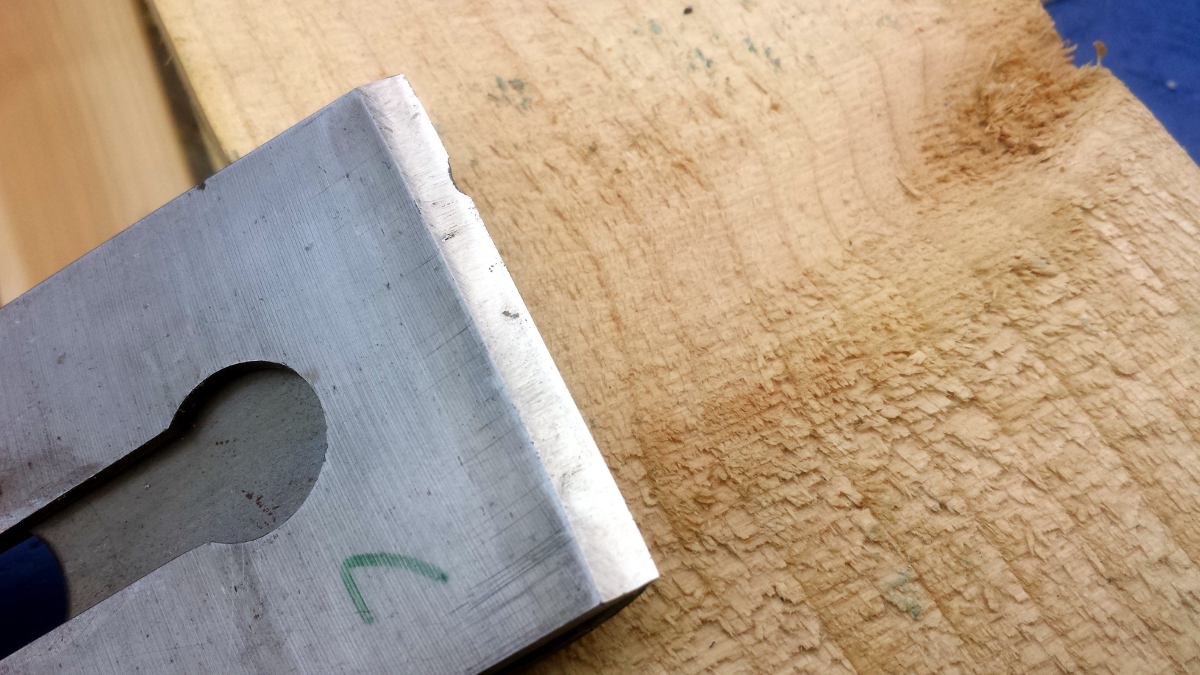
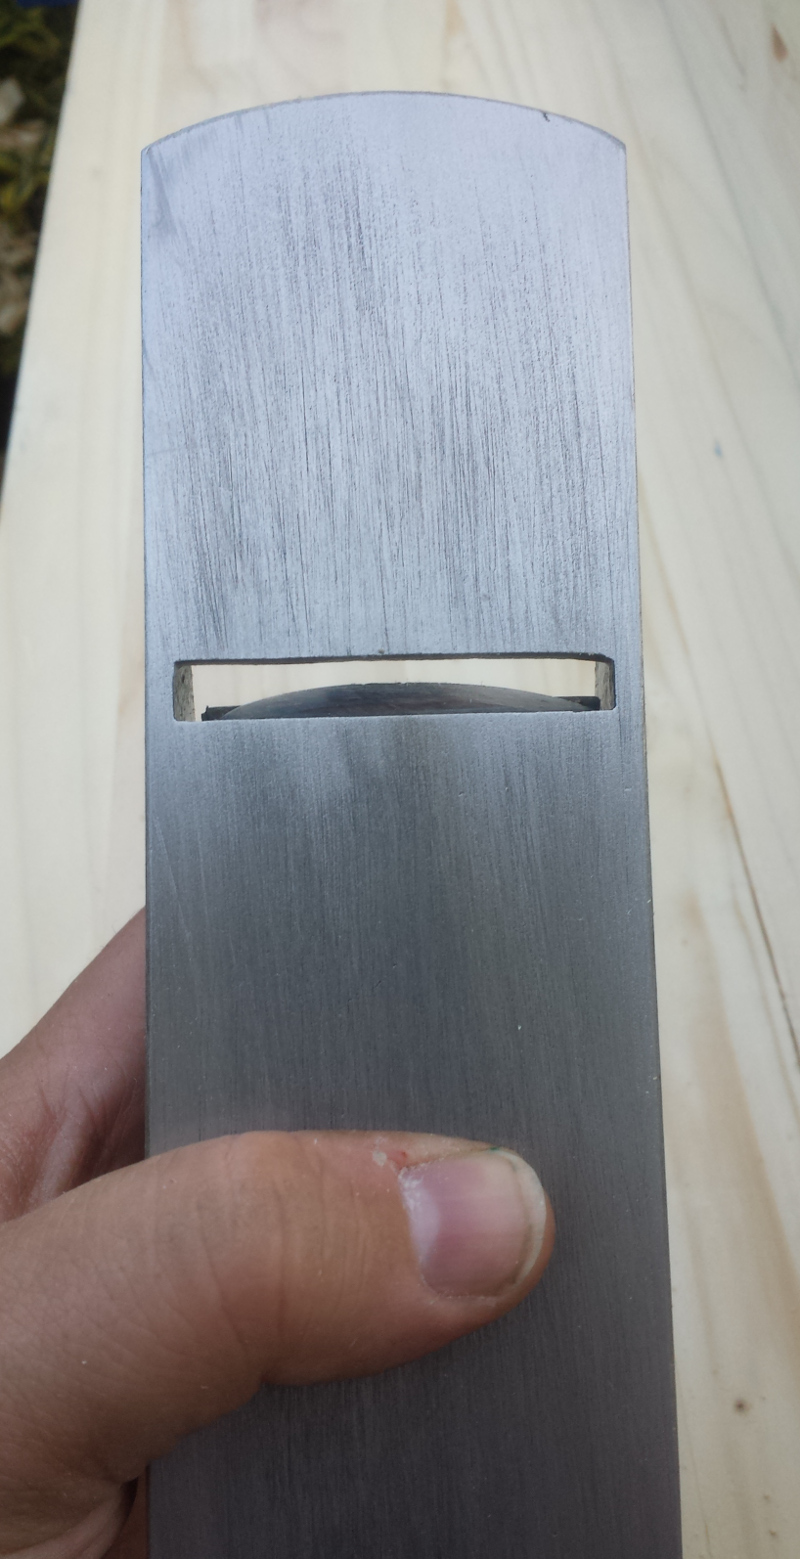
And before doing anything with the bench, I hauled out the grinder and reground the bevels on my #7 after an earlier argument with a knot:

2016-06-26-19.07.28a.jpg


And since I was doing that, I reground the camber on my scrub plane to make it a little more aggressive:

2016-07-03-20.43.52a.jpg


I may need to rename that thing Sid. I also reground the stanley blade in my #5½ record to put a less aggressive camber on it than sid's, so that I'd have a second scrub plane but with a longer base. And I cleaned up the bevel on the new record blade I got for the #5½ (the stanley blade didn't match the cap iron so it was pretty awful as a normal jack plane blade; so now it's the scrub blade and the new one's the jack blade). With all that done, I got out the sandpaper and diamond plates and started sharpening blades (and for the hell of it, lapped the sole of the POS scrub plane too, and it seriously needed it). I even tried freehand sharpening for the scrub planes with half-decent results (turns out an eclipse jig does a pretty good job teaching your muscles what the angles feel like).
And finally, an hour or so after starting, I was ready to start. Bloody hell. I know if you're given ten minutes to chop down a tree you should spend five minutes sharpening the axe, but I'm starting to think whomever said they could sharpen an axe in five minutes was a lying person of questionable parentage.

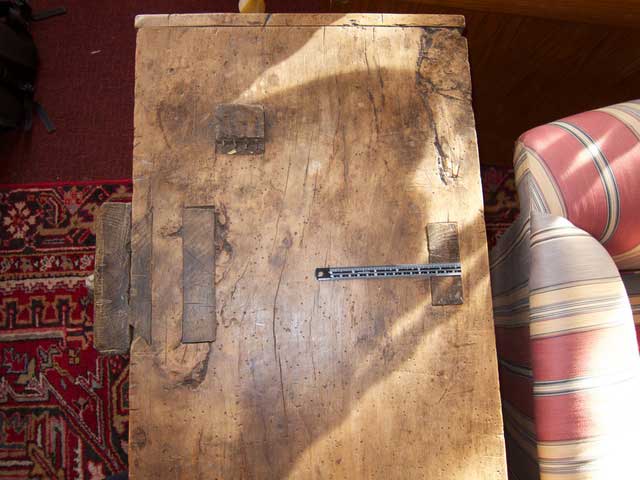
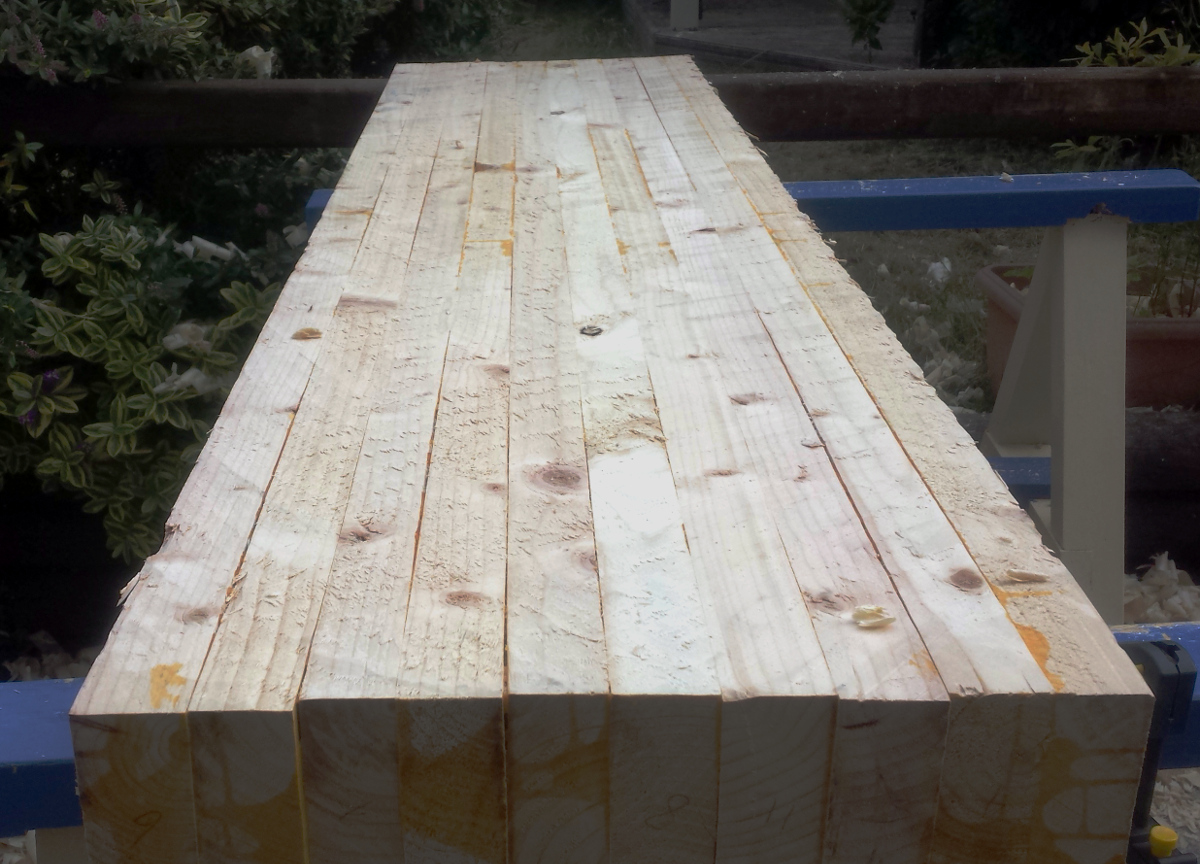
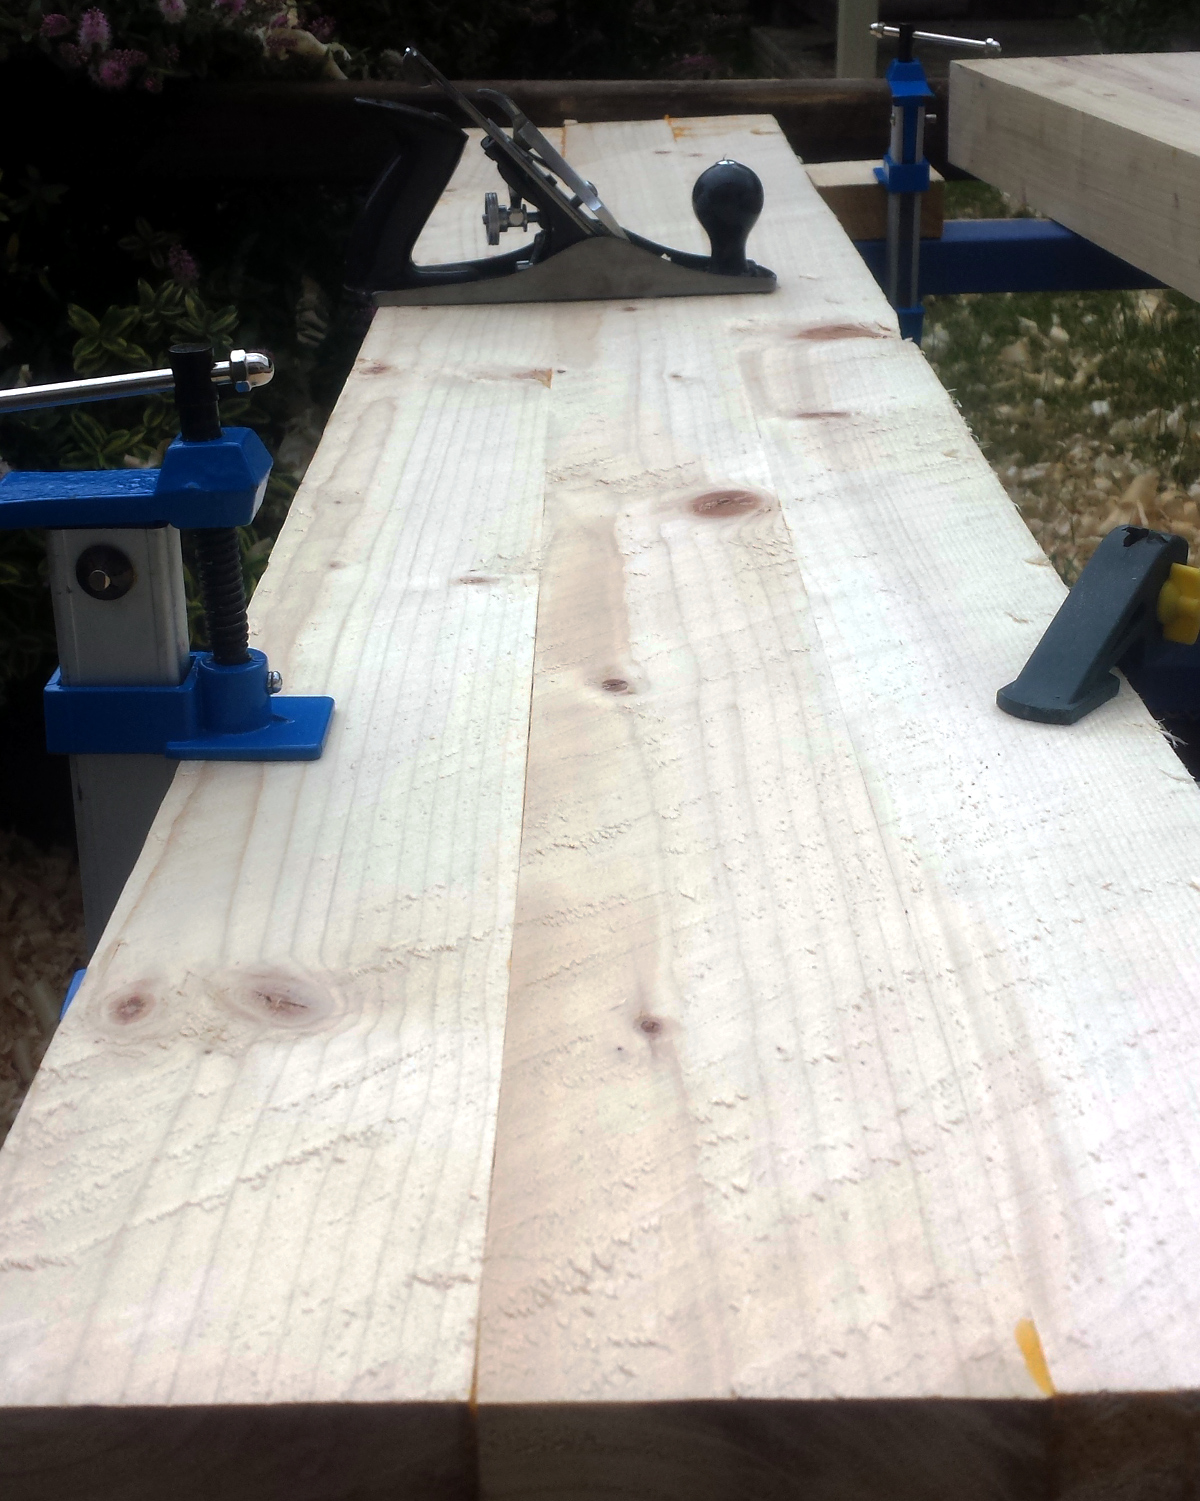
Anyway, this was where the benchtop was on Friday:

2016-06-30-21.08.32a.jpg


And after a half-hour or so with the scrub plane on Saturday, I got it to here:

2016-07-03-16.33.52a.jpg


So I got out Sid, and had at it. Ten minutes of cross-grain hacking with Sid and twenty more with the #5½ scrub plane, the last few of those being stop-check-plane-curse-recheck minutes, and I got it to here:

2016-07-03-17.28.11a.jpg


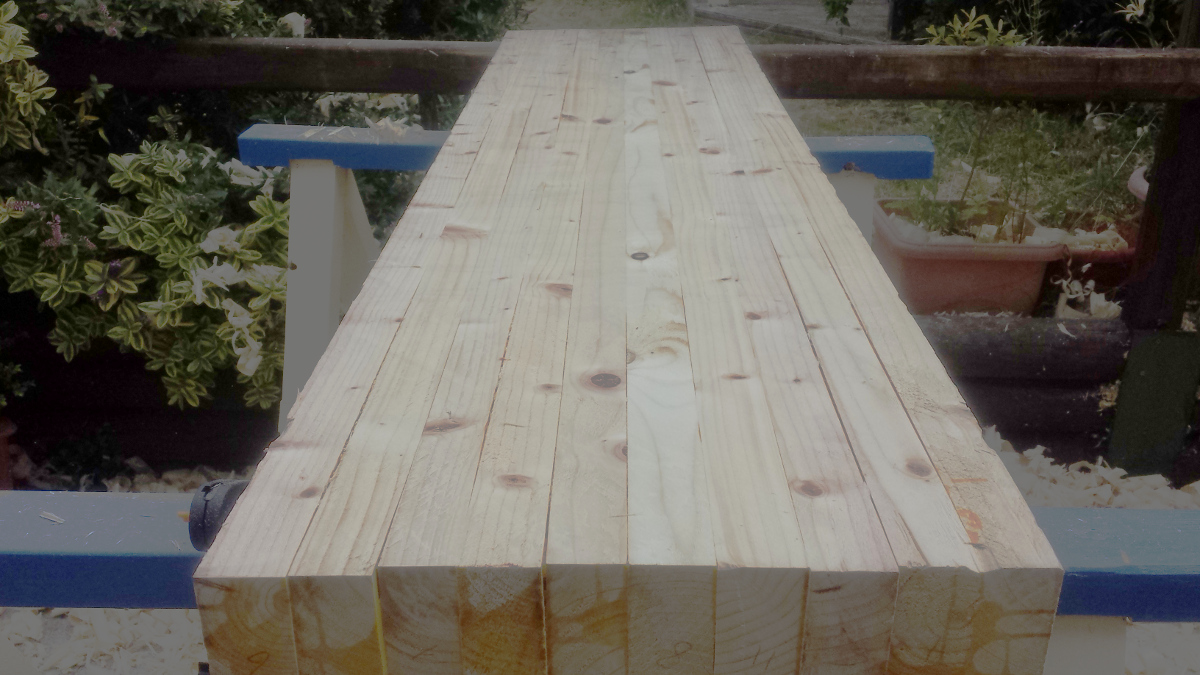
And then I put the #5½ back into jack plane mode and gave the top some smoothing to take out the gouge marks from the scrubbers (phnarr, phnarr) and even ran the #7 over it for a minute or two:

2016-07-03-17.27.47a.jpg


I was just about to cheer and then I remembered that the benchtop has two sides. #-o
Yeesh. Flip it over, and let Sid loose on it...

2016-07-03-18.02.24a.jpg


Then tidy it up with a lot of cross-scrubbing with the #5½...

2016-07-03-18.29.08a.jpg


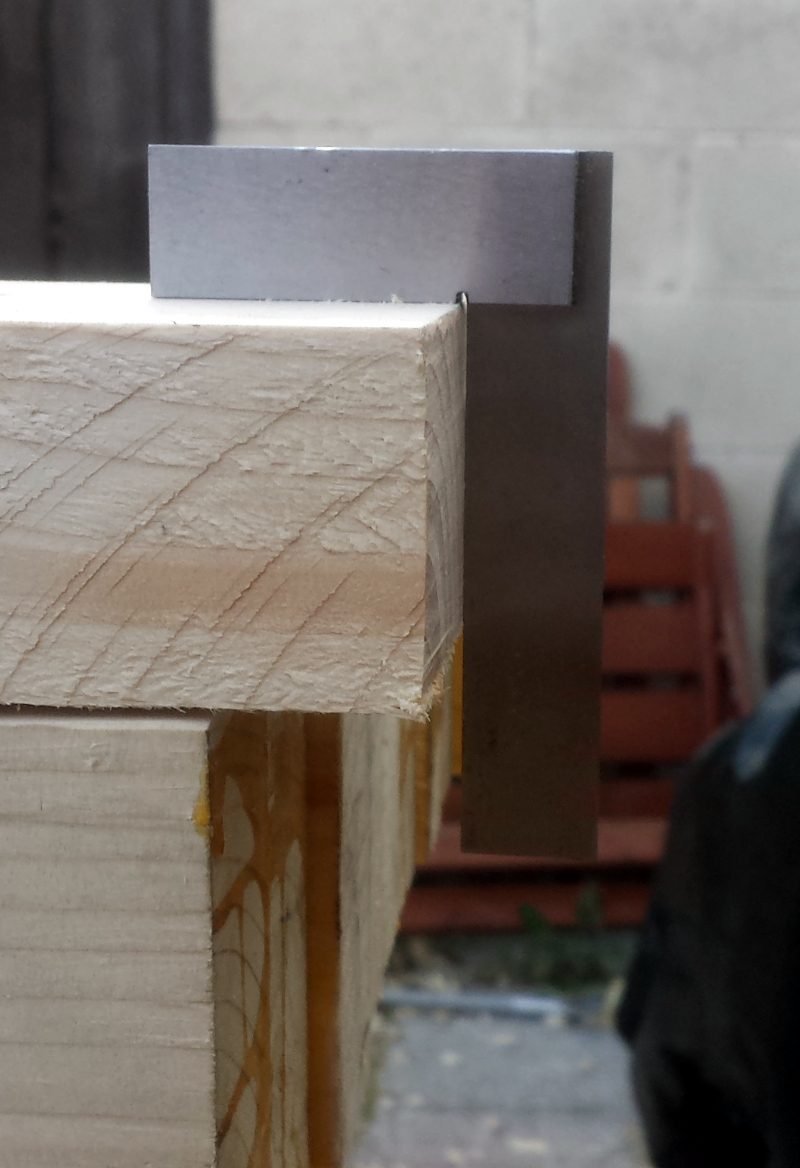
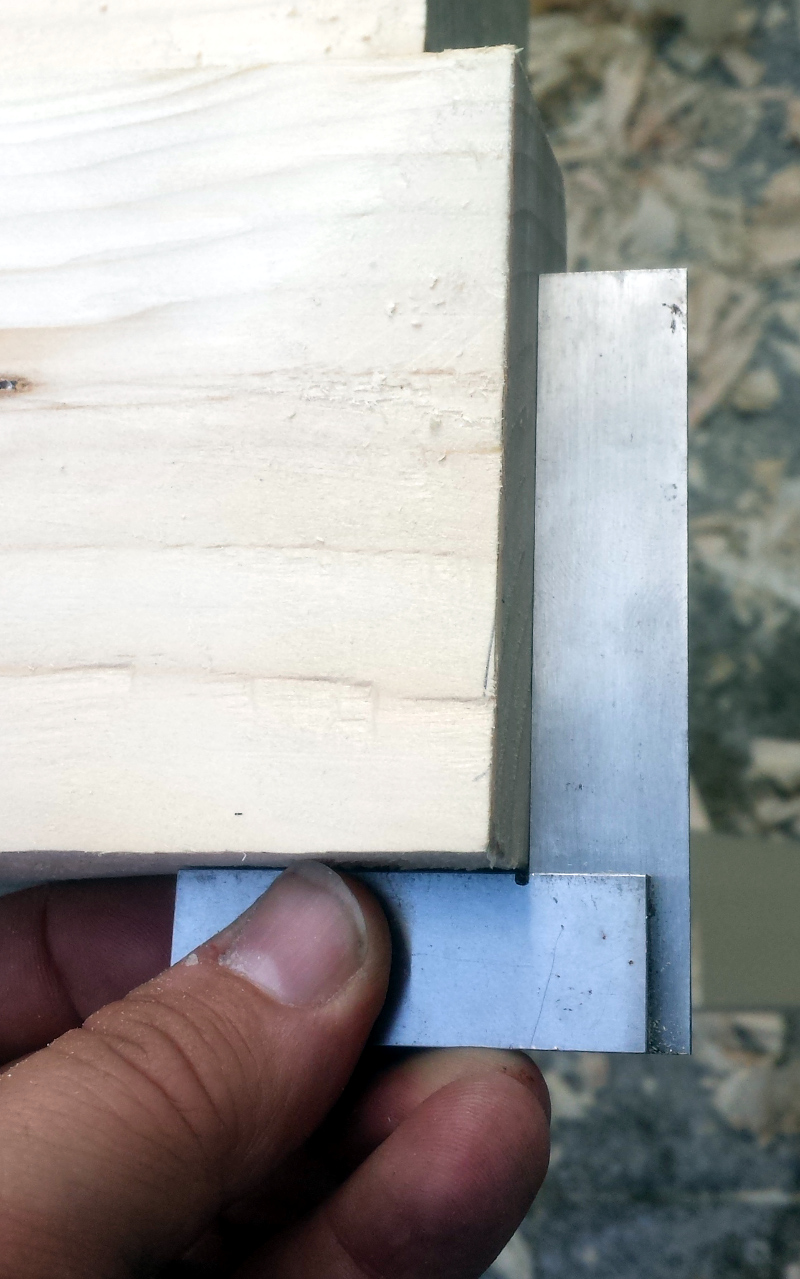
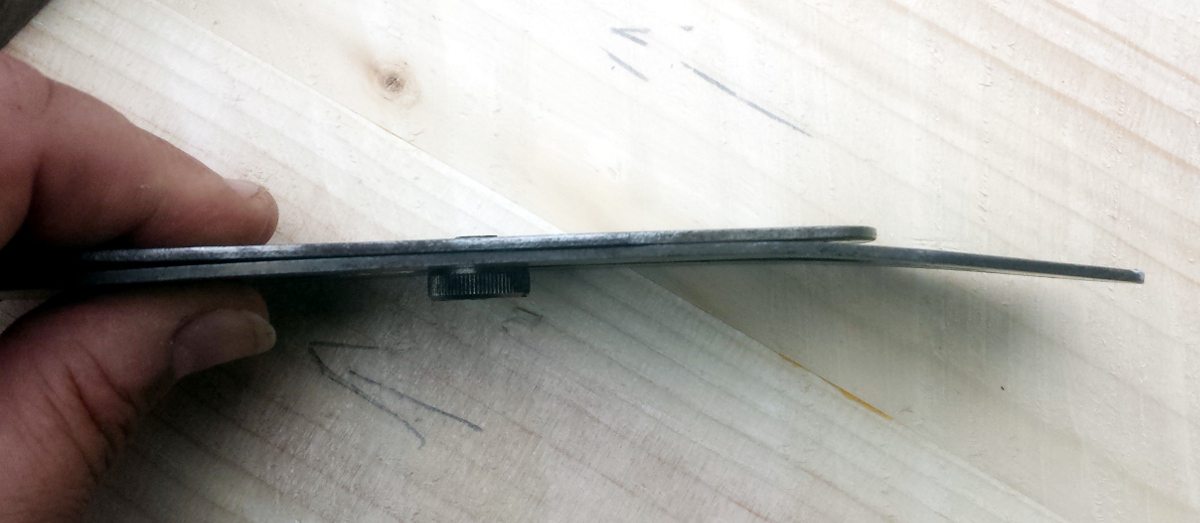
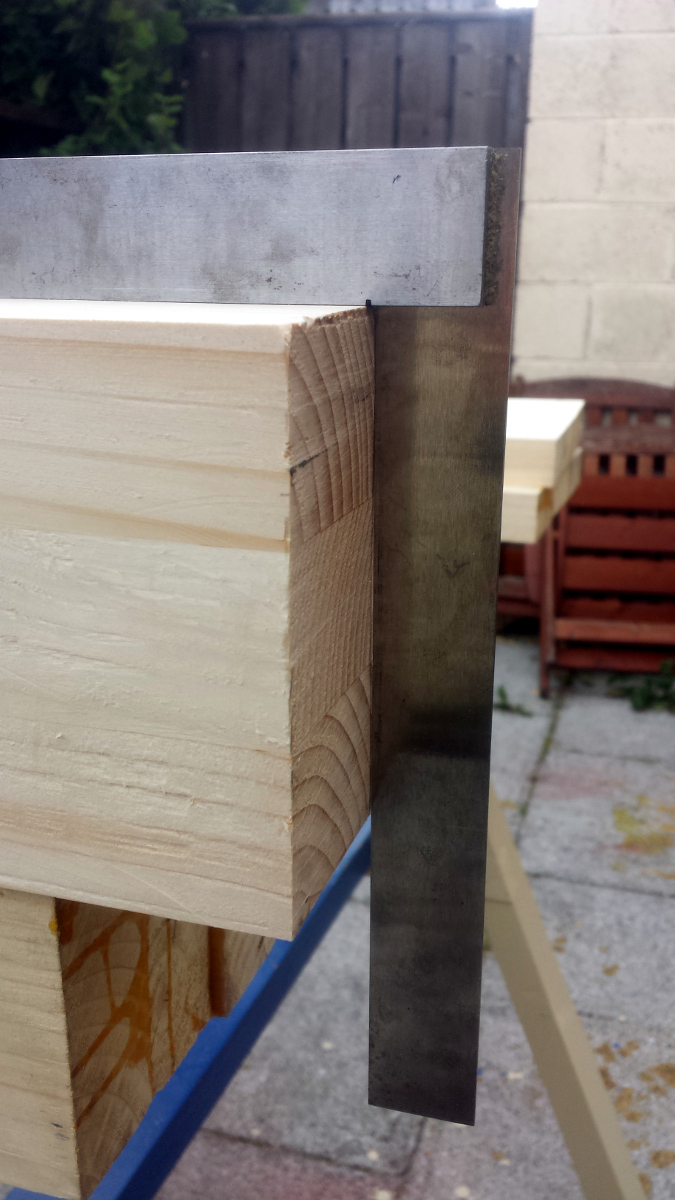
And then, right when I'm about to start cheering, check for twist.

2016-07-03-18.42.49a.jpg


OH COME ON!!! Stupid wood.
Out with the #4½, set to a heavy cut and started hacking. And hacking. And checking. And how the hell did that high point become a low point? SOD! Hack some more. And check again. And on and on and finally have something that's as straight as I can see...


...and then flip it back over and the other sodding side is twisted too. AGHHHHHHH. Back to the hack/check/hack/check/curse/hack/check cycle. But eventually, more due to exhaustion overwhelming perfectionism, I get to here and call it done...

2016-07-03-20.01.24a.jpg

2016-07-03-20.01.41a.jpg


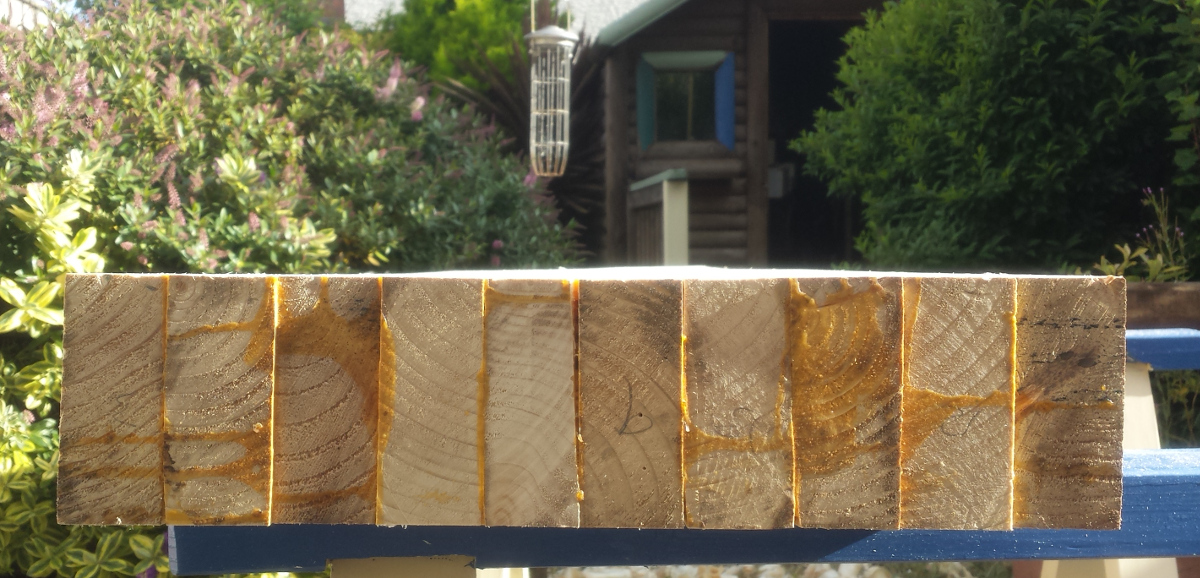
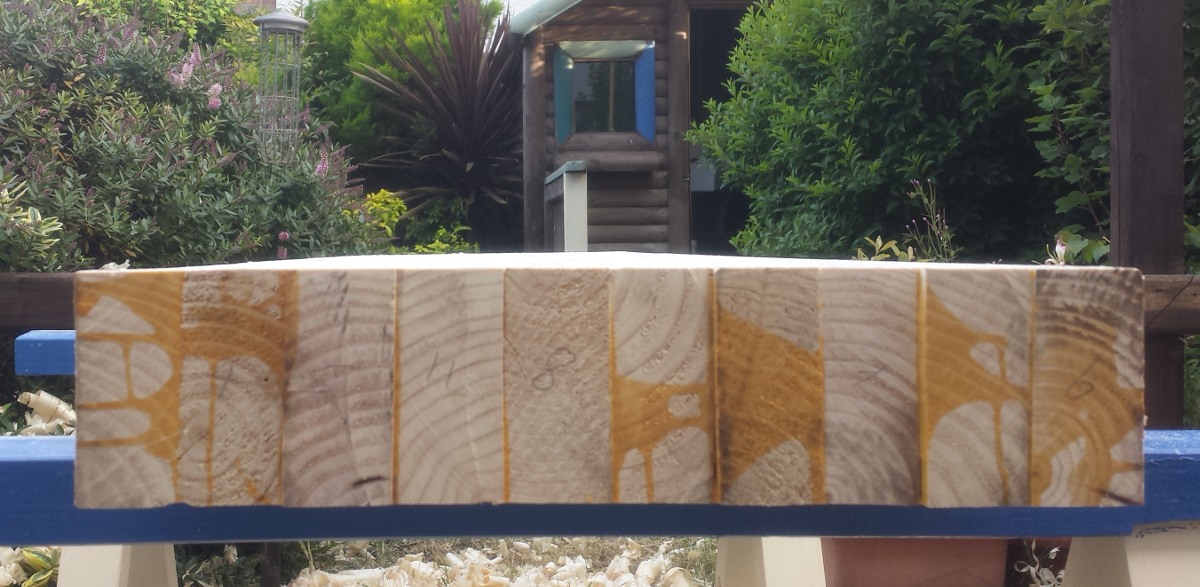
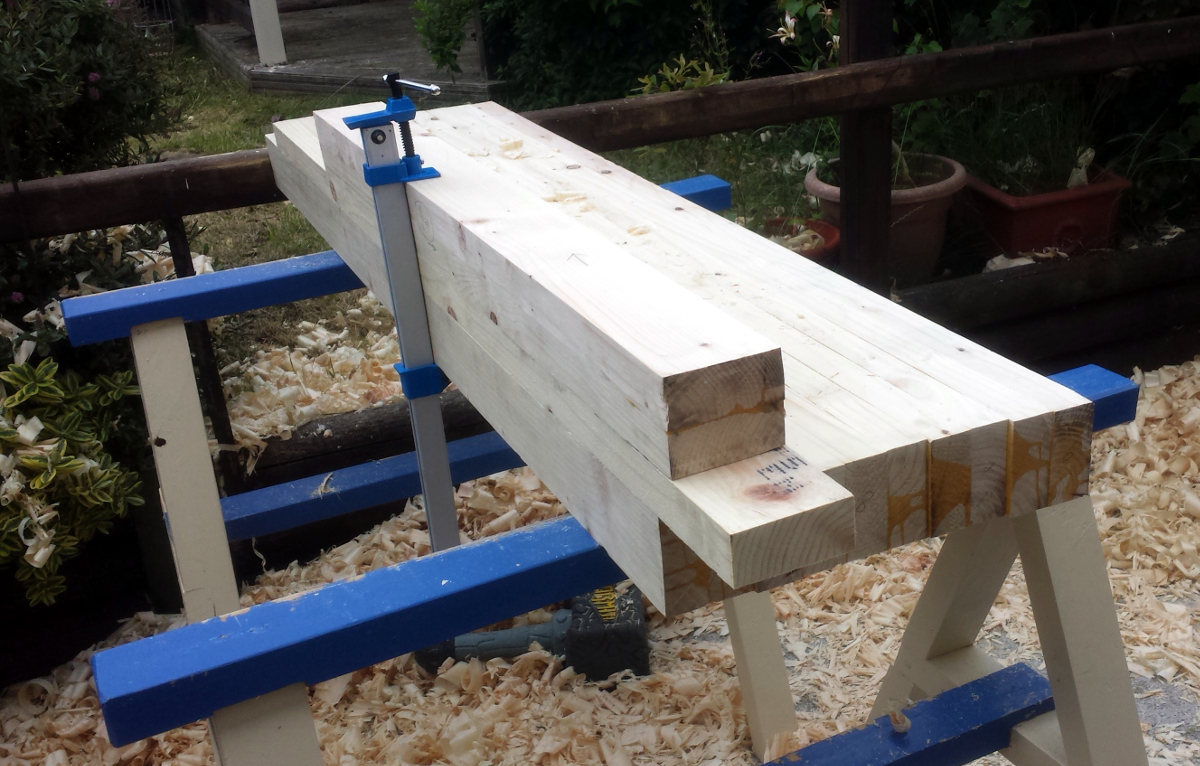
I think it's flat enough for now....


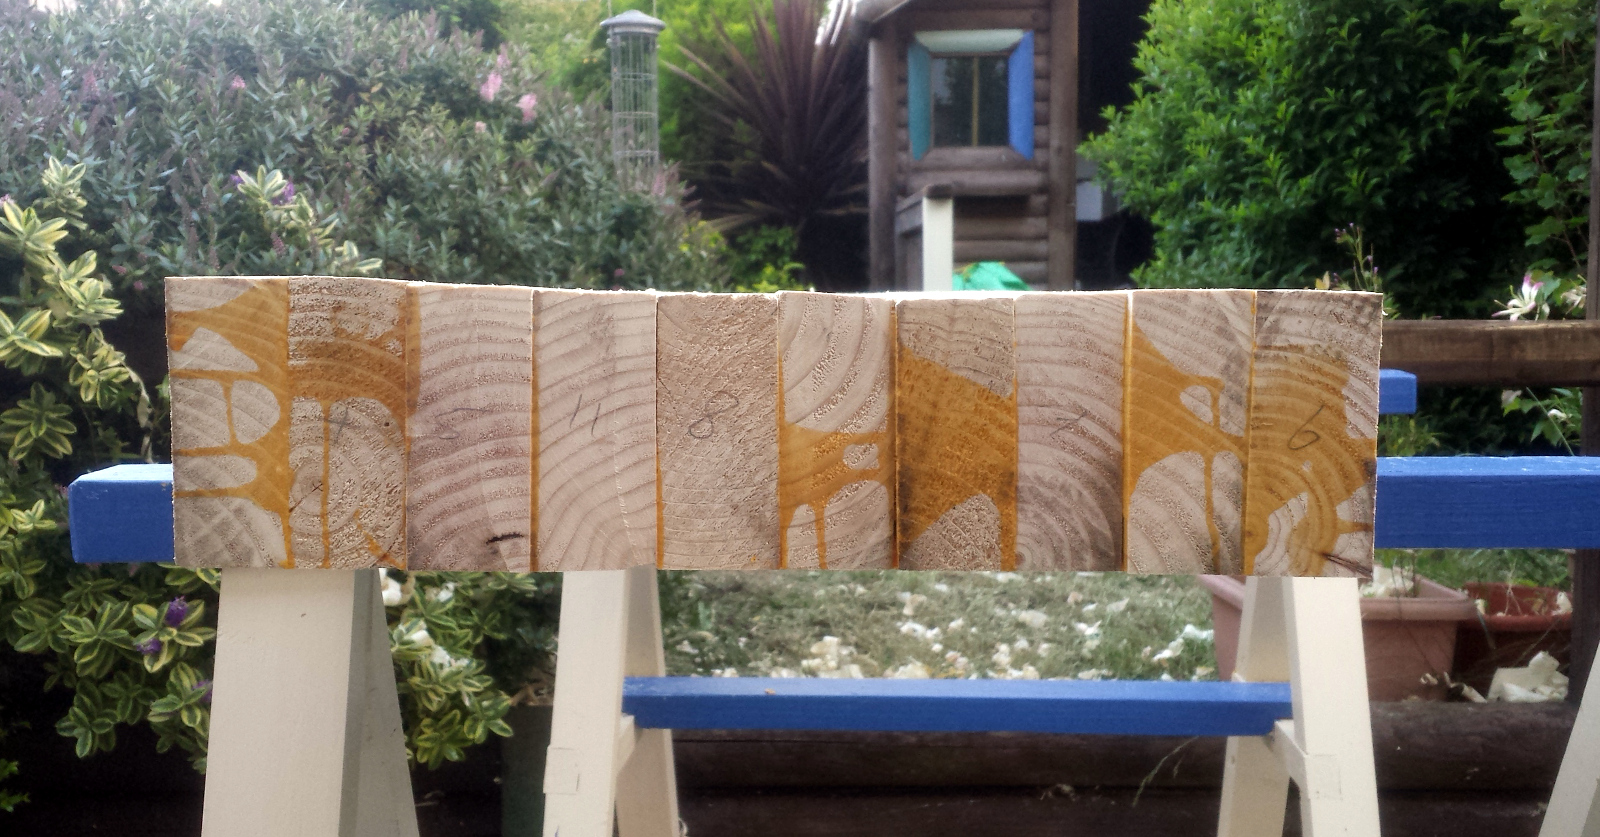
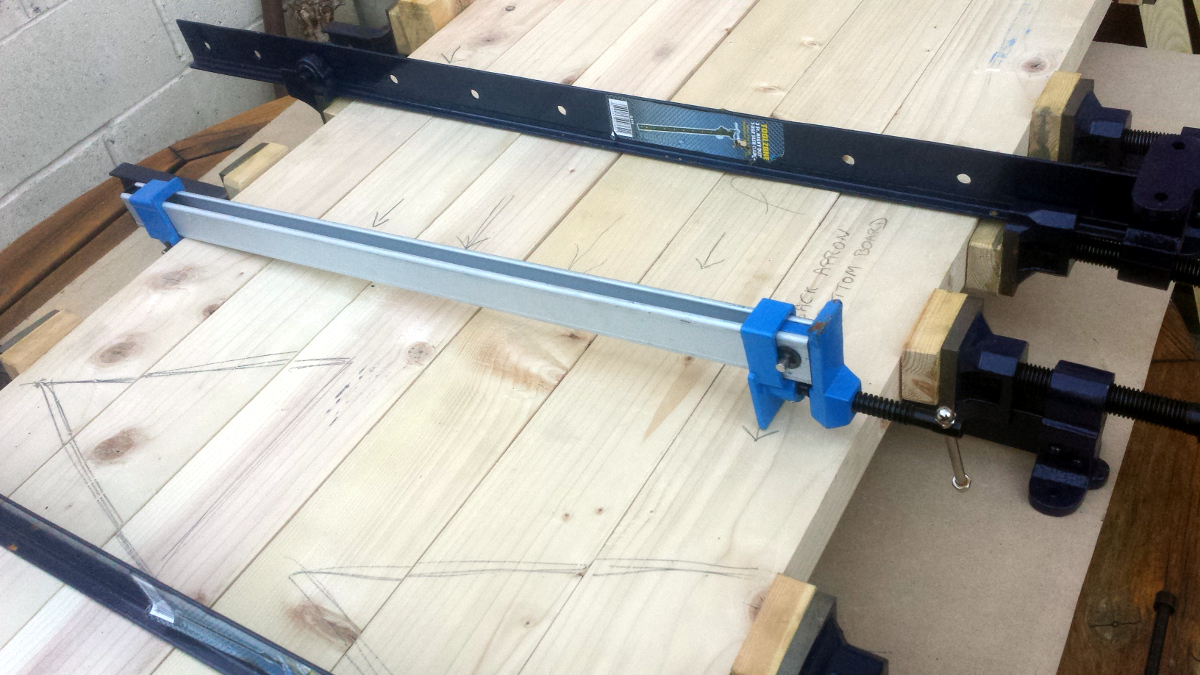
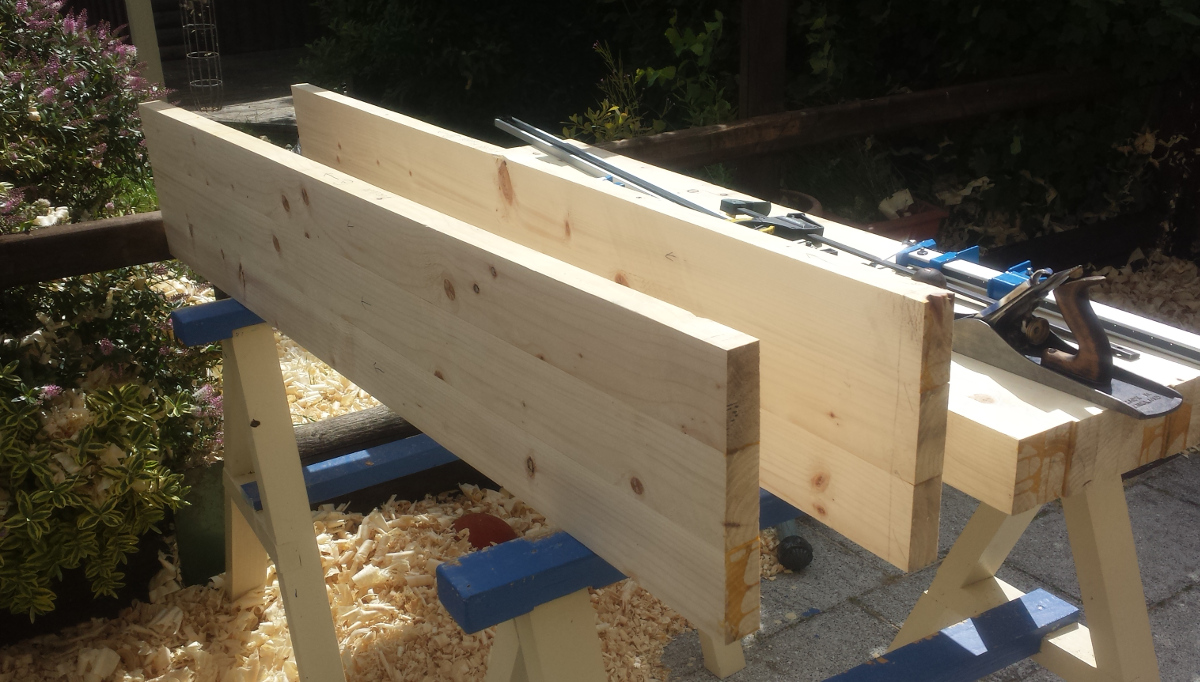
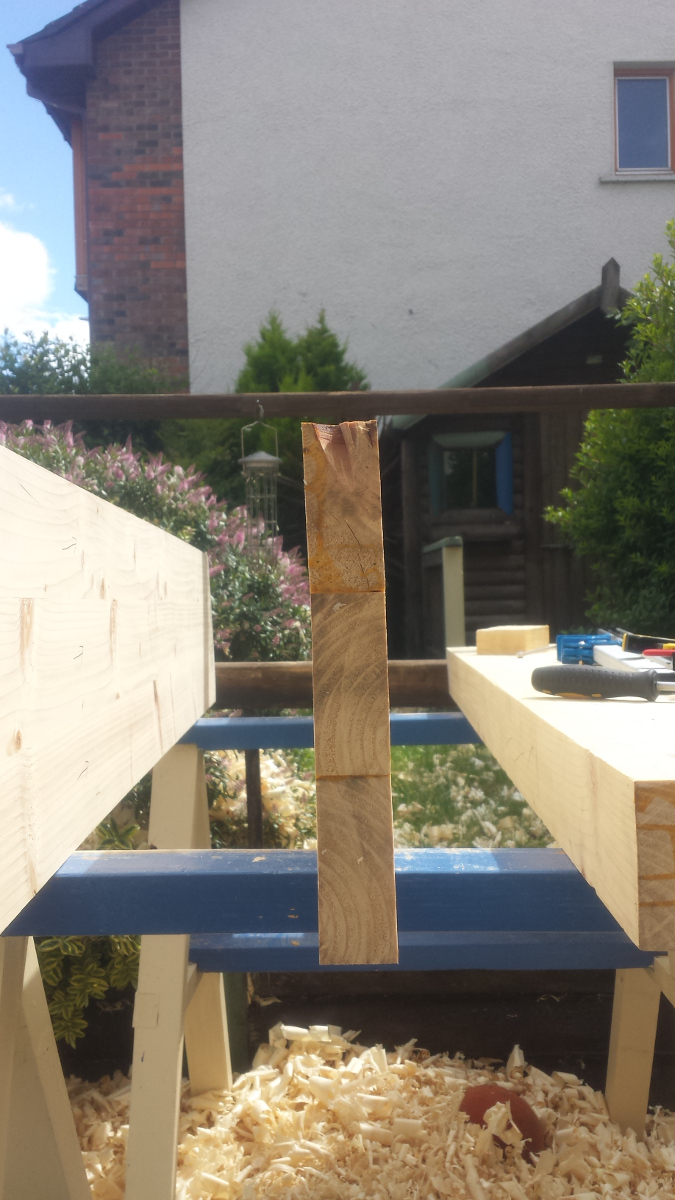
So I still have some daylight left and that idea about the vice leg was still rattling round in my head, so I got one of the spare 63" 2x4 lengths I had left and the vice leg; planed the glue face on the spare length; and marked off one against the other (dodging a large knot in the process):

2016-07-03-20.21.39a.jpg


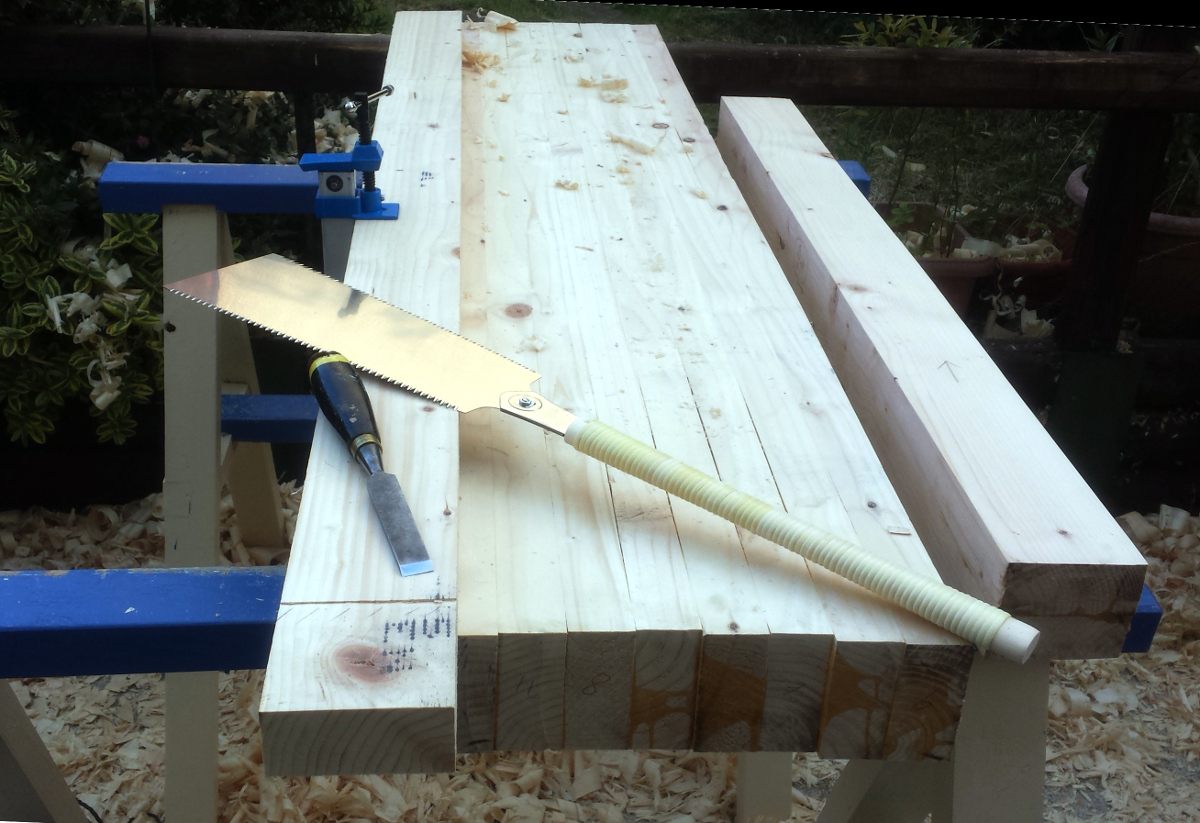
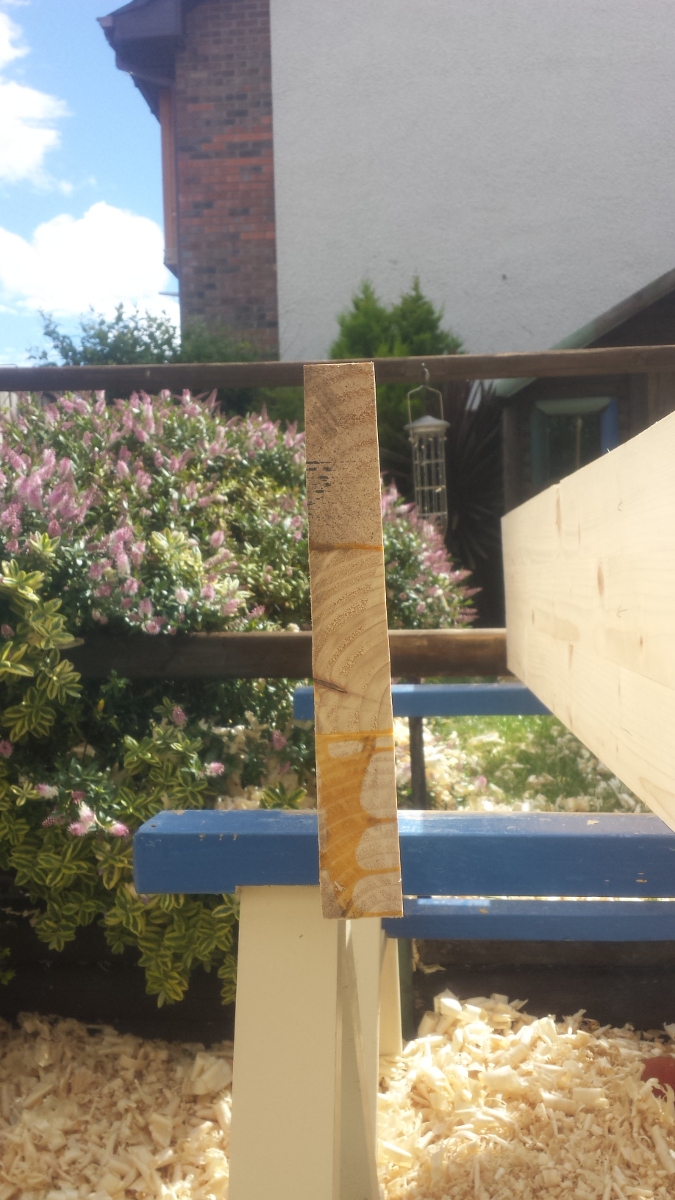
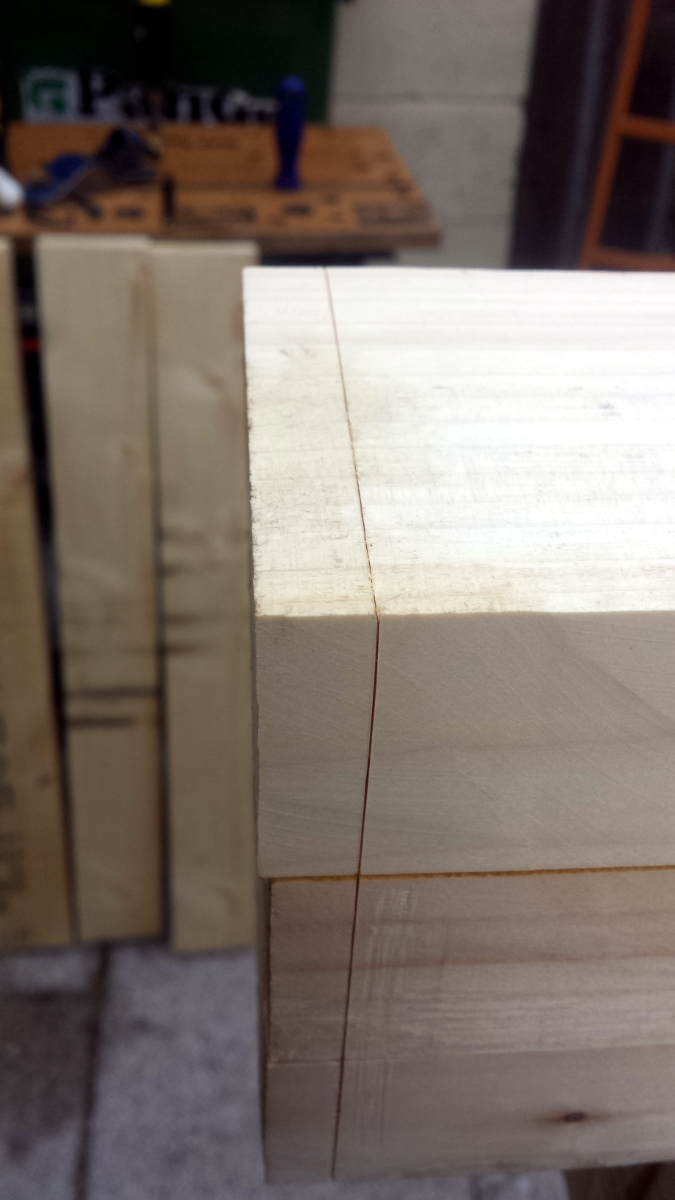
Out came the marking knife, the chisel to do the Sellers knifewall thingy, and the HOLY CARP WILL YOU LOOK AT THE SIZE OF THAT THING ryoba japanese saw I got from Dictum to do the trimming end cuts on the benchtop and legs:

2016-07-03-20.27.42a.jpg


I'll admit to using a small set square to watch the vertical orientation of the blade initially, but mainly I was just too busy being blown away by how much easier this is on top of a robust benchtop with firm clamping of the workpiece and at a height that was comfortable. I can't saw to a line to save my life on the workmate; I've tried enough times to convince me to spend money to buy a mitre saw. But the very first cut on the benchtop with a brand new saw and without even having the bench assembled or the vice attached?

2016-07-03-20.34.33a.jpg

2016-07-03-20.34.42a.jpg


I am waaaay too happy about that one cut. I mean, this is the point where I say something that starts with "Booya" and ends with HR having a discussion about inappropriate words for the workplace. But I'm a nontrivial amount of cash into this project so far and this was the first indication of what the bench would be like to work on and WOW is it ever worth it.

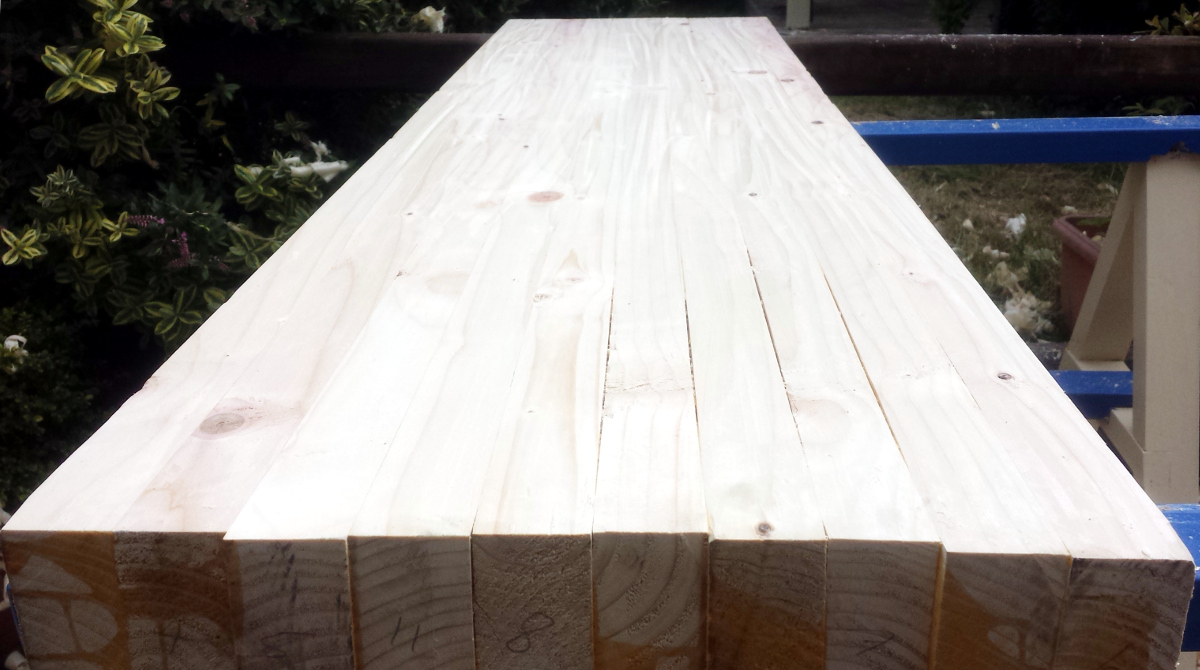
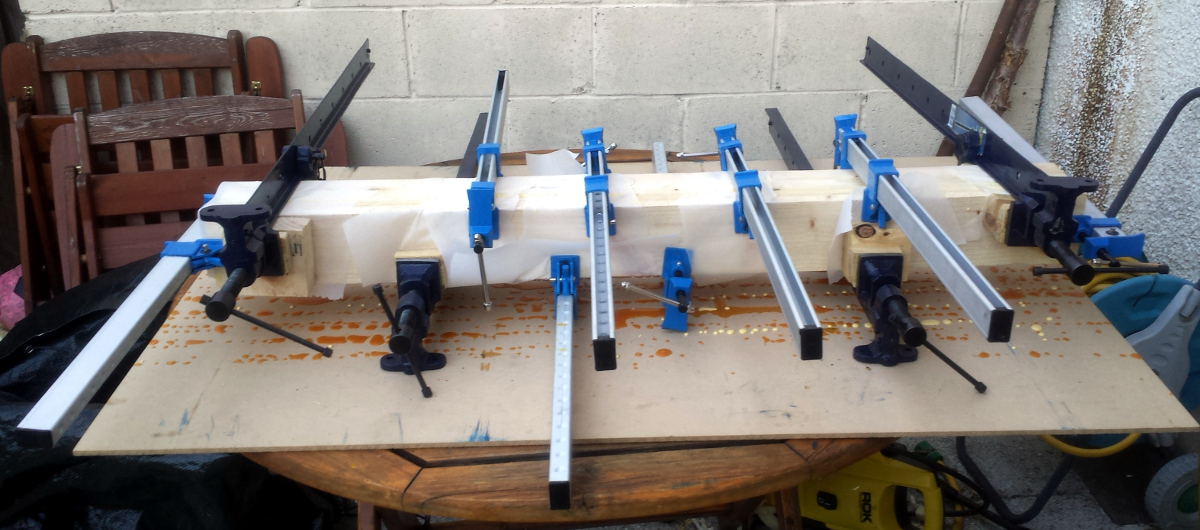
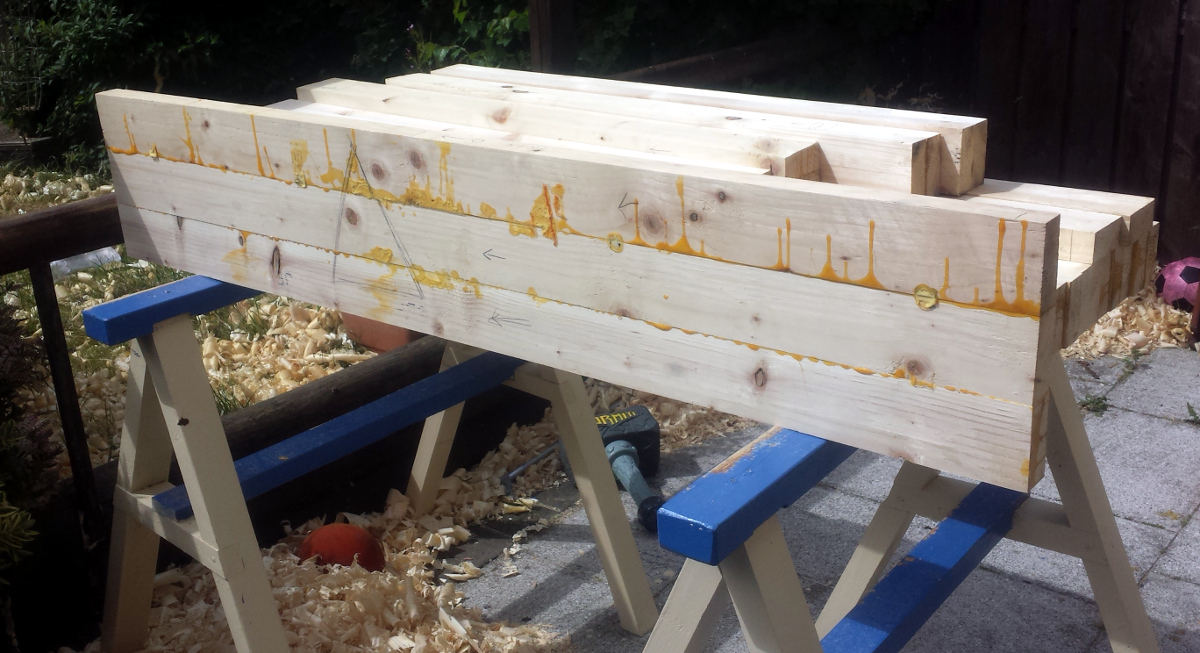
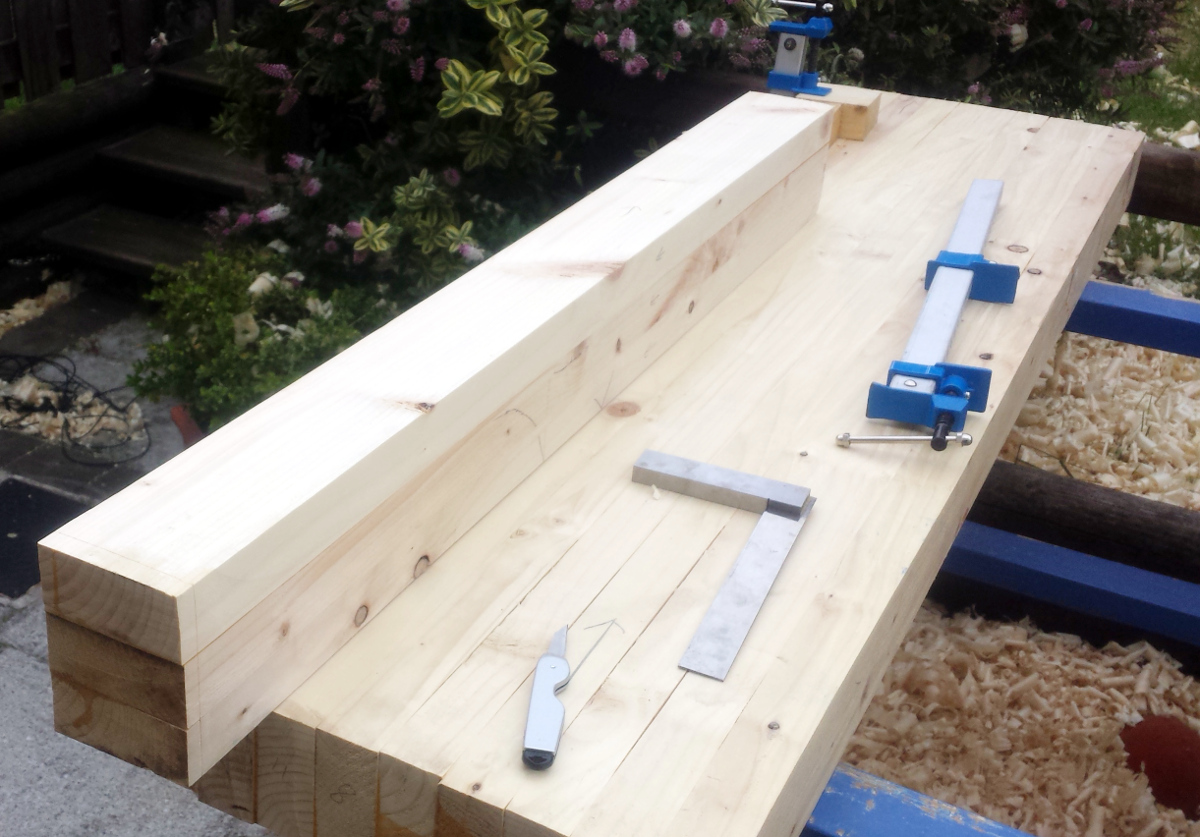
Anyway, finished cutting the new board to length - by the way, the most difficult thing about using a large Japanese saw is resisting the urge to swing it round your head, scream lip-synced gibberish and attack Godzilla by trying to saw through his ankles. If you can avoid that, they give great results pretty readily. Then I set up the clamps and got out the greaseproof paper, did the dry run and then did the actual glue up, making sure to not let the unplaned edges line up with the planed edges of the leg (so now both the unplaned edges are proud of the planed surface on the leg so I can plane them all down more readily).

2016-07-03-21.13.54a.jpg


Then tidied away all the tools, wrapped the glue-up in one tarp and the benchtop in another because OF COURSE it's forecast to rain for the next week, and went in to sit down to have a cup of coffee. Which was when I realised that my arms weren't working anymore...

cat-tired1.jpg
 
Why plane the underside? or are you just a masochist? :D It only needs to be flat where it meets other woodwork.
By the way - if you decide to use holdfasts (excellent things) that top is too thick for them, you'll need to counterbore the holes. Don't drill 19mm holes first and then discover the holdfasts won't grip.
 
phil.p":2m3t9a8o said:
Why plane the underside? or are you just a masochist? :D It only needs to be flat where it meets other woodwork.
It was pretty terribly rough, and there's some joinery where the legs meet it and around the stretchers. But yeah, I think that could get filed under "rookie mistake" :D

By the way - if you decide to use holdfasts (excellent things) that top is too thick for them, you'll need to counterbore the holes. Don't drill 19mm holes first and then discover the holdfasts won't grip.
Crud, are you sure? I was looking at the Simon James ones, they were supposed to work in benchtops 4" thick. I guess counterboring the hole from the underside of the bench would be simple enough; how much does it need to be counterbored by though, or is this one of those cut-test-cut-a-bit-more type of things?
 
Yes, it does say 4", doesn't it? Maybe there's a bit more spring in the actual holdfast than there is in some others? I don't know. My top is about 2 3/4" and they're perfect on that, and I have read here somewhere that people have had to counterbore the holes after drilling them as the holdfasts didn't grip properly and iirc the tops weren't much over 3". If you already have the holdfasts you could do a test run on some scrap - it could save you hassle, as counterboring is easy but trying to counterbore when you've lost the centre isn't great fun. I believe most designs are meant to work best between about 2" and 3" so you'd need to leave about that - someone with the experience of thicker tops will hopefully be along.
 
Yes - iirc that seems to be about the cut off point and much over that diminishes the grip, a bit of research would probably throw up the original posts. I think if it were mine I'd counterbore to about the 3" rather than risk needing to do it afterwards, although of course if they advertise them as working at 4" they'll work at 4" (but may not work at their optimum, of course). Another thing to consider is if you have a drill stand, a bench drill or even a bench top morticer that needs bolting down on occasion, you can space the holdfast holes to suit. I can bolt my drill stand so it can swing over the vice, which can be very useful at times. Before my morticer had its own bench that would bolt down as well.
 
Oh, the joy of coming home to an inch of rain and finding that the tarp over the glueup had been blown off despite being tied down.
Fudge. The mdf sheet I was using as a flat surface is toast, I'll have to dry and reoil those cast iron clamps, and I've no idea if or how badly it'll affect the vice leg. Gah. At least the glue had dried.
 
Well, the vice leg glue-up seems to have been unaffected by its shower, and it's now a suitably beefy leg (by which I mean, it's now large enough to look comically too large for the benchtop. Oh well, it won't be the only thing that'll look funny about this by the time I'm done I suspect). There wasn't much time for the rest of the week to do much work (so I occupied myself by buying more tools. Why did nobody tell me this was a sickness you could catch? What the hell did I need a #6 for? Well, other than for preparing smaller boards that didn't really need the #7, and for filling the space in the tool cabinet between the #5½ and the #7.... though maybe a T5 would help with the symmetry... Oh, for pete's sakes!).

Today was dryish in defiance of a forecast for thunderstorms and drowning pets, so after the chores for the week and a visit from family were done, I managed to get two or three hours in. I spent a bit of that staring at the top, the remaining boards that will have the leg tenons in them and which aren't laminated up yet so I can cut the joints with saws rather than chop out the mortices by chisel, the four legs and the boards for the aprons, assembling and reassembling them in my head to walk through the sequence looking for a lazy-ass shortcut. Not finding any, and finding to my disgust that the bench didn't assemble itself in reality by magic while I was imagining how it'd go together in my head (stupid physics), I opted to assemble the aprons today and cut the leg mortices tomorrow. So I cleaned up the four remaining apron boards (the top two of each were already planed clean) and picked my sides and oriented them to have matching grain directions, and then edge jointed them. Which sucked the north end of a southbound donkey the first time, but by the fourth I was starting to get the hang of it. I guess having fifty-four different planes has at least one upside. Though I may need to ease off on the carnal feelings towards my #7, I don't think the RSPCA would approve.

Got both the aprons prepped for glue-up, planning to glue them both up at the same time. Got out the cast iron clamps and laid them out, all grand, then got out the aluminium sash clamps and prepped them....

2016-07-09-21.45.11a.jpg


pipper. I knew this was going too well. Okay, so the options are to either clamp up one apron at a time (yeah, no, this is falling behind already); open the cast irons a bit more and put spacer blocks between the aprons in line with all eight of the clamps, then put the aluminium clamps into the gaps that created (except that I don't have enough space blocks and that's a nice big fiddly panel glue-up job that I can see taking one turn of pressure and then bursting upwards like a juggling trick gone wrong); or just use the cast irons.

Did I mention I'm a lazy pineapple at the best of times?

So the aprons are now clamped with the cast irons and curing under a tarp, and tomorrow I'll cut the legs to length and start the joinery by marking out where the tenons will go in pencil and then assembling the leg frames with the short stretchers as two units. Glue those up, and while they're curing, start marking out for the record 53A and figuring out how and where to mount that exactly. When the leg frames are made up, it'll be time to cut the mortices and tenons at the top and the housing dado the top short stretcher will sit into, then the joint with the apron, then the long stretcher, and then it'll be the final assembly.

Ah, sure that'll be easy, right?

Heaven's+Name.png
 
Keep it going Mark =D>
Really enjoying this WIP, I'm taking notes ("north end of a southbound donkey", made me chuckle) :lol:
 
A nice dry-ish day for most of today (for which I know karma is going to exact vengeance) so after breakfast, out to check on the apron glue-up.

2016-07-10-11.35.09a.jpg


Not bad. No daylight between the boards. A bit of bowing and twist though, so out with sid...

2016-07-10-13.20.01a.jpg


Did I say a bit of twist? I'm sorry, I meant an entire 40-foot container full of pineapple worth of twist. The front apron wasn't too bad, it only took the one pass with sid on either side - about 20-odd minutes in total - but the back apron's middle board was a few mm higher than the other two boards and it ate the rest of an hour getting that down to even reasonably flat. But I got it done and then got out the faithful #4½ to do the smoothing away of sid's furrows. Front apron board was less than ten minutes and there wasn't any twist in it at the end of that, and okay there might be a mm or two of bow over the full length of the apron, but I'm okay with that, I just need the parts around the legs to be flat and the rest to be reasonable. Then I changed over to the back apron board, and in the middle of moving boards around, caught the #4½ full in the side and knocked it off the 40" tall work surface onto the paving stones.

You know that moment when you run a boning knife through your finger and the pain hasn't hit yet, but you can see how bad it was and you know it's going to hurt? Yeah, that moment. I was fully expecting to see cast iron bits go flying in all directions. But I seem to have gotten off lightly, it landed on its lovely crucible cast blade instead of the body of the plane and it acted as a crumple zone:

2016-07-10-14.55.50a.jpg


Well, tiffin.
I knocked it back to straight with light and delicate adjustments with the appropriate tool (ie. a few belts off a hammer), but the edge took a hit off the cast iron when it got shoved through the plane on impact. So I'll have to resharpen (or regrind) the edge in the next few days. I got out the #5½ and got on with it with that, and they didn't look terrible afterwards. I mean, they don't look good either, but I'll accept "not terrible" for now.

2016-07-10-15.34.55a.jpg


2016-07-10-15.35.14a.jpg


2016-07-10-15.35.23a.jpg


And at that point, it was time for a slightly late lunch.

To be honest, it felt like time for a liquid lunch followed by a sunday afternoon spent inspecting my eyelids for pinholes, but unfortunately the maid said it wasn't her job to finish the bench off. Can't get the staff these days. So after some coffee and sandwiches, I got back to it. I checked the plan, but it called for the aprons to have taken 20 minutes to fully complete, which in hindsight was probably a little fragile as a plan. So I figured I'd try to get a leg frame done, only to realise I'd forgotten to plane the stretchers yet and the legs weren't S4S yet either. Le sigh. So out with the try square and the planes, squared up the vice leg and the matching back leg, then went to cut off the top centimetre to get a reference face. And the knife lines all lined up, so that was okay.

2016-07-10-17.23.33a.jpg


I'd been using a japanese marking knife up to now, but it's one of those only-cuts-one-way asymmetric ones, and damn near impossible to store in a toolbox (I wind up having to keep it in my chisel tool roll). And it looks wrong when you look at it when cutting a line (it's an optical illusion caused by the curve of the handle, but it always looks like the tip of the knife is bent over). So I figured I'd try out the stanley folding knife Paul Sellers used (since it's the same one my father used to have in the toolkit when I was a kid).

2016-07-10-17.23.38a.jpg


Works pretty well actually. It's not terribly pretty or flash, but it does get the job done rather nicely. And you can fold up the blade and stash it in the toolkit a lot more easily. Well. More accurately, you can get it out of the toolkit more easily, there's less stabbyness, blood and cursing. Anyway, normal chisel & knifewall crosscut routine, out with the giant Japanese ryoba saw and the little set square and it's blind woodsman time.

2016-07-10-17.49.40a.jpg


Didn't go too badly. Got the reference face cut on the vice leg, then measured off 40" (which is the benchtop height I want) and cut off the leg at that point the same way (and then chamfered the corners of that end). Did the same on the matching back leg, got the reference face cut and the knifewall done for the other end and the chiselling done, and then it started to rain, so there was lots of cursing and running about with tarps. The rain let up for five minutes a little later on, so I ran back out and finished cutting the bottom of the leg before getting everything back under wraps. So one day of work, two aprons and two legs. At this rate, and with our weather, I might be done by November.

So over the rest of the week, I've got to fix the blade on the #4½, plane and S4S the short stretchers and maybe the long ones, S4S the remaining legs, and then I think I really would be able to start on the joinery next weekend.

giphy.gif
 
Really enjoying this thread Mark, great job. Once I get my workshop sorted a bench is first on my list of things to build. Hope it goes as well as your build has so far.
 

Latest posts

Back
Top